When to think about repairs
The reasons for car seat repair can vary. Restoration may be required after an accident, or the upholstery of the chair will simply tear or become too worn over time.
As soon as sitting in your car becomes uncomfortable, it's time to get ready for seat repairs.
One should not discount the fact that driving in a damaged seat can not only cause unwanted stress on the lower back and spine, but also lead to an accident if the driver, instead of watching the road, pays too much attention to trying to get more comfortable in the seat.
Main types of damage and defects
The most common types of damage to car seats include:
- shabby condition of the upholstery, usually the armrests;
- failures in the base of the structure;
- deformation of the internal seat springs;
- the cushion gasket is sagging;
- the casing is cracking;
- mechanical damage, ruptures, cuts, burns, other results of careless handling;
- damage resulting from the deployment of airbags or seat belt pretensioners.
What repairs should be made depends on what damage needs to be repaired. The necessary tools, as well as materials for repairs, are selected accordingly.
Option #1 if the hole is small.
Step 1
In an inconspicuous place, for example, at the bottom of the seat, take a razor and shave off the required amount of upholstery fibers.
Step 2
Collect the fibers in a small container. The fibers of the upholstery material will look like simple fluff.
Step 3
Fill the cigarette burn hole halfway with glue.
Step 4
Using tweezers, drape the extracted material onto the glue. Don't compact it!
Step 5
Reapply a thin layer of adhesive over the fibers. Be careful! Avoid contact with undamaged areas.
Step 6
Using tweezers, add more fibers until the hole is completely filled with them.
Necessary tools and materials for replacing upholstery and filling
The seat upholstery in the cabin can be made of fabric, Alcantara (an artificial material similar to suede) or leatherette. Working with leather upholstery will be described below.
In addition to new upholstery material and lining foam, you may need:
- chalk or marker for cutting;
- assembly (stationery) knife, sharp scissors;
- a set of needles for hand sewing;
- awl;
- a spool of strong silk (“parachute”) threads;
- pliers;
- screwdrivers;
- portable (car) vacuum cleaner;
- hacksaw;
- hammer;
- glue gun
When selecting a new material for upholstery, a very important role is played by the competent selection of shade, as well as strict adherence to the direction of the pile for fleecy fabrics when cutting.
We repair car seat upholstery
When you contact specialized car services with the problem of replacing or repairing the upholstery on the seats of your car, you can hear a terrible amount for the entire scope of work. The desire to update the interior immediately disappears. Although you can try to repair car seat upholstery yourself and see from your own experience that this process is not so difficult, but very interesting and exciting.
To achieve a positive result, you will need to follow certain rules, recommendations and advice from experienced professionals:
- prepare the necessary tools in advance, they should be at hand - sewing needles, an awl, high-quality glue, thread, chalk, a hammer, a set of keys and other mandatory tools for every car mechanic;
- choose and purchase upholstery material (with a little extra).
Work order
Let's consider the most complete cycle of work necessary to restore a damaged chair. If we are talking about minor cosmetic repairs of cracked or torn upholstery, complete dismantling of the chair should not be carried out.
Removing and disassembling the seat
The seat should be removed from the interior and completely disassembled.
It is most convenient to do the work on a table, so that you can lay out all the parts and not get confused later during assembly.
Keep a portable vacuum cleaner handy as a lot of dust tends to accumulate inside the seat. It is better to carry out work in a protective dust respirator or in a regular gauze bandage.
The ultimate goal of disassembling a chair is to remove the cushion and back from the frame. First, all external fastenings are removed, and then the upholstery is removed.
The upholstery is removed using sharp scissors or a utility knife, which is used to rip the seams. When removing the upholstery, remember that in some places it may be glued, so you should remove it carefully. The glued areas can be soaked using solvent or regular gasoline.
When dismantling, it is better to sign the disassembled parts so that there are no hiccups or errors during the assembly of the chair after the repair is completed.
Cutting new parts
In order to cut new parts from stored fabric, it is convenient to use old parts from the removed trim. They need to be placed on top of the fabric prepared for cutting and outlined as accurately as possible with a thin chalk or marker line. At this stage, the accuracy of the lines is most important, as well as the coincidence of the pile directions of the new and old parts.
You should also pay attention to how much the edge of the fabric frays when cut. The fabric should be cut with the sharpest possible scissors, or best of all, with an electric knife, which simultaneously burns the edge when cutting.
If there is no electric knife, a fresh cut of loose tissue can be carefully burned with a lighter, trying to prevent excessive ignition.
Connecting the parts of the new case
The cut out parts are sewn together with thread or fastened with a glue gun. You can combine the two methods by first connecting the parts by gluing, and then stitching them over the adhesive joint with threads.
When using a glue gun, you need to carefully study the instructions and find out whether its use on a particular type of upholstery material is acceptable. It is best to check in advance on a piece of fabric how tightly the glue sticks, and also make sure that it does not damage the structure of the fabric.
The parts must be connected in such a way that their edges are on the wrong side of the upholstery. Distortions and folds when connecting are unacceptable.
Each stitched seam in the new upholstery should be beaten with a hammer on a soft foam base so that the seams do not puff up.
.
Replacing foam pads
When replacing the filling in a seat cushion, be especially careful to ensure that all voids are filled. If, after finishing work, there are unfilled corners in the seat, such a chair will very quickly become deformed, become uncomfortable, and all the work will have to be done again.
For this work, foam rubber with a base of woven material on one side is suitable.
It is better to give preference to materials of those brands that are resistant to compression and last a long time. Some car enthusiasts prefer to use polyurethane foam as a filler for seat cushions.
The parts of the new seat upholstery are placed on foam rubber. In this case, they do not use a brush, which will glue the inside of the foam rubber, but a special adhesive spray, which will be distributed only over the surface of the material and glue it to the fabric, but will not spoil the foam rubber itself.
Assembling the chair
The chair should be assembled in the reverse order of its disassembly. First you need to connect the seat hinges, assemble the cushion and pull the cut and sewn upholstery over it. The seat and cushion are also connected by hinges and secured with screws.
The assembled chair is installed in its place. Now all that remains is to steam the new upholstery so that it acquires its final well-groomed appearance. This completes the seat repair.
Restoring cuts on leather seats
If the seats in the car are leather, repairing them can also be done without resorting to expensive workshop services.
Leather chairs are perfectly preserved during temperature changes and high humidity.
, with good care they last a long time, but they have, perhaps, only one significant drawback - they develop tears and cracks when exposed to direct sunlight.
Considering the high cost of the material, complete replacement of the covers in this case is impractical, but the resulting gaps can be patched.
Repairs may require:
- “liquid skin” composition;
- paint matching the tone of the chair upholstery;
- degreaser;
- plastic mesh for patching small holes and cracks;
- thermal powder;
- fine sandpaper;
- small iron.
Procedure:
- Align the edges of the hole to remove any defects around the perimeter.
- Degrease the surface, including intact upholstery leather.
- Sand the edges of the hole with fine sandpaper.
- Cut it out of plastic mesh and install a patch of the required size, 1-1.5 cm larger than the hole.
- Apply thermal powder to the mesh and heat the surface with an iron.
- Level the surface with sandpaper.
- Apply several layers of liquid leather to the mesh, each time waiting until it dries completely.
Before starting restoration work, it is better to practice on an old piece of leather, for example, an old leather jacket. If you need to patch several cuts, you should start with those that are minimally noticeable, and then move on to the rest.
Restoring leather cases - using liquid leather
Repair of leather car seats is carried out in the following ways:
- Scratches and abrasions can be eliminated if only the top layer of paint is damaged by using a special aerosol paint or polish with filler. The skin is first cleaned, dried and degreased, after which paint is applied. As soon as the new layer dries, it is polished. It is important to prevent the appearance of smudges of the coloring material, since they are very difficult to eliminate.
- If there are tears or cuts, the leather interior of the car is restored using a liquid analogue of leather, a special mesh and an appropriate repair kit. First, sand the edges of the tears with sandpaper, then apply a mesh made of plastic to the damaged area and fill it with liquid leather.
- Leather seat repairs are often carried out using a polymer mass. It is applied to the entire area of the seat, resulting in a material that copies the texture of the original upholstery after drying. The formed film is carefully removed and the damaged area is covered with it, ironing it through Teflon.
If the covers are being sewn anew, it is advisable to thoroughly steam the material (especially for leather) before stretching them onto the seats. In this case, the fabric will sit correctly on the frame and, after drying, will fit tightly around it.
Repair of covers with heating system
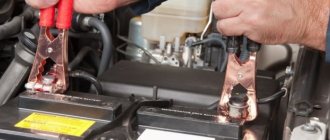
If the heating system built into the seat cover has become unusable, you can also fix it yourself.
The first thing to do is to use a tester to accurately localize the location of the wire break.
Next, you should connect the broken wires and use a tester to check whether the pulse passes through. The corrected cover is installed back on the seat and the functionality of the system is checked.
In order to restore a presentable appearance to the seats in the car, you need patience and accuracy. In this case, it is quite possible to do without large expenses in a car repair shop.