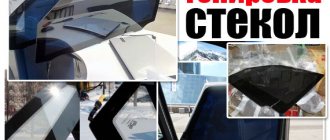
Types of tinting
Films for tinting car windows differ in quality, shades and degree of light transmittance.
Darkening materials are divided into several types:
- factory tinted windows;
- glass tinting varnish;
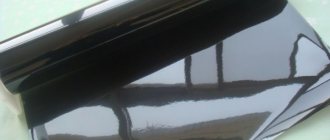
- film with an adhesive layer and a darkening effect;
- curtains
You can make windows darker using any of the following methods. Film and varnish produced by different manufacturers differ in quality, so it is better to use well-known materials.
What tint should you use:
When covering glass with cheap tinting, after some time cloudy inclusions, streaks and fading may appear. The choice of color depends on the personal wishes of the driver and the shade of the car body.
The best hair toners
What should I use to dye my hair - tonic, special balm or spray? The choice is yours, and we will help you make it right. So, here is a list of the most popular products. Among them, coloring sprays have gained the most popularity.
No More Roots spray paint from Salon Fix
This is an American-made hair spray, so we are talking about a high quality product. Pros:
- Well covers overgrown hair roots, including gray hair;
- The spray adapts to the color of the hair, so you will not see the difference between the roots and the entire length of the hair;
The only downside is a small range of colors - only 4 shades, the price is around 1000 rubles. You can buy a tinting spray in an online store, or through joint purchases in specialized groups.
spray paint No More Roots from Salon Fix
Airbrush spray paint from Oribe
With this spray, painting your roots will no longer bother you - it’s easy to choose the shade and the coloring is quick. Pros:
- Ease of use – the bottle is small in size, convenient to take with you in your purse;
- The color palette is very rich;
- Instant results;
- After use, a visible “clean head” effect;
- Natural composition, no harmful parabens.
The only downside is the price - around 2000 rubles, but the result is worth it.
Airbrush spray paint from Oribe
Magic Retouch hair coloring spray from L'Oreal
This spray is specifically for coloring hair roots and is suitable for gray hair. What are its pros and cons?
The benefits of L'Oreal Magic Retouch color spray
- Perfectly covers overgrown gray hair roots;
- Its properties are similar to dry shampoo;
- The result is instant;
- Applies evenly and dries quickly.
Cons of L'Oreal Magic Retouch color spray
- Leaves traces of dye on your hands if you touch your hair with them after dyeing;
- Light blondes have a hard time choosing a shade;
- Not resistant to moisture.
L'Oreal spray is not very suitable for coloring hair along the entire length, since the result may be uneven. The price is around 500 rubles.
Hair coloring sprays are not always easy to purchase, and the choice of brands is quite limited. Other tinting agents, of which there are more on the market, will come to the rescue. Let's focus on the most effective ones.
Magic Retouch hair coloring spray from L'Oreal
Alchemic Conditioner for Natural and Colored Hair Tobacco
From the name it is easy to understand that the product has a slight smell of tobacco. It is unobtrusive, however, it may not be to everyone's taste. Perhaps this is its only minus. The advantages include the following:
- Large selection of shades;
- This product is suitable for both colored and natural hair;
- Gives a natural look to hair, emphasizing its natural color;
- Has nourishing and moisturizing properties;
- Hair is easy to comb.
The price varies between 1500-2000 rubles.
hair conditioner Alchemic Conditioner for Natural and Colored Hair Tobacco
Toning agent "Tonic"
From the list presented, this product is one of the most budget-friendly. It has its advantages and disadvantages.
Pros of "Tonic"
- Interesting and bold colors in the palette;
- Shades for blondes remove yellowness well (for example, the color “Pink Pearl”);
- Low price - around 250 rubles per balm;
- Easily washed off.
Cons of "Tonic"
- Colors hair unevenly;
- Dries out hair;
- You can overdo it with color;
- Doesn't stick well to hair, avoid exposure to rain.
Tonic toner
Ollin Matisse pigment
It costs a little more than the above-mentioned “Tonic”, however, according to reviews, it provides better hair coloring. The advantages include:
- Pleasant aroma;
- Has moisturizing properties.
The only downside is the small selection of colors, the price is no more than 300 rubles per tube.
Ollin Matisse coloring pigment
Materials and tools
Car window tinting is a simple process that you can do yourself. However, to achieve a good result, you need to be careful and use quality materials.
Film tinting tools:
- industrial dryer;
- lighting equipment or bright lamp;
- sharp stationery knife;
- rubber spatula for smoothing tint on glass;
- a set of soft microfiber cloths;
- soap solution for tinting;
- spray with air pumping for uniform spraying of the composition.
When varnishing, you need to dismantle the part or carefully close the interior trim using rags, newspapers and masking tape. A degreasing mixture used to treat the surface before painting can harm door cards, so they must be protected with a thick cloth.
To install tinted curtains or finished glass at home you will need:
All necessary clips and hooks for curtains are secured in hidden places using the included latches and screws.
When tinting car windows yourself, you should be careful not to let the liquid get into your eyes.
DIY car window tinting technology
For those who want to do car window tinting with their own hands, without resorting to the services of car services, we offer you to get acquainted with the most affordable tinting technology. The process is quite simple and takes little time, but requires attention, accuracy and patience.
To successfully tint your car yourself, you will need:
- — a roll of tint film (one is usually enough for 4 side windows);
- - a rubber spatula or a plastic scraper (the latter is less desirable, as it leaves micro-scratches);
- - sharp stationery knife;
- - detergent or shampoo;
- - clean warm water;
- - a dry, lint-free cloth;
- - spray bottle.
In addition, if you decide to do the window tinting yourself, then it will not be superfluous to also call an assistant who will insure you if difficulties suddenly arise. It is better to do glass tinting in a dust-free room or outdoors in good, windless weather. It is also recommended to use a construction, installation, or at least household hair dryer to quickly dry tinted windows.
Since the side windows are easier to remove than the front and rear windows, it is better to start tinting yourself with the side ones. First, remove the seals and thoroughly, using detergent, wash all the glass intended for tinting. Particular attention should be paid to the corners. Next, add shampoo or detergent to the prepared water and pour the resulting soap solution into a spray bottle.
We spray the washed glass from the outside and apply a tint film to it with a dark layer inside. It is important not to mix up the sides! To make it easier to determine which layer is which, you can slightly separate the film from one corner. We align and cut the film attached to the glass, leaving approximately 1 cm of film on all edges.
When a piece of film of the desired shape is ready, generously spray the glass with soapy water from the inside. Next, quickly, so that the glass does not have time to dry, we separate the dark layer of the film, simultaneously wetting it with a solution from a spray bottle. Here, a person inexperienced in tinting glass with his own hands will need an assistant: one of you will firmly hold the transparent layer, and the second will carefully pull off and spray the dark one.
Next, apply a dark layer to the wet inner side of the glass. We spray it on top. Then we apply a transparent layer on it, which will protect the film from mechanical damage, and begin to smooth it with a rubber spatula in the direction from the center to the edges. It is necessary to get rid of all air bubbles and smooth until the dried transparent film begins to fall off. Having removed it, carefully trim the protruding edges of the tint film, running a sharp knife along the edge of the glass.
Finally, if you have a hairdryer, dry the glass around the perimeter. If not, move on to the next window. After the work has been done, it is not recommended to insert seals into the doors or open tinted windows for two days.
Finally, it is worth noting that tinting a car yourself allows you to significantly save money, but does not provide the guarantees that you get when tinting it from professionals. Each tinting specialist has certain skills that can only be acquired with experience. When doing tinting yourself, you will most likely have to repeat the procedure much more often than if you go to a salon.
- Headlight tinting is a new type of car tuning
- Windshield tinting for a comfortable and safe ride
- We produce various types of tinting - photos of the work are presented on the website
- : glass tinting for every taste
Car preparation
To perform high-quality car window tinting, you need to prepare the materials and the car in advance. A properly cleaned window will provide good visibility at any time of the day and will not become stained when pasted.
High-quality tinting is covered with a protective layer that can withstand small mechanical loads. However, a grain of sand that gets on the glass can break through the film when smoothing it with a scraper during the pasting process.
Preparing for tinting at home:
- Wash the car body thoroughly with a high pressure washer.
- Apply a soap solution to the inside of the windows and use a blade to go over the entire surface to cut off any adhered grains of sand and dirt deposits.
- Remove the decorative trim from the posts.
- Thoroughly rinse the corners and hidden cavities of the front and rear shields.
- Degrease the prepared surface.
The heated rear window should not be treated with a blade or cleaned with a hard sponge. If dirt is found, it should be washed off with window cleaning chemicals until it disappears completely.
After cleaning the windows, you need to make a pattern from the film or cover the interior panels for painting with varnish.
All work is carried out in a room with a positive air temperature. Before tinting, you can wet the floor with a spray bottle to prevent dust from being raised when walking.
Window tinting as an element of car tuning
An experienced and sensible motorist differs from an “amateur” in that he will think a hundred times before tinting his car. Such caution is justified, since summer is not an eternal thing, and the hundred or two hundred dollars spent could just as easily be spent on something more useful.
As a rule, everyone has to scroll through conflicting thoughts in their head like these: “Tinting is fashionable, stylish, and the interior will be more comfortable...” On the other hand, tinted windows have problems with the vehicle’s visibility, limited visibility at night, is it worth...? In a tuning studio or in some car dealership, a young specialist will happily impose his opinion on you, justifying it by reading from the label of the tinting film that: “Tinting is a high-tech product that consists of a large number of layers using high-quality materials, as well as special dyes ....” and so on. This may be true, but there are pitfalls to consider, so let's find out.
Most likely, you will be offered something from the range of leading companies in this market, for example, Sun Gard or CP Films, or maybe even Johnson. These companies produce such films and are leaders in the modern industry; their products are appreciated by many car enthusiasts. Such manufacturers are interested in constant leadership, so they regularly update their product range and improve the quality of their products. In contrast to their “low-quality competitors,” this refers to the “Chinese-Taiwanese” manufacturer, which supplies film to our market in unlimited quantities. Kits ala “Cut and glue yourself” are well suited for those who consider themselves a professional and press their hard-earned money on a “normal atelier”. However, as practice shows, as a result they either “screw up” everything, or simply after a while go to competent craftsmen to redo everything, and in the end they pay twice.
Moreover, branded service almost always gives a serious guarantee for the installed film - it can be a week, a month, a year or even a lifetime warranty, it all depends on the material and its manufacturer. The process of tinting car windows itself usually takes no more than 2-3 hours. This time will be enough for a qualified specialist to prepare, cut, and subsequently adjust.
The film is securely attached to the glass using acrylic adhesive glue. Therefore, you should not trust those who offer you “money in the morning, chairs in the evening” and ask you to leave the car for the whole day. Such “specialists” might somehow be able to cope with a domestic car, but it’s unlikely that they would handle a foreign car. Moreover, when installing the film, it may be necessary to disassemble the door mechanism, which affects the locks, as well as airbags and other important components. By trying to save money, you become one of those who prioritize cheapness over quality and reliability. Of course, if you really want to, you can do everything in a dark garage or by yourself, but then you will have to blame yourself, while admiring the numerous bubbles and swellings.
As for the branded service, everything is a little simpler here, if you do not take into account the complexity of choosing from a wide range of different types of film, manufacturers, as well as colors and shades. Leading manufacturers today offer a wide range of various shades, ranging from barely noticeable on glass to almost light-proof film options.
Roughly speaking, all known films are divided, as a rule, into metallized and non-metalized (dyed). They have specifications and are characterized by many indicators, for example, such as reflection and transmission of visible light, reflection of solar energy, as well as many others. Each series has its own colors and shades. Having decided on the option you like, you can set the discrete step yourself, or the gradation of light transmittance and much more.
Raising this question, I would also like to draw your attention to the fact that by using tinting films, you not only get rid of the piercing rays of the sun, but also at the same time preserve the interior of your car in its original form, creating a strong barrier between it and destructive ultraviolet radiation.
The film can save the upholstery from fading, and protect the instrument panel from overheating; in addition, it will increase the service life of rubber, as well as wooden (if any), and leather elements of the car interior. Films of “branded” origin are capable of reflecting 99% of ultraviolet rays and about 45% of heat from sunlight. But this, as you understand, is not all.
This may be news to some, but a layer of tint film significantly increases its strength. Just think, to your “triplex”, consisting of three layers, a fourth is added, which is of sufficient thickness to significantly increase the strength of the glass. By the way, this also applies to the currently popular “reservation” of headlights.
And finally. Don’t forget about the “letter of the law” when tuning your car and finding long-awaited comfort. Remember also that when entering the territory of Finland, the windshield and windows located in the front doors of your car must be completely devoid of any tinting. Whether it’s super transparent film or “five percent” film, it doesn’t matter, they simply won’t let you in. By the way, the domestic GOST still allows these glasses to be tinted, no more than 25% - 30%, respectively. However, there are rumors that our country will also adopt a “Finnish” law, also known as a pan-European law on tinting, which will take away the element of tuning and comfort from some, and work and “daily bread” from others.
Window tinting as an element of car tuning
Please rate this page
Windshield
Windshield tinting is a responsible and complex process. The ingress of dust, dirt or creases in the material can ruin the appearance.
A tinted windshield allows less light to pass through, so you need to choose a film with a high degree of transparency. When covering a window with materials with 35% shading, you can achieve a good result with minimal loss of visibility at night.
Front panel tinting:
- Bend the wiper arms so that they do not interfere with work.
- Unwind the roll of film and place it on the glass.
- Cut the material with a margin of 1-2 centimeters.
- Wipe the window thoroughly with microfiber.
- Apply soapy water.
- Apply the material to the outside of the shield, with the adhesive layer facing up, without removing the protective film.
- Smooth the surface with a rubber scraper, wetting it generously with liquid.
- Difficult transitions and corners are heated with a hairdryer and smoothed until the shape completely matches.
- The edges of the film are cut 0.5-1 centimeter less than the glass area, without going beyond the contour of the black coating.
After trimming the edges and heating with a hairdryer, a pattern is obtained that perfectly fits the curves of the glass.
Adhesive windshield shading material:
- The previously prepared inner surface of the window is degreased and thoroughly wiped with a lint-free cloth.
- The surface is wetted with soapy liquid.
- You need to separate part of the protective layer from the tinting and apply the film to the surface of the window.
- Moisten the material generously with the mixture of liquid and remove the remaining layer.
- Use your hands to distribute the tint evenly over the glass.
- Using a scraper, smooth the surface from the center to the edges, removing water and bubbles.
- Use your left hand to cut out the place where the mirror is attached, without going beyond the black coating.
After gluing the material, the car is left alone for 3-5 hours to dry the surface. If bubbles appear, they must be removed immediately.
How to darken a rear window
The tinting of the rear windows is no different from the windshields. To give a unique shape, a template is made and glued to a pre-treated surface.
Shields with heating threads should be passed with a scraper in a horizontal plane. This will protect the chain from damage and ensure a better fit of the tint. When carrying out work, you need to disconnect the plug going to the thread, and also remove the additional brake light.
Film template
Tinting the rear window begins with preparing a template. To do this you need:
- Cut material to fit.
- Apply to damp glass and smooth with a scraper.
- The corners are heated with a hairdryer and take the exact shape.
When making a template, it is important to lay the material with the adhesive layer facing up, otherwise, when gluing it to the inner surface, the corners will be bent in the other direction.
How to apply tint
Tinting the rear window is done using a squeegee, soap and water, or window cleaner. To protect the shelf from getting wet, you can cover it with a cloth.
Gluing tint to the rear window:
- Degrease the inside and wipe with a clean cloth.
- Inspect the surface for the presence of villi, hairs, and grains of sand.
- Treat the window with liquid.
- Tear off the transparent layer and apply the material to the glass.
- Wet the surface generously.
- Move the material in the desired direction, clearly matching the boundaries.
- Carefully remove the water using a rubber scraper.
Pasting is carried out without a hairdryer, since the template follows all the curves of the shield. After drying, you can install the brake light and return the plastic panels to their place.
How to tint side windows
Tinting side windows is faster and easier due to the small area and the absence of sharp bends.
To darken you will need:
- prepare the film;
- clean windows;
- glue the material.
Side windows are often darkened with a silicone-based film. This allows you to quickly remove the tint in certain situations and re-stick it after softening in warm water.
Sample
Tinting the side front windows is not complete without first making a template.
- The film is cut with a small margin.
- Apply to the dampened window.
- It is smoothed and cut strictly along the contour of the frame.
When cutting the template, be careful with the utility knife to avoid scratching the painted door panel. The material is applied with the adhesive base upwards, otherwise the film will not be suitable for installation from the inside.
In order not to make a mistake with the patterns, you should first paste over one part of the car, and then the other. The trimmed tinting should be removed away from the work site so that it does not get in the way underfoot.
Film application
To paste the rear and front side windows, you need to follow these steps:
- Degrease the shields.
- Moisten them with liquid.
- Remove the transparent film from the adhesive layer of the tint.
- Place the material on the window and smooth it out with your fingers.
- Close the door and inspect for cracks and uncovered areas.
- Move the material in the desired direction.
- Remove water and air with a scraper.
When removing excess liquid, you need to carefully insert the tint into the rubber bands using a thin scraper or a plastic bank card. The film should take the shape of the window and straighten out.
After pasting the windows, do not open them for at least 24 hours. After drying, the car can be used as usual.
When darkening with a special varnish, the window is thoroughly degreased, the racks and plastic elements are closed with tape, covering material, newspapers, and fabric. Layers are applied with an exposure of 15-20 minutes. The complete drying time is indicated on the paint can. You can remove the varnish with a special compound that corrodes the coating.
How to remove tint
Tinted windows become scratched and scuffed over time. In this case, you will need to remove the old film and apply a new one.
To delete, you can use the following methods:
- heat;
- soapy water;
- special chemical compounds.
Heat removal uses a hair dryer to melt the adhesive. When the film is removed, the glass remains clean and does not require additional processing.
When the adhesive layer is softened with soap, streaks and cloudy marks remain, which can be easily removed with a degreaser and a razor. When working with caustic agents, cover the panels with cloth or newspapers.
When cleaning the rear shield from glue, be careful not to damage the heating filaments. If the fiber breaks, it will require restoration by service or using conductive glue.
Adviсe
Tinting without removing the windows does not take much time. To achieve a good result and tint the car without flaws, you need to carefully inspect the shield for dirt and foreign objects.
Windshield tinting is the most difficult step due to the curves and large area. Difficulties are often caused by cutting space for mirrors and rain sensors. For convenience, you should guide the knife along the black line of the silk-screen printing and do not step beyond it.
When selecting material to match the body color, you should avoid bright red shades, which change the correct perception of colors and can confuse the driver while driving.
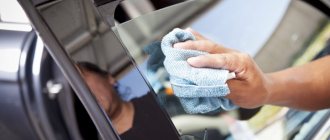
If certain specifications of the adhesive are observed and high-quality materials are used, the car windows will noticeably transform and retain light transmittance. When caring for tinting, do not use aggressive products or rags with hard bristles: this can lead to clouding and scratches.
A modern take on car tinting
Residents of modern megacities spend most of their day behind the wheel, covering kilometers of roads. At the same time, they take quite a lot of risks. And not because driving is stressful, which has a detrimental effect on health, but also because all this time they are exposed to ultraviolet radiation. Research in this area gives a clear answer - a car is simply not able to save its owner from the effects of sunlight penetrating into the cabin through car windows. They are simply not designed to prevent the penetration of ultraviolet rays into the cabin, which means they can fully contribute to the development of cataracts and even skin cancer in the driver. But car tinting may well help to cope with this problem.