Signs of failure of the outer grenade (CV joint).
There are two options here:
- signs that your grenade has already broken
- signs that the grenade will soon come out and break .
How to understand that a grenade will soon break.
Of course, the first sign of a malfunction of the external grenade is a crackling sound . If you hear a crackling noise while driving with the steering wheel turned, it is definitely a CV joint. The greater the angle of rotation of the wheel and the harder you press on the gas, the louder the clicks. Another sign that does not always appear is vibration on the steering wheel at speeds greater than 80 km/h. The vibration is only slightly similar to the vibration from an unbalanced wheel. It usually manifests itself as a slight twitching of the steering wheel.
How to understand that the outer CV joint has broken.
If the CV joint breaks, the car will stop moving. In any gear engaged, press the gas, the speed increases, but the car does not move.
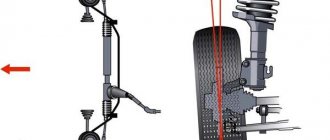
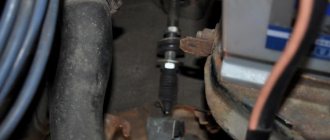
How to understand that it is the outer CV joint that has broken, and not the internal one or the clutch in general (the first signs of failure are similar to the signs of a clutch failure)? First of all, start the car and put it in any gear. Next, open the hood and look in turn at each of the shafts going from the box to the wheels (one short, the other long). If any shaft is spinning, it means that the CV joint has broken on this side.
I recommend not just visually looking at the shaft, but touching it with some long, hard object, such as a stick. The main thing is that there is nothing on it that could wrap around the shaft . When you touch the shaft with a stick, if it is spinning, you will feel a slight vibration. This is usually done in the dark, because it is difficult to understand whether a cylindrical object is spinning, especially in the dark.
We are starting renovations
To independently remove CV joints on a nine or any other car, you need to have the following tool on hand:
- A socket wrench for “30” or a socket with a strong wrench.
- Hammer and chisel.
- Balloon wrench.
- Set of spanners and sockets.
- Penetrating lubricant such as WD-40.
- Capacity of at least 5 liters.
- Marker or metal scriber.
- Jack, support and wheel chocks.
You may also need a grinder, drill, drill bits, and other attributes. The work can be complicated if the drives have never been removed - the threaded connections become dirty, which complicates disassembly.
The procedure for replacing VAZ grenades is quite simple, but you will have to suffer a little, since knocking the old element off the drive is problematic. You need these tools:
- Set of sockets and keys. In particular, you will need a socket wrench or a “30” socket.
- Jack (it is best to use a hydraulic one paired with a support).
- Hammer.
- Chisel. Before replacing the grenade on the VAZ-2109, it must be removed; to do this, you will need to loosen the nut.
- Capacity 4-5 liters.
- Puller for retaining rings.
- Vise.
You will also need a new repair kit. It consists of a grenade, a locking ring, lubricant, a nut, a boot and two clamps.
So, the first thing you need to do is dismantle the old grenade. By the way, before changing the boot on the VAZ-2109 grenade, the same manipulations are performed. The thing is that it can only be replaced after the removal has been carried out.
Without this, installing a new boot simply won’t work. You will need to perform the following manipulations:
- On the side to be repaired, loosen the wheel fastening.
- Using a drift, you need to straighten the edges of the nut.
- Place chocks under the rear wheels to prevent the car from rolling away.
- Use a 30mm wrench to remove the nut.
- Raise the side of the car that is being repaired with a jack, remove the wheel, and place the car on a support.
- Completely unscrew the nut from the grenade. Please note that the washer is used when installing a new grenade - do not lose it!
- Drain the gearbox oil.
- Remove the two bolts that secure the ball joint to the suspension arm. Check the condition of the hinge - if it is deplorable, you will have to change it.
- You will most likely have to pull the pin out of the steering knuckle. The tip may interfere with the removal of the grenade.
- Now that everything is ready, you can pull the hub along with the strut to release the CV joint.
How to remove a vaz shruz
Having determined that it is the external grenade that is broken, we begin to remove it.
How to unscrew the hub nut on a VAZ?
First of all, unscrew the hub nut. To do this, take a 30mm head and a lever, the larger the better. We put bricks under the wheels to prevent the car from rolling (simply putting it in gear is not an option, the wheel will spin) and begin to unscrew the hub nut.
In this matter, the more you weigh, the better, since I very often lacked my weight and leverage of about one and a half meters. I got out of the situation in the following way: I stood completely on the lever, as close to the edge as possible, thereby giving maximum tension to the nut, and hit the lever with a hammer. Usually this method helped me unscrew even the most soured wheel nuts.
One more nuance: if the outer walls of the head come into contact with the walls of the hub, it is better to lubricate the head with mining or lithol, or, in extreme cases, with silicone grease. Thanks to this trick, the head will not bite in the hub.
How to remove a grenade?
The hub nut is unscrewed, now we remove the wheel, unscrew the two bolts that hold the ball joint, disconnect the suspension arm and the hub, move it to the side of the car while lightly tapping the grenade, remove it from the hub. At this point there are two options:
- The grenade is already broken.
- Replacing the grenade due to its crunching sound.
In the first case, you simply remove the outer part of the CV joint from the shaft, then the retaining ring from the drive shaft and knock off the cage with a hammer.
In the second case, removing the CV joint becomes more difficult. You need to deflect the grenade relative to the shaft at the maximum angle so that the bearing balls and their cage are visible.
Now use a hammer to break the jumpers of the cage between the bearing balls and take out the balls one by one. When you take out the last ball, you can remove the body of the grenade, and then its inner part sitting on the shaft, after first removing the locking ring from the shaft.
Of course, you can simply try to knock the grenade off the shaft, but due to the locking ring this will be problematic.
That's it, the CV joint is completely removed. Now let's start installing the new part.
Use of CV joints in a VAZ 2109 car
The installation of CV joints began to be performed on front-wheel drive cars. This is due to the fact that the use of a crosspiece in the cardan transmission, with four needle bearings, as in rear-wheel drive vehicles, does not ensure the required equality of the angular velocities of the shafts - driven and driven. When using such a device, it will be associated with an increase in the dimensions of the unit, the price of the product will increase, and the torque will be transmitted with a large pulsation, which will increase with an increase in the angle between the shafts. The design of CV joints provides a service life the same as the service life of a car, but during operation it was revealed that wear of the elements occurs faster, especially its external parts. Although they are made flexible, from moisture- and frost-resistant materials, the part cannot serve for a long time under the influence of external factors. It is greatly influenced by constant deformation, large amounts of abrasive and moisture. In addition, during repairs or long-term operation of the car, the boot may become damaged, and cracks may appear on the protective rubber, which will lead to failure of the element. The shaft leading to the CV joint may also be damaged. Often this defect is difficult to notice with the naked eye, but with a crooked shaft the operation will not be normal. All this leads to the need for repairs or.
How does the internal CV joint of a VAZ 2109 car work?
In order to determine the structure of the CV joint, it can be disassembled. For this:
- The hinge moves and is removed from the spline shaft.
- Use a screwdriver to pry up and remove the plastic stop, as shown in the photo.
- The hinge shaft is clamped in a vice.
Tip: To prevent dents on the shaft, insert pads made of soft metal into the vice.
- Use a screwdriver to pry up and remove the retaining ring.
- Using pliers, the separator with the cage and balls is removed.
- Six balls are pulled out with a screwdriver.
- The clip is disconnected from the separator.
If, after dismantling, all parts are in good condition, the assembly can be assembled by first putting 80 cm3 of lubricant into its cavity. Such a complex design of the internal CV joint on the VAZ 2109 shows how difficult it is to disassemble and repair it. And if dirt gets in and the protective cover is damaged, other parts of the CV joint may become unusable. The component elements of the product are not interchangeable, so the best option for a VAZ 2109 car would be to replace the internal CV joint along with the boot (see). Traces of grease visible on the joint body indicate a break in the boot. If oil leaks at the junction of the gearbox and the drive axle shaft, this indicates wear of the inner “grenade” oil seal, which requires replacement. A characteristic “crunch” when the car moves around corners indicates the need to check the angular velocity joints. A noticeable “play” when rocking the drive axle shaft with your hands or at least a torn joint cover indicates that the VAZ 2109 internal CV joint needs to be replaced.
How to replace the internal CV joint of a VAZ 2109 car
The instructions for replacing the internal CV joint of a VAZ 2109 car with your own hands suggest the following procedure:
- It drains completely.
Tip: The oil is drained from the gearbox after the vehicle is raised. If its quality is good, then it is used a second time; if there are deviations from the norm, it is better to replace it with a new one, then this will save time on performing the same operation a second time.
- The hub nut is unscrewed.
- You need to remove the wheel.
- Unscrew the ball joint, which will free the strut from the lower arm.
- To ensure free movement of the outer CV joint, the wheel must be moved to the side.
- The outer grenade is knocked out of the wheel.
- Both grenades are knocked out of the gearbox.
Tip: To prevent dirt and dust from getting into the gearbox, you need to cover the hole in it.
- Carefully, to avoid damage, the drive shaft is clamped in a vice.
- The clamp that the boot holds on the body of the inner CV joint is released. A screwdriver is used for this.
- The boot is removed. It can be cut if further use of the element is impossible due to breakage.
- The old CV joint is knocked off the drive shaft using a special guide made of bronze.
- The CV joint and a new boot are put on the shaft.
Tip: A plastic plug is installed at the end of the shaft, on the side of the internal joint.
- The inside of the CV joint is generously lubricated with grease.
- It is necessary to ensure that the direction of the drive and the seat of the product coincide.
How to replace the internal CV joint on a VAZ 2109 can be clearly seen in the video.
Drive Shaft Installation
So:
- New retaining and thrust rings are installed.
- After applying graphite lubricant to the hinge splines, the drive shaft is placed in the housing.
- Fixing the shaft in the side gear.
- Installing the unit into the wheel hub.
- Final assembly is performed in the reverse order of disassembly.
On our website you can find a lot of useful and necessary information on this topic.
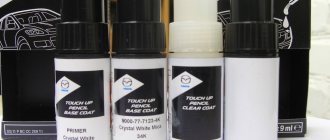
The VAZ 2109, unlike its predecessors, has front-wheel drive. In its design, to transmit torque from the gearbox to the wheels, instead of a rear axle gearbox, the so-called CV joint (colloquially “Grenade”) is used. Since this mechanism is constantly in motion, its components quickly heat up. Therefore, to remove the temperature in the “grenade”, a special lubricant is used. And to ensure that dust does not fall on the part and the lubricant does not quickly become clogged, special boots are used - casings that protect the “grenade” from contamination.
By design, the car has two CV joints and two boots - external and internal. The external ones are installed on the hub, and the internal ones - in the gearbox mechanism. In general, this part is designed for quite a long service life, but, like all parts and mechanisms of a car, it may require repair or replacement. Read on to learn how to make the replacement yourself.
How to install a new CV joint on a VAZ.
Be sure to follow this sequence for installing new parts:
- Small clamp.
- Grenade boot.
- Large clamp.
- Retaining ring.
- The CV joint itself.
First, we clean the drive shaft from dust, dirt and old grease. Most CV joints come with lubricant, a boot, two clamps and sometimes a new hub nut. If suddenly there is no lubricant in the kit, it is better to use graphite lubricant, and if it is not available, then simple lithol. First of all, we put on a small collar. Then the boot (it should go behind the limiting washer) and a large clamp. Then we put a retaining ring on the drive shaft. Now open the tube of lubricant and completely squeeze it into the grenade. Now it's time to put the CV joint on the drive. Because of the locking ring, it will be difficult to insert the drive into the grenade, so we take a hammer and lightly, trying not to damage the thread, press the grenade into place. Now you need to put the boot on the CV joint and tighten the clamps. Assembly occurs in reverse disassembly sequence, but there is one nuance! Do not overtighten the hub nut! This may cause the bearing to hum. The hub nut must be tightened with a force of 225.0–250.0 N*m. Of course, few people have a torque wrench. So, tighten the nut tightly, but not with all your might. In theory, a force of a maximum of 25 kg will need to be applied to a meter-long knob. But, the extension pipe will spring back under such force, so how can you describe it exactly? But obviously there is no need to jump with weight.
Reasons and signs of replacing the VAZ 2109 CV joint
The CV joint fails due to damage to the boot - sand, water and dirt get into the lubricant. Since this may not be noticed immediately, but after several hundred kilometers, the problem will go so far that the “grenade” will have to be replaced. Therefore, the anthers must be inspected at every maintenance , or even more often, and replaced at the slightest sign of wear.
A crunching sound when turning and accelerating will notify you of the upcoming replacement of the CV joint. You can confirm your suspicion by hanging the wheels and checking whether there is play in the drive shaft by shaking it with your hand.
When to replace
In order for this part to work long enough, sand, dirt and dust should not get into it. Contamination significantly accelerates wear and reduces the service life of the unit. But to protect against this, a boot is provided, which can become unusable relatively quickly. Therefore, timely replacement of the boot will keep the CV joint in working condition for a long time.
The wear of the CV joint is indicated by a noticeable crunch and extraneous sounds when turning the steering wheel. In this case, it is recommended to replace the unit.
Causes and breakdowns
In reality, the resource of the CV joint turns out to be significantly less, which is caused by operating conditions, poor quality of roads, driving habits and other factors.
The CV joint is popularly called a “grenade,” which is due to the external similarity of the element to this explosive device.
Here's what you should know about grenade malfunctions:
- Practice shows that the most common cause of CV joint failure is dirt, dust, and sand that enter the mechanism through a damaged boot;
- Sometimes the problem of a non-functioning grenade can be solved by replacing the boot. This is possible if the CV joint itself has not yet worn out due to exposure to contamination;
- If the damaged boot is not detected in time, the grenade will be completely worn out within literally 200 kilometers;
- If the CV joint fails, a strong crunching sound appears when cornering and accelerating. Such a symptom indicates the need to urgently replace the CV joint;
- The cost of new grenades is quite affordable; they are available at any auto parts store. But you should purchase those that meet the technical requirements of the VAZ 2109;
- If you have at least a little experience in repairing cars yourself, it is quite possible to replace a grenade with your own hands.
Old and new element
Removing the drive, boot and CV joint
To replace the outer CV joint, follow the following procedure:
- We place the car on the inspection hole and support it with wheel chocks.
- Using a 30mm socket, loosen the hub nut. If the nut does not break off, then you can extend the key with a pipe.
- Raise the car with a jack in the right place and remove the wheel.
- We unscrew the bolts securing the ball joint of the lower arm to the hub.
- We squeeze out the tie rod end with a puller.
- Unscrew the drive shaft nut completely.
- We pull out the hub by grasping the brake disc and pulling the shock absorber strut towards us.
To change the boot and hinge, you will have to climb into the inspection hole. To remove the CV joint, remove the clamps that hold the boot. Next, we get rid of the old boot, which is easier to do with a knife. Use a rag to remove grease from the hinge. Then you need to knock down the inner race, for which we lightly hit the attachment with a hammer, which must be rested against the end of the hinge. Next, we thoroughly clean the CV joint from dirt, sand, dust and grease.
How to replace anthers
There is nothing complicated about this, but it is worth noting that if you drove a car with a torn boot, then dirt got under it. It mixed with lubricant, resulting in a very strong abrasive that can wear away metal. The result is an increase in gaps and the appearance of a terrible crunch. On a VAZ-2109 car, the CV joint boot is replaced much more often than the joints themselves. But, due to the specific design, it is necessary to completely remove and disassemble the drive.
Fortunately, you only need to remove the outer CV joint to change both boots. But fresh rubber is very hard, putting it on the axle shaft will be problematic. Before replacing the boots, be sure to wash the hinges and press new grease into them - this will increase their service life. By the way, the drive repair kit includes CV joint, lubricant, boot and clamps. The latter need to be mentioned separately - it is not always possible to use the worm type, since the adjusting bolt can cling to the gearbox or hub.
Read more: Rating of the most stolen cars in St. Petersburg
Build process
When assembling the outer CV joint, you must perform the following steps:
- We put a rubber part on the shaft.
- We stuff the CV joint (new or cleaned) onto the shaft until the part is secured with a retaining ring.
- We place fresh lubricant in the hinge and boot.
- We put the boot on the outer race.
- We remove excess air from the boot by pressing it with your hand.
- We secure the boot with clamps.
Then the drive is put in place, the hub is clamped with a nut. It is also necessary to put back the tie rod end, support and wheel. Next, you can lower the jack and tighten the nut securing the drive. To prevent it from unscrewing on its own, the nut should be capped.
Interior
Replacing the internal CV joint of a VAZ 2109 is carried out if the following parts and tools are available:
- Vise;
- A set of keys;
- Hammer;
- Jack.
First of all, completely remove the drive from the car and secure it in a vice. To remove the boot, you will need to remove the CV joint clamps. After this procedure is completed, you can begin to remove the part itself. Using a hammer, give the part a few firm blows to force it out of the mount. At the end of this part there is a plastic tip. It must be carefully removed for subsequent installation on a new “grenade”.
Before replacing, all fasteners, and the CV joint itself, must be lubricated with a special lubricant. Next, carefully put the new part back onto the drive. To do this, use a hammer and a wooden block so as not to damage the part.
Features of repairing the internal CV joint
To replace the inner CV joint, it is necessary to completely remove the drive, for which the outer joint is first disconnected without subsequent dismantling. Next, using a pry bar, remove the hinge end from the gearbox. To do this, we insert the flat part of the tool between the outer frame and the box, and then move it like a lever.
Further, the procedure for replacing the unit will be similar to the actions when repairing the external hinge. The inner CV joint must be correctly inserted into the transmission. It is recommended to insert the part into the hub, with the help of which the unit is brought into place by pushing movements. But it is also possible to drive the already assembled shaft with a mallet or a wooden pointer and a hammer. The hinge must be secured with a locking ring.
At the final stage, all removed parts are installed back. At this point, the replacement of CV joints is considered completed.
If you find an error, please select a piece of text and press Ctrl+Enter.
Sequencing.
1. Using a jack, lift the wheel on the side where the CV joint is worn.
2. Unscrew the wheel mounting bolts and remove the hub nut thrust washer.
3. Unscrew a pair of lower ball joint mounting bolts from the steering knuckle.
4. Then turn the steering wheel very strongly towards or away from the direction in which the replacement will take place.
5. Having slightly pulled the steering knuckle with the strut, carefully remove the splined end of the outer CV joint from the hub, and then use a pry bar to push the inner CV joint out (from the gearbox).
6. Secure the drive shaft in a vice and remove the clamps from the CV joints (internal, external). Turn the boot inside out. If there is damage on the latter, then you don’t have to worry about dismantling it and just cut it off with a knife.
Read more: Renault Logan eight-valve timing marks
7. Now, using a hammer, knock the CV joint off the shaft and install a new one in its place. Then repeat all the previously performed steps in reverse order, not forgetting:
- lubricate the CV joint well before installing it,
- replace the old hub nut with a new one,
- touch the edge of the new hub nut after tightening (to prevent unscrewing),
- install a plastic plug at the end of the shaft.
That's the entire replacement procedure. As you can see, nothing complicated.
I recommend reading:
How to determine faulty CV joints on a VAZ 2109
It is advisable to conduct a full examination, but there is no specific method that will help make a final diagnosis. It is better to use several methods, only all of them together can identify breakdowns. Replacing the CV joint on a VAZ 2109 is necessary if there is a crunching sound when turning. This indicates that there is large play in the outer hinge.
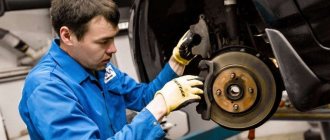
When reversing, this unpleasant sound will bother you. Don't think that there is nothing wrong with this. This can all result in the joint jamming, which will lead to loss of control of the VAZ 2109. Frankly, the comfort when driving the car is deteriorating. When performing diagnostics, inspect all suspension components in parallel, namely:
- Front wheel bearings.
- Shock absorber boots.
- Ball joints and boots on them.
- Tie rod ends (and boots).
- Anthers of internal garnets.
As a rule, it is the outer pair of CV joints that fail; the inner one suffers much less during vehicle operation. The fact is that the load on the external ones is greater, their angle of rotation is more significant, which cannot be said about the internal ones.
It is most convenient to carry out diagnostics on a pit or a lift, while the entire suspension should be suspended so that no loads are applied to it. However, replacing the outer CV joint of a VAZ 2109 should be carried out on a car that is in exactly this position.
Replacing CV joints: practical recommendations
On the advice of specialists, the CV joint should be completely replaced. An exception may be anthers or other small elements of this type. In addition to lubrication, all the clamps in the CV joint must also be replaced with new ones, and during assembly, monitor the cleanliness of the work to prevent dirt particles from getting into the hinges.
To install the CV joint in place, it is better to use a hammer and a wooden spacer, watching your movements so that they are not strong and not sharp. Those. Simply place the spacer and tap it until the part snaps into place. If you neglect this and hit the part itself, you will simply damage it.
Once the hinge is in place, its boot is installed. First of all, the clamp is clamped onto the shaft using pliers. In this case, you will need to equalize the pressure in the part; to do this, just use a screwdriver to pick up the edge of the boot and unscrew it. After this, the clamp is clamped from the outside. The plastic plug must be installed at the end of the shaft, not forgetting about it. The remaining steps are performed in the reverse order in the same way as the CV joints were removed before.
Replacing the outer CV joint of a VAZ 2109 may seem complicated and time-consuming, so you can always turn to professionals for help. They encounter such a replacement quite often, so it won’t be too difficult for them.
Drive disassembly
First of all, you will need to remove the drive (in fact, the left and right ones are removed in the same way, the only difference is their length). The connection between the external CV joint of the VAZ 2109 and the hub is made using splines, a ring and a nut. Internal - using a special ring. So, you will need to carry out the work:
- The standard set includes open-end wrenches, ring wrenches, as well as a socket wrench with a large lever at “30”, a jack and stops, and stands.
- Hammer.
- Chisel.
- Mount.
- Vise.
Materials: a small supply of graphite-based lubricant. Everything you need for replacement is included in the kit:
If you plan to change the anthers on the internal grenades, then be sure to purchase a set of clamps. Replacing the VAZ 2109 CV joint is carried out in a certain sequence, which you simply need to follow. The most difficult thing is to unscrew the nut on the hub. Sometimes you have to resort to extreme measures - drilling, since it is impossible to unlock it.
Partially unscrew the nut with the car mounted on all four wheels, and be sure to place stops under the rear wheels. After you have loosened the nut, unscrew it and lift the side to be repaired. After dismantling the wheel, unscrew the tie rod end nut (first remove the cotter pin). At the bottom, unscrew the ball joint mount. After releasing the entire strut and hub, you can hold the brake pipe and try to pull the hub towards you.
With difficulty, but you will remove the VAZ 2109 CV joint from the splines. After this, you need to remove the internal grenade - install a small chisel between the gearbox and the grenade. Apply several sharp blows so that the CV joint comes out of the gearbox. In just a few seconds you will be able to do this. That's all, now take the entire drive and clamp it in a vice. You knock out the old outer CV joint with a hammer, but before doing this, it is advisable to break the boot.
If you don’t mind the old grenade, then the new one should be stuffed carefully, trying not to damage the slots and threads. When replacing the VAZ 2109 CV joint, you must thoroughly wash and clean everything so that dirt does not get under the boot on the new grenade. Otherwise, after a while you will again be faced with the need to carry out expensive repairs.
Basic procedure
First of all, you should put the car on the parking brake and secure the rear wheels with blocks. After this, while the car is on the ground, the hub nut is loosened. You will first need to remove the protective cap. It should also be taken into account that this nut is tightened quite tightly, so you will have to make a significant effort. At this point you can loosen the wheel bolts.
Next, you need to raise the front of the car by placing the body on supports. After this, you can unscrew the wheel bolts completely, removing the wheels, and remove the hub nut stop washer. The next step is to disassemble the steering rod, or rather its tip. The fastening bolts of the lower part of the steering knuckle support are screwed together, after which it is necessary to turn the steering wheel in the direction from which the replacement is being made until the extreme position is reached.
Next, the spitz end of the outer CV joint of the VAZ 2109 is pulled out from the hub, after the steering knuckle and strut have been pulled out. The next step is to press out the inner CV joint secured in the gearbox, for which it is better to use a pry bar.
It is important to pay attention to the fact that if it is necessary to carry out work on all CV joints, it is recommended that after removing one drive, install a retainer in the box, which can be an old similar part of the inner CV joint. Otherwise, the gears will shift, making it impossible to install the CV joints in place.
Read more: Vortex tingo who is the manufacturer
If traces of oil were observed in the area of the gearbox during operation of the vehicle, then the seals on the CV joints will also need to be changed. Next, you need to clamp the drive shaft with a vice, remove the clamps from the hinges and unscrew the boots if they are intact. It is enough to cut off torn anthers with a knife.
The CV joints are knocked off the shaft with a hammer and drift, with the main forces being applied to the hinge cage. The same is done for the outer CV joint.
If you only need to replace the boots, the joint should be washed with gasoline to get rid of old grease and traces of dirt. The new boot is placed on the shaft, but it is important to keep in mind that the right shaft is longer than the left. In addition, it is better to immediately replace the lubricant in the CV joint, making sure there is enough of it.
How to replace the constant velocity joint on the “nine” yourself?
mace The start of Volzhsky's production of the eighth and ninth series of cars gave an impressive impetus to a change in priorities - the rear-wheel drive “classic” received a worthy competitor, whose sales ratings increased every day. However, the appearance of a completely new unit - the constant velocity joint, and especially its diagnostics and repairs, have long puzzled not only ordinary car enthusiasts, but also craftsmen. After many years of operation, we can already talk about the accumulated experience in this area, which will be discussed below.
Briefly about hinges and fault prevention
The driving front wheels significantly increase the maneuverability of the car and also reduce fuel consumption. However, sooner or later you have to pay for this, because replacing a CV joint with a VAZ 2109 is due to the specifics of its operation - operation under constant load. External hinges transmit not only torque to the wheels, but also change the angle between the axle shafts during movement. After a certain period of time, wear appears between the rubbing units and the gap increases, and, therefore, at a minimum, extraneous noise appears.
Shall we get started?
Attention! The hub nut does not need to be tightened with great force. After installing the wheels, tighten the bolts without applying much physical force.
- We remove the car from the jack, place a brick under the front wheel and tighten the nuts tightly.
- Well, now pour oil into the gearbox.
Often, owners of domestic cars are faced with the need to replace the CV joint on a VAZ 2109, since the safety of those in the cabin directly depends on its functioning. CV joint is an abbreviation that stands for constant velocity joint. The part must be replaced if there is any suspicion of a malfunction.
For example, while driving a car you can hear noise from the front wheel drive. In this case, the first thing to check is the CV joint boots, which may be torn, have cracks or traces of grease. To check, just turn the steering wheel all the way in any direction and look behind the wheel.
If damage is found, it is necessary to change the dust cover so that grains of sand, water, stones and the like do not get into the CV joint, which will certainly render the joint unusable. Also, when the car turns into turns, a characteristic tapping sound may appear, which indicates a malfunction of the hinges themselves. To verify the need to replace them, check for the presence of play, which will require rocking the drive shaft.
How to independently determine problems with the constant velocity joint on the “nine”?
Lubrication Both types of hinges are structurally one unit, but the outer one breaks much more often due to high loads and rotation angles. Let's look at some signs of identifying a malfunction and ways to detect it:
- when trying to move the wheel hub in different planes, play is felt;
- when changing speed or starting off, the car moves jerkily;
- with the steering wheel turned to the maximum, start moving - the faulty outer joint makes a certain crunching sound;
- extraneous noise in straight-line motion indicates a problem with the internal joint.
Good diagnostic results are obtained by a technique that allows you to lift the car (at least jack it up). Here it is possible to rotate the wheel when the internal joint is maximally curved. It is in this way that you can hear the so-called hinge “crunch”, which allows us to speak with absolute certainty about the breakdown of the constant velocity joint.
External
Replacing the outer CV joint of a VAZ 2109 is mainly done without removing the drive. To do this, the front wheels need to be jacked up and the front of the car placed on special supports. The wheels must be suspended so that the drive can rotate freely.
Next, unscrew the screws securing the wheel, remove it, and turn the steering wheel all the way in any direction. Disconnect the pivot pin from the splined end of the grenade. Unscrew the nuts securing the boot and remove it. Carefully knock out the inner CV joint from the gearbox, followed by the outer one. The drive must remain in place and locked. Now, the CV joint can be replaced, or preventive maintenance can be done by washing it with gasoline. If damage is visible on it, then replacement is simply necessary. While replacing the internal grenade, insert a temporary plug into the gearbox hole, but do not secure it. After the replacement is completed, remove the internal “grenade” and install the external one in its place. Reassemble completely and insert the CV joint back.
After everything is in place, put the wheel back, and before driving, check the operation of the steering wheel. If the steering wheel turns normally, all the way, and is not accompanied by a crunching sound, then you have done everything correctly.
The constant velocity joint (CV joint), or, as it is popularly called, a grenade, appeared at the moment when front-wheel drive cars began to be introduced onto the market, and its main task is to transmit command from the gearbox to the drive wheel. If you remember, in rear-wheel drive cars this function is performed by the cardan transmission. For a front-wheel drive car, such a mechanism will lead to an increase in its size, and, accordingly, the price will increase along with this.
As for the VAZ-2109, this model has two CV joints: external and internal.
And today we will talk about how to replace the outer boot for a given car with your own hands, since it is this that most often becomes deformed and torn.
How to replace a faulty CV joint on a VAZ 2109 yourself?
Organization of repair work requires thorough preparation; the contractor must have:
- new hinge and boot;
- lubricant;
- clamps;
- jack and pry bar;
- a set of keys and screwdrivers;
- vice;
- bronze or copper plate;
- hammer.
dismantling Before you begin replacing the CV joint on a VAZ 2109, you should secure the car using the hand brake and stops that are installed under the rear wheels.
After loosening the wheel rim bolts and hub nuts, the front part of the car is jacked up and lowered onto the supports so that the wheels are suspended. Next, the process of changing one of the hinges is performed according to the following diagram:
- Unscrew the wheel rim mounting bolts and unscrew the hub nut;
- unscrew the two bolts that secure the steering knuckle and the lower ball joint;
- Turn the steering wheel as far as possible in the direction from which the part is being changed;
- pulling the steering knuckle with the stand towards you, remove the splined hinge shaft from the hub using a hammer and a copper lining;
- fix the drive shaft in a vice, remove the clamps and unscrew the joint boots (if the boots require replacement, it is better to cut them off immediately);
- using a metal pad, knock the faulty joint off the shaft and install a new one;
- press in with lubricant and tighten the boot with clamps;
- Assembly of the unit occurs in the reverse order.
Important! It is better to carry out the procedure for changing hinges simultaneously with changing the retaining and thrust rings installed on the shafts. A similar algorithm is used when replacing hinge boots. In the case of repairing only one unit, the craftsmen recommend disassembling and changing the lubricant on the second joint.
anther
Malfunctions of constant velocity joints on modern cars
In the modern automotive industry, almost all vehicles are equipped with constant velocity joints (CV joints) for their drive. Each drive has two hinges - internal and external. This device is designed to transmit rotation from the transmission differential to the wheels
Elements protecting hinges on front-wheel drive VAZ vehicles
The boot is a hinge protection element on front-wheel drive Zhiguli cars, made of special corrugated rubber. It is installed on the internal and external drive joints and protects them from external factors. It also holds the lubricant necessary for operation inside the joint.
All about the CV joint and how to dismantle and install it
Before we start talking about any breakdown, it is necessary to give a specific definition of a particular part that will be repaired in the future. This also applies to repairing the CV joint. This part is one of the components of the transmission. In general, CV joint is an abbreviation that
How to independently replace CV joint boots on a VAZ 2109.
CV joint boots are a front-wheel drive unit, which is popularly called a “grenade”. The reasons that lead to their damage can be different: aging of the material, hitting an obstacle, as well as careless operation of the car.
CV joint protective covers: signs of failure and principles for installing a new boot
The grenade (CV joint) is an important element of the car’s drive - with its help, torque from the gearbox is transmitted to the drive wheels.
Replacement
If problems arise with grenades, you should determine which ones have problems. Next we will look at how to change the drive and how to remove it. Additionally, we recommend watching the repair manual video.
The procedure for replacing inner and outer CV joints differs from each other, therefore each stage should be considered separately.
Let's start with the internal.
Inner CV joint
Rubber boots are a vulnerable element of the grenade design. It is not uncommon that by replacing the boot, washing the grenade with gasoline and applying new lubricant, it is possible to solve the problem. If the wear of the CV joint is insignificant, such measures can replace a full repair.
But if you discover the breakdown late, you will have to completely replace the inner CV joints.
- Apply the handbrake and install chocks under the wheels.
- Unscrew the hub nut using a wrench and a socket. Carefully remove the punching elements from the nut with a punch. This way you will be able to preserve the carving on the garnet. The nut itself will need to be replaced with a new one during reassembly.
- The main thing here is to unscrew the nut, lowering the wheels to the ground. Otherwise, you risk breaking the differential and other gearbox components.
- Raise the car using a jack on the desired side, first loosening the wheel nuts. Remove the wheel.
- Drain the gearbox oil. This can be done earlier, at your convenience.
- Release the steering knuckle from the ball joint at the bottom. To do this, unscrew a pair of mounting bolts.
- Since you have already removed the hub nut and unscrewed the ball joint from the steering knuckle, proceed to removing the splined part of the grenade. To do this, pull the brake disc and strut assembly towards you. She has a decent ride. Just remember to turn the steering wheel all the way so that the tip of the steering wheel extends as far as possible.
- Pry the inner grenade with a pry bar, which will allow you to remove the drive.
- Having taken out the CV joint, look at the condition of the oil seal in the gearbox. If you find traces of leaks, be sure to replace the element.
The internal drive (CV joint) is designed to work with smaller angles, its boot is less susceptible to negative influences. Therefore, the internal grenade is changed quite rarely.
Outer CV joint
The outer grenade wears out more actively, so replacement is carried out more often.
Under no circumstances remove two CV joints from the gearbox at the same time. Otherwise, it will cause the gear to become misaligned. Remove one at a time or insert special inserts in place of the hinge.
- If you have extensive experience in such matters, it is quite possible to knock out an external grenade right under the car. This saves time and effort. But such a task requires increased attention and caution in actions.
- Ensure that the axle shaft is stationary or has limited movement. If this is not done, the axle shaft will move when the grenade clip is struck with a hammer. Because of this, the inner CV joint will simply come out of contact and split into parts inside the boot. Therefore, you will have to dismantle the unit completely, and this is a very difficult task.
- You can hold the axle shaft with your hands, but a more effective means is a hand vice or a gas wrench. It is better to enlist the support of a partner. This is the best option.
- Take a fairly heavy hammer with a short handle.
- If damaged, cut, turn or move the boot to the side so that it does not interfere with striking.
- The blows should be made sharp, but at the same time careful. There is no point in hitting the element with great force.
- Due to successive blows, the resistance of the locking ring should weaken, which will allow the outer grenade to be removed from the axle shaft.
- Thoroughly treat the seating area with gasoline, clean it with a rag and put a portion of new lubricant into the hinge.
- A new boot is put on the axle shaft and a brand new CV joint is mounted.
Dismantling works