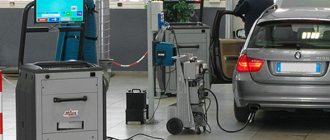
The brake system of a vehicle is an important component that ensures stable operation of the vehicle and safety during movement associated with timely stopping of the vehicle. Careful attention to the components and assemblies of the brake system makes it possible to always be sure that the car will be able to stop in critical situations that often happen on the road. Understanding the operating features of the brake system will help you notice the defect in a timely manner and fix it yourself or by specialists from a service station.
Content:
- 1 Diagnostics and repair of the car brake system: signs of malfunction 1.1 There are several symptoms indicating the presence of problems in the mechanism:
- 1.2 Specialists use several types of diagnostics:
- 1.3 Diagnostics and repair of the brake system is mandatory if you notice at least one sign of a breakdown:
- 1.4 Replacement may be required:
It is better to entrust the repair of a car's brake system to specialists who will perform diagnostics and replace worn-out units with new ones.
Important! If there are problems, the brake system should be repaired as quickly as possible. The safety of the driver, his passengers, and motorists passing by depends on this! If an indicator appears on the dashboard indicating a problem, it is prohibited to move further according to traffic regulations!
Replacing brake pads
Poor performance of hydraulic disc brakes may be due to the following reasons:
- damage or contamination of the hydraulic line or air ingress into it;
- complete wear of the brake pads;
- dirty pads or disc.
In the first case, it is necessary to replace the hydraulic line or bleed the hydraulic brake; the second and third cases are easier to deal with.
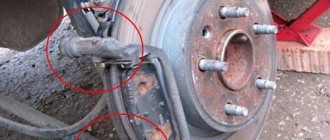
First, carefully inspect the brake pads. All manufacturers prescribe their minimum thickness, at which braking efficiency is not reduced. By the way, the uneven wear of the left and right pads indicates that the rotor is not centered relative to the caliper.
As the pads wear, the valves move closer to the rotor, so before installing new pads, you should move them slightly apart and readjust their position. The entire replacement procedure consists of the following sequence of steps: 1. Place the bicycle on a repair stand and remove the wheel.
2. Remove the retaining ring and unscrew the mounting bolt.
3. Pull out the old pads away from the wheel hub axis. Remember the location of the return spring between the pads - it releases them after braking is completed.
4. Thoroughly clean the surface of the valves and the inside of the caliper. Use a lint-free technical cloth and a mild cleaner such as isopropyl alcohol.
5. Using a plastic lever, such as a tube changer, press both valves into the caliper. To install the valve correctly, you need to press on the center of the valve, not the edge.
6. Install a return spring between the new pads and insert them into the machine.
7. Tighten the mounting bolt and install the retaining ring.
8. Clean the brake disc and replace the wheel. Check the correct location of the rotor, pads and the functionality of the entire system.
Diagnostics and repair of the car brake system: signs of malfunction
There are several symptoms that indicate problems in the mechanism:
- The driver feels a pulsation when he presses the brake pedal;
- The pedal falls down or is pressed too easily;
- When you try to brake, the car goes to the right or left;
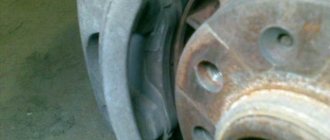
- Uneven pad wear;
- Brake discs overheat excessively;
- The driver noticed a brake fluid leak;
- The braking distance has increased noticeably;
- The wheels brake arbitrarily;
- When braking, extraneous sounds and noise appeared.
It is not possible to accurately determine the source of the problem without a full diagnosis.
As a result, it is possible to find out the nature of the problem, and also make a decision to repair parts of the brake system. Important! Regularly performed diagnostics of the system allows you to reduce the cost of repairs and recognize the problem in time.
Experts use several types of diagnostics:
- Checking the behavior of the vehicle directly while driving;
- Diagnostics on the stand.
In the latter case, a roller stand is used, the functionality of which can simulate driving. They also carry out inspections and mechanical diagnostics, which allows us to determine the presence of brake fluid leaks, play, and other problems.
Diagnostics and repair of the brake system is mandatory if you notice at least one sign of breakdown:
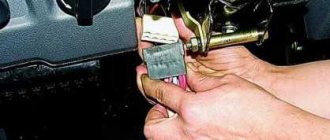
- First, you should make sure that all connections leading from the exhaust manifold are tight;
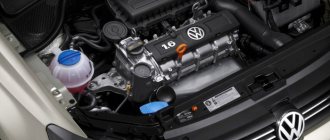
- Next, start the engine and press the brake, make sure the vacuum booster is working;
- Pay attention to the indicators that appear on the dashboard;
- Check the pneumatic drive; the engine should not be running;
- Leakage areas can be easily identified by lubricating the parts with soapy water.
The technological process of repairing the brake system largely depends on the results obtained.
May need replacement:
- Pads and discs;
- Hoses and cylinders
- Handbrake cables and shoes;
- Brake pipes;
- Vacuum booster, brake caliper;
- Brake fluid, etc.
Disc brake device
- The handle is a control mechanism on the steering wheel that activates the actuator.
- The rotor is a brake disc.
- Adapter – mounting bracket for attaching the caliper to the bicycle frame.
- Caliper is a caliper that is an actuator. It does a useful job, namely, braking the wheel. They call it a caliper by analogy with the English name caliper - caliper, caliper.
- Pads are plates that stop the rotor due to the abrasiveness of their surface.
- The brake line is a link that transmits mechanical action from the handle to the brake actuator.
Why is the brake pedal on the VAZ 2110 tight?
Brake system maintenance and repair
The technology for restoring the brake system largely depends on the nature of the problem.
If you are not familiar with the device and do not have experience repairing the brake system, it is not recommended to deal with the problem yourself. However, you can try to determine the cause of the problem on your own and take basic steps to eliminate it. If the brake pedal fails when you press it, this indicates air congestion. In this case, it is necessary to remove excess air from the hydraulic drive and add brake fluid.
- Before you begin eliminating air, make sure that there is a normal volume of liquid in the cylinder.
- Now remove the protective cap from the air valve.
- Install one end of the hose onto the fitting, and lower the other into a container with brake fluid.
- Press the brake pedal 2-3 times and, holding it, unscrew the fitting a couple of turns. Press the pedal again, hold it for a few seconds, then release slowly.
- The steps must be repeated until air bubbles no longer appear in the brake fluid container.
- While holding the pedal, tighten the fitting.
- Release the pedal, remove the hose, and replace the protective cap.
TO
category:
Car maintenance
P
publication:
Maintenance of hydraulic brake drive
H
read more:
Maintenance of pneumatic brake drive
Maintenance of hydraulic brake drive
Due to leaks in the connections of pipelines, hoses, fittings and other parts of the hydraulic brake drive system, air may enter it. In this case, the effectiveness of the brakes is significantly deteriorated, since when you press the pedal, the air in the system is compressed, which reduces the fluid pressure in the brake cylinders of the wheels and weakens the effect of the brake pads on the brake drums.
An external sign of air entering the hydraulic brake drive system is insufficient resistance provided by the pedal when pressed, while the pedal “springs”. To eliminate this defect, it is necessary to remove air from the hydraulic drive system.
If the wheels are braking when the foot brake pedal and parking brake lever are in a free position and adjusting the gap between the shoe linings and the drums does not give a positive result, then the reasons for this may be: swelling of the cuffs in the cylinders, clogging of the compensation hole or air holes in the plug of the main brake cylinder. To eliminate these malfunctions, unscrew the plug and clean the holes. If necessary, you need to drain the fluid and clean the compensation hole, and also check the condition of the brake cylinder cuffs, replace the unusable ones, flush the system with acetone or brake fluid and fill with fresh fluid.
Promotional offers based on your interests:
Rice. 110. Main cylinder of the hydraulic brake actuator of the GAZ-5 3-12 car: A - hole in the piston; B - bypass hole; B - compensation hole; 1 — lock ring; 2 - thrust washer; 3 — outer piston cuff; 4 — washer; 5 — inner piston cuff; 6 — exhaust valve spring; 7 — inlet valve; 8 — exhaust valve; 9 — filler plug; 10 – cover; 11 — body; 12 – fitting; 13 – return spring; 14 - piston; 15 — protective cap; 16 — pusher; 17 — lock nut; 18 — thrust; 19 — pedal; 20 — pedal release spring
Brake fluid leaking from the wheel brake cylinders indicates wear on the wheel cylinders or seals.
If leakage continues after replacing the seals, the wheel brake cylinders must be replaced. To fill the hydraulic brake drive system, mixtures of castor oil and solvent (alcohol) are used.
The filling capacities (l) of the hydraulic brake drive are as follows: for the GAZ-53-12 car - 0.55; bus PAZ-672B - 0.7; car GAZ-24 “Volga” - 0.5; Moskvich cars – 0.42.
The fluid level in the master cylinder reservoir should be 15-20 mm below the edge of the filler hole.
When maintaining the brake system, it is necessary to check and adjust the amount of free play of the brake pedal, the size of the gaps between the pads and brake drums, and the action of the central or transmission brake.
Adjusting the free travel of the foot brake pedal of the GAZ-53-12 car. The free play should be in the range of 8-14 mm, which corresponds to a gap of 1.5-2.5 mm between the pusher (Fig. 110) and the piston.
To adjust, you should: – disconnect the brake pedal from the linkage, first undo the cotter pin and remove the pin connecting them; – check the position of the pedal under the action of the release spring - it should rest against the rubber buffer secured under the inclined part of the floor of the car cabin; – unscrew the locknut, screw the pedal rod into the piston pusher so that when the piston is in the extreme forward position, the axis of the rod hole does not reach the axis of the pedal hole by 1.5-2.5 mm; – in this position, lock the connecting rod of the pedal lock nut in the pusher; – align the holes in the connecting rod and the pedal, place the pin and pin it; – check the free play of the pedal, which must correspond to the value specified in the Operation Manual.
Adjusting and checking the wheel brake mechanisms is carried out in the following sequence: – hang the wheel using a jack; – rotate the bolt of the pad adjusting eccentric until the wheel brakes; – gradually rotate the adjusting eccentric bolt in the opposite direction until the wheel rotates freely without the drum touching the pads; – adjust the gap between the other shoe and the drum in the same way; lower the wheel; adjust the brakes of the remaining wheels by performing the above operations; – if the brakes are properly repaired, then when you press the pedal with your foot, it should not go down more than half the stroke, and then you should feel a “hard pedal”; – when the car is moving, the brake drums should not heat up; – when braking in motion, the car should not move to the side; – it is not recommended to use the pad support pins when adjusting, as this will disrupt the factory setting of the pads.
To fill the hydraulic brake drive with brake fluid, it is necessary to clean the filler plug of the brake drive master cylinder, the bypass valves on the brake wheel cylinders and the hydraulic vacuum booster from dirt; check, if necessary to adjust, the gaps between the pusher (see Fig. 110) and the piston of the master cylinder and between the pads and brake drums; Unscrew the master cylinder filler plug and fill it with brake fluid; remove the rubber protective cap on the bypass valve of the hydraulic brake booster; put a rubber hose on the bypass valve to bleed the brake drive; lower the free end of the hose into a glass container with liquid; unscrew the bypass valve 1/2-3/4 turn and, keeping the hose immersed in the liquid, press the brake pedal several times (press quickly, release slowly); pump the hydraulic drive until the release of air bubbles from the hose stops; holding the hose in the liquid, screw in the bypass valve as far as it will go; close the valve while pressing the brake pedal; remove the hose from the bypass valve and put the protective cap on it; bleed the wheel brake cylinders by performing the operations indicated above, observing the sequence rear right brake - front right brake - front left brake - rear left brake; Add fluid to the master cylinder to the level indicated above and tighten the filler plug tightly. When bleeding the hydraulic drive, it is necessary to add brake fluid to the master cylinder, avoiding emptying the reservoir to prevent air from entering the system again.
The parking brake is adjusted by lifting one of the rear wheels of the car, and then performing the following operations: put the brake lever (Fig. 111) in the extreme forward position; tighten the adjusting screw so that the brake drum does not turn by hand; unscrew the locknut; unpin the pin of the fork and push out the pin; adjust the length of the rod with the adjusting fork until the lever stops in the expansion rod, selecting all the gaps in the connections; then increase the length of the rod by unscrewing the adjusting fork one or two turns until the hole in the fork coincides with the hole in the lever; place the finger with the head up and pin it; tighten the locknut; unscrew the adjusting screw so that the drum rotates freely without jamming, and when a force of 600 N is applied to the lever handle, the pawl moves by 3-4 sector teeth; Having completed the adjustment, lower the car wheel.
Rice. 111. Parking brake of the GAZ-53-12 car: 1 - adjusting screw; 2 — pad supports; 3 - cracker; 4 — housing of the adjusting mechanism; 5 - balls; 6 — housing of the expansion mechanism; 7 — expansion rod; 8 - traction; 9 — brake lever; 10 — gear sector; 11 – latch; 12 — thrust; 13 - lock nut; 14 – drum; 15 — lever; 16 – fork; 17 — brake pad
Maintenance of the hydraulic vacuum foot brake booster
Hydraulic vacuum brake boosters are installed on GAZ-53-12, -66-11 vehicles and the PAZ-652B bus.
Maintenance of the amplifier (Fig. 112) consists of systematically cleaning the devices from dirt, checking the tightness of connections of pipelines, hoses, covers, fittings, device mounts and the efficiency of the system.
Rice. 112. Diagram of the hydraulic vacuum booster of the GAZ-53-12 car (braking torque); 1; II, III, IV cavities; 1 - body; 2 - diaphragm; 3 - spring; 4 - rod; 5 - spring; 6 - vacuum valve; 7 - atmospheric valve; 8 — control valve piston; 9 — piston cuff; 10 - piston valve
The hydraulic vacuum brake booster of a GAZ-53-12 car may have the following main malfunctions: – partial or complete self-braking of the car’s wheels, due to the lack of clearance between the vacuum valve 6 and its seat or the penetration of outside air through leaks in hoses, fittings, covers and other connections into the cavity III chambers; – an increase in the effort required from the driver when braking the car due to the lack of free movement of the atmospheric valve 7, which leads to the creation of a constant vacuum in the cavity III of the amplifier chamber. In this case, the pressures in cavities III and IV are equalized, the diaphragm does not move and the amplifier refuses to operate partially or completely; – reduction in the efficiency of the hydraulic vacuum booster due to air entering the hydraulic drive.
If the hydraulic vacuum booster malfunctions, the vehicle's braking system operates, but at the same time, the effort required to press the brake pedal and the braking distance of the vehicle increase significantly.
To eliminate the listed malfunctions, it is necessary to make appropriate adjustments.
Adjusting the control valve for the hydraulic vacuum brake booster of a GA 3-53-12 vehicle: – unscrew the screws and remove the control valve cover with the hose; unscrew the vacuum valve plug; – supporting the nut with a wrench, unscrew the valve with a screwdriver and press the brake pedal to check the stroke of the atmospheric valve, which should be 1.0-1.5 mm.
The stroke of the atmospheric valve is adjusted by screwing the vacuum valve into the nut in order to increase the stroke of the atmospheric valve through the rocker arm, having previously performed the above operations.
Promotional offers:
Read more: Maintenance of pneumatic brake drive
TO
Category: – Car maintenance
Home → Directory → Articles → Forum
Expert advice
If you feel like your braking distance has increased, this may indicate the need to replace the brake fluid.
This procedure is one of the important stages of machine maintenance. The liquid absorbs water, which at high temperatures promotes the formation of steam bubbles. When you press the brake pedal, the bubbles compress, reducing the pressure level. Over time, this leads to complete failure of the brake system. To avoid this problem, it is recommended to change the fluid at least once every 24 months! Now we have a Telegram channel with the latest news. Subscribe and stay updated!
Purpose, classification and requirements
Purpose of brake control
The brake control of a car is used to slow down its movement until it comes to a complete stop and to hold it in place when parked.
Classification of brake mechanisms
Forced deceleration can be carried out in various ways: mechanical, hydraulic, electrical, off-wheel.
Friction brakes are the most widely used. Large passenger cars often use disc brakes on the front wheels and drum brakes on the rear wheels. Drum shoe brakes are installed on trucks, regardless of their load capacity. Only in recent years has there been a tendency to use disc mechanisms for trucks. Drum band brake mechanisms are currently not used at all as wheel brake mechanisms. In rare cases, they are used as transmissions for the parking brake system (MAZ, Belaz-540)
Hydraulic and electric brake mechanisms are used as retarders. On a number of cars, the retarder is the engine; the intake manifold is closed by a steel flap.
Classification of brake drives
A mechanical drive, consisting of rods and levers, is used mainly in manually controlled brake systems (auxiliary brake system - parking brake).
In this drive, the driver's muscular energy is used to activate the braking mechanism. The simplicity of the design and the constant rigidity of the mechanical drive make it most used for the parking brake system.
The hydraulic drive is used in the service brake system of passenger cars and light and medium-duty trucks. In this drive, the force of the pedal axis is transmitted to the brake mechanisms by liquid. The driver's muscular energy is used to apply the brakes. To provide the driver with the job of applying the brakes, a hydraulic drive with a vacuum (GAZ-66) or pneumatic booster (Ural-4320) is often used.
Currently, a hydraulic drive with a pump is beginning to become widespread. In this case, to turn on the brake mechanisms and create the braking torques on the wheels necessary for quick braking of the car, the energy of the engine is used, driving the hydraulic pump directly, or through any power transmission unit of the car.
Pneumatic actuator is widely used in the braking system of tractor units, medium and heavy duty trucks and buses. In a pneumatically driven braking system, the brakes are activated by using the energy of compressed air.
On long-wheelbase vehicles and tractors of heavy-duty road trains, a combined hydropneumatic drive is often used. In this drive, compressed air energy is used to increase braking forces, and they are transmitted to the brake mechanism by liquid. An electric drive is necessary on road trains, since this provides the simplest method of transmitting energy over long distances with a very short time for the braking system to operate.
Requirements for brake controls
1. Maximum braking distance, maximum steady-state deceleration in accordance with the requirements of GOST 22895-95, for passenger cars and trucks, depending on the type of test.
2. Maintaining stability when braking (stability criteria are: linear deviation, angular deviation, folding angle of the road train.)
3. Stability of braking properties during repeated braking.
4. Minimum response time of the brake drive.
5. The force-following action of the brake drive, that is, the proportionality between the force on the pedal and the drive torque.
6. Low work of brake systems control - the force on the brake pedals, depending on the purpose of the vehicle, should be within 500....7OO N, the brake pedal travel 80...180mm.
7. Absence of organoleptic phenomena (auditory).
8. The reliability of all elements of brake systems, the main elements (brake pedal, master brake cylinder, brake valve, etc.) must have guaranteed strength, must not fail during the guaranteed service life, an alarm must also be provided to notify the driver of a brake failure systems.
Types of brakes
Most cars are equipped with friction-type mechanisms that use the principle of friction forces. They are located in the wheel and according to their design they are divided into drum and disk.
Previously, drum mechanisms were installed on the rear wheels, and disc mechanisms on the front. Now they can install the same types on all axes - both drum and disc.
Drums.
Drum type or in everyday life - the drum mechanism consists of two shoes, a cylinder and a tension spring, which are installed on a platform in the brake drum.
Friction linings are glued to the pads (they can also be riveted).
The lower part of the pads is hinged on the supports, and the upper part is supported by a tension spring against the pistons of the wheel cylinders.
In unbraked mode, there is a gap between the block and the drum, which ensures free rotation of the wheels.
When fluid enters the cylinder, the pistons move apart and move apart the pads that come into contact with the drum, and brake the wheels. It is known that in this design the front and rear pads wear unevenly.
Disk.
Disc version includes:
● a caliper mounted on a suspension; its body contains internal and external brake cylinders (there is an option with one cylinder) and a pair of pads; ● disk mounted on the hub.
When braking, the pistons press the pads against the rotating disc and stop it.
Comparative characteristics.
The drum version is cheaper and easier to produce. It is distinguished by the effect of mechanical self-reinforcement, which is expressed in the fact that with prolonged pressure on the pedal, the braking force increases significantly. This is explained by the fact that the pads at the bottom are connected to one another, and friction against the front drum increases the pressure of the rear.
But the disk version is smaller and lighter, and its temperature resistance is better due to faster cooling. It is also easier to change worn disc pads than drum pads, which is important if you are doing the repairs yourself.
We hope you found it interesting, but this is not the last conversation about brakes. Subscribe to the newsletter and share your knowledge.
See you soon!
Tags Brake system