Troubleshooting and Troubleshooting Process
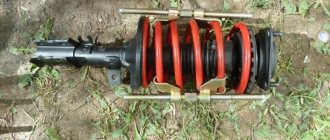
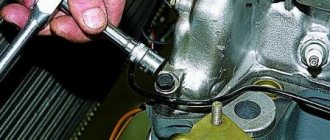
Ford Focus Hatchback Stabilizer strut logbook
If the struts rattle, the first thing you need to do is check their geometry. Any deviation from the norm is a sign of damage, and further operation of the vehicle is impossible until it is eliminated. Next we move on to inspecting the front hinges. Defects in their components (silent blocks, boots and bushings) indicate the need for urgent repair measures. If diagnostics are performed in the inspection pit, it is necessary for an assistant to rock the car. Third-party sounds during this will indicate a malfunction of the parts.
It is best to check the condition of the stabilizer struts when the suspension is unloaded. To do this, the vehicle must be raised on both sides with jacks and secured on stands, resting them on the frame. In this case, the wheels must be on the ground. You should jerk the racks sharply. If the elements are in good condition, no play should occur. You can more accurately assess their condition using a car stethoscope by listening to the noises during exposure to the racks.
If the stabilizer struts break, they must be removed from the vehicle. No complicated tools are required to carry out this procedure, unless a special puller for ball joints would be helpful. If it is not available, if you are smart, you can make a similar device based on a hydraulic jack. Not all racks can be repaired. This is determined by the features of their design.
It must be emphasized that restored stabilizer struts have their own installation features. During this process, you only need to tighten the nuts and then lower the vehicle. Final tightening and adjustment should only be performed in this position.
Most stabilizer struts cannot be repaired, so they must be replaced without fail. In principle, the process of replacing them is not particularly difficult, and is quite doable in a garage. However, to carry it out you will need a minimum set of tools, which is included in the standard car first aid kit. Carrying out maintenance and repair work yourself will not only save a certain amount of money, but also thoroughly study the design and functioning of individual elements. Thanks to this, you can not be afraid of being taken by surprise in the event of various malfunctions.
Replacing suspension arm silent blocks
Sometimes the knocking noise is caused by a worn out silent block of the lever. To replace it with a new one, perform the following steps:
- Jack up the side, remove the front wheel,
- Unscrew the ball joint fixing nut, the key is set to “14”. We knock the finger out of its seat,
- The fastening of one silent block is located vertically, the other horizontally. Unscrew the nuts one by one, head to “19”,
- We remove the lever from under the car,
- We fix it in a vice, press out the rubber bushings one by one,
- We inspect the seat and, if there are no defects, press in new bushings. We reassemble the structure.
After installation is complete, we visit a service station to check the wheel alignment angle. Despite the fact that the tie rod ends have not moved, the wheel angle may not be set correctly initially.
CLAIM
How to change stabilizer bushings
1. A stiffening device mounted in a flexible axle (1), containing at least two longitudinal rods (2) connected by a cross member (3), an anti-roll bar (4) and a flexible stiffening element (5), wherein the longitudinal rod (2) is welded to the ends of the stiffener (5), and the anti-roll bar (4) is welded to the central part of the stiffener (5), between the plane containing welds common to the flexible stiffener (5) and the longitudinal rod (2 ), and a plane containing welds common to the flexible stiffener (5) and the anti-roll bar (4), there is a space (e).
2. Stiffening device according to claim 1, characterized in that the flexible stiffening element (5) is placed inside the longitudinal link (2), between this link (2) and the end of the anti-roll bar (4).
3. The stiffening device according to claim 2, characterized in that in the middle part of the flexible stiffening element (5) there is a hole with a size smaller than the size of the anti-roll bar (4), which is placed around this hole.
4. Stiffening device according to claim 1, characterized in that the flexible stiffening element (5) is located outside the longitudinal link (2), between this link (2) and the end of the anti-roll bar (4).
5. The stiffening device according to claim 4, characterized in that in the middle part of the flexible stiffening element (5) there is a hole with a size larger than the size of the anti-roll bar (4), which passes through this hole.
6. Device according to any one of claims 1 to 5, characterized in that the flexible stiffener (5) is formed from a rectangular plate.
7. The device according to claim 6, characterized in that holes are made inside the flexible stiffener (5) in front and behind the welding area of the anti-roll bar (4).
8. Device according to any one of claims 1 to 5, characterized in that the flexible stiffener (5) is formed from a plate containing a central region (51) and two ends (52) located on each side of the central region (51), with In this case, these three areas have a rounded shape with indentations (53).
9. A method for manufacturing a stiffening device according to claims 1-8, including:
cutting out a plate to form a flexible stiffener (5),
welding the ends of the flexible stiffener (5) with any of the longitudinal rods (2) and welding the anti-roll bar (4) with the central part of the flexible stiffener (5) with the possibility of creating a space (e) between the plane containing welds common to the flexible stiffener (5) and longitudinal thrust (2), and a plane containing welds common to the flexible stiffener (5) and anti-roll bar (4).
Rocking car
Failure of the anti-roll bar leads to excessive swaying of the car, which is observed during:
- trains over bumps,
- braking,
- occurrences turn,
- acceleration
If you do not pay attention to the rocking of the car, this may result in loss of control over it. As a result, the car will fly off the road or roll over.
In addition to the swaying of the car from the suspension side, there are other signs of a malfunction of the stabilizer link. The chassis becomes softer, and road surface unevenness is absorbed better. Due to the improvement in comfort with broken knuckles, many car owners recommend dismantling them even on fully functional cars.
How to distinguish an original spare part from a fake
Which brand to choose a wheel bearing
Counterfeiting of famous brands is not such a rare occurrence in the modern market. The same is observed with CTR spare parts. Chinese manufacturers have achieved the greatest success in producing counterfeit products. Is it possible to distinguish an original part from a counterfeit one? Yes, you can. And quite easy.
The original CTR stabilizer link is noticeably different from the counterfeit one. You just need to be able to see some of the nuances of a fake. To do this, you need to know at least the basic differences that are striking:
The color of original CTR spare parts is always black. Only a dot or stroke applied to a part is colored. By the way, the presence of such a label is mandatory; The laser code imprint is always green. Present on all parts; package. From it you can immediately determine what is in your hands - an original branded part or a counterfeit
The first thing you pay attention to is the material of manufacture. The real box is made only from corrugated cardboard
There are no inscriptions in Korean. The drawings are continuous, without cuts. A sticker is glued to the surface (on either side), indicating the name, barcode, part number and QR code.; the price of the original spare part is slightly higher than the counterfeit one.
Why does a car's suspension need stabilizer bars?
When a car corners, its body tilts to the side. The angle of inclination, properly called the roll angle, depends on the magnitude of the centrifugal force, as well as on the design and elasticity of the suspension.
The load can be distributed equally on the left and right suspension elements, and then the roll angle will decrease. The element that transmits force from one strut or from one spring to another is the stabilizer. The design of such stabilizers is described in more detail below.
Their design, in theory, consists of an elastic bracket and two rods. And the rods are also called “racks”.
Typical anti-roll bar
To understand how a stabilizer works, it’s easier to immediately study its structure:
Suspension stabilizer in modern cars
The couplings 6 allow the tubular bracket 5 to rotate freely. The bracket, in turn, is connected to the shock absorbers, but not through couplings or hinges, but through struts 3. Each strut or rod is the stabilizer strut discussed in the title.
Note that the shock absorber strut plays an important role in the design of a modern suspension. The shock absorber itself not only dampens vibrations, but also serves as a guiding element.
There were cases when the rod broke while driving, and the owner did not notice the deterioration in controllability.
Types of stabilizer struts
The racks themselves (rods, links) can be completely symmetrical (Fig. 1). Then they can be “flipped” and also rearranged from left to right. The design of most cars uses asymmetrical racks, which, however, can be rearranged from left to right. And the most “difficult” option is when the left and right posts are different (not shown in the photo).
- Stabilizer struts for VW GolfStabilizer struts for VAZ cars
- It is clear that the most vulnerable part of the stabilizer is its struts (rods). In some cars, their service life is 20 thousand km. It is recommended to inspect and check these parts more often - every 10 thousand km. But a breakdown can occur in the middle of this interval.
- What stabilizer bars are has been fully explained, but we’ll look at where to look for them in the car right now.
How to find struts in the car itself
You can take it and see what is under the bottom of the Lifan crossover. The struts of two stabilizers, front and rear, are not covered by anything:
X60 rear suspension links
In general, this option, when the racks are not protected, is atypical. Moving units are usually covered with anthers, corrugations, and covers. But the symmetrical rods shown in the photo contain a pair of anthers directly in their design:
Boot of symmetrical stabilizer link
Loss of boot seal is not the most common defect. However, this option cannot be ruled out either.
What do struts look like in Chinese cars?
You need to remember a banal rule: the rear stabilizer struts are never symmetrical, unlike the front ones. For example, this is what the rear linkage looks like in a Lifan X60:
Rear left link
It is impossible to move such a unit from the left side to the right, and it is even more impossible to turn it over during installation. These “prohibitions” do not apply to the A-pillars. But they, that is, the front struts, fail more often. So, everything is logical.
In the spare parts catalog, each of the racks is designated by one number. That is, it is considered one detail:
| Lifan Solano | B2906200 | is the same | – | – |
| Lifan X60 | S2906210 | is the same | S2916260 | S2916210 |
| Lifan Smily | – | – | F2916210 | is the same! |
The Solano sedan has springs installed at the rear, and there are no struts in the stabilizer design. They are not present in the front suspension of the Smily car either - the bracket here is “threaded” into the lever couplings:
Front suspension design Smily
Each of the couplings, designated 10, does not interfere with the longitudinal movement of the bracket. This option is suitable for small cars.
We identify all problems ourselves
It has already been said here that the most unreliable, most “fragile” part of the stabilizer is the struts. This is done on purpose so that in the event of an accident, the least damage can be caused. Let's name the main symptom accompanying the breakdown of stabilizer struts or rods.
This is a dull knock that occurs when driving over any irregularities, potholes and even small stones. And sometimes the car begins to roll out of the roll worse - conclude that one of the struts has already been torn off.
But knocking will be observed in 90% of cases! It can come from both the front and rear suspension.
Creaks and crunches, especially when cornering, usually indicate the destruction of the boot. But the defect itself, we repeat once again, is rare. The hinge shown in the photo will begin to deteriorate over time. And the creak should then turn into a grinding sound.
Reasons why you need to change the shock absorber struts of a VAZ 2110
- Knock in the suspension.
- A slight vibration feedback to the steering wheel, which impairs vehicle controllability.
- The appearance of rocking of the front of the car.
- A slight deviation of the wheels from straight-line movement.
If the driver detects such deviations, an urgent replacement of the VAZ 2110 stabilizer strut is needed. The durability of the struts depends on the quality of the road surface and the manufacturer. The price of quality products is slightly higher than that offered by less popular manufacturers of structures.
Tip: There is no need to check the wheel alignment after replacing the shock absorber struts; they do not have any effect on the wheel alignment angles.
Replacing stabilizer parts for a VAZ 2110 car
To work you need to purchase:
- The wrench is set to “17”.
- Driver or ratchet.
- Head at "17".
The instructions suggest the following procedure:
- The car is installed on a viewing hole or its front part is raised and fixed on supports.
- For safe operation, the car is placed on the handbrake.
Tip: To prevent unexpected movement, the car must be firmly secured in place by placing “shoes” or wheel chocks under the rear wheels.
- Unscrew one nut at a time, securing the car body to the arms of the anti-roll bar struts, on both sides.
Unscrewing the stabilizer fixing nuts
- The spring washers are removed.
- The bolts are removed from both sides.
- Unscrew two nuts holding the stabilizer bars to the body.
- The spring washers are removed from the studs.
- Along with the struts, the brackets and stabilizer bar are pulled out.
- If you only need to replace the stabilizer bar on a VAZ 2110 or its bushings, unscrew the nuts securing the struts to the levers, then knock the struts off the assembly rod with a polymer or wooden hammer.
- The VAZ 2110 stabilizer strut and bushing are visually inspected. In case of deformation of the racks, rupture, wear, loss of elasticity, cracks or loose fit of the bushings to the surface of the rod, all elements are replaced with new parts.
Tip: To remove bushings that have become unusable, a press is required, so it is easier to replace the rack together with the bushings.
- The assembly rod is inspected. It should be without deformation, the ends should be located in the same plane.
Tip: Minor changes in geometric dimensions on the stabilizer bar can be corrected, in other cases the part needs to be changed.
- Stabilizer pads that are worn, torn, have lost elasticity, or do not fit tightly to the bar must be replaced with new ones. To do this, new cushions are put on the stabilizer bar, at a distance of 350 millimeters from its center. Their cuts are located towards the front of the car.
- The struts, lubricated with soapy water, are placed on the stabilizer bar, as shown in the photo.
The shock absorber strut is placed on the rod
- The structural rod is installed in place, the nuts securing the cushion brackets are tightened until the play in the cushion sections is eliminated.
- Tighten the front nuts first, from the side of the cut, then the rear ones.
- The nuts are tightened to hold the front struts until the gap between the arms and the struts disappears.
- With the suspension loaded, all stabilizer fixing nuts are finally tightened. The car is standing on a hard surface. The tightening torque of the rack elements is 4.3 – 5.3 kgf-m; bracket 1.3 – 1.6 kgf-m.
How to correctly replace a strut on a stabilizer bar on a VAZ 2110 can be clearly seen in the video.
The design of the front suspension of the VAZ 2110 is identical to most Lada models and consists of the following elements:
- Oil type shock absorber;
- Spring;
- Support bearing;
- Stabilizer's pole;
- Stretcher;
- Silent blocks, rubber bushings.
During the operation of the car, parts wear out, become unusable, and operating efficiency decreases. The technical equipment needs preventive maintenance and repair.
ATTENTION! A completely simple way to reduce fuel consumption has been found! Don't believe me? An auto mechanic with 15 years of experience also didn’t believe it until he tried it. And now he saves 35,000 rubles a year on gasoline! Read more"
The process of replacing suspension elements yourself is not complicated, and the operating principle is intuitive. We carry out restoration work on our own; there is no need to contact a workshop.
Why do stabilizer struts run little and is it possible to increase their service life Autocentre.ua
According to research by specialists from the Internet resource atp-kiev.com.ua, stabilizer struts have a reduced service life in Ukraine for a number of reasons. The main ones:
Broken roads are the main culprit for the low life of stabilizer struts
- bad roads in Ukraine;
- low quality of non-original products;
- aggressive or careless driving style.
The quality of roads in Ukraine is beyond criticism. Therefore, no matter what kind of stabilizer struts are of high quality, they serve us, sometimes two to three times less than in developed countries with good roads. Manufacturers of spare parts, as a rule, supply their products to different countries and put quite a decent resource into them, but taking into account operation on roads made in accordance with standards.
- The use of very rigid polyurethane stabilizer bushings can reduce the life of the stabilizer link arms.
- According to the experience of service station technicians in developed countries, the “original” stabilizer struts in many cars last up to 200 thousand km. In our country, depending on the part, they run from 50 to 150 thousand km.
- Non-original products, especially those from the Middle Kingdom, which do not undergo certification in Ukraine, usually last much less - according to reviews from car owners, sometimes even 5 thousand km. They don’t nurse.
- The reason for such a small resource is trivial - the very poor quality of manufacturing of these units.
- During maintenance, you should ask the service station mechanics to additionally check the condition of the stabilizer strut boots.
The influence of the car owner's driving style on the life of the stabilizer struts is understandable. If the driver does not like to avoid road bumps, does not slow down in front of large obstacles, or drives over speed bumps diagonally, he exposes the stabilizer bars to excessive shock loads. Ultimately, this, in fact, leads to premature failure of these units.
Low-profile tires are not able to absorb a significant part of the impact energy from road unevenness, so a significant part of it is transferred to the suspension, including the stabilizer bars
Also, the life of the stabilizer struts is reduced:
- with increased tire pressure and with different pressures in the wheels of the same axle;
- when installing low-profile tires;
- when installing heavy tires with a rigid sidewall (often tires from the Middle Kingdom);
- when installing non-original, heavier rims and tires;
- when installing very rigid polyurethane bushings of stabilizers and silent suspension blocks;
- when driving speed bumps diagonally;
- during heavy braking when driving through potholes;
- in the event of a rupture of the stabilizer link joint boot when driving on forest roads or for another reason.
Increased pressure on very rough roads helps protect the tire from damage, but when driving on roads with many small potholes, it contributes to wear on the stabilizer links.
In view of this, if you want to change the stabilizer links less often, you need to do the following:
- change your driving style (if it is aggressive);
- install original stabilizer struts (if you are confident in their long service life);
- install reinforced stabilizer links, for example, the ATP brand (ATP auto parts).
Extraneous sounds
The most harmless symptoms of a faulty stabilizer bar link are extraneous sounds. The intensity of the noise depends on the speed and angle of rotation.
The ball joint struts make a lot of noise when driving over any uneven road surfaces. For example, moving over speed bumps can indicate a malfunction of the knuckle. The sound will definitely come from the wheel arch only on the side on which the malfunction is present.
It is much more difficult to detect a breakdown of a rack whose design includes bushings. When such a spare part fails, it begins to creak and knock. The sound is quite quiet and cannot always be recognized while inside the car.
How to change
Replacing stabilizer struts on a VAZ 2114 does not take much time. If a car enthusiast has already done this on other VAZ models, it will be even easier to figure it out. The traffic stabilization system on the VAZ 2114 was borrowed from Priora. The stabilizer struts can be used the same as usual.
Searched device
To replace, you will need to place the car on a jack, making sure to set the handbrake. Use the wrench to reach the rack and unscrew it. Often the part is repaired, if, of course, repair is possible. As mentioned earlier, you can replace the grease under the boot, but this is not always possible. It should be noted that repaired struts can last for some time if the driver does not yet have the opportunity to purchase new ones. In place of the old rack, a new one is installed using the same algorithm in reverse order.
We change the parts of the anti-roll bar on a VAZ 2110
1. To carry out work, lift the front of the machine or stand on the inspection hole.
2. Disconnect the exhaust pipe of the muffler from the exhaust manifold and lower it down.
3. Unscrew 1 nut securing the stabilizer struts to the arms, remove the spring washers and remove the bolts on both sides.
4. Unscrew 2 nuts securing the stabilizer bar to the body and remove the spring washers from the studs.
5. Remove the brackets on both sides and remove the stabilizer.
6. To replace the stabilizer struts, remove them and install new ones, lubricated with soapy water.
7. To replace the rubber pads, remove the posts from the bar, and then the pads (the easiest way is to cut them lengthwise).
8. Reinstall the stabilizer in reverse order. The nuts securing the stabilizer struts to the arms are finally tightened when the car is standing on the ground.
- 1 Reasons why you need to change the shock absorber struts of a VAZ 2110 car
- 1.1 Replacing parts of the stabilizer of a VAZ 2110 car
General view of the stabilizer strut of the VAZ 2110
An important component of the chassis of the VAZ 2110 car is the suspension. This is an independent design with hydraulic shock absorbers and cylindrical springs. In addition, the unit is equipped with braces, wishbones and a stabilizer bar. Shock absorbers dampen vehicle vibrations when a wheel gets into potholes on the road. The direct connection of the VAZ 2110 car with the road is provided by the wheels. They change the direction of movement of the car, support the entire mass of the car, absorb shocks and some impacts from defects in the road surface. Each suspension unit performs its own specific functions and is responsible for safety when driving a car. Directly ensuring safety, and only then comfort, is carried out on the VAZ 2110 by the stabilizer strut and the stabilizer itself. This article will help you on how to replace VAZ 2110 struts in a unit with your own hands.
How to change stabilizer links
It’s worth mentioning right away that replacing stabilizer struts will differ for different brands and models of cars. But as a rule, the procedure is not difficult and is accessible even to inexperienced car owners. To do this, you need to have a jack and plumbing tools - wrenches, hexagons, a pry bar (depending on the car model). The front and rear struts are different for most cars. The front ones are long, the back ones are short.
Note! It is recommended to change the stabilizer struts in pairs (right and left at the same time), even if only one of them is knocking.
The first thing you need to remember before starting work on replacing struts is that the axle of the car where the spare part is supposed to be replaced must be completely suspended, that is, the stabilizer and strut must be in an unloaded state. This can be achieved by jacking it up on one side, and then installing the ball on the stand. Otherwise, even if you can dismantle the old rack, you will not install the new one correctly. Statistically, this is the main reason for premature rack failure.
During the replacement process, do not damage the anthers under any circumstances. If they are in poor condition, replace them. After all, the service life of the rack directly depends on their integrity.
Remember that after replacing the stabilizer struts, there is NO need to do a wheel alignment check, since they do not affect the wheel alignment.
Replacing the front stabilizer bar on a Ford Focus
Diagnostics and replacement of struts on TOYOTA RAV4 2002
We also advise you to familiarize yourself with the video instructions for replacing struts on Chevrolet Cruze and Renault Logan.
Reasons why you need to change the shock absorber struts of a VAZ 2110
- Knock in the suspension.
- A slight vibration feedback to the steering wheel, which impairs vehicle controllability.
- The appearance of rocking of the front of the car.
- A slight deviation of the wheels from straight-line movement.
If the driver detects such deviations, an urgent replacement of the VAZ 2110 stabilizer strut is needed. The durability of the struts depends on the quality of the road surface and the manufacturer. The price of quality products is slightly higher than that offered by less popular manufacturers of structures.
Tip: There is no need to check the wheel alignment after replacing the shock absorber struts; they do not have any effect on the wheel alignment angles.
Replacing stabilizer parts for a VAZ 2110 car
To work you need to purchase:
The instructions suggest the following procedure:
- The car is installed on a viewing hole or its front part is raised and fixed on supports.
- For safe operation, the car is placed on the handbrake.
Tip: To prevent unexpected movement, the car must be firmly secured in place by placing “shoes” or wheel chocks under the rear wheels.
- Unscrew one nut at a time, securing the car body to the arms of the anti-roll bar struts, on both sides.
- The spring washers are removed.
- The bolts are removed from both sides.
- Unscrew two nuts holding the stabilizer bars to the body.
- The spring washers are removed from the studs.
- Along with the struts, the brackets and stabilizer bar are pulled out.
- If you only need to replace the stabilizer bar on a VAZ 2110 or its bushings, unscrew the nuts securing the struts to the levers, then knock the struts off the assembly rod with a polymer or wooden hammer.
- The VAZ 2110 stabilizer strut and bushing are visually inspected. In case of deformation of the racks, rupture, wear, loss of elasticity, cracks or loose fit of the bushings to the surface of the rod, all elements are replaced with new parts.
Tip: To remove bushings that have become unusable, a press is required, so it is easier to replace the rack together with the bushings.
- The assembly rod is inspected. It should be without deformation, the ends should be located in the same plane.
Tip: Minor changes in geometric dimensions on the stabilizer bar can be corrected, in other cases the part needs to be changed.
- Stabilizer pads that are worn, torn, have lost elasticity, or do not fit tightly to the bar must be replaced with new ones. To do this, new cushions are put on the stabilizer bar, at a distance of 350 millimeters from its center. Their cuts are located towards the front of the car.
- The struts, lubricated with soapy water, are placed on the stabilizer bar, as shown in the photo.
- The structural rod is installed in place, the nuts securing the cushion brackets are tightened until the play in the cushion sections is eliminated.
- Tighten the front nuts first, from the side of the cut, then the rear ones.
- The nuts are tightened to hold the front struts until the gap between the arms and the struts disappears.
- With the suspension loaded, all stabilizer fixing nuts are finally tightened. The car is standing on a hard surface. The tightening torque of the rack elements is 4.3 - 5.3 kgf-m; bracket 1.3 - 1.6 kgf-m.
How to correctly replace a strut on a stabilizer bar on a VAZ 2110 can be clearly seen in the video.
What are the best stabilizer bars for Ford Focus 2
Not many motorists know how to choose spare parts for their car. Thus, the selection of front stabilizer struts for a Ford Focus 2 should be treated with special care, since the quality of the product will determine how stable the vehicle will be on the roads.
A little theory about stabilizer struts
The process of replacing the front stabilizer struts.
Before proceeding directly to the process of selecting the front stabilizer struts, it is necessary to understand the location of the part in the front suspension and the mounting locations.
Ford Focus 2 front suspension diagram
So, let's move on to considering the split diagram of the front suspension of the second Focus:
Front suspension diagram.
Let's decipher the designation of the parts indicated in the diagram:
- Front stabilizer bar
- Front stabilizer link
- Front stabilizer bushing
- Bushing bracket
- Stretcher
- Front arm
Selection of stabilizer struts
Pilenga stabilizer struts are among the cheapest.
Of course, the manufacturer recommends purchasing and installing stabilizer struts only from original production. But, since the price of analogues is much lower, then, as practice shows, most motorists choose the second option.
Before moving directly to the consideration of the choice of racks, it is worth looking at why the original racks are better than their analogues:
- Higher workmanship.
- Due to high quality control measures at the manufacturer's factory, there is less chance of receiving a defective part.
- If the catalog number is selected correctly, the product will fit perfectly into the mounting mounts.
The disadvantages include the high cost of original parts compared to analogues.
Original
Original front stabilizer link.
1686594 – article number of the original front suspension stabilizer bar for Ford Focus 2nd generation. The average cost of a product is 1600 rubles.
Analogs
Analogue of the original stabilizer link.
In addition to the original spare part, it is worth indicating analogues that can be installed, indicating a rating from 1 to 10 by quality, where 10 is the highest quality.
| 555 | SL1760 | 800 | 3 |
| ABS | 260413 | 500 | 4 |
| Blue Print | ADM58526 | 700 | 4 |
| Febest | 0523-004 | 600 | 8 |
| Febest | 2123-CA2F | 800 | 8 |
| Febi | 22408 | 800 | 8 |
| Kamoka | 9967760 | 400 | 8 |
| Lemforder | 29499 01 | 800 | 10 |
| Mapco | 59664HPS | 600 | 6 |
| Mapco | 59664HPS | 350 | 6 |
| Meyle | 716 060 0014/HD | 900 | 8 |
| Optimal | G7-1079 | 600 | 7 |
| Rts | 97-90609 | 800 | 6 |
| JP Group | 1540400200 | 500 | 7 |
| TRW | JTS490 | 1700 | 10 |
| Sidem | 67760 | 600 | 5 |
| SWAG | 50 92 2408 | 1000 | 8 |
As you can see, in addition to the original front stabilizer struts on the Ford Focus 2, there is a large selection of analogues that can be installed on the car
It is worth paying special attention to the quality rating of analog spare parts provided by the German independent auto industry center
Recommendations for servicing the VAZ 2110 suspension
- Strictly follow the recommendations of the operating manual regarding the timing of technical inspection. For VAZ 2110 it is 15,000 km.
- The average service life of the suspension does not exceed 50 – 60 thousand km. Mandatory maintenance every 15,000 km.
- Buy consumables mainly from certified points of sale and dealerships;
- When purchasing, always ask for quality certificates.
- Check that the catalog numbers correspond to the data in the operating instructions.
- If you do not have personal skills in servicing technical equipment, use the services of certified service stations, where they provide a quality guarantee for the work performed.
A moderate driving style and professional installation of parts will increase the service life of vehicle mechanisms by 7–10%.
Many motorists ask: which racks are better - obviously those whose catalog numbers are indicated in the instruction manual.
Description of the stabilizer link
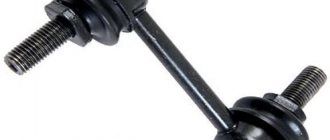
On most cars, the stabilizer struts are a rod, the dimensions of which are from 4 to 20 cm. On its two sides there are special hinges with a wide variety of designs. There are also hingeless designs. The photo below shows what a classic stabilizer link looks like.
The design of the stabilizer link is not one-piece. The hinge is welded to the rod. This technical solution is due to safety. The location of the weld is called the “neck”.
It is slightly thinner than the rest and has less mechanical strength. When overloads occur, a fracture occurs in the “neck”. If not for this design solution, it would have been impossible to predict the location of the break and the rack could have pierced the bottom.
Originals, analogues, article number, price of stabilizer strut for VAZ 2110
Technical data: length 110 x width 32 mm.
Stand structure: base, metal tip, rubber boot, lock ring. Nuts and washers are not supplied, the owner must purchase them separately. Thread pitch 1.25, diameter 8.0, length 60.0 mm.
| vendor code | Price, rub.) | vendor code | Price, rub.) |
| Original front | |||
| VAZ-2110 assembled kit 2110-2906050 | From 320 | VAZ-2110 2110-2906050SS | From 320 |
| 2110-2906050 | –/– | 2110-2906055 | –/– |
| Front analogues | |||
| SIDEM 19169 | From 300 – 350 | MOOG LALS10573 | From 300 – 350 |
| SS40106 | –/– | SS40102 | –/– |
| SLST-104 | –/– | SS20-10-29060 | –/– |
When to replace transverse stabilizer bushings
The degree of wear of the bushing can be determined during a routine inspection. Cracks, changes in the properties of rubber, the appearance of abrasions - all this indicates that the part needs to be replaced. Typically, bushings are replaced every 30,000 km. Experienced owners advise changing all bushings at once, regardless of their external condition.
During a routine inspection, the bushings may become dirty. They should be cleaned of dirt so as not to provoke accelerated wear of the part.
Unscheduled replacement of bushings is necessary when the following symptoms occur:
- steering wheel play when the car turns;
- noticeable vibration of the steering wheel;
- body roll, accompanied by characteristic unusual sounds (clicks, squeaks);
- vibration in the car suspension, accompanied by extraneous noise;
- when driving in a straight line, the car pulls to the side;
- general instability.
Detection of such problems requires urgent diagnosis
Primary attention should be paid to the bushings. By replacing them, you can check the operation of the car, and if signs of malfunction remain, an additional inspection should be carried out
Lada 2110 PhiX › Logbook › Installing a 20mm stabilizer on a VAZ 2110
Last summer I was lucky enough to take part in local amateur rally-sprint competitions. www.drive2.ru/l/4319972/
For me, this was an excellent opportunity to test my “sporty”, as I considered it, balanced suspension. At that time, Eibach ProKit springs and KYB Exel-G front struts were installed. www.drive2.ru/l/1676027/
After driving a few laps around the track, I couldn’t help but notice that the car had excessive roll when cornering, and this not only affected comfort, but also handling.
A little physics
If the roll is excessive, the inner wheel is unloaded, loses contact with the asphalt and begins to slip. At the same time, the differential comes into operation and the torque is lost on the loaded outer wheel. As a result, under gas, the car understeers and goes “plow” out of the turn. You have to slow down the gas so that the car grabs the surface, levels out and still fits into the turn. Naturally, the speed of cornering, especially sharp ones, drops significantly.
The first thought that came to me was “I want a differential lock” so that both wheels can row and turn the car into a turn. But after analyzing the results of the rides, I decided that I needed to start with something else. A stiffer stabilizer will prevent the inner wheel from unloading and will maintain traction. The wheel will not spin, which means that the differential will continue to properly transmit torque to the wheels and the car will spin into the turn without a significant loss of speed and trajectory.
To make it clearer, I’ll tell you a little about the principle of operation of the anti-roll bar.
. The operation of the anti-roll bar is based on the redistribution of load between the elastic elements of the suspension. During a lateral roll, the stabilizer is twisted in such a way that the ends of the stabilizer move in different directions (one rises, the other falls). On the loaded side, the stabilizer tries to lift the body, as it were, and on the unloaded side, lower it accordingly. The greater the body roll, the greater the resistance of the stabilizer. This ensures that the vehicle is aligned with the road surface. The thicker the stabilizer bar, the more effectively it will combat roll.
The essence of our modification is to install a thicker stabilizer. There are tuned stabilizers of different thicknesses and even different designs on sale. Due to the fact that tuning parts are not so easy to get here, I decided to use the most budget-friendly, proven option and install a stabilizer from Priora.
The VAZ 2110 uses a stabilizer with a thickness of 18mm, while the stabilizer from Priora has a thickness of 20mm.
The Prioro stabilizer is equipped with bushings and struts from viburnum, respectively, the catalog numbers on them are also Kalinovsky. 1118-2906050 1118-2906040
I bought a stabilizer from Priora for 800 rubles, dragged it into the garage, took off the old one, pushed in a new one, but it didn’t push. So I was convinced from my own experience that the stabilizer from Kalina is NOT SUITABLE for the VAZ 2110
. As it turned out, buying a stabilizer from Priora is not so easy; sellers are not able to distinguish it from Kalinovsky.
It will be useful: Variator Nissan Beetle: fuel consumption, oil change, reviews
The stabilizer from Kalina is easy to distinguish from the tenth (or priority one), it is not symmetrical, there is a bend in the area of the right bushing.
Also Kalina stab. It has a sharper and higher bend in the center, because of which it just doesn’t fit into the top ten, resting against the body.
Replacing the stabilizer
Replacing the stabilizer is a simple procedure and can be done by anyone who can unscrew a few nuts. To replace the stabilizer you will need a 13mm wrench and a pair of 17mm wrenches, of course it is advisable to have a ratchet. Using two 17mm wrenches, unscrew the bolts securing the stabilizer struts to the arms.
Next, unscrew the 4 nuts securing the stabilizer to the body.
This should be done with extreme caution, because... there is a possibility of breaking the studs. It is better to use a penetrating lubricant such as wd-40. Remove the brackets securing the stabilizer to the bottom of the car.
We remove the stabilizer from the space between the bottom of the car and the muffler. Many people wrote that they were able to remove the stabilizer without removing the muffler, but I didn’t succeed. I believe that this is only possible on a non-lowered car. I had to unscrew a couple more bolts securing the pants to the catalyst. After which the stabilizer is easily removed.
Problems when replacing Lacetti stabilizer struts
But, as you know, not always everything goes like clockwork and often, in a seemingly simple procedure, unexpected problems can arise.
According to my personal statistics, the bottom nut usually unscrews without problems, but the top one never gives up without a fight. And the culprit is thread corrosion.
Below we will look at methods to combat this phenomenon in order to avoid such problems in the future and save time and nerves.
The 15 mm wrench treacherously slipped and, accordingly, attempts to rip off the nut led to nothing.
After suffering, I decided to act differently. Since the bottom one was twisted, I came up with the idea of breaking the stand in order to tear it out of the ball pin. This would make it possible to grab the finger with a gas wrench. But there was no way to remove the stabilizer link anywhere - one thing interferes, then another.
It was decided to unscrew the ABS sensor and move it to the side. It unscrewed easily, since I recently changed the wheel bearing and unscrewed it.
This made it possible to bend the stand so that it came off the finger
If you haven’t unscrewed the ABS sensor for a long time, then there is very little chance of unscrewing it without problems. Therefore, you can do it a little easier. This will be shown in the video at the end. But its essence is as follows. It is necessary to insert some metal object (socket wrench, small pipe or square profile, etc.) between the stand and its mounting bracket. After this, pull the bottom of the stand towards you. The stand should come out of your finger
Now I took the gas key and grabbed my finger
Holding it, he began to tear off the nut. The nut went so cute
This finger
Without stabilizer link
Installation of the new rack went quickly. I pressed the stabilizer with a handle and pushed the stand into place.
I also noticed that the new ones do not have right-left color markings.
Only the inscription on the box is on the right
And here is the corresponding letter “R”
That's all, the new rack is in its rightful place, and the nasty knocks have disappeared
Now let’s talk about how to make your life easier in the future and not have to worry about unscrewing rusted connections.
For this purpose, during any repairs of this kind, I always have a Movil with a brush on hand
and autoplasticine
I apply Movil to the threads before installation (shown on the example of a rear stabilizer strut)
And after assembly, I cover the threads along with the nut with autoplasticine
A minute spent today will save a couple of hours in the future and preserve precious nerve cells. Moreover, Movil and autoplasticine cost pennies. Everything holds up perfectly and keeps the thread in perfect condition. Verified.
Here is a video about replacing Lacetti stabilizer struts
Peace to your home and good luck on the roads!
On this topic:
I like 24+
Members who liked this post:
What to do if the stabilizer link starts knocking? Is it possible to drive?
The main sign of a malfunction is the sound of the struts, while a number of additional signals are observed:
- constant body roll when turning;
- spontaneous change in the trajectory of the vehicle while driving over uneven surfaces;
- when driving, you can hear the stabilizer joints rattling;
- During acceleration or braking, the suspension feels loose.
If the stabilizer bar is knocking: is it possible to drive? This is the question that worries most car owners. Let us emphasize once again: it is strictly not recommended to operate a vehicle on which the stabilizer struts are damaged, since such a malfunction causes a decrease in controllability, and this can provoke a serious accident. In addition, the constant knocking of the suspension while driving distracts the driver all the time.
The deterioration of the hinges located inside the stabilizer struts is a progressive defect, since at the initial stage the malfunction does not manifest itself in anything, and then, as wear progresses, extraneous noise and body roll occur while driving. As soon as the first symptoms are noticed, you must immediately go to the nearest car service center to diagnose the condition of the suspension elements (in particular the stabilizer struts), or perform independent troubleshooting.
Important! To diagnose the condition of the suspension, it is necessary to lift the car on a lift, or jack it up on all sides, since under the weight of the vehicle it is not always possible to detect play in the hinges. Can stabilizer struts make knocking noises when they are in good condition? Naturally - yes
The cause of extraneous noise is incorrect adjustment of the stabilizer elements, which must be eliminated without fail.
Can stabilizer struts make knocking noises when they are in good condition? Naturally, yes. The cause of extraneous noise is incorrect adjustment of the stabilizer elements, which must be eliminated without fail.
To carry out the diagnostic process, you may need the help of a friend and the following set of tools:
- jack - for lifting a vehicle and inspecting and repairing suspension parts. Please note that safety regulations prohibit performing any work when the car is jacked up without placing appropriate supports under its frame;
- shoes for fixing wheels;
- frame stands;
- It would be nice to have a car stethoscope, since when the suspension is unloaded, extraneous noise from its elements can only be heard with its help.
Manufacturers of the middle price segment
Many drivers consider the production of stabilizer bars in the mid-price segment to be the best option, since there are much fewer counterfeits, maximum quality, and you can also find more options for a particular car. However, each brand has both advantages and disadvantages.
Mid segment stabilizer links
Despite this, options such as:
- CTR;
- Sidem;
- Delphi.
Korean-made CTR struts specialize specifically in car suspension. This is a highly specialized company that works directly with car brands such as Kia and Hyundai. If a driver drives one of these cars, then he is very lucky. It is quite difficult to encounter a fake, but it is always possible.
Stabilizer links CTR
offers its products directly from Belgium. The production of the stabilizer link is of average quality, but if you drive it correctly, this option can even last for several years. A distinctive feature is that they are suitable for almost all cars. Because of this, there is no point in counterfeiting racks, since the number of product items from this company is simply off the charts.
Sidem stabilizer links
Not only European quality. It is worth noting that it is the USA that is most valued for its excellent product. These stands really last a long time. The Delphi brand is the most expensive in the middle price segment. Unlike all other companies, this representative never talked about closing his business. This is how they managed to gather millions of regular customers who were already convinced of the high quality of their products.
Delphi stabilizer links
