Quick search
Compression springs are high-precision flat-wire elastic elements. They are easy to install even in those units for which standard springs are not suitable. With an equal working stroke, the free and working height of such products is less than that of conventional twisted springs made of round wire.
Springs are widely used to create static loads in bearings, support units and seals instead of similar disc springs. They allow minimizing tolerances and gaps of mating parts.
Branded spring tensioners
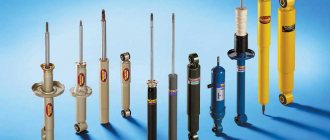
Of course, there is special equipment used when repairing cars of a certain brand. To compress springs, however, universal ties are more often used. The appearance of these devices is shown in the figure:
Branded spring ties
It is clear that a set of universal zip ties can be bought in a store. However, the cost of such equipment is higher than the price of all the components in total.
We cook the screeds ourselves
In general, it makes sense to make shock absorber spring ties yourself. How to do this is discussed further.
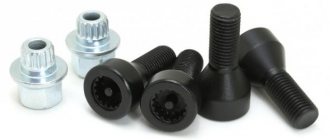
Four nuts and two threaded rods
The metal products listed below are easy to find in almost any supermarket. For example, you can buy two M16 threaded rods. You will also need four extended nuts, as well as a steel plumbing pipe. Its internal diameter is 16-16.5 mm.
The end result is what is shown in the pictures. You will also need a steel rod, which is used to make reinforcement. Let's look at how screeds are made:
- Two identical cylinders are cut from the pipe, the length of which is 80-120 mm;
- Threaded rods can be shortened if necessary;
- 8 rods approximately 30 cm long are made from reinforcement;
- Using any bending equipment, the rods are bent to obtain hooks;
- Four rods are welded to two nuts, another four - to pipe sections;
- The set of components is completely ready for use at this stage.
It is easier to weld by placing the workpieces on a plane. The essence of these words is illustrated by the picture:
How to weld hook rods
Actually, what follows is a film where the technology is shown “inside and out”. The author even solved the problem with the lack of a bending machine: to bend one rod, you need two similar rods welded to a steel profile.
If the reader thinks that using welding is difficult, then it is better not to take risks. Welded joints can withstand significant loads, but only if they are performed according to all the rules. Spring ties can be made without welding. A suitable drawing is given below.
Two ties in 10 minutes (video)
Reinforced version with two grips
Now I’ll tell you and give you a few photos of the new zip ties that I ordered about a month ago, but there was still no reason to write about it. I didn’t change the manufacturer of my main tool and bought these things from Ombra:
As for the advantages over the above, the main ones can be listed below:
- The metal itself from which these devices are made is at least three times thicker. As for the threaded rod itself, it is almost twice as thick.
- Since the couplers have two grips on each side, the likelihood of slipping off is practically eliminated, because the grip area is many times larger.
- The biggest plus is that the head with turnkey edges is located on the top side of the ties. Accordingly, there is no need to puff with the open-end wrench and constantly throw it around. It’s enough just to put the head on and make two or three turns of the wrench per second. As a result, the speed of work is probably ten times higher, and maybe even faster.
How should the spring be tightened?
Let's list the steps involved in tightening the shock absorber springs yourself. Everything looks simple:
- When the body is supported by a jack, two ties are brought to the spring from opposite sides;
- By rotating the nuts with your hands, you achieve confident engagement of the hooks and springs;
- Using a wrench, the nuts on different rods are rotated in turn;
- It is better to play it safe and secure the compressed spring with straps or wire.
Video of spring tensioners on shock absorber
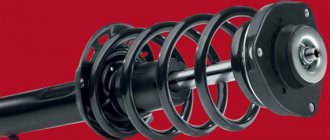
No explanation required here. The result is shown in the photo.
Spring compressed by ties
When using homemade and even purchased equipment, follow these simple tips:
- Before using ties, threaded connections are lubricated with cyatim or grease;
- The ties cannot be removed from the compressed spring, even if it is additionally fixed;
- When carrying out work, exercise maximum caution. It is better to sacrifice body parts than your own health.
Features of the suspension of Lifan cars are discussed in these articles:
Drawings of universal threaded ties
Let's return to the question of how to make a device for tightening shock absorber springs yourself. Below is the appearance of the finished devices:
Factory-made threaded ties
On one side of the rod there is a left-hand thread, on the other - a right-hand thread. The standard thread pitch is M18. But buying threaded rods is not enough here. And to cut the thread yourself, you will need special equipment.
Drawings of the components that make up the entire structure are shown here:
Threaded tie (3 parts)
To make parts, you need a lathe, drilling and, probably, milling machine. It may be easier to contact a workshop. Print the drawing by downloading it from the website.
Most likely, there are no other drawings of universal ties on the Internet. And what is shown above is taken from a book on repairing domestic cars. You can use it.
Let's say the ties were made according to the drawings and all the parts fit together. But even then the advice about using lubricant remains valid. You need to take solid oil or cyatim and apply this material to the threads of the nuts.
Packaging cyatim-201, 20 gr.
Cyatim-201 lubricant is a rather expensive material. You can reduce consumption by mixing it with machine oil in a 50/50 ratio. Good luck.
Actually, that's the whole question. Is it possible to carry out this operation without screeds? There is a narazh, there are no ties.
Comments 66
You can remove it! You can’t take it apart!
I have already found a way to remove it without zip ties, but I’d rather wait for the zip ties)))) And the tip didn’t come out at all...
a crowbar to help you and an assistant (one presses with a crowbar, the other knocks) just unscrew the nut completely, and then tighten it
There is no crowbar, there is a 70 cm pipe with a diameter of 12 and a pair of hands))))
Well, you can’t get a pipe between the tip and the fist
If for the first time you ask someone who is in the know to show you and help, you will suffer and get tired in the end, either you will drag it to the service center or you will still have to look for an assistant.
How I removed the struts: I lifted it with a doncrat, removed the wheel, put a block under the support instead of a wheel, removed the doncrat, put a couple of people on the hood, the car lowered, tied up the spring and then remove the strut and install a new shock absorber
I also did this when there were no spring ties. I tied the springs with wire rod about 7 mm, and bent 2 staples from it so that it would not fly off the coils)
How I removed the struts: I lifted it with a doncrat, removed the wheel, put a block under the support instead of a wheel, removed the doncrat, put a couple of people on the hood, the car lowered, tied up the spring and then remove the strut and install a new shock absorber
And then, after you removed the strut, unscrewing it from the hub, did you do the alignment?
How does a spring remover work, and what types are they?
What is a puller used for? It overcomes the straightening force of the springs. The applied force on the puller brackets is commensurate with the weight of the car, but this does not mean that its design is too expensive and high-tech.
There are many options, but they are divided into only two types: mechanical and hydraulic drive.
Mechanical spring remover
Most often it has a threaded drive mechanism.
With a sufficient diameter of the pin (providing a good gear ratio on the thread), and a long handle of the key, you can compress the springs manually without excessive effort.
The technology is as follows: two pullers are symmetrically put on the rack. By turning the threaded rod, you bring the claws to the middle of the spring directly on the shock absorber, compressing it to the required size.
Installing one puller on a spring will cause it to break.
Pullers placed on both sides ensure uniform compression. When working with the suspension of trucks or heavy SUVs, experienced craftsmen install 3 or even 4 pullers.
Correct installation of pullers on the spring
Semi-permanent racks
Service stations often use semi-permanent struts to remove springs from shock absorber struts. The tool is quite universal and fits most pendants. Thanks to the drive mechanism gearbox, working with it is convenient and safe.
The only drawback is that it is not always possible to compress the spring directly on the car. After all, this is a bench device: the puller works with the suspension removed from the car.
Lever type
Lever type pullers have a similar “problem”. The mechanism is reliable and safe, but its dimensions do not allow it to fit into the space under the wing of the car.
Replacing the front struts of a Lada Priora with your own hands
1. Place the jack under the side from which you will be making repairs, in my case - the right.
3. Disconnect the brake hoses and remove them from the holder bracket on the rack.
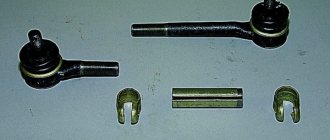
4. Using pliers, carefully straighten the locking cotter pin on the steering end pin, then remove it and unscrew the nut with a 17mm wrench.
5. Take the steering tip remover and press it out of the seat.
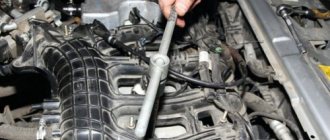
6. Next, turn the support and begin unscrewing the nuts fastening to the steering knuckle; fortunately, the bolts and nuts treated the day before with WD40 will make this procedure easy and pleasant.
7. If necessary, you can use a hammer to knock out the bolts, just be careful not to damage the threads.
8. The eccentric top bolt is needed to adjust the camber, so do not lose the washer from it, it often sticks to the strut. This bolt must then be put in its place, so do not mix it up. Wheel alignment will have to be done in any case, so remembering the rotation of the eccentric along the axis is pointless.
9. The next step is to unscrew the fastening nuts under the hood, which secure the A-pillars to the body with a key, for this purpose on “13”.
10. Now remove the front strut assembly from the wheel well.
Manufacturing a shock absorber spring remover
Many car enthusiasts use a regular chain: they wind a few turns around the coils of the spring and tighten the chain. After lifting the car with a jack, the shock absorber strut is stretched, but the spring remains compressed. This is a dangerous method: if the chain slips, the spring may spring back and cause serious injury.
How to make a simple puller similar to an industrial one
A mechanical semi-stationary “machine” can be created from a “Volgovsky” jack.
- old jack from Volga-24, Moskvich 412 or other Soviet passenger car = 0 rub.
- old connecting rod from any engine = 0 rub.
- steel corner from a landfill 1 meter = 0 rub.
- a pair of rods from broken shock absorbers = 0 rub.
- a handful of bolts and nuts M12 - M14 = conditionally free.
Drill, grinder, file, welding machine - such a set is either in the garage or available from a neighbor for a couple of beers. A platform from a corner is assembled to the top of the jack (where the turntable with the gearbox is located). Then a bracket according to the size of the support cup is welded to it. We screw the connecting rod to the standard support arm of the jack; the shock absorber strut will fit into it.
No need to worry about the strength of the structure. The jack lifts the car, the connecting rod also withstands a huge load. And to strengthen the cantilever structure of the bracket, we weld rods from the shock absorber rods. The puller is universal: the length of the shock absorber allows you to service any struts for passenger cars, as well as most SUVs.
The next spring remover, which is easy to make with your own hands, is a tightening type. Suitable for small spring sizes, since it is unrealistic to develop a large force on such a device.
The components are even more affordable than in the previous design. A piece of pipe, an angle and a long bolt M14 - M18. You can use a hairpin. We weld brackets from a corner and sawn pieces of an inch pipe. The puller consists of two identical ties, so there should be four brackets.
Be sure to weld the guide bushings for the studs. Otherwise, when tightening, the brackets will jam.
The spring is tightened by synchronously tightening the nuts on the studs. If you use a set of 2 ties, they should be installed strictly symmetrically.
Replacing the front struts of a Lada Priora with your own hands
The need to replace the front struts arises after dull knocks alternating with clicks begin to be heard from under the wheel arches while the car is driving over uneven surfaces. Typically, this was not observed at high speeds, but when overcoming speed bumps, they appeared again.
After self-diagnosis of your Lada Priora, it is not always possible to find the cause of the knocking, the suspension is normal, but the noise is still there. After digging a little on the net, I came across several similar topics in which people discussed my problem, and it was there that I learned that the front struts were to blame and that now I had serious work to do called: replacing the front struts with my own hands. After I went to the service station, my verdict was confirmed, it was possible to fix everything right there, but I decided to do everything myself. Read more about knocking in the front suspension here.
After several hours of searching, I found front struts that suited me in all respects; these were Acomi struts model “Comfort CLASSIC A170.2905.002/003-05”.
Homemade spring removers from car struts - video
Homemade portable stand
Wall-mounted
Bottom line: The cost of homemade spring pullers tends to zero, since they are literally assembled from trash. And without them, it is not possible to service the car’s suspension.