The structure of the tape
To understand where a small tape has such strong holding power, you need to understand its structure. The brake band of an automatic transmission consists of a huge number of strips that are highly elastic and flexible. They consist of a flexible, but at the same time reliable and durable metal alloy. The inside of the belt is covered with a special friction material.
Features of repair of transmissions with automatic transmission
- When repairing, avoid damaging gearbox parts.
- The workplace should be kept as clean as possible.
- When disassembling and assembling the gearbox, it is not recommended to use knitted gloves or wipe parts with a rag. If necessary, it is recommended to use a nylon rag or paper towel.
- All parts must be washed and dried using compressed air. Metal parts can be washed with ordinary washing powders.
- Discs with friction linings, plastic and rubber parts must be washed only with automatic transmission oil.
- If the transmission housing is damaged, you should disassemble and flush the automatic transmission cooling system.
- When disassembling, parts should be placed on the table in exact accordance with the order in which they were removed. Particular attention should be paid to the location of thrust washers, gaskets, thrust rings, valves, ball valves and crankcase bolts.
- If there is a chain drive, it should be checked for possible wear. To do this, you need to measure the deflection approximately in the middle of the chain in both directions, using any test point on the transmission housing. If the total deflection exceeds 27.0 mm, the chain must be replaced.
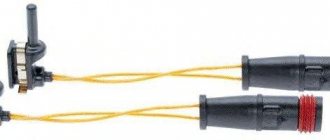
- Carefully remember how the wires are connected to the valve box and connectors. The connectors must not be mixed up; they must be connected in strict accordance with the repair instructions.
- The connectors can sometimes be difficult to open, so try to avoid pulling on the wires.
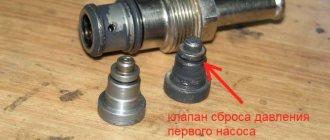
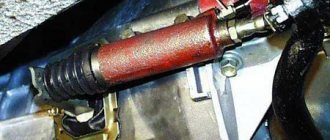
- To remove some pumps from the crankcase, special equipment is required: - a sliding hammer (Fig.) or a special device (Fig.).
- If it is easy to confuse the springs of hydraulic accumulators, it is recommended to attach corresponding labels to them. Different colors of springs cannot be used as an indication of their installation locations. Incorrect installation of springs affects the quality of gear shifting.
- During removal, be careful not to deform the brake band, otherwise it will need to be replaced.
- After the parts have been washed and dried, they must be inspected to determine the degree of wear and the possibility of further use. In this case, special attention should be paid to the contact surfaces of the bushings and thrust washers. Thrust needle bearings must be free from pitting, surface layer peeling and spalling.
- In some cases, it can be very difficult to remove the gasket. To avoid damaging the aluminum surface of the crankcase, use a special aerosol and a plastic scraper. Using a metal scraper may damage the aluminum surface and create a potential oil leak.
- All paper gaskets must be installed dry only. They must not be installed with glue or sealant.
- All bolts must be tightened only with a torque wrench, to the torque specified in the repair instructions. Improper bolt torque is a leading cause of stuck valves, oil leaks, and damaged parts.
- When assembling needle bearings, thrust washers, O-rings and rubber seals, it is recommended to use petroleum jelly. You cannot use thick machine oil, since it, unlike technical petroleum jelly, does not dissolve in automatic transmission oil. Engine oil can get into the automatic transmission control system and clog the strainers, jets and channels there.
- It is recommended to soak new friction discs with linings and brake bands in oil for 30 minutes before installation.
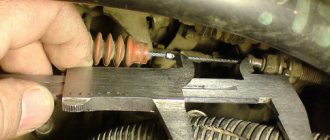
- Checking the fit of the ring in the groove can be done using the method shown in Fig.
The gap between the ring and the groove walls should not exceed 0.12 mm. Before installation, the ring should not lose its shape. As for the inner diameter, the seal should not stretch too much during installation. The thickness of the sealing ring determines, when installed in a groove, the degree of its compression, due to which its sealing properties are ensured. The consistency of the O-ring thickness and the piston groove width can be checked by simply moving the piston inside the cylindrical bore. A piston with a ring seal having a circular cross-section requires quite a lot of force to move, while seals with a square cross-section allow the piston to move with little force. O-rings with a circular cross-section tend to twist during piston movement, resulting in an elastic force that tends to return the ring to its normal state. This property leads to increased resistance during movement of the piston with such a seal. Typically, at least two o-rings are installed on the piston. Therefore, it is necessary to remove them one by one and check each ring separately. Raised seals. Such seals can also be checked by moving the piston in the cylinder. Since their sealing properties depend on oil pressure, little force is required to move the piston. Before checking, the seal must be lubricated with automatic transmission oil. You should feel slight resistance as you move the piston back and forth. If such resistance is not felt, then there is a defect in the seal. A normally installed lip seal should show slight deformation. If there is excessive deformation, the seal lip will have poor contact with the bore surface. A too loose fit in the groove causes the seal lip to jam between the bore surface and the piston. When installing overrunning clutches with nuts, the manufacturer's instructions must be strictly followed. The nuts can easily be installed in the cage in the opposite direction, which will lead to improper operation of the clutch. Roller freewheels usually do not pose any problems during installation; however, they may also be installed incorrectly. Although this is almost impossible, it does happen sometimes. Be very careful when inspecting overrunning clutches - they may work fine at room temperature, but fail in cold temperatures or when the vehicle is accelerating significantly. When checking a coupling with nuts, you should especially carefully inspect the leading edge of the nuts. The amount of wear of the cracker should not exceed 0.8 mm. Otherwise, the coupling must be replaced. When working with Teflon rings, remember that to ensure good sealing properties, this soft material does not allow any burrs, scratches or other types of damage on the surface on which it works. Installation of continuous Teflon rings requires special equipment (Fig.). Without using such a tool, you can easily damage the ring or overstretch it. The conical bushing of the device (see figure) has a special coating,
which has a low coefficient of friction so that the ring can easily slide along it. When assembling an automatic transmission, it is necessary that all small strainers are installed in their places. Small filters are additional filters designed to protect valves, regulators and electrical solenoids from contamination. Their purpose is to prevent foreign matter from entering the valve box in order to prevent the valves from sticking. Friction linings of brake bands that have cracks, peeling or become black on the surface must be replaced. During inspection, check the brake band tension. If the stretch is too high, the belt loses its normal shape and causes cracks to appear on the surface of the friction lining. Such tapes should be replaced.
Purpose of the brake band
The main purpose of this automatic transmission element is to provide clutch from one to three sets of gears. The coupling is carried out due to the fact that the belt slowly rotates around the drum, and it, in turn, is connected to the belt itself.
The advantages of the main tape include:
- strong holding power;
- softening shocks and impacts when changing gears;
- the ability to use it to lock the rotating parts of the planetary gear set of an automatic transmission onto its body.
Adjusting the brake band
The processes included in car maintenance (for example, replacing or adding car oil or repairing an automatic gearbox) also include adjusting the brake band. Like other parts and mechanisms of a car, the tape tends to wear out.
Due to wear and tear, problems may arise during the operation of the vehicle. The adjustment is carried out using torque wrenches; they need to tighten the bolts that are responsible for the tension of the tape. Fastening elements can be located both inside the automatic transmission and on the outside of the automatic transmission housing.
Problems with automatic transmission belt and their symptoms
Various malfunctions can occur in the planetary mechanism fixation unit, leading to abnormal behavior of the car and breakdown of the entire box:
- wear of the friction layer of the belt. In this case, the planetary unit is not completely blocked; when switching, the driver feels a “kick” of the box. In addition, a grinding noise may be heard from the automatic transmission;
- damage to the piston cuffs (breakage, physical wear). The tape completely loses its blocking ability, and the box jerks with each gear ratio change;
- piston rod failure due to mechanical damage. The piston breaks up into fragments that get into the transmission fluid and other automatic transmission components. The oil becomes contaminated with metal particles, which act on other parts of the transmission as an aggressive abrasive, and large debris can themselves damage or jam parts of the automatic transmission. Even a short trip with such a gearbox can permanently disable it, which will lead to an expensive overhaul of the automatic transmission or an equally expensive replacement.
Occasionally there are cases when the tape “wedges” the moving elements of the box. This occurs if the opening cavity of the servo drive is dirty or the spring is worn out. A characteristic sign of a problem is that the car refuses to start moving, or, for example, does not work in reverse gear.
Replacing the ribbon
As mentioned earlier, when the tape wears out, it must be replaced. Any car enthusiast who is more or less familiar with the structure of the car can replace the brake band. Now we will explain how to do this.
So, to replace the brake band you will need the following set of tools:
- Heads for 10, 14 and 19.
- Sealant.
The replacement process begins with dismantling the engine protection, fender liner and driver's wheel. Afterwards, it is worth removing the air filter and housing using a 10 socket. Using a 14 socket, remove the bolt for adjusting the automatic gearbox. A jack is installed under the power unit, and the automatic transmission mount is unscrewed with a 19mm head (the bolt located on top of the structure is removed).
This will allow you to get close to the box in which the tape is located. Next, use a 10mm head to unscrew the bolts from the cover and push it inside. This will allow you to peel off the lid, which is held on by the sealant. After this, some car oil will leak out. A new one is installed in place of the old tape, and the lid is lubricated with a thin layer of sealed glue. The assembly process is carried out in the reverse order of disassembly.
Adjusting the tape
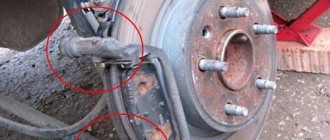
The gap between the band and the brake drum is adjusted by a system of levers on which force is applied through an adjusting pin or screw. If the adjustment is made with a pin, then it is tightened with a torque wrench. The force with which the torsion is carried out is determined by the car manufacturer.
Automatic transmission with stud installed:
The impact on the pin/screw affects the fastening of the belt in the automatic transmission. If the adjustment mechanisms are accessible from the outside, no additional manipulations are required, otherwise the box tray will have to be removed.
Interesting: some types of “automatic machines” are adjusted using special rods of different lengths. The adjustment is made when disassembling the unit, installing the rod of the required length. Sets of rods are produced by manufacturers of such boxes.
The tension should be monitored at the slightest suspicion of a problem with the tape. It is advisable to carry out preventive diagnostics when changing the oil, since in this case, as a rule, the pan is removed, and it is worth taking advantage of this opportunity.
Important: do not over-tighten the tape, this will speed up the wear of both it and the box as a whole.
How to make adjustments in the field, without a torque wrench (it is advisable to do this with two people):
- stand in a place with a slight slope;
- put the car on the handbrake;
- place a cobblestone, brick, or brake shoe under the wheel to hold the car;
- put the brick (shoe) a few centimeters away from the wheel;
- if there is a partner, he must monitor the car and report when it starts moving;
- loosen the locknut of the bolt;
- tighten it, but not all the way - so that there is a slight stop;
- release the handbrake;
- Gradually loosen the belt bolt until the machine begins to roll on its own;
- tighten the screw 2-3 turns.
The required number of revolutions is determined experimentally until the box shocks disappear. This method does not claim to accurately measure the moment of force during adjustment, but will help eliminate the problem with the tape in the field, after which it is advisable to visit a car service for more precise adjustment and verification, or do it yourself, already with a torque wrench.
I consider this method of adjustment to be the most correct, so as not to catch a small tightening torque; everyone who disagrees (and those who want to get smart) with this, please do not poke, etc.
the need to properly adjust the tape arose after fiddling with kick 1-2, I also noticed shocks at 2-3 (this was before the washers were added)
you need a 14 socket, a small ratchet with a long extension, and a 30 a torx, and the most important thing is a brick! preferably red, we put the car on a small hill, on the handbrake, put a brick and be sure to check that when the handbrake is released, the brick will hold the car. Next, we put honey mushrooms on the handbrake + neutral in the automatic transmission, place a brick at a small distance of 2-3 cm so that the car can roll a little (if you do it with two people, then you can finally not worry about it) loosen the lock nut - leave the key in place, insert a Torx inside and start tightening ! until it stops slightly - well, pull it up a little - then release the handbrake and the car should stand still! then we begin to loosen the adjustment until the car rolls (this is when the drum is released), from this moment we count 2.5 turns (unscrew it) after holding the torx we lock the lock nut and that’s it, individual adjustment is possible i.e. 2 or 3 turns
Types of brake bands
There are currently three main types of brake bands:
- LAT-2: the main purpose of such a belt is operation under conditions of high pressure and fairly high friction temperature. Such tapes are equipped with reinforced brass wire. LAT-2 brake tapes are used in countries where tropical climates predominate.
- EM-K: brake band is used in friction and brake units at relatively average pressure and temperature not exceeding 250 degrees Celsius. The tape contains brass shavings. The main advantage of this tape is its high elasticity. The use of chips allows the tape to be used on uneven friction surfaces.
- EM-1: tape that is used in different climatic conditions. Ideal for use in Russia. Has an average wear resistance resource.
Experts recommend using LAT-2 type tape; it has a high wear life and can be used in fairly difficult conditions. Therefore, when choosing a tape, you should pay close attention to this variety.
Automotive brake band: replacement process
The automatic gearbox is designed to make life easier for the driver. She changes gears on her own. However, the stability of operation lies in the serviceability of all components of this mechanism, which, in particular, includes the automobile brake band.
The structure of the tape
To understand where a small tape has such strong holding power, you need to understand its structure. The brake band of an automatic transmission consists of a huge number of strips that are highly elastic and flexible. They consist of a flexible, but at the same time reliable and durable metal alloy. The inside of the belt is covered with a special friction material.
Purpose of the brake band
The main purpose of this automatic transmission element is to provide clutch from one to three sets of gears. The coupling is carried out due to the fact that the belt slowly rotates around the drum, and it, in turn, is connected to the belt itself.
The advantages of the main tape include:
- strong holding power;
- softening shocks and impacts when changing gears;
- the ability to use it to lock the rotating parts of the planetary gear set of an automatic transmission onto its body.
Adjusting the brake band
The processes included in car maintenance (for example, replacing or adding car oil or repairing an automatic gearbox) also include adjusting the brake band. Like other parts and mechanisms of a car, the tape tends to wear out.
Due to wear and tear, problems may arise during the operation of the vehicle. The adjustment is carried out using torque wrenches; they need to tighten the bolts that are responsible for the tension of the tape. Fastening elements can be located both inside the automatic transmission and on the outside of the automatic transmission housing.
Signs of brake band wear
The main sign that the brake band is worn out and requires replacement is that the car can move forward, but reverse does not work. In addition to wear of the friction lining of the belt, the cause may be a broken piston rod. To eliminate the problem, it is necessary to replace either the rod or the brake band.
In addition, an indirect sign may be jolts and jerks that occur when trying to switch from first to second gear.
Replacing the ribbon
As mentioned earlier, when the tape wears out, it must be replaced. Any car enthusiast who is more or less familiar with the structure of the car can replace the brake band. Now we will explain how to do this.
So, to replace the brake band you will need the following set of tools:
- Heads for 10, 14 and 19.
- Sealant.
The replacement process begins with dismantling the engine protection, fender liner and driver's wheel. Afterwards, it is worth removing the air filter and housing using a 10 socket. Using a 14 socket, remove the bolt for adjusting the automatic gearbox. A jack is installed under the power unit, and the automatic transmission mount is unscrewed with a 19mm head (the bolt located on top of the structure is removed).
This will allow you to get close to the box in which the tape is located. Next, use a 10mm head to unscrew the bolts from the cover and push it inside. This will allow you to peel off the lid, which is held on by the sealant. After this, some car oil will leak out. A new one is installed in place of the old tape, and the lid is lubricated with a thin layer of sealed glue. The assembly process is carried out in the reverse order of disassembly.
Types of brake bands
There are currently three main types of brake bands:
- LAT-2: the main purpose of such a belt is operation under conditions of high pressure and fairly high friction temperature. Such tapes are equipped with reinforced brass wire. LAT-2 brake tapes are used in countries where tropical climates predominate.
- EM-K: brake band is used in friction and brake units at relatively average pressure and temperature not exceeding 250 degrees Celsius. The tape contains brass shavings. The main advantage of this tape is its high elasticity. The use of chips allows the tape to be used on uneven friction surfaces.
- EM-1: tape that is used in different climatic conditions. Ideal for use in Russia. Has an average wear resistance resource.
Experts recommend using LAT-2 type tape; it has a high wear life and can be used in fairly difficult conditions. Therefore, when choosing a tape, you should pay close attention to this variety.
How to distinguish a fake brake band from an original one?
Currently, in the automotive spare parts market, along with original parts, you can find a huge number of counterfeit ones. To recognize a fake, you need to pay attention to the following points:
- External condition of the packaging. If the package contains unevenly applied stickers, and it also has scuffs and dirt, then there is a 70 percent chance that there is a fake part inside.
- External condition of the part. It should be free of scuffs and dirt. All components must be symmetrical and even.
- Availability of markings. Both the box and the part itself must contain the logo of the manufacturing company, as well as the serial and articulation numbers of the part. If they are not there or the package number and part number do not match, then it is a fake.
- Price. An original, high-quality part cannot be too cheap.
If, for example, the seller tries to sell an original brake band for 1500-2000 rubles, then there is definitely a fake in the box. An original, high-quality brake band LAT-2 costs about 7-8 thousand rubles. However, you should not save on your purchase, because once you buy a tape, you can forget about a number of problems associated with operating a car that is equipped with an automatic gearbox.
What are the dangers of using counterfeit parts?
Counterfeit spare parts are not capable of providing high reliability during operation. In some cases, the use of counterfeit spare parts leads to unnecessary financial costs, and in others it endangers the life and health of the driver and passengers. Systems that require the installation of high-quality and reliable parts include the following components and mechanisms:
- brake;
- fuel;
- engine.
You should not try to save money when purchasing parts intended for installation in the above-mentioned parts assemblies. Fake parts can lead to more serious damage, and they will also pose a threat to the life and health of the driver and passengers of the vehicle.
Conclusion
Summarizing the above, it is worth noting that the brake band of a car is a fairly important element that plays an important role in the functioning of the automatic gearbox. At the moment there is a huge selection of brake tapes. For Nissan, Opel, Volkswagen and even domestic car brands, you can easily and quickly select this spare part at a reasonable cost.
Replacing the brake band yourself is a fairly easy task, especially for those motorists who have an understanding of the structure of an automatic gearbox. It is worth noting that if you are not confident in your own abilities, then you should not try to change the brake band yourself; it is better to contact a specialist.
When choosing a brake band, you need to beware of fakes. To distinguish a fake, you should pay attention to the country of origin of the tape, the external condition of the box and the part itself, as well as the presence of markings and an articulation number. It is worth understanding that a LAT-2 class tape costs at least 7 thousand rubles. Therefore, the LAT-2 tape worth 2-3 thousand rubles is fake and should not be purchased.
The brake band is a fairly important element in the design of a car’s automatic gearbox. The smooth functioning of the automatic transmission depends on its technical characteristics. If you use a worn or counterfeit belt, you can run into more serious damage, which can lead to a complete replacement of the car’s automatic transmission.
Experts recommend using LAT-2 type tapes; their properties allow them to be used in extreme operating conditions.
fb.ru
How to distinguish a fake brake band from an original one?
Currently, in the automotive spare parts market, along with original parts, you can find a huge number of counterfeit ones. To recognize a fake, you need to pay attention to the following points:
- External condition of the packaging. If the package contains unevenly applied stickers, and it also has scuffs and dirt, then there is a 70 percent chance that there is a fake part inside.
- External condition of the part. It should be free of scuffs and dirt. All components must be symmetrical and even.
- Availability of markings. Both the box and the part itself must contain the logo of the manufacturing company, as well as the serial and articulation numbers of the part. If they are not there or the package number and part number do not match, then it is a fake.
- Price. An original, high-quality part cannot be too cheap.
If, for example, the seller tries to sell an original brake band for 1500-2000 rubles, then there is definitely a fake in the box. An original, high-quality brake band LAT-2 costs about 7-8 thousand rubles. However, you should not save on your purchase, because once you buy a tape, you can forget about a number of problems associated with operating a car that is equipped with an automatic gearbox.
Automatic transmission repair AW TF80/81
Automatic transmission AW TF80/81 is a Japanese development of AISIN AW CO, LTD. The 6-speed TF-80 unit was created in 2001 and to this day is successfully installed on a variety of car models. A more powerful modification, the TF-81, was released in 2004 and was installed in conjunction with 4-liter engines.
The boxes are installed on both front-wheel drive and all-wheel drive vehicles.
These automatic transmissions work with engines ranging from 1.9 to 4.4 liters, with a torque limit of up to 450 Nm.
Decoding of markings.
The labeling of this box is divided into three sections:
- The first two letters are part of the official name of the company Aisin Warner
- The letter T comes from the word “Transverse” - transverse. This indicates that the box is transversely mounted.
- Letter F – “Forward” – front-wheel drive.
- The numbers 80 and 81 indicate the position of the box within its family.
Model range of cars with automatic transmission AW TF-80/81
The box is designed for front- and all-wheel drive vehicles with a transverse engine. The designers made it compact, 358 mm long. The Lepelletier series used made it possible to implement six gears in such a small space.
Each automaker has its own designation for this automatic transmission: AF21 (TF-81SC) on Ford cars, AF40-6 (TF-80SC) on Ford and General Motors, AM6 on Peugeot-Citroen cars and AW6A-EL on Mazda.
Car with TF-80SC gearbox:
| Volvo | |
| C30 I | 2011 — 2013 |
| S40 II | 2010 — 2012 |
| S60 I | 2006 — 2009 |
| S60 II | 2010 — 2018 |
| XC60 I | 2009 — 2017 |
| XC70 II | 2008 — 2016 |
| Renault | |
| Espace IV | 2006 — 2011 |
| Vel Satis | 2005 — 2009 |
| Opel | |
| Astra H | 2006 — 2009 |
| Astra J | 2009 — 2015 |
| Vectra C | 2005 — 2008 |
| Insignia A | 2008 — 2017 |
| Zafira B | 2005 — 2014 |
| Zafira C | 2011 - present |
| Saab | |
| 9-3 | 2006 — 2011 |
| 9-5 | 2010 — 2011 |
| Peugeot | |
| 307 | 2006 — 2008 |
| 308 | 2007 — 2013 |
| 407 | 2006 — 2010 |
| 607 | 2005 — 2010 |
| Citroen | |
| C5 | 2004 — 2008 |
| C6 | 2005 — 2011 |
| Cadillac | |
| B.L.S. | 2006 — 2009 |
| Alfa Romeo | |
| 159 | 2006 — 2011 |
| Brera | 2005 — 2010 |
Car with TF-81SC gearbox:
| Volvo/year of installation | |
| S80 II | 2006 — 2011 |
| XC90 I | 2005 — 2014 |
| Mazda/year of installation | |
| CX-7 | 2006 — 2012 |
| CX-9 | 2006 — 2016 |
| Land Rover/year of installation | |
| Freelander 2 | 2006 — 2014 |
| Evoque | 2011 — 2013 |
| Ford/year of installation | |
| Mondeo 4 | 2007 — 2011 |
| Galaxy 2 | 2006 — 2011 |
| Lincoln/year of installation | |
| MKZ | 2006 — 2012 |
| Hyundai/year of installation | |
| Veracruz | 2006 — 2012 |
Frequent malfunctions of automatic transmission AW TF80/81
Automatic transmission models do not differ much from each other structurally. The differences relate to the valve body and the number of clutches.
Malfunctions typical for Aisin TF-80.
This automatic transmission is considered one of the most reliable; it has virtually no significant problems up to 100 thousand kilometers. Mileage over 150 thousand reveals typical problems for any automatic machine.
Characteristic shocks and jerks during gear shifts indicate problems in the valve body, and slipping and vibration indicate worn torque converter clutches
If you feel quite strong impacts, then most likely this is a sign of a worn out brake band or a failed clutch package.
Malfunctions typical for Aisin TF-81.
Despite the fact that this automatic transmission is considered one of the most reliable units in its class, which is installed on front- and all-wheel drive cars, after a long run, various malfunctions will begin to occur in it.
So, an untimely oil change after 150,000 kilometers will result in problems with the valve body.
Having crossed the mark of 200,000 kilometers, the torque converter clutch in the box wears out.
Then the brake band or one of the clutch packs may burn out.
What is included in automatic transmission repair at Center-AT MAI.
We provide a range of services:
- We carry out computer diagnostics of faults;
- remove and disassemble the box;
- We carry out troubleshooting of the transmission;
- we eliminate malfunctions in the operation of the torque converter;
- selecting spare parts and consumables;
- We replace worn parts;
- We assemble the automatic transmission and install it in place;
- change the oil and carry out a break-in;
- We perform computer output diagnostics.
You can be confident in the quality of the work performed: we have been working since 1994, we provide a guarantee for automatic transmission repairs (12 months or 20 thousand km), we use technologies created for the aerospace industry. Restoration of the crankcase or other parts of the box is carried out at aircraft factories in Moscow. The highest competencies of our technicians guarantee quick identification of the true causes of the malfunction and prompt elimination of automatic transmission breakdowns. To sign up for service, call one of our dispatch numbers.
What are the dangers of using counterfeit parts?
Counterfeit spare parts are not capable of providing high reliability during operation. In some cases, the use of counterfeit spare parts leads to unnecessary financial costs, and in others it endangers the life and health of the driver and passengers. Systems that require the installation of high-quality and reliable parts include the following components and mechanisms:
- brake;
- fuel;
- engine.
You should not try to save money when purchasing parts intended for installation in the above-mentioned parts assemblies. Fake parts can lead to more serious damage, and they will also pose a threat to the life and health of the driver and passengers of the vehicle.