What are the defects?
According to the nature of their origin, all defects are classified as natural, mechanical. In the first category:
- erasing the coating from corrosion, paint;
- the appearance of rust from exposure to external factors;
- metal wear.
Mechanical damage means:
- dents after hitting an obstacle, from impacts with gravel;
- factory defects in paintwork, lack of corrosion protection.
The repair procedure is selected depending on the degree of damage; if corrosion has covered more than 70%, the part is completely replaced. In case of deformation, if the metal does not require cutting, it is enough to straighten it. If the outer layer of anti-corrosion is damaged without damaging the outer and inner parts of the metal, then clean it and apply protection.
Typically, drivers have to repair a part after hitting an obstacle; you can straighten the threshold on a car with your own hands if there is no internal wear of the metal.
Repairing body damage without welding
Restoring the integrity and appearance of a vehicle using welding is often not economically feasible, and sometimes impossible or unreliable. Then methods of repairing bodies without welding are used. It is not recommended to restore load-bearing elements in this way, especially on your own.
Weldless repair methods
Almost all body work without welding is classified as unprofessional. They are not the result of any developments in this area, they are based on the use of the properties of certain materials and substances, and do not have a clear technology tested and regulated by relevant institutes, organizations, standards and GOSTs. This is the fruit of folk wisdom and ingenuity of domestic craftsmen, initiated by the specific conditions of our life. For example, in Europe, no one would think of trying to repair a damaged body part or a damaged car - they are simply replaced with new ones. These methods are aimed, first of all, at eliminating through-through damage to the front surfaces and underbody of the car.
General requirements and rules are as follows. If necessary, use a grinder to cut out or expand the damaged area. The area to be repaired is cleaned of paint, rust, and dirt. Treated with anticorrosive or zinc, degreased. After filling the hole, a surface of the desired configuration is formed at the repair site; if necessary, painter's putty is used. Then the body is prepared for painting.
Puttying
Use putty with fiberglass. It comes in the following types:
- with small glass fibers;
- with averages;
- with large ones.
To seal through damage, use a composition with large fibers. The method is suitable for small holes or when significant damage is located in the area of structural “pockets” that protect large masses of putty from shedding (for example, the front part of the hood above the radiator grille). To fix the composition during work, you can use pads that are installed on the back side of the damage. Puttying is the most unreliable method. They are used mainly as a last resort for urgent repairs and when there are no other alternatives.
Before starting work, the stripped metal of the body is primed. When mixing putty with hardener, bubbles should be avoided. The composition is first coated inside and then laid on top. When the damage is significant, work is carried out in several stages. Allow one layer to dry, then apply the next one. Drying occurs naturally.
The use of aluminum mesh allows you to repair more significant damage. It is applied to the hole and secured with tape. Upon completion of work, the tape is removed.
Fiberglass and glue
For more serious damage, use fiberglass and an adhesive composition made from epoxy or polyester resin. Fiberglass is used to reinforce the patch. This method is more reliable than the previous one and also requires preliminary priming.
Several overlays are cut out of fiberglass according to the shape of the hole. The size of the first ensures that the damage is overlapped by 2 cm. Subsequent pieces of fiberglass are larger than the previous ones, the last one completely covers the prepared bare metal of the repaired area.
The pads are impregnated with glue and installed, or applied to the damaged surface with glue applied in ascending order of size. To prevent the fabric from sagging during work, when there are large holes, linings are installed. At the end of the work, the resin is allowed to dry and set. The method is suitable for minor damage.
Soldering
Used to eliminate large damage. A patch made of a sheet of metal is pressed tightly against the body, the connection to which is made with solder. Flux is used to ensure soldering strength. This method is quite simple to implement and even a beginner can do it; In terms of reliability, it is something between welding and gluing. Solder and flux are selected based on the alloys of the metals being joined. Soldering is performed with a high-power electric soldering iron.
Main disadvantages:
- relatively high cost (due to the high price of solder);
- the connection is not strong enough (welding is much more reliable).
The metal patch should completely cover the hole. Before starting work, the soldering points on the plate and body are tinned (treated with solder and flux using a soldering iron). The larger the area of tinning and, accordingly, soldering, the more reliable the connection. If the soldered pad protrudes strongly, then it is leveled on the surface of the car part with a hammer. The resulting dent is repaired with putty.
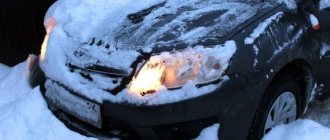
Owners of old cars often have problems with holes appearing in the body of the car. Such holes occur naturally due to rusting of old metal. Any manufacturer will not provide a guarantee against body corrosion for more than 12 years. Consequently, a 15-year-old car will definitely have traces of metal corrosion on the body, which will only increase over the years. So over time, in places of corrosion, the metal can rust through. In this article we will tell motorists how to repair a hole in a car body with their own hands, on their own.
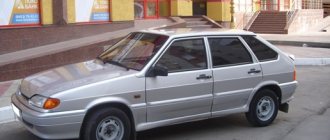
Types of car thresholds
Car thresholds can be fixed or removable. The first relate to the power parts of the body; they form a single structure with the bottom, providing the base with the established rigidity. All VAZ and BMW models until 2010, Opel brands, and some cars of Japanese and Korean brands were equipped with non-removable ones.
The removable element is installed from the passenger compartment and is bolted to the bottom base. The part can be easily removed and repaired if a dent appears, the paintwork is chipped, or the first pockets of corrosion are noticeable. Removable thresholds can be easily replaced with original replicas, so in case of serious damage or cracks, the part cannot be repaired.
The straightening of a non-removable threshold is carried out by welding, drawing, straightening, and of removable ones only by straightening.
Repair of fixed parts
Structurally, the non-removable thresholds are a hollow box, the main element of which remains the amplifier, as the power part of the bottom. The external element serves to protect the body and as a decor that improves the appearance of the car.
When repairing, the car is placed on a jack or lift for the convenience of the technician. If it is necessary to cut out part of a part or use welding, then the doors and floor covering are removed. For small dents, you can pull out the threshold without painting using a reverse hammer or staples. The most common garage repairs of non-removable elements:
- sealing through holes;
- straightening;
- patch welding of the rusted area;
- anti-gravel treatment of primary corrosion areas when the seal is not damaged.
To perform repairs you will need a set of tools, equipment and the necessary skills. The complexity of the work lies in the fact that the part cannot be dismantled; if welding is carried out, it must be done directly on the car.
Repair of removable parts
This does not require much experience; it is enough to be able to straighten metal with a hammer. If drawing is carried out, the removable part can be easily secured on the machine. Correction and filling of holes on removable thresholds is carried out much less frequently than on welded ones; when plastic linings become deformed, in 90% of cases they are simply replaced with new ones. The price of new parts will not exceed the cost of services at a service station.
Threshold putty
The main types of putties from which you can choose the right one are:
- putty with aluminum filler - popular because of its ease of processing;
- Fiberglass Putty - Highly durable and can fill holes and dents that are difficult to repair.
It is necessary to apply the putty carefully, otherwise it will peel off quickly. Be aware that putty cannot be applied to paint.
Threshold putty
Before applying to the surface, a hardener must be added to the putty. Its amount should not exceed 4% by weight of the entire mixture. The mass must be stirred for 5-7 minutes, then applied in thin layers. The interval between applying each layer should be up to 10 minutes. During this “break”, you can repair defects on the surface by gently pressing the mixture with a spatula to allow air to escape.
How to repair it yourself without painting
Among all types of repairs, pulling out the threshold without painting is possible only in the case of slight deformation, without a sharp edge, when the paintwork is not damaged. A smooth dent without folds can be pulled out on its own in only two ways:
- using a pulling tool and hot glue;
- vacuum suction cups.
At service stations, a type of paintless body service using PDR technology is common. In this way, small, shallow deformations are eliminated. Craftsmen use special tools: levers and hammers, squeezing out a dent always occurs from the inside. When repairing a non-removable body element, it is necessary to use external tools; vacuum suction cups remain the best option. Considering that most defects are associated with damage to paintwork and metal cracks, the paintless method is not used when:
- The deformation of the metal has a sharp angle, and there is a crack in the protective coating.
- The first signs of corrosion appeared.
In case of such damage, it is necessary to carry out full surface treatment before and after reducing the dent.
How to pull out a threshold with a reverse hammer
Pulling out a threshold with a reverse hammer is considered one of the most popular and easiest ways to remove significant dents from a non-removable element. For repair you will need:
- grinding machine (grinder);
- reverse hammer;
- putty, hardener;
- sandpaper R-120, R-80;
- welding machine;
- automotive primer, degreaser;
Before work, you must remove the negative terminal from the battery and hang the car on a jack. We will look at how to straighten the threshold on a car with our own hands step by step:
- Grind the damaged area with a grinder. It is recommended to protect your eyes with goggles. When working, large grains of old paint and primer fly off.
- Clean the area with sandpaper.
- Weld the end of the reverse hammer to the threshold and begin to pull out the metal with small taps. The extraction is carried out starting from the edge of the dent.
- Weld the hammer, maintaining a distance of at least 1-1.5 cm. Walk across the entire dent, gradually pulling the metal to its original state.
You cannot start drawing immediately after welding the hammer; you must wait until the part has cooled.
- Sand the weld seams with a grinder and sand them.
- If there are any unevenness on the surface, level it with a hammer and sand it.
- Degrease and apply automotive primer.
- Dilute the putty with the hardener, treat the surface, leveling the part.
- The putty is applied with smooth, quick horizontal movements, and the protruding material is cut off.
- After complete drying, the surface is sanded with R-80 sandpaper. A second layer of putty is applied and processed in the same way.
- Auto enamel or any other protective agent is used: anti-gravel, film, etc.
Using a reverse hammer remains the most reliable way to repair permanent thresholds when deformed. It is guaranteed to be free from internal welding corrosion and is available at home.
Suction cup pulling
The use of a suction cup or vacuum hammer is justified in cases where the dent is small and repairs can be limited to without painting. However, if there is old damage, a complete surface treatment is carried out after extraction.
Drivers turn to the service station with one question: what to do if the threshold on the car is bent? Without understanding the nuances of the damage, they, as a rule, pay 70% more for the work of a tinsmith. To prevent this from happening, you need to remember: if the dent is corrected with a suction cup without additional painting, the technician spends up to 15 minutes on maintenance, and the cost of the work is calculated from time to time.
The steps are similar to using a reverse hammer, but the vacuum pump plays the role of a puller. The difficulty of using the device is due to the fact that, due to the unevenness of the deformation, it is not always possible to install the pump on the part. Repair process step by step:
- The suction cup is installed on the dent.
- The air is released through several pumping cycles. At the same time, the master observes the movement and condition of the metal, which should return to its original state.
Straightening with a spotter from the microwave
Experienced drivers and home repair enthusiasts use used microwave ovens to make special equipment for garage repairs - a spotter. The unit allows you to do spot welding quickly and easily. The tool is widely used in body repair. Using a spotter, dents on a car's permanent threshold can be removed quickly and efficiently.
Straightening thresholds with a spotter is not a paintless method; the threshold must be processed and painted. Required materials and equipment:
- spotter or any other spot welding;
- hooks or rings for welding;
- Grinder;
- sandpaper R-120;
- stop level or counter hammer;
- putty knife;
- materials for processing and painting thresholds: primer, degreaser, putty, varnish or enamel for paintwork.
The process of pulling out a dent in stages:
- The surface is polished with a grinder.
- The negative terminal is removed from the battery.
- Rings or hooks are welded to the place of deformation with a spotter, the distance between parts is from 5 mm.
- Use a reverse hammer or stop to carefully pull out the area of deformation, and at the same time tap the edge, if necessary.
The operation is carried out until the surface of the threshold, the skirt and the outer part take their original shape.
- The welded rings are removed and polished with a grinder.
- The surface of the threshold is rubbed with emery, treated with a degreaser, and primed.
- A thin layer of automotive putty is applied to the dried threshold.
- The part is painted with enamel and treated with an anti-gravel compound.
Self-repairs are often carried out using a reverse hammer; few drivers have pulling devices: stops, a set of rings.
Extraction of the threshold using a spotter is carried out in the following directions: the edge of the threshold or skirt, corners, central part. If you don’t have a spotter at hand, you can use a welding unit.
We remove defects by welding
Welding repairs are both complex and most productive when repairing corrosion damage to permanent thresholds and body wear. Welding is used if it is necessary to replace an amplifier, install a metal patch on a through hole, and in some cases to straighten dents. Let's look at how to straighten the threshold if there is no corrosion damage, step by step:
- A welding machine is used to cut out the deformation area with the letter “G” or “P”.
- Use a screwdriver to bend the edges of the metal.
- Using pull hooks, portable anvils and hammers, the dent is straightened out from the inside and out.
- The incision site is welded with a metal patch.
This is a fundamental way to straighten dents; welding machines are used much more often if the threshold is partially or completely replaced. The deformed area is cut out and a new part is welded. If a rusty seal is found under the exposed deformation, then it is necessary to carry out a full repair with cutting out the metal and welding new parts.
Corrosion repair without welding
The body of any car is its most expensive part, and therefore requires constant care and cosmetic repairs. Perforation corrosion is a problem with many modern cars. Are there ways to avoid buying a new car frame and how to repair a hole without welding - these are two pressing questions of many car owners.
The cost of work at car repair shops is impressive, so many people prefer to repair their cars themselves.
Tools and materials required for work
Repairing corrosion without welding is the cheapest and easiest way to fix the problem. To do this you will need to buy the following set:
- Aluminum mesh with a size of approximately 25*18 cm;
- Scotch tape (preferably metal);
- Fiberglass putty;
- 80 or 120 grit sandpaper;
- Air machine for leveling surfaces;
- Universal putty;
- Primer;
- Paint (to match the body);
- Paint polishing products.
Stages of work execution
All work to quickly eliminate a hole in the body without welding is carried out in stages:
- Cleaning the damaged area from rust and paint;
- Fixing an aluminum mesh with tape to an empty area of the body (there should be space between the tape strips to fill the mesh with putty);
When attaching the mesh, it is necessary to make maximum efforts to fix it flush with the car fender.
- The space between the attached tape on the mesh is filled with fiberglass putty. In this case, you need to carefully rub the material into the cellular mesh structure to form a sufficiently thick layer;
- After the putty has dried, the tape is removed;
- Re-application of putty to finally fill the hole in the body;
- The hole in the body is puttied both outside and inside. The result should be a strong and neat patch;
- The dried surface should make a dull sound when tapped;
- Leveling the patch with coarse sandpaper of 80 or 120 grit. In this case, you can use special equipment, for example, an air machine to obtain a more even surface of the patch being formed;
- Applying a universal putty composition and sanding again;
- Cleaning the work area from dirt and dust, covering its perimeter with tape;
- Applying primer first, then paint;
- The next stage is coating the repaired area with varnish;
- The final step is polishing the repaired area.
If you look closely, corrosion repairs without welding will be noticeable on the body. However, this method of solving the problem requires little expense; even an inexperienced car owner can cope with the work. You can use putty on the hole only if there is minor damage to the body.
If body corrosion is removed with mesh and putty, the service life of the patch is from one to two years.
This method is used only in emergency cases: urgent inspection or preparing a car for sale. If the car is expensive and the owner does not intend to change it, it is better to entrust the work to car service professionals. And one more important detail - if corrosion has affected most of the car body, the expensive part will have to be replaced with a new one.
How to pay TWICE LESS for GASOLINE
- Gasoline prices are rising every day, and the car's appetite is only increasing.
- You would be happy to cut costs, but is it possible to live without a car these days!?
But there is a completely simple way to reduce fuel consumption!
Don't believe me? An auto mechanic with 15 years of experience also didn’t believe it until he tried it. And now he saves 35,000 rubles a year on gasoline! Read more about this at the link. KuzovSpec.ru
Threshold straightening
In case of minor damage to the thresholds, it makes sense to carry out minor straightening repairs. But if, in addition to a violation of the geometry of the body or the integrity of the paintwork, deeply damaged or rotten sections of metal are found, then it is more advisable to purchase a new part. Usually the threshold forms a single unit with the body, giving it additional rigidity, but there are also removable thresholds.
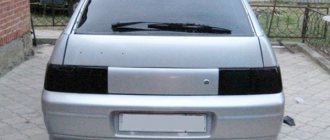
Removable threshold
The car's removable threshold is usually located on the outer side of the side member. It protects the body from small stones that jump out from under the wheels.
Straightening the threshold with a spotter
Straightening and subsequent painting of removable car sills is much easier than in the case of a non-removable part. To do this, you must first dismantle it by unscrewing the screws with which it is attached to the spar. Then the dents are straightened, the inside is treated with anti-corrosion primer or ointment, preparation for painting and painting. After re-installing the threshold, areas damaged during installation are repainted.
Fixed threshold
When straightening such parts, the dents are pulled outward. To do this, the old layer of paint is removed, and special extraction hooks are welded to the damaged area. They are grabbed with a special inertial puller (spotter) and the dent is leveled.
In addition, you can cut out the damaged area and replace it with a new one, leveling the surface with subsequent putty and painting. When the straightening is completed, we move on to the preparatory stage before painting the threshold.
A step-by-step guide to painting your own car sill
To paint the thresholds of a car with your own hands, you need to go through 4 stages in sequence.
Puttying
Leveling the surface of the threshold with putty occurs in the following sequence.
- Degrease the surface of the threshold;
- Mix the hardener with the putty a few minutes before applying it. The proportion of hardener in the mixture should be in the range from 2 to 4%;
- Apply the resulting mixture to the damaged area of the part in a thin layer quickly, within 5-7 minutes;
- Dry the part for 5-10 minutes;
- Sand the treated area;
- Repeat puttying several times until a smooth surface is achieved;
- When using fiberglass-based putty, keep in mind that it is quite brittle, despite its apparent hardness, and porous. Therefore, this stage should be completed with finishing putty.
Padding
Coating with a primer prevents corrosion and promotes better adhesion of the paint to the surface of the car. In addition, the primer fills the pores. The procedure for applying it yourself is as follows.
- Degrease the threshold;
- Cover the adjacent surface of the car with film or newspapers;
- Dilute the soil with solvent (you can use 647). The primer should be the same color as the paint or a neutral gray;
- Spray primer onto the part. Repeat if necessary;
- Sand the threshold “wet” with P800 sandpaper or “dry” with P400 sandpaper;
- Treat areas of complex configuration with Scotch Brite.
Coloring
The number of coats of paint varies depending on what color primer was applied. If the latter is very different from the paint pigment, then the number of layers increases. Do-it-yourself painting of the threshold is carried out as follows.
- Apply paint from a spray gun to the part at a distance of 20-25 cm; (You can also paint from a spray can if the paint is chosen correctly.)
- Let the paint dry for 3-7 minutes;
- Repeat staining 2-4 times.
Opening with varnish
The final stage after painting the thresholds. Performs protective and decorative functions.
- Thin the varnish according to the instructions.
- Apply the coating to the part twice (with a break for drying) from a paint sprayer with a pressure of 1-1.5 atmospheres, using the same nozzles as for paint.
- Spray 3 layers of a mixture consisting of wash solvent and varnish in a 1:1 ratio.
- Treat the transition zone from the damaged area to the rest of the surface with a mixture further diluted with a solvent. Then coat it with a clean solvent.
- Allow the thresholds to dry completely for 2-3 days.
- Polish and grind the surface.
The threshold, as the most vulnerable part and subject to aggressive influence, regularly needs minor repairs and repainting. It's easy to do it yourself. It is enough just to follow the given technological sequence exactly.
We recommend reading:
Did you like our site?
Don't remain indifferent, share with your friends and colleagues!
Painting car sills is necessary to protect them from rust. During this process, it is not necessary to go to a service station. Every man is quite capable of doing this procedure with his own hands.
Preparing thresholds for painting
First of all, the surface must be properly prepared. It is necessary to wash the car, inspect it, clean the sills, putty and prime all damage to them.
Preparing the thresholds for painting is easy. Removing thresholds with your own hands is easy. To do this, unscrew the screws that secure the threshold to the spar. Then the metal is straightened using straightening tools, after which the inner surface of the car threshold is painted with a special anti-corrosion paint. If the threshold is seriously damaged and it is necessary to carry out welding work on site, then remove the floor covering, remove the doors and the seat.
Before painting, the surface is sanded, puttyed and primed.
After straightening work, cleaning is carried out. This is necessary so that the weld seams are smoothed out, all cracks are sanded, and the old paint is removed.
The necessary tools will be a sanding machine, sandpaper and a Scotch Brite sponge, which can be used not only dry, but wet or moistened with special matting agents.
Threshold painting tool
First you need to smooth out any protruding chips. Weld seams are smoothed using a grinding machine. If they are small, then sandpaper will be enough. Using a grinding machine, the final cleaning of the surface to bare metal is carried out. As you can see, it’s quite easy to do it yourself here. Next, apply the anti-rust agent with a brush. After 10 minutes, the solution can be removed with a rag. This will completely remove rust from the metal surface. Next, the surface is degreased with gasoline or an alcohol-containing solution, after which you can proceed to puttying the thresholds.
The main types of putties from which you can choose the right one are:
- putty with aluminum filler
- popular because of its ease of processing; - Fiberglass Putty
- Highly durable and can fill holes and dents that are difficult to repair.
It is necessary to apply the putty carefully, otherwise it will peel off quickly. Be aware that putty cannot be applied to paint.
Threshold putty
Before applying to the surface, a hardener must be added to the putty. Its amount should not exceed 4% by weight of the entire mixture. The mass must be stirred for 5-7 minutes, then applied in thin layers. The interval between applying each layer should be up to 10 minutes. During this “break”, you can repair defects on the surface by gently pressing the mixture with a spatula to allow air to escape.
Next you need to prime the surface. The primer allows the paint to adhere well to the putty.
Primers are epoxy and acid based. It must be remembered that epoxy and etching (acid) primers are incompatible with each other.
Apply the selected primer correctly in one layer, then rub it in with sandpaper. Acrylic primers are gaining particular popularity. They are applied in two layers. Once the priming is complete, sanding is done.
Now it’s time to apply anti-gravel paint; it can also be applied to enamel. The paint comes with instructions where everything is described in detail.
Do not experiment with the choice of paint color - it is better to turn to specialists.
They will select the required shade. Painting thresholds involves applying the first layer from top to bottom in horizontal lines. The remaining layers must be applied vertically. The distance from the cylinder to the part should be approximately 20 cm. After the surface of the part has dried, it is polished.