Cars admin26.02.2020
Welcome car enthusiast, reader of the Rtilvaz.ru blog!
The topic of today's video is about painting bumpers. In the commentary on the video of painting the bumper with his own hands, he asked Vlad ShchCh questions about the preparation for priming and applying paint. The master answered my questions in detail, check them out at the end of this article. This is the difficulty, since people do not understand how to produce it.
Which one is stuffed with risk, what the part itself is painted with. Molar specialist Vlad Shchch talks about this in this video lesson.
Video story by Vlad Shch:
We need to fill the bumper with a line under the primer. To apply marks, either sandpaper or Scotch-Brite is used. Sandpaper and scotch-brite are suitable for work here: P 220, P320.
It is convenient to fill the scratches with sandpaper on a flat, wide surface of the bumper. We work without a block, directly taking it in our hand. Scotch Brite will be needed when processing uneven, hard-to-reach surfaces, transitions and niches where sandpaper cannot be used.
Sandpaper can be used in the range from P220 to P320, say 240, 280 and so on up to P320. The mark after the stone from P220 will be correspondingly larger and will be filled with soil when it is applied.
We've sorted out the working material and are moving on to polishing the bumper. We need to prime it completely. That is, we will prime everything that will be painted.
On some bumpers, for example, when there is a skirt, a structurally black spot from the sandpaper remains, so this part is not sanded. Painting tape is applied along the edge of the skirt so as not to interfere with the plane of the skirt when sanding the bumper itself.
When sanding, we bring the surface of the bumper to a matte state until the applied mark is clearly visible.
When working with sandpaper, we work without fanaticism, since sanding removes part of the bumper surface material. With strong pressure, for example, in the area of the edges, you can “knock down” their pattern. Therefore, we work with minimal hand pressure.
You can also work on the planes themselves with Scotch Brite; it also marks the surface. The mark must be applied completely over the entire surface of the bumper. If you skip any area where there is no risk, then later the paint may begin to peel off there.
There is a scratch on the new bumper, what should I do?
If the scratch is not so deep, then we just take sandpaper and carefully sand this area, thereby removing it. If the scratch is deeper, we do not sand it completely, since if we remove it completely, then a hole will form in this place.
Then, when we apply the primer, but in the place where there is a trace of the scratch, we will pour in more primer so that it makes it level with the plane itself. If the scratch is quite deep and remains visible after applying the primer, then it can be puttied afterwards.
For these purposes, you can use one-component putty or on plastic. After puttying, you need to sand the place where it was applied and prime it again.
You can putty the uneven areas immediately before processing it, if you see that the bumper is beaten and scratched. However, it is better to do this after priming, so all flaws are clearly visible on the applied primer. Some of the scratches will be filled in, but what is “remaining” will be more reliably puttied over the ground, and then re-primed.
Some manufacturers sell their products primed. That is, from the factory the bumper is covered with primer - this is rare, but this bumper is exactly like that.
You need to do everything the same way as shown in the master’s video, that is, it makes no difference whether there is factory primer on the bumper or it is in bare plastic. The primer from the factory has a very thin layer of coating, making it difficult to prepare for painting. In practice, the result is abrasion down to the plastic, and therefore it is better to re-prime everything yourself and then prepare the bumper for painting.
Pile for soil adhesion
When working with sandpaper on the body of the bumper (not on all products, depending on the material), deep scratches remain, as if with a velvety surface, in the form of a pile. You should not be afraid of this, since it will all be filled with soil, which will then also be sanded.
The pile that remains after sanding is exactly what is needed for the adhesion of the primer itself. In such cases, the pile increases the adhesion surface of the soil on the part. That is, the pile reliably adheres the primer to the bumper.
After the entire bumper has been sanded, that is, completely prepared for priming, it is necessary to treat its entire surface using plastic.
Soil adhesion enhancer
If you apply a primer without a primer, then since plastic has poor adhesion to materials, the material simply does not adhere. That is, if you apply the primer itself without preparation, there is still a possibility that the soil will subsequently peel off. This is why you should always use a primer before applying primer.
There was a question like this several times: is it possible to do without using a primer when priming plastic?
Answers from a molar specialist
Yes, you can apply primer without using a primer, but, as mentioned above, the primer itself fits very poorly on the bumper. When it is simply not possible to purchase a primer, then it is necessary to apply the mark more carefully so that the body of the bumper becomes like suede. That is, to raise the pile on the plastic. The bumper itself will be quite rough and a large scratch will become visible. Thanks to this roughness, the soil itself clings more reliably.
Yes, in such cases, you only need to sand it with sandpaper, since Scotch-Brite does not cause such an obvious risk.
After primer treatment, a filling primer must be applied. In this case, it is a two-component primer, that is, a material with a hardener. The primer should be used in the same color as the part itself.
This bumper will be painted white, and primer will also be used in white. If the color is black, then you need to use black primer.
When the color is between black and white, then you can use gray primer, as it is the most universal, for which any color, black and white, is suitable. In order to save paint, a primer is used that is similar in color to the paint itself, which will cover the bumper.
Applying primer is a mandatory procedure, since after sanding there remains a visible mark, which is quite rough. It will not flood when painting without first using a primer.
The filling primer is applied in two layers, but three coats can be given so that you can sand the applied primer without any consequences.
Basic priming
In cases where no additional priming is required, or after applying primer for plastic, you can proceed to the next step. This is the application of a basic acrylic primer, which provides better paint adhesion.
Important: you should not forget that before applying acrylic primer, the surface is degreased.
Further painting of the bumper with your own hands is carried out only after the acrylic primer has completely dried and sanded it.
DIY bumper painting. Preparing a plastic bumper for painting
Let's look at the different options for bumpers that need to be painted.
p, blockquote 4,0,0,0,0 —>
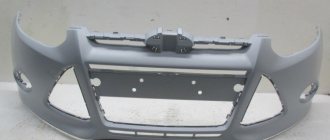
New bumper, not covered with primer
p, blockquote 5,0,0,0,0 —>
- The most important rule when preparing a new bumper for painting is to remove the factory mold release agent (applied when the bumper was manufactured). Mold release is used to release plastic parts from the injection mold. There may be a residue of it on the bumper, which is not visible visually, but affects adhesion. If you grind the bumper before removing such grease, it will be rubbed into the plastic. Insufficient cleaning or incomplete removal of mold release agent may cause poor paint adhesion. Even if the paint does not peel off immediately, chips from stones will appear more often.
- Some craftsmen use Scotch Brite when washing the bumper with soapy water. That is, simultaneous grinding occurs. This process is also acceptable.
- Mold release may consist of wax or oil. It can be either outside the plastic or inside. Modern release agents are most often water-soluble (using something like a soapy composition) and can be washed off fairly easily with soapy water.
- When washing a plastic bumper, soapy water should be as hot as the hand of the master can withstand. This will dissolve and wash off the mold release agent more effectively. It is better that the soap in the water is pH neutral.
- A bumper with a structured surface must be washed most thoroughly. To do this, you can use a brush with soft bristles.
- You need to wash both the front and back sides so that the grease does not accidentally get back onto the front part.
- Next, rinse the surface and warm the bumper for 15–30 minutes at a temperature of 60 degrees Celsius. The heat will help release the lubricant that is inside the plastic out. Once cooled, repeat the washing process again, rinse and dry.
- When rinsing the bumper after washing, the water should flow freely. If it behaves like it does on a wax surface and separates into separate streams, then this part of the bumper is not clean enough.
- To remove wax or oil based release agents, you can use a 1:1 mixture of isopropyl alcohol and distilled water. As mentioned earlier, modern lubricants are water-soluble, but to be on the safe side, treatment with this solution can be done. In addition, this will provide additional general degreasing.
- Next, you need to sand the surface well with Scotch Brite with water and matting paste, each indentation, without missing the edges of the bumper.
- After sanding, dry the bumper and inspect it carefully. There should be no glossy areas left; the entire bumper should be matte.
- Plastic can accumulate a static charge, which attracts dust, so it is better to use an antistatic agent, which is part of a special degreaser for plastic. The article “preparing a new bumper for painting” describes a recipe for a homemade antistatic solution.
- Before painting, you need to apply an adhesion promoter (primer for plastic), wait 10 minutes and paint.
- There is also a painting method in which, after applying a special primer for plastic, an epoxy primer is applied. After it dries (from 30 minutes to 1–2 hours), paint is applied. Epoxy primer (see article on its use) increases paint adhesion, which, in turn, will affect chip resistance.
New bumper coated with primer
p, blockquote 6,0,0,0,0 —>
Here the situation is similar to painting new metal parts coated with primer. It is unknown what kind of primer the part was coated with. It is also unknown whether the bumper was coated with an adhesion promoter before applying this primer. You need to do a solvent test. If the primer does not dissolve, it can be prepared for painting by sanding. If the primer dissolves, it is better to remove the primer and prepare the bumper for painting in the same way as a new bumper without primer.
p, blockquote 7,1,0,0,0 —>
New bumper coated with paint
p, blockquote 8,0,0,0,0 —>
This type of bumper requires preparation for painting by sanding and degreasing. Application of an adhesion promoter (plastic primer) is not required.
p, blockquote 9,0,0,0,0 —>
Used bumper, coated with paint
p, blockquote 10,0,0,0,0 —>
- You need to carefully inspect the used bumper. Is there any damage on it? Even if there is no obvious damage, the paint may have small, barely noticeable cracks that will be visible after new paint is applied. Any damage must be repaired before painting. If there are small cracks, then the paint in this area of the bumper needs to be sanded down to the plastic and primed first with a primer for plastic, and then with a filling acrylic primer. When repairing a plastic bumper, you need to use special elastic putties (you can read more in the article “technology for puttying and painting a bumper”).
- If the old paintwork is not damaged, then it must be prepared for the application of new paint by matting and degreasing. In this case, there is no need to apply an adhesion enhancer (primer for plastic).
Unpainted plastic bumper, used
p, blockquote 11,0,0,1,0 —>
- As in the previous version, the bumper needs to be checked for damage and repaired if necessary.
- Painting such bumpers requires careful washing, since it is unknown what products might have been applied to it for protection.
- As with a new bumper that is not primed, before painting you need to apply an adhesion promoter (plastic primer), wait a few minutes, then paint.
Painting structural plastic
p, blockquote 12,0,0,0,0 —>
- The spray gun must be moved faster than when applying regular paint to avoid wet spots. The paint should not spread. This way the special paint will apply evenly and with the desired texture.
- You need to do a test spray on a piece of masking paper to determine and remember the correct speed of the spray gun.
- Allow time for the solvent to evaporate between coats. After applying all coats, allow the paint to dry for 30 minutes at a temperature of at least 20 degrees Celsius.
- Next, use gray Scotch Brite to sand off the freshly applied paint. This is necessary to remove high spots and dust from the surface, making the surface smoother, but not flat. At this stage, the surface structure will already resemble the texture of a plastic bumper.
- The next step is to degrease the sanded surface and paint it with paint specially selected to match the original color of the bumper. No preliminary application of an adhesion promoter (special primer for plastic) is required, since the paint will not be applied to “bare” plastic.
- Apply the paint in 1–2 thin or medium layers. Here you also do not need to fill the surface much if you paint with matte black paint, so you need to move the spray gun a little faster than when painting with glossy paint.
Additive for increasing elasticity
This additive can be added to primer or varnish to increase elasticity. In addition, it increases resistance to cracking during deformation, and also improves chip resistance. It is necessary to add no more than 30% of the total amount of product with hardener to primer, varnishes and two-component paints. It is better to check the percentage of addition on the product container. The primer or varnish must first be mixed with the additive, and only then with the hardener. A coating with this additive will take longer to dry. Can be used when painting a plastic bumper. In addition, the additive can be used on other body parts (hood, fenders) to increase chip resistance. Many people successfully paint bumpers without such an additive, but if you want to paint a bumper following all OEM recommendations, then such an additive is required.
p, blockquote 13,0,0,0,0 —>
Bumper painting process
The process of painting a bumper is no different from painting other body panels. You can read more about this in the article “car painting technology.” Also, it is quite possible to paint a plastic bumper with an aerosol can (see the article “Painting a car with a spray can”).
p, blockquote 14,0,0,0,0 —> p, blockquote 15,0,0,0,1 —>
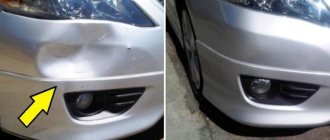
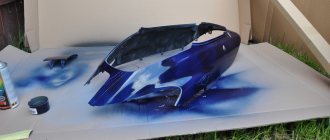
The bumper is the part of the car that suffers most often. It is most often scratched, deformed, subjected to mechanical stress, or hit in an accident. Therefore, the bumper is also most often repaired and painted. Damage to the bumper can vary. Local painting of a small scratch or chip can be done using a can of spray paint, choosing the color of the paint from the catalog. For general painting of the entire bumper, you will need a room, a spray gun and other special equipment.
Repairing and painting a bumper always begins with a thorough wash. To do this, use water with any detergent. The washed bumper is dried and the next steps proceed. Work on cleaning, stripping, grinding, priming, painting should be carried out wearing a protective mask. The room in which such work is carried out must have proper ventilation.
Tools and materials for painting the bumper
- solvent, white spirit or any degreaser; a special degreaser for working with plastic is perfect;
- primer for plastic surfaces;
- antisilicone;
- putty for plastic surfaces;
- orbital sander;
- sandpaper with grain P120, P 180, P 220, P 500, P 800;
- spray gun or spray gun;
- paint matched to tone;
- finishing varnish.
Bumper touch-up
Sometimes small scratches and abrasions may appear on the protection. Naturally, this does not require replacing the entire protection, but it does spoil the appearance of the car somewhat. In such a situation, it is quite possible to apply local painting of the bumper. In such a situation, dismantling is often not even necessary. It is quite possible to touch up the bumper without removing it. To do this, you need to very well clean the crack from dirt and use a knife to remove the cracked paint. From this point on, the entire procedure for preparing for painting will completely correspond to the process of applying paint to the entire bumper. No step should be skipped or accelerated. Paint and varnish can be applied from a spray can or with a brush.
When starting such a restoration, you need to take into account the fact that an undesirable option may result when the newly applied coating will be slightly different in color from the rest of the surface and the owner of the vehicle will end up with a stain on the bumper.
In the article, we tried to talk about the main nuances of repainting the protection of a car, and all you have to do is tune in and enjoy the work of restoring your car.
How to paint a bumper yourself: detailed instructions
Everything will depend on what the task is. Painting a new bumper is a little different from working with an old one.
How to paint a new plastic bumper
- Painting a new bumper begins with cleaning it, removing oil used during transportation, and degreasing it. For sanding, use P800 sandpaper.
- The next stage is priming. For this, a two-component acrylic primer is used. It is applied sequentially in two layers. The next layer should be applied after the previous one has dried. The top layer of primer should be more liquid.
- The next grouting of the primer is done with any sandpaper from P500 to P800 for better adhesion of the base layer of paint to the plastic. If during grouting there are places that are visible to the putty or to the plastic, these places should be covered again with a very thin layer of primer. You need to cover it 2 times. After this, the surface of the bumper is blown with compressed air.
- Degrease the surface for painting.
- Apply a base coat of paint.
- Two more layers are applied at intervals of 15-20 minutes.
- After you are convinced of the quality of the paint, you should apply a layer of varnish to add shine and completeness.
Painting and repairing an old bumper
Painting an old bumper is different in that you must first repair all damage and defects in the bumper; you may need to solder the bumper.
- The bumper must be removed from the car and washed well.
- Remove dried tar or resin. White spirit or solvent will help with this. If the resin is not removed, it will clog the sandpaper during stripping and sanding.
- Make necessary repairs.
- Use P180 sandpaper to clean the surface, removing the old paint down to the primer.
- Next, blow off with compressed air under pressure.
- Treat with anti-silicone.
- Use plastic putty to eliminate any unevenness on the surface of the bumper. It is convenient to use putty with glass fiber. This putty settles less; glass fibers act as a reinforcing base.
- Sand with P180 sandpaper and coat with finishing putty;
- Sand with P220 sandpaper;
- Prime the entire surface of the bumper with a one-component quick-drying primer;
- Sand the primer with P500 sandpaper.
- Degrease the surface;
- Paint the surface of the bumper as with a new bumper.
Useful tips when painting a bumper
- All work can only be performed with a thoroughly cleaned and washed bumper.
- There should be no drafts in the room where painting work is carried out. Dust or flies that fall on a wet painted surface will certainly ruin the entire work.
- For degreasing, use a wet cloth and then a dry one.
- It is not recommended to use heating equipment such as hair dryers to dry paint.
- It is better to start treating the bumper from the edges and hard-to-reach surfaces, and then the surfaces that are not difficult to access.
- Before starting work, you should carefully study the instructions for the varnishes, primers, and putties that you are going to use.
- If streaks and shagreen marks have formed, wet sanding with waterproof sandpaper should be applied, then treated with polish.
We can conclude that you can repair and paint the bumper yourself if there are no serious requirements for quality. It is possible to repair a small scratch or chip. In more serious cases, it is better to contact a service station.
Professionals will do this job better. Painting a bumper requires special conditions and equipment. Stripping, grouting, sanding - these jobs are dirty and require respiratory protection. Without experience and skills, an amateur will spend a lot of time and nerves on this. The painting work itself is also harmful to health and can be performed in well-ventilated areas.
Bumper painting
Painting of this part can be done using spray cans or a special spray gun. Before proceeding with the work of applying paint and varnish, you can get qualified advice from colorists on selecting the desired color. In addition, you need to know the available data on the composition of the paint, many brands of which include various types of hardeners, which quite strongly influence the speed of the drying process.
Preparing the premises
Before painting the bumper, it is very important to prepare the room, because we absolutely do not want to get grains of sand and hairs stuck in the paint. To do this, you need to remove all trash from the workshop. It is best to vacuum the immediate area and then dampen it.
Applying paint
Only after all these steps can you begin to paint the prepared bumper. It is recommended to apply paint from a distance of 35 - 40 cm, but everything is very individual and it is advisable to first check it on a different coating. How is it most convenient for you to spray the composition. This should be done according to the following algorithm:
- We thoroughly blow off the bumper again and degrease it. And literally before painting, we go over the entire surface with a sticky napkin. It allows you to remove even the smallest specks of dust.
- We apply the first layer, the so-called “spray”.
- After 15-20 minutes, apply the second final coat of paint. Sometimes it may be necessary to make a third layer. It will also need to be applied to a dry surface (after 15 - 20 minutes).
- If suddenly, during the process of applying different layers, a stuck speck of dust is discovered, then after the paint has completely dried, you can use an interlayer napkin for debris and carefully remove the problem.
Applying varnish
After the last coat of paint has completely dried, you can begin applying varnish to the bumper. The first thing you need to do is to thoroughly clean the spray gun of any remaining paint and fill it with varnish. The varnish must first be diluted. Now you can apply a thin layer of varnish. It is recommended to apply three layers, taking breaks of about half an hour. Allow at least five hours to dry the last layer.
If after complete drying you find streaks, they will need to be carefully sanded off.
When performing this stage of work, you need to pay attention to how the varnish comes out of the spray gun nozzle. There are often situations when small clots gradually begin to form at the tip of the nozzle. The problem is that they can come off during the spraying process and end up on the bumper. To prevent this from happening, the nozzle must be periodically cleaned with a brush.
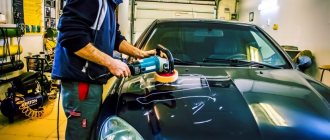
To complete the entire process, the bumper can be polished. Felt or foam rubber circles with polish are well suited for these purposes. It is better to do this a few days after completion of the work.

