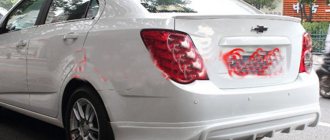
Lacetti fuel pump. Device and replacement
In this article we will consider such a unit as the Lacetti fuel pump (fuel module). We will find out the answers to many interesting questions, namely:
- description of the Lacetti fuel pump
- how to remove and replace the fuel pump from a Chevrolet Lacetti
- how to disassemble the Lacetti fuel pump
- replacing the fuel pump mesh on a Chevrolet Lacetti
- fuel level sensor
- checking the pressure regulator in the fuel line
This article will also be useful to owners of Lanos, Aveo, etc.
Answer to the question
The easiest way is to replace the sensor. Cost 300 rubles.
Some experts advise immediately changing the sensor if the car's reverse light does not light up, since it can only work when fully depressed, and when halfway pressed, it will not work.
How exactly in your case, since your reverse lights come on every other time!
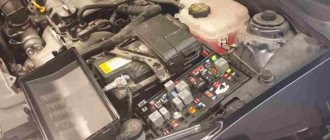
> Chevrolet Lacetti fuses and relays
Why do you need a Lacetti fuel pump?
The Chevrolet Lacetti fuel pump (fuel module) is installed in the car’s gas tank and has a capacity of at least 60 l/h. Its task is to ensure preliminary purification of gasoline, create the necessary fuel pressure on the injectors (about 4 atmospheres) and dump excess fuel back into the tank. Also ensure control of the fuel level in the tank and signal its minimum reserve balance.
It is for these purposes that the fuel module consists of an electric liquid pump, a mesh filter, a pressure regulator, a fuel level sensor with a float and a reserve signal lamp sensor. Access to the fuel module is provided from inside the car with the rear seat removed.
Replacing the Lacetti fuel pump
To remove the Lacetti fuel pump, the first step is to relieve the pressure in the fuel system. How to do this is described in detail in this article.
Disconnect the terminal from the negative terminal of the battery.
Next you need to remove the rear sofa. It is attached with only two clamps. You need to grab the sofa in the places shown in circles and sharply pull up, first in one place, and then in the second. The red arrow shows the fuel pump hatch
How to remove the rear sofa of the Lacetti
The hatch is glued with mastic, so we pry it up with a screwdriver and, overcoming the resistance of the mastic, remove it.
Note: Do not break the wires going through the hatch to the connector!
We see a connector, two fuel lines (supply and return), a retaining ring, as well as a lot of dust and cobwebs.
Garbage must be removed so that it does not end up in the tank. The easiest way to do this is with a vacuum cleaner.
Attention! The vacuum cleaner can only be used until you have removed the fuel lines and opened access to the tank. As soon as you depressurize the system, hide any power tool somewhere further away.
Disconnect the connector. To do this, move the orange latch to the side...
...and, pressing the latch tongue, remove the connector
We remove the fuel lines. To do this, press the latch and pull the fitting up
But sometimes this does not help, so it would be better to pull out the latch. Using a screwdriver, carefully pry it off on one side and use something thin to help pull it out on the other.
Here is the latch itself
After this, remove the fuel line from the fitting
Now you need to turn the metal retaining ring slightly counterclockwise. To do this, gently hit the ring with a hammer in a circle through the adapter until it disengages. You can come up with other ways to turn the ring. For example, with sliding pliers. But not everyone has them, but a hammer can definitely be found everywhere)))
Remove the retaining ring
Now we remove the Lacetti fuel pump from the tank. Just be careful not to damage the fuel level sensor with float
Since there is still a lot of gasoline left in the fuel module, it is convenient to put it in a cut-off plastic bottle for now
It is also necessary to remove the rubber sealing ring. Clean it and the seat.
Put the clean ring in place and cover the hole in the tank so that no debris gets in there and the interior does not stink too much while we disassemble the fuel module
We pour the remaining gasoline from the module into our cut-off bottle.
Lacetti fuel level sensor
A fuel level sensor and a reserve fuel remaining indicator sensor are installed on the outer part of the fuel module housing.
To replace the Lacetti fuel level sensor, simply slide it along the guides and remove it from the body. To replace the fuel reserve warning lamp sensor, simply remove it from the holder. And, of course, connect the wires instead of the old ones.
Replacing the Lacetti fuel pump mesh
Most often, the fuel module must be disassembled to replace the fuel pump mesh filter.
Pressing the latch of the wire block, turn it off by sliding it down
We do the same with the second block, only move it up
Unsnap the latches around the body
We slightly remove the fuel pump holder from the housing glass and remove the wires from the groove
Then the pressure regulator does not allow it to come out. You need to pry it out a little with a screwdriver
We take out the fuel pump holder from the housing and are horrified by what we see
There is a lot of garbage in the glass, including a dead spider.
We wash the glass and set about replacing the Lacetti fuel pump mesh.
Use a screwdriver to pry up the mesh and it easily comes off the fitting and pump pin
Here is the old and new fuel pump mesh
We put on a new one, making sure that it sits all the way.
Lacetti fuel pressure regulator
If desired, you can check the approximate serviceability of the pressure regulator in the fuel system. To do this, you can use a compressor by connecting it to the thin fitting of the fuel module
The regulator should maintain a pressure of 3.5-4 atmospheres. If this pressure is exceeded, it should open and release the excess through its valve.
In this case, the regulator can be considered working
Conclusions. The Chevrolet Lacetti fuel module has a simple and fairly reliable design. The module elements are not repairable. If the fuel pump motor, pressure regulator or sensors fail, it will most likely not be possible to restore their functionality. But you can change these elements yourself without buying an assembled fuel module, because it is many times more expensive than the individual components. Moreover, the pump itself can be purchased from VAZ cars, which have lower numbers on the price tag than the original pump.
Here are a few threads from our forum related to fuel pump replacement:
And if you change the fuel pump mesh in time and do not operate the car “on light,” which can cause the fuel pump to overheat, then the fuel module will serve you well for a very long time. The main thing is to remember to take precautions.
I also recommend treating the fuel pump connector with a contact protector.
Why don't the lights light up?
If the clearance lamp does not light up, the car needs urgent inspection and troubleshooting.
The reasons may be the following:
- – Bulb burnout. If only one light does not light, for example, the rear one, first check the lamp and replace the burnt one with a working one. As a last resort, use a similar lamp from another headlight.
- – Fuse blown. If the left side lights at the front and rear stop lighting, the probable cause is hidden in the mounting block - in the fuse that is responsible for the left side lights, interior, license plate and instrument panel lighting.
- – Oxidation of contacts. Inspect the fuse box. The reason may be oxidation, disconnection and poor contact of the pads. To eliminate the problem, the contacts are cleaned and firmly connected.
- – Oxidation of contacts in the size lamp socket. To fix the problem, rotate the lamp in the socket 3-5 times, which will remove the oxidized layer and restore contact. Clean the surface with sandpaper.
- – Failure of the headlight switch button. The reason, if the marker does not light up, may be a malfunction of the lights switch due to loss of contact or oxidation of the wire. It needs to be cleaned, secured and checked.
- – The size fuse is switched on. The fuse may constantly burn due to a weak contact in the block or a short circuit. Take a 12W light bulb and connect 2 wires to it. Remove the fuse and connect the wires from the lamp to its contact areas. If it lights up, the cause of the malfunction is a short circuit. To find out exactly where the short is, unplug and check everything that the fuse is responsible for.
The most common reasons why the dimensions stop lighting are listed. If after these manipulations the problem cannot be corrected, contact the service center for inspection by qualified specialists.
Where to start the inspection if the lights on the VAZ 2109 do not light up? Lighting will always remain a hot topic, as it is a matter of safety, especially while driving. Everyone is pleased when all the lights in the car are on, the dashboard is fully illuminated, and the halogens and low beam illuminate the path as much as possible.
In such cases, the ride becomes quiet, calm and relaxed, but how everything changes when at least one light bulb burns out. This causes inconvenience and emergency situations, and you can also get a fine from a road service employee.
Possible problems and solutions
The dimensions on the VAZ 2109 do not light up, then look for the reason in the wiring.
Even experienced drivers recommend carefully checking the functionality of all devices and components before leaving. The nine is no exception, in which optics can often fail for various reasons, including:
- Broken wire contact;
- The lamp has burned out;
- The board has burst.
For prompt diagnostics, it is necessary to have those responsible for their electrical unit. So, remember the two seven-amp fuses under the marking:
- F10:
responsible for the light dimensions, both front and rear, illumination of the instrument panel, cigarette lighter and license plate; - F11:
attached only to the right side of the rear marker.
So, if F10 burns out, it will be noticeable, since the entire instrument panel will go out, but when F11 burns out, you won’t notice the problem.
To diagnose, you need to open the hood and find the F11 we need in the mounting block. If everything is normal with the fuse, then look for the K4
- This is a lamp relay. Often it tends to burn out. In the mounting block it is easy to find by the black circle with the multiplication sign inside. Old owners, in order not to suffer, install metal jumpers.
Another typical reason
that the dimensions are acting up, there may be banal oxidation of the terminals in the mounting block. I’ll explain why: structurally, it is located close to the drain hole, so that in good rain or downpour, water and leaves can get in, which will lead to a short circuit. Just a matter of time and nothing more.
The rubber cover is not durable, and after a couple of years it will lose its tightness, and the drain hole will become clogged with debris.
Possible causes are damage to the wiring, but the solutions are strictly outlined: either look for it yourself, but provided that you understand the essence of the matter, or contact a car service technician. But it is still necessary to eliminate the cause, since this is, first of all, one’s own safety and the safety of the passengers whom the driver is transporting.
If the car ages
, there is damage to electrical wiring throughout the body due to natural aging and the negative influence of weather conditions. Negative temperatures cause the winding to lose its elastic functions and the wire simply breaks in half.
For any car repairs, especially electrical components and everything connected with it, it is highly advisable to remove the negative terminal from the battery. Otherwise, you can end up in a completely confusing situation. For example, if the dimensions and instrument lights on a Chevrolet Lacetti do not light up, the logical connection between them cannot be traced. But this is only at first glance.
We remove the fuel pump on a Chevrolet Lacetti for replacement: part numbers and cost, replacing the mesh
Ignoring simple rules of auto hygiene can be costly. For example, a nondescript mesh that costs a couple of hundred can really ruin a family budget. This very mesh, a coarse fuel filter, is located in the Chevrolet Lacetti fuel pump module. How to remove it, how much the fuel pump module and electric motor cost, how to replace the mesh and, most importantly, when it needs to be done, we’ll find out right now.
Fuel pump on a Chevrolet Lacetti
The location of the fuel pump is classic for injection cars.
Like all modern budget cars, the Chevrolet Lacetti is equipped with an electronically controlled injection system.
The fuel pump, which is required to maintain high pressure in the system, operates in difficult conditions - only gasoline is responsible for its lubrication and cooling. The user manual for some cars (Daewoo Nexia, for example) states that operation in the warm season with a fuel level in the tank lower than a quarter is extremely undesirable. Otherwise, the pump motor overheats and there is a high probability of failure.
Causes of failure
There is not a word about this in the manual for the Chevrolet Lacetti. In addition, knowing the quality of our fuel and the amount of dust on the roads, the maintenance schedule for the gas pump can be safely halved. It's all about the dust and solid particles contained in gasoline. They quickly clog the mesh of the pump inlet pipe, and because of this, it works under enormous load, trying to create the necessary pressure in the power system.
Symptoms of a fuel pump failure
As a result, we have the following symptoms of incorrect operation of the fuel pump in the Chevrolet Lacetti:
- the car jerks when driving at high speeds;
- noticeable dips appear during acceleration;
- engine starting is difficult;
- There is a drop in power and a depletion of the working mixture.
The latter can lead to failure of the catalyst , unstable operation of the control electronics, and the occurrence of a lot of errors in the on-board computer.
To avoid this, you need to perform maintenance on the fuel pump at least once every 20 thousand mileage (according to GM regulations - 40 thousand), otherwise the entire fuel module may need to be replaced.
Chevrolet Lacetti fuses (description): characteristics and photos
I came across an article describing electrical problems and with tips on failed fuses. It helped me. Perhaps it will help someone else.
Cabin fuse box in Chevrolet Lacetti
F2 (10 A) - electronic engine control unit (ECU), automatic transmission control unit, automatic transmission selector position sensor, speed sensor, generator, intake manifold solenoid valve, fuel pump relay winding, ignition coils, main relay winding.
F3 (15 A) - emergency switch.
F4 (10 A) - instrument panel, brake light switch, automatic air conditioning, electric damper drive, power steering, warning signal. If your dashboard instruments stop working after removing and installing the glove compartment (for example, when replacing the cabin filter), it could short circuit occurs, check fuse F21 in addition to this fuse.
To avoid a short circuit, when replacing the filter and removing the glove compartment, you need to remove fuse F21 or disconnect the terminal from the battery. Check the wires and contacts in connector C202, which is located in the left front fender, to the left of the driver’s feet. To get to it, you need to remove the driver's sill trim and the corner fender panel.
F5 - not used.
F6 (10 A) - relay for the air conditioning compressor, headlights, heated rear window, power windows.
To avoid problems with the air conditioner in the spring, in the winter sometimes turn it on with a warm engine, driving the car into a warm place (in the cold it will not turn on due to lack of gas pressure). The problem of freon leakage is common among Lacetti owners. Therefore, when servicing or repairing, be sure to check the entire system and connections for leaks.
The leak may be due to leakage of the filling valve located under the protective cap. By pressing this nipple valve, you can check the pressure; at normal pressure, the gas should suddenly begin to come out with a loud hiss. If the pressure is low, refueling is required. If the light on the A/C button comes on but the air conditioning does not operate, check the connector near the air conditioning clutch.
The coupling is located approximately under the air filter, the connector has two wires. The contacts in it may have oxidized, or the wires may have broken. If the lamp on the A/C button does not light up or lights up only once, check the contacts of this button and the serviceability of the board to which it is attached. When the air conditioner is turned on, the inner part of the clutch should rotate, just like the outer one.
If the rear window heating does not turn on, check, in addition to this fuse, fuse Ef7 and relay K10, which are located in the block under the hood, as well as the terminals of the glass heating elements at the rear pillars and the absence of broken threads of the heating elements. If a broken thread is detected, it must be sealed with conductive varnish or glue, which is sold in car dealerships.
Check the serviceability of the heating button and the control board on which it is located. This board is a very weak point, because... Usually, over time, contacts disappear or become unsoldered, tracks break, and microcracks appear. In this case, resolder the tracks and restore all contacts.
To get to the board, you need to remove the central panel (more convenient with the glove compartment removed), as well as the panel on which the heating and ventilation control knobs are located. Electrical diagrams of this board: Electrical diagram of the heating and air conditioning control buttons Connection diagram of the A/C air conditioning button on the central panels
https://www.youtube.com/watch?v=ytcopyright
Read more: Will “hydrogen trains” be able to rid us of diesel fuel?
If the power window in the driver's door does not work, also check fuse Ef14 in the block under the hood, fuse Ef9 in any other door, as well as relay K8 in the block under the hood. The glass may not rise or fall due to distortion and friction against the rubber guides; in this case, try lubricating them with silicone grease or WD-40.
The window lift motor or its brushes could also have failed (when replacing the brushes, you need to file a new suitable brush, since brushes of this size are usually not sold). To get to the mechanism parts, you need to remove the trim of the desired door. Check the gear, cable and the absence of jamming of the mechanism.
If, when you press the open/close button, no voltage comes to the window lift motor, the wires between the door and the body may have broken, check them by removing the protective corrugation. Also check the control unit, its connectors and wiring, located in the driver's door. Electrical wiring diagram for power windows: Wiring diagram for power windows in a Chevrolet Lacetti
F7 (20 A) - heater, electric drive of recirculation and air direction dampers, high speed of the heater fan, automatic control of the air conditioner. If the heater does not blow hot air and only cold air comes out of the holes, the damper cable has most likely come off its mounting. To fix the problem, you need to remove the glove compartment and install the cable in place.
Also check the antifreeze level in the tank; if the level is low, an air lock could form in the system. If the stove does not work at all, check, in addition to this fuse, fuse Ef3 in the engine compartment. The fan motor may have burned out; this can be checked by applying voltage directly. Otherwise, the problem may be in the wiring and connectors.
F8 (15 A) - electric mirror drive, folding mirrors, sunroof control (if equipped). If the electric adjustment or electric folding of the side mirrors does not work, also check the fuses in the engine compartment Ef19 and Ef25. If the mirrors are not adjustable in winter, water may have gotten into them and frozen, warm them up and try again.
Check the wires in the corrugation between the driver's door (since it contains control buttons) and the body for breaks, and the connectors for contact. If both mirrors are not adjustable in any direction, check the switch in the driver's door and its contacts; there should be a minus on pin 6, and plus 12V on pin 8.
F9 (25 A) - front and rear windshield wipers, washers. If the wipers do not work, check the steering column switch, gear motors and their brushes, as well as the wiring. In winter, moisture could get into the motors and freeze inside. Dirt and foreign objects may also have gotten into the wiper mechanism; disassemble and clean them. In hatchbacks, the rear wiper may not work due to a broken wire between the body and the trunk door.
F10 - not used.
F11 (10 A) - ABS. If the anti-lock brakes stop working and the lamp of the same name on the dashboard lights up, the problem may be in the brake mechanisms, front wheel rotation sensors or in the ABS control unit. The front wheel sensors need to be cleaned of dirt by removing the front wheels one by one and checking for breaks in the sensor wires. In other cases, diagnostics will help determine the cause.
F12 (10 A) - immobilizer, rain sensor, alarm. If your car stops starting, the problem may be with the immobilizer. In addition, check fuse F24. The immobilizer detects the stored chip key; if this does not happen, it blocks the engine from starting. When replacing keys, the code for the new chip key is flashed into the electronic unit, only after which the immobilizer works properly.
F13 (10 A) - automatic transmission control.
F14 (15 A) - hazard warning light. If when you press the button the hazard light does not turn on, check the serviceability of the button, its contacts and wires. If the button backlight does not work, check the condition of the lamp and fuse Ef28 in the block under the hood. If the hazard warning lights do not flash, check the breaker relay 2 located on the bracket under the dashboard on the driver's side.
F15 (15 A) - alarm control unit.
F16 (10 A) - diagnostic connector. The diagnostic connector is located under the steering column, on the back of the panel.
F17 (10 A) - radio, clock. If the radio does not turn on, also check fuses F23 and under the hood Ef1. Then check the contacts in the connectors and wiring, and also measure the voltage at the power contacts of the radio; if it is not there, most likely there is a break in the wiring. If, after removing the terminal from the battery, the radio is locked and asks to enter a code, it can only be entered 3 times, then you need turn off the battery power again.
To enter the code, you need to connect the battery, turn on the ignition, turn off the ignition (without removing the key from the lock) and then enter the code. First enter number 2 - the region code for radio settings, then 4 digits of the code itself. The code must be indicated on the documents included with the radio or in the glove compartment on the back of the lid.
If you cannot find the code anywhere, try the following options: 3462, 4136, 2151, 2152, 2153, 2346, 2453, 2654, 3116, 4314, 3265, 3346, 3451, 4853, 5241, 5253, 5312, 4316, 4362, 4513 , 4524, 6234, 1435, 4256, 4216, 4356, 1157, 1156, 1165, 1325, 2145, 3221, 3241, 3251, 5436, 5445, 5624, 5813, 65361, 6451, 6452, 6645, 8253.
F18 (15 A) - additional 12 V socket. If it does not work, most likely the wires are not connected, there is a break or there is no contact in its connector. If the socket stops working after connecting some device to it, most likely there is a short circuit, check this fuse, the contacts inside the socket and the wiring.
Selecting a fuel pump and module
Replacing the entire fuel module is rarely necessary.
It is made in a plastic case, inside of which there is an electric fuel pump, a gasoline coarse filter to protect the pump from solid fractions, a fuel level sensor with a float, and a low fuel level sensor in the tank. In short, there are not many reasons to completely replace the module.
Module article number
By the way, the price of an assembled module ranges from 4 to 6 thousand rubles, depending on the manufacturer. The stock module (catalog number PDCM008) from the RMC company costs 4,560 rubles.
Fuel pump part numbers
Most often the fuel pump itself fails.
Bosch fuel pump
Fortunately, several options are suitable for the Lacetti, varying in cost. However, when choosing, you need to take into account that each of the pumps has its own very important characteristics - maximum pressure and performance. For 1.4 and 1.6 liter Chevrolet Lacetti engines, the regulatory pressure developed by the pump should be 3.8 atm, and the productivity should be 60 l/hour .
Based on this, several options can be considered:
- Bosch 0 580 454 001 , productivity 110 l/h, too much for the Lacetti;
- Bosch 0 580 453 453 , productivity - 60 l/hour, just right;
- Bosch 0 580 453 140 - 90 l/h, with a reserve.
The pressure in all these pumps is about 5 atm, but the excess is removed by pressure reducing valves in the pump itself and in the fuel rail.
The price of these pumps is approximately the same - about 2–2.3 thousand rubles. There are more expensive models, but practice shows that overpayment is not justified.
Analogs
Pekar gasoline pump with packaging.
Pekar gasoline pumps have proven themselves to be quite good. from VAZ-2112.
Mesh filter article
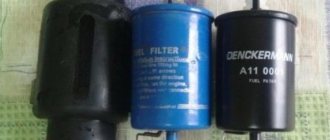
As for the coarse filter mesh, the best options both in price and quality are FPS116, manufacturer ICRBI, article number HS110051, catalog number 5300301 at a price of 160 rubles, or FPT-05 (200 rubles).
Analogue Filter Master CT10
Chevrolet Lacetti Snezhka v 2.01 › Logbook › Reverse gear does not light up (resolved)
Hello... Having left for work in the morning, and it was early dark at 5:30 in the morning, I sat down, warmed up a little, as usual, and was ready to back up, when I noticed that the reverse light didn’t seem to be on. There was no time to figure it out and I left. In the evening, upon arriving from work, I stood with my back to a snowdrift and still realized that the rillie did not turn on the reversing lighting. Then I came up with a pattern: it doesn’t work when it’s cold, but when it’s hot it’s all humming... Having used the search on D2, I came to the conclusion that most likely the reverse sensor had failed... I went and got an inexpensive carburetor cleaner (I took whatever was available) and upon arrival I started removing This sensor can be unscrewed with a 19 key, just pull it off, then go by hand. Here is its location...
There is a wire with a blue chip going to it
I brought this limit switch home and, having pressed on it, I realized that it was not in order (I didn’t eat much) literally 5 times I pressed it and came to the conclusion that this way you can’t really clean it.
It’s hard to stuff inside the sensor
I took isopropyl alcohol, brushed it over the external contacts and literally poured it drop by drop from above, pressing at the same time so that the liquid would go inside (a lot got in)
Don’t do it) I sat and watched the switch and pressed this limit switch as if it were an anti-stress))) Well, in the end, he now walks so easily and smoothly. I installed everything and it works. I know that a temporary solution is possible and that it’s easier to order and costs a penny: not the original 100 versus the 280 original. That's not the issue, I wanted to understand if this is the problem at all. Now I’m sure that this is the case, and if it dies, I’ll install a new one) then I found out that it was possible to check the fault in another way by simply inserting a jumper into the chip, thereby closing the contacts) And in the near future the timing belt will be replaced. There are still spare parts for this set) Thanks to maxx096 for help with identifying spare parts)
While flipping through d2, I showed interest in the top Lacetti tab... I chose my city and it turned out that I was in first (smiled)
Thanks to everyone for your interest in this post)
Replacing the fuel pump and mesh filter on a Chevrolet Lacetti
The replacement procedure is not particularly complicated and can be done independently. Only a standard set of tools is useful for the job. The replacement process occurs according to the following algorithm:
- Relieve the pressure in the fuel rail. To do this, you need to remove the fuel pump fuse Ef18, it is located in the engine compartment, and start the engine. As soon as all the fuel is used up, the engine will stall on its own.
Fuel hoses and power.
We take the fuel pump out of the tank.
The latches are marked with arrows.
The filter mesh is marked with an arrow.
When replacing the fine mesh filter of the fuel pump, you need to navigate on site. If the mileage of the car is high, then most likely this replacement is necessary.
Old and new fuel pump filter mesh
Video about replacing the fuel pump mesh
Where is the Chevrolet Lacetti fuel pump located?
The Chevrolet Lacetti was equipped with four engines - 1.4, 1.6, 1.8 and 2.0-liter engines with a power of 96, 109,122 and 132 horsepower. Of these, only 1.6 and 1.8 liters were officially sold in Ukraine. The type of engine had no effect on the design of the fuel pump
Almost all injection fuel systems, especially on global budget cars, are arranged according to the same principle - a fuel module, which includes an electric fuel pump, a fuel level indicator sensor, a coarse (and sometimes fine) filter and a fuel supply system to the highway. This is exactly how the fuel module on the Chevrolet Lacetti is designed.
Chevrolet Lacetti power system diagram, tank and fuel pump
It is located directly in the gas tank under the rear seat, where, accordingly, there are also a fuel pump, a coarse filter mesh, and a fuel level indicator sensor. To get to it, you need to remove the rear seat cushion.
Finding the cause and restoring the light
Rear fog lamp fuse.
What do the glove compartment and rear foglights have to do with it? The 15-amp fuse F21 is connected to the glove compartment lighting and the battery saving mode module. If a short circuit occurs in the circuit, it is this fuse that blows, which supplies power to the main battery block fuse.
This fuse is marked ef1 (rated 30 A) and is installed in the mounting block under the hood of the car. In addition, it protects circuits F13, F14, F15, F16, F21, F22, F23 and F24, and these circuits contain the side lights and dashboard lights.
Check algorithm for Chevrolet Lacetti
Therefore, to troubleshoot the problem we do the following:
- Checking to see if the glove box light is working . If it doesn’t work, we disassemble the glove compartment (after having removed the negative terminal from the battery), connect the power wires to the switch and the light bulb, if necessary, look for a break or short circuit and fix the problem.
First, look at the glove compartment lighting.
We check fuses F4 and F6 for integrity.
There is also a fuse box under the hood.
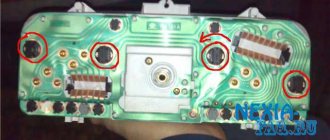
Rear side of the instrument panel.
How to remove and change the fuel pump of a Chevrolet Lacetti
The fuel pump works under damn tough conditions. Besides the fact that our gasoline is not always pure, like the tear of a Japanese virgin, the electric motor of the pump must be lubricated with this gasoline and cooled with it. Therefore, we highly recommend not allowing the tank to be more than ¾ empty.
To replace and diagnose the fuel pump on a Lacetti, you will need a standard set of tools, a new pump, and a mesh filter, which is the first to receive sand and slag that has entered and accumulated in the tank. We'll also stock up on rags and work outdoors, at least in a well-ventilated garage. Gasoline doesn't like jokes.
How to relieve pressure in the Lacetti fuel system
First, let's relieve the pressure in the system. This is necessary so that when the fuel line from the module is disconnected, gasoline does not wash you and the entire interior. The pleasure is so-so. To relieve pressure in the Chevrolet Lacetti's power system, you can go in several ways:
- We remove the fuel pump fuse, it is marked according to the diagram ef18 .
The same fuse that is under the hood
- Remove the fuel pump relay.
- We remove the wiring harness block from the fuel module.
Whichever is more convenient for you. Since you will still have to remove the seat, it is better to remove the block from the pump. We remove the seat cushion, remove it from the passenger compartment, after which we see the hatch in the floor pan.
How to replace a Chevrolet Lacetti fuel pump
- We tear off the pump hatch from the sealant with a sharp knife around the perimeter and remove it.
- We see the connected fuel lines and terminal block. We remove it and start the engine. It will idle for about 10-30 seconds and die. The pressure has been released.
- Now we proceed to dismantling the fuel module.
- Remove the fuel line from the fittings by pressing the lock.
- Carefully rotate the locking washer, tapping the end of the cutout.
- Carefully remove the fuel module.
- We drain the remaining fuel from the pump.
- Remove the float and fuel level sensor by disconnecting all wires from the level warning lamp sensor.
- We squeeze out the plastic clips and retract the latches.
- We take out the pump with the mesh.
- Remove the mesh filter.
- The pump can be replaced. For installation, it is advisable to use the original fuel pump. Its catalog number BOSCH F 000 TE1 440, price is about 1300 hryvnia.
We install a new fuel pump and strainer (penny Arirang CT10 ).
We assemble and install the fuel module in the reverse order. Good luck to everyone and clean gasoline!
Relay and fuse diagram for Chevrolet Lacetti under the hood
Mounting block under the hood
Single article number for all relays: 96190187
| Number on the diagram | Name | What is he responsible for? |
| 1 | ILLUMINATED ION RELAY | Instrument lighting relay |
| 2 | HORN RELAY | Horn relay |
| 3 | MAIN RELAY | Main relay or ignition relay |
| 4 | HEAD LAMP RELAY | Headlight unit |
| 5 | FRT FOG RELAY | Fog lamp relay (FTL) |
| 6 | A/C COMP RELAY | A/C compressor clutch relay |
| 7 | FUEL PUMP RELAY | Fuel pump (fuel pump) and ignition coil relay |
| 8 | POWER WIN DOW RELAY | Power window relay |
| 9 | ELEC FAN LO RELAY | Engine Cooling Fan Relay (Low Speed) |
| 10 | DEFOG RELAY | Heated rear window relay |
| 11 | ELEC FAN HI RELAY | Engine Cooling Fan Relay (High Speed) |
| Number on the diagram | Name | Protected circuit | Amperage, current in A |
| A | Tweezers | — | — |
| Ef1 | WATT MAIN | Hazard alarm, anti-theft control unit, diagnostic connector, rear fog lights, clock, air conditioning system, air conditioning switch, audio system, immobilizer, automatic transmission control unit | 30 |
| Ef2 | ABS | ABS control unit, ABS control unit | 60 |
| Ef3 | BLOWERMOTOR | Air conditioning fan | 30 |
| Ef4 | IGN-2 | Electric windows, electric rear view mirrors, starter | 30 |
| Ef5 | IGN-1 | Fuel pump switch relay, engine control unit, exhaust gas recirculation valve, ignition system, fuel pump, evaporative emission canister purge valve, engine cooling fan | 30 |
| Ef6 | ELEC FAN LO | Engine cooling fan (low speed) | 20 |
| Ef7 | DEFOG | Heated rear window | 30 |
| Ef8 | ELEC FAN HI | Engine cooling fan (high speed) | 30 |
| Ef9 | POWER WINDOW | Power windows (except driver's door) | 20 |
| Ef10 | DIS | Fuel pump switch relay, electronic engine control unit, exhaust gas recirculation valve, ignition system | 15 |
| Ef11 | ECM | Main relay power circuit | 10 |
| Ef12 | HEADLAMP | Headlights, instrument and control lighting | 25 |
| Ef13 | STOP | Brake signal | 15 |
| Ef14 | DR'S P/WDO | Power windows (driver's door) | 20 |
| Ef15 | H/L HI | High beam headlights | 15 |
| Ef16 | HORN | Sound signal | 15 |
| Ef17 | A/C | Air conditioning compressor | 10 |
| Ef18 | FUEL PUMP | Fuel pump power supply circuit | 15 |
| Ef19 | PASS F/BOX | Instrument cluster, horn switch, power folding mirrors, dome light, interior light, trunk light, trunk lid open sensor | 15 |
| Ef20 | H/L LO LH | Low beam (left headlight) | 10 |
| Ef21 | EMS | Evaporative emission canister purge valve, heated oxygen sensor, engine cooling fan | 15 |
| Ef22 | INJECTOR | Injectors, exhaust gas recirculation system | 15 |
| Ef23 | IL LH | License plate lights, hazard warning lights, tail light, block headlight (left side) | 10 |
| Ef24 | FOG | Fog lights | 15 |
| Ef25 | WORLD HEAT | Electric drive and heated rear view mirrors | 10 |
| Ef26 | DOOR LOCK | Central locking system | 15 |
| Ef27 | H/L LO RH | Low beam (right headlight) | 10 |
| Ef28 | IL RH | License plate lights, hazard warning lights, tail light, block headlight (right side) | 10 |
| Ef29 | SPARE | Spare | 10 |
| Ef30 | SPARE | Spare | 15 |
| Ef31 | SPARE | Spare | 25 |
Read more: Bosch PFS 3000-2 description and technical specifications
| Number on the diagram | Name | Protected circuit | Amperage, current in A |
| F1 | AIRBAG | Electronic airbag control unit | 10 |
| F2 | ESM | Electronic engine control unit, electronic automatic transmission control unit*, generator, vehicle speed sensor | 10 |
| F3 | TURN SIGNAL | Hazard warning switch, direction indicators | 15 |
| F4 | CLUSTER | Instrument panel, electronic low beam*, horn, brake light switch, electronic variable power steering*, air conditioning switch* | L0 |
| F5 | — | — | — |
| F6 | ENG FUSE | Air conditioning compressor relay, heated rear window relay, power window relay, headlight relay | 10 |
| F7 | HVAC | Air conditioning fan switch relay, air conditioning switch, climate control system* | 20 |
| F8 | SUNROOF | Electric mirror switch, electric folding mirrors, electric sunroof (optional, not available on all cars) | 15 |
| F9 | WIPER | Wiper gear motor, wiper operating mode switch | 25 |
| F10 | HANDS FREE | 10 | |
| F11 | ABS | ABS control unit. ABS executive unit | 10 |
| F12 | IMMOBILIZER | Immobilizer, electronic anti-theft alarm control unit, rain sensor | 10 |
| F13 | those | Automatic transmission control unit (for cars with automatic transmission) | 10 |
| F14 | HAZARD | Hazard switch | L5 |
| F15 | ANTI-THEFT | Electronic anti-theft alarm control unit | 15 |
| F16 | DIAGNOSIS | Diagnostic connector | 10 |
| F17 | AUDIO/CLOCK | Audio system, clock | 10 |
| F18 | EXTRA JACK | Additional socket | 15 |
| F19 | CIGAR LIGHTER | Cigarette lighter fuse | 15 |
| F20 | BACK-UP | Reversing light switch, automatic transmission mode selector* | 10 |
| F21 | REAR FOG | Relay for turning on rear fog lights, relay for illumination of instruments and controls, side lighting | 15 |
| F22 | ATC/CLOCK | Clock, climate control system*, air conditioning switch* | 15 |
| F23 | AUDIO | Audio system | 15 |
| F24 | IMMOBILIZER | Immobilizer | 10 |
Replacing the Chevrolet Lacetti fuel pump
Chevrolet Lacetti cars are equipped with a non-separable fuel module, which ensures fuel supply through the system. If a malfunction occurs in one of the components of the fuel pump, it will have to be replaced completely as an assembly. The need for replacement may be caused if the engine control system generates an error or if the operating fuel pressure does not match.
To carry out the operation of replacing the fuel module yourself, you will need a sealant and a multimeter. Before you begin replacement, study the safety rules for work related to the engine control system.
Required tools and materials to replace the fuel filter
In order to successfully replace the fuel filter, you need the tools and materials from the table below.
Table - Tools and materials required to replace the fuel pump
| Tools and materials | Note |
| Socket or wrench | To unscrew the lock |
| Pliers | Can be replaced with pliers |
| Screwdriver | Flat blade |
| Rags | For cleaning the work surface |
We diagnose the fuel module of a Chevrolet Lacetti car
Prepare your vehicle for diagnostic and replacement operations.
- Turn on the ignition and listen to how your car’s fuel pump works; after turning off the ignition, it should still work for a couple of seconds.
- If you find that the pump is not working, check the EF 18 fuse. If the fuse is faulty, replace it and repeat the diagnostic process. If the fuse has not blown, but is about to do so, there may be a short circuit in the fuel pump circuit that needs to be located and repaired.
- If the fuse is good, check the pump fuel relay; if it is faulty, replace it.
- If the relay is working, separate the block with wiring harnesses from the fuel pump and apply a short-term voltage of 12V to the outputs of block 2, apply a negative charge to it, and 3, apply a positive charge to it. If the fuel pump is faulty, replace the fuel module assembly.
- If the electric fuel pump is working properly, check its power circuit.
The right headlight does not light up - Chevrolet Lacetti Electrics Forum - AutoPeople
How to turn off the dimensions? With them, according to the idea, the neighbor will go out, first I adapted what was available, a wire with a fuse. Zoom wire with a fuse as a size switch And one day I was in a hurry, there was no time to pull the fuse, I turned off the car, pulled the key out of the ignition, opened the door and... everything went out.
Imagine my joy when I found out that the Chevrolet Lacetti hatchback does not have low beams on; you don’t have to poke the fuse switch. F11 10 A - ABS. If the anti-lock brakes stop working and the lamp of the same name on the dashboard comes on, the problem may be in the brake mechanisms, front wheel rotation sensors, or in the ABS control unit.
Replacing the fuel module on a Chevrolet Lacetti
Prepare the vehicle for the operation of replacing the fuel module, while ensuring the safety of the work.
- Turn off the car and remove the ignition keys from the lock. Raise the hood and disconnect the positive battery terminal, this will be necessary to avoid a short circuit during the operation. In the same way, reset the “brains” of the vehicle. Relieve pressure in the fuel line.
- Remove the rear seat. Grasp its front corner with your hands, first on the left, then on the right, and with sharp movements pull the cushion up to release the seat lock. For more comfortable access, fold the carpet on the floor forward.
- Now that the seat has been removed, there will be a plug in front of you that covers the hole in the gas tank, you can begin to remove it. It is tightly fixed using bitumen mastic; professional vibration insulation is produced by analogy. Carefully trim it with a knife or pry it up around the perimeter using a flathead screwdriver. Move the hatch cover to the side, do it very carefully so as not to damage the block with the wiring harnesses from the fuel pump.
- Disconnect the chip that goes to the power supply. To begin, press out the orange fuse, then press the tab on the chip and pull it out of the plug of the electric fuel pump. Thus, separate the block with the wiring harness from the fuel pump.
- Disconnect the fuel lines. Squeeze the stoppers and separate the tip from the discharge pipe. To do this, use your fingers to squeeze the petal-shaped clamp located at the bottom of the plastic end cap on the fuel line and pull it up.
- Remove the fixing ring. Remove the locking lock that secures the fuel module. To remove it, use a pair of flathead screwdrivers, press them into the lock openings and turn the locking ring counterclockwise.
- Prepare a container in advance to drain the remaining gasoline from the removed fuel pump cup.
- Tilt forward and remove the module assembly from the fuel tank. Immediately lower the fuel pump into the prepared container to ensure that the remaining gasoline is collected. Next, you can safely inspect the fuel module.
- It is advisable to cover the hole leading to the gas tank with the plug that you just removed, while taking care that gasoline does not get on the chip with the wires. There is a rubber sealing gasket, which, when in contact with gasoline, can increase in volume up to three times. If you do spill gasoline on it, remove the sealing ring. An unsuitable O-ring will require replacement.
- Clean the edges and manhole cover of any old sealant or traces of mastic. Replace the fuel module assembly, and then reassemble all the removed parts in reverse order. The tips on the pipeline will have different diameters; it will correspond to the fittings on the fuel module. Secure the hatch cover to the floor using sealant. It is possible that the fuel strainer of the fuel pump will need to be replaced, in which case you will have to disassemble the module and replace it.
