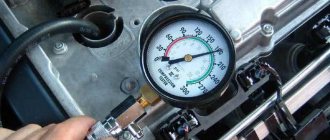
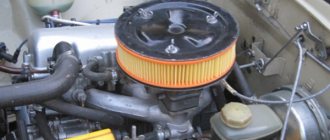
Many manufacturers of foreign cars, targeting the sale of their cars on the Russian market, offer models with an installed autonomous preheater for the engine and interior. This option is especially valuable in regions with a long winter operating season. Those motorists whose cars are not equipped with a factory engine pre-heater should not be particularly upset. Buying it and installing it on any make of car is currently no problem in any region of the country. The more pressing question here is how effective this equipment is and whether it is worth the costs required to purchase and install it.
This is why you need an engine pre-heater in winter.
DIY engine heater
An engine heater is necessary for every car in order to start without problems in any frosty winter. You can buy a factory heater and install it on your car, but if you don’t have enough money for a factory one or you want to make an engine heater yourself, you will need special skills and materials. In order to make a good heater with your own hands, you will need the following components. 12 mm gun casing, glow plug, relay, copper wires and this will probably be enough. First of all, you will need to drill a hole in the side wall of the sleeve; you will also need to make a hole in the bottom in which the thread for the candle will be cut. After which the sleeve is attached to the suction pipe. This design is installed in the car tank and a wire with a voltage of 12 volts is supplied to it. The operation of such a homemade heater is that voltage is applied to the spark plug installed in the sleeve, which gradually heats it up, and the spark plug itself already heats the fuel in the car tank, which is supplied to sleeve through the suction pipe. After installing such a system, you don’t have to worry about your car not starting at low temperatures. Now you can start your car in any case, even if the temperature outside is below 30 degrees below zero. If the temperature is not very low, try to start your car without turning on this system, since with frequent use and at not very low temperatures it may break down. To protect this system, felt materials are used, which are placed on the manufactured structure. Before starting a homemade heater, you need to check it very carefully; it must work very clearly and accurately. This heater cannot be used with water; install it only in combination with antifreeze. Carefully check the cooling system; there should be no sediment in it. You can turn on the heater only when the engine is not running, as otherwise a breakdown may occur after which it will be very expensive and time-consuming to restore your engine. In order to avoid making mistakes and causing irreparable damage to your car, follow certain safety rules. If your car has a V-twin engine, then you need to install the heater on both sides, this will allow the heater to work more efficiently and will allow your car to start faster even at the lowest temperatures. With a careful approach and proper execution of all work on the manufacture of an engine heater, you will be able to make a high-quality and reliable heating system with your own hands, and it, in turn, will give you the opportunity to start your car without problems in any weather. When installing the system, be very careful and careful, this will allow you to avoid making any mistakes.
12V oil heating
The main condition for do-it-yourself oil heating of the engine is that the device must be in the sump. To do this, there is no need to make additional holes in it, since the design is used instead of a drain plug.
What will you need?
To complete the task you will need:
- small pipe;
- nichrome wire 0.6 mm, length should be 2 meters (you must use the product in the form of a spiral);
- insulators made of ceramics;
- textolite washers and bushings;
- drain plug;
- bolts with nuts (as connecting components).
Algorithm of actions
Step-by-step assembly instructions:
- First, take the drain plug and make a hole in it using a drill. It should not be through; there will be about 5 mm left to the end. The hole diameter should be 13 mm. After this, an M14 thread is cut into it.
- After this, a through hole with a diameter of 8 mm is made. A textolite tube of the required size is installed in it.
- Then take a piece of tube measuring 120 mm, its outer diameter should be 1.4 cm. An M14 external thread must be applied to one part.
- After this, the car owner needs to tighten a long bolt and nut to the nichrome spiral. A textolite washer is installed on it, the product is inserted into the hole of the drain plug. A washer is mounted on the other side, after which the entire structure is secured with a nut. This part will serve as the positive terminal, so you need to make sure that the located screw does not touch the body of the plug.
- Insulators made of ceramic are installed on top of the spiral. A screw with a nut is also screwed on the other side.
- A spiral with insulating elements is installed into the tube. Then the resulting structure is screwed into a threaded hole made in the cork.
- The opposite end of the pipe is capped. At this stage, you need to make sure that the screw at the end of the spiral is always in contact with the plug; for this, the element can be soldered.
- Then the product is sealed. To complete the task, it is recommended to solder the connection point of the pipe.
- After assembly, you need to install and connect the pan heater. The heater is screwed in instead of the standard drain plug, but when the latter is removed, some of the engine fluid will come out of the system. After installing the heating device, the volume of lubricant must be replenished.
- To provide power, you need to lay the cable from the battery. For this, only the positive conductor is used, since the grounding function is performed by the pallet itself. Additionally, a switch and a 10 amp safety device can be added to the circuit.
Heating device diagram
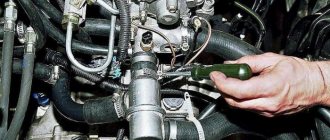
How to install and connect an engine heater yourself
Do-it-yourself oil pre-heater
Heaters (with the exception of those that operate on the principle of natural circulation of liquid) are connected to a break in the lower (return) hose of the heater. Connecting to the top (supply) hose is not only less efficient, but may damage the heater. The reason for this is the low level of coolant in the cylinder head. For the heater, it is necessary to prepare a mount that will allow it to be clearly fixed. There should be free space around the heater, this will protect the body from damage while driving on uneven roads. All electrical wires must be laid by tying them into a single bundle and attaching it to the engine and body using clamps that are sold at any auto store. This will avoid chafing or broken wires. To connect the autonomous heater to the fuel tank, you will have to lay a separate fuel line. This will avoid serious interference with the operation of the vehicle's fuel system, and will also ensure that the heater operates if the fuel pump located in the tank is turned off.
- Roll the car onto a pit or lift and carefully inspect the engine compartment. Find and equip a place to install the heater. Put it there, but don't plug it in. Make sure the fuel line, wires and hoses fit properly and are not in contact with other parts.
- Then check and replace the thermostat if necessary. If you do not do this, the heated coolant will circulate not through the inner circle (cylinder block, cylinder head, heater), but through the outer circle (inner circle + radiator). Because of this, the efficiency of the heater will decrease several times. If you are installing an autonomous heater, first lay the fuel line. Make sure that it will not be damaged when the bottom of the car hits an unexpected bump. Make sure the connection to the fuel tank is tight.
- Drain the coolant. If it was not possible to locate the heater next to the lower hose of the heater, then prepare a hose of a suitable internal diameter (on most cars it is 16 mm). Unscrew the heater hose clamps and remove it.
- Prepare sections of suitable length from the engine to the heater and from it to the stove. Install them and secure with clamps.
- Connect and route all wires through the engine compartment. After this, fill the cooling system with antifreeze or antifreeze (take into account the increased volume of the system), start the engine and make sure that there are no leaks anywhere. And only then connect the fuel line. After connecting it, apply power to the fuel pump and make sure that no fuel leaks appear anywhere within 15 minutes.
Autonomous
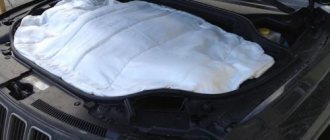
DIY car blanket dimensions, materials and sewing method
Heaters that operate autonomously from external power sources are, in turn, divided into air and liquid. The first ones serve to access the warm flow into the cabin, but the second ones only serve to heat the engine.
You can read separate articles on this topic:
- Webasto engine preheater;
- Eberspacher engine preheater;
- BINAR engine pre-heater.
Their installation is much more complicated than installing a “modified boiler”, but there are also many more functions. Thus, heaters of these types are usually equipped with remote-controlled key fobs, or can be in contact with mobile gadgets. The price for such “goodies” is also appropriate.
A distinctive feature of autonomous preheaters is the ability to install them in the place where it is convenient. Essentially, these are modified internal combustion engines that have their own fuel and water pumps, glow plug, combustion chamber and sensors.
On the other hand, one can understand car enthusiasts who are trying to save money and do what they can do themselves. This is evidenced by numerous videos on the Internet, where car enthusiasts share their experiences.
Autonomous heater option
Another, one of the most common types of this equipment is an autonomous pre-heater. It is capable of heating large volumes of air quickly, consumes little energy, and its operation is almost silent.
Installation can be carried out both in the power supply system and in the cooling system of a car with a gasoline or diesel engine. There will be heating in any case. The energy source in this case is the fuel tank.
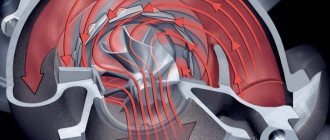
This preheater consists of a small chamber with a fuel-air mixture and a special pin that ignites it. In the walls of the chamber there is a constantly circulating coolant, the pump is responsible for heating it. Further, it enters the small circuit of the cooling system, which provides heating.
The installation is quite simple: you need to connect the heat exchanger of the device to the small cooling system office, and the electrical component to the machine’s electrical network. For example, in a Mercedes car, glow plugs can be installed in the same row with the injectors in the cylinders, the wires of which can be connected to the relay.
How to make a preheater with your own hands instructions.
DIY car engine cleaning products
First we need a standard tee for an inch pipe. It is necessary to wrap a heating element into one of the ends of such a tee, which, by the way, can be picked up in the same plumbing store where you will purchase the tee. If the seller finds it difficult to help you with your choice and purchase, then the words “TEN for instantaneous water heaters for 1-1.5 kW” should help him offer you what you need. Ideally, it is desirable to find a similar heating element with a built-in thermostat.
A small pipe 10-15 cm long is screwed into the opposite end of the tee, which is necessary so that the coolant in the resulting chamber heats up faster and better.
It is necessary to screw adapter plugs into the remaining unused end of the tee and the end of the pipe opposite the tee, allowing a flexible hose to be connected at this location.
During assembly, all connections must be reliable and tight.
Now, the heating unit is ready, now it needs to be connected to the engine cooling system.
Most often, the best connection location will be a break in the lower hose of the cooling system, which supplies coolant to the car's interior heater.
Next, a wire of the required cross-section for your power is connected to the contacts of the heating element. Subsequently, voltage will be supplied to this wire, which is necessary for the operation of the created system.
The next step in making an engine preheater with your own hands will be to install an electric pump to circulate fluid in the system. For these purposes, you can use ready-made options - pumps for pumping coolant from Gazelle cars, or you can look for something else. It is quite possible that such a pump is in your car itself, then a similar one can be used for our purposes.
When you find the pump, it should be connected in front of the heater we assembled - through a standard open relay to the car's hog network or through a step-down transformer with a rectifier to the same socket (220V) as the heating element of the heater.
The preheater is ready.
The operation of this system is as follows: half an hour to an hour before the trip, we connect our heater to the network (during this time, at an outside temperature of about -25°C, 1.5 kW is able to heat the engine, although not to positive temperatures, but to about zero for sure, and make it easier thereby starting the last one), and before leaving – turn it off.
Video
I recommend reading:
How to polish a windshield with your own hands?
Replacing the cabin filter in Opel Astra.
Antifreeze (antifreeze) is thrown out of the expansion tank - reasons, ways to solve the problem.
Why does the idle speed fluctuate?
Antifreeze heater 220 V
The first will be an antifreeze heater operating from a 220 V network. To manufacture it you will need:
- heating element;
- Pipe sections;
- Plumbing fittings, tees, adapters;
- Materials for sealing connections;
- Clamps;
- Cable with plug;
- Insulating materials;
Below are the plumbing items that will be required for assembly:
Regarding the heating element. It is best to purchase a heating element for a water heater (for example, “Ariston”), equipped with a thermostat. Installing it in a homemade device will not be difficult, and in addition it will be possible to adjust the heating range. As for power, a heating element of 1.2-1.5 kW is suitable for a passenger car.
The diameter of the pipe and its length should be selected based on the size of the heating element and its mounting thread. The pipe itself should be thick-walled.
To assemble the device you will not need many tools:
- Bench vice;
- Taps and dies for threading;
- A set of keys;
- Angle grinder with cutting wheel (“grinder”).
Having prepared everything, you can start working. Assembling the pre-heater is done as follows:
- We take the pipe and make the necessary measurements, taking into account the existing bends and tees;
- In plumbing tees, the threads are usually already made, so you can immediately screw the heating element into it using sealing materials;
- We cut threads on a piece of pipe (external on one side, internal on the other);
- Screw the prepared section into the tee;
- On the other side, screw the adapter into the pipe;
- We screw another adapter into the third terminal of the tee;
- We connect the cable to the heating element and isolate the connections;
After assembly you should get a device like this:
As you can see, assembling an antifreeze heater is very simple. It is only important that all connections are well processed in terms of sealing, since even the slightest leakage of antifreeze is not allowed. Therefore, after assembly, you should carefully check the device before installing it on the car.
Additionally, you can weld a mounting bracket to the pipe. Installing an engine heater yourself is also not difficult. It can be mounted using either a sequential circuit (embed the device into the antifreeze supply pipe into the interior heater) or parallel (organize the supply from the cylinder block, and the drain into the pipe leading from the main radiator).
Battery powered
This type of heater includes heat accumulators. While the engine is running, the coolant heats up to a temperature of 95-100 degrees and circulates through the engine channels. The heat accumulator is a well-insulated reservoir (vacuum thermos) with a capacity of up to 15 liters, through which the coolant passes before entering the radiator.
Such devices include the popular Gulfstream system, which is produced in modifications for 2.5 and 4 liter engines. The differences between the models are in the volume of the thermos - 10 and 15 liters. This thermos keeps the coolant hot for up to 2 days. After power is supplied to the electric motor, hot liquid begins to circulate through the cooling system, heating the engine. The engine warm-up time takes 5-15 minutes depending on the air temperature.
In addition to the heat accumulator, stores sell various devices that, according to the manufacturer, heat the oil and make it easier to start a cold engine. But in reality, the only effect from these devices is a completely dead battery, which is unable to crank the engine shaft. The reasons for this are obvious - it is necessary to warm up not only the oil, but also the coolant, and this requires a lot of energy. Battery life is not infinite. To warm up the engine to normal temperature, 0.5-1 kWh of energy is required. At a voltage of 12 volts, this will require from 40 to 80 Ampere hours. And the capacity of a car battery is 55-75 Ampere hours. As a result, there is no energy left to start the engine.
Types of heaters
There are several ways to insulate the filter device and ensure its heating. Let's take a closer look at each type of heater.
Bandage patch
The bandage type of devices is made in the form of an overhead clip. It is intended for installation on the external part of the filter element and heating it before starting the power unit. For optimal operation, the device is connected to the vehicle’s on-board network, the voltage source being the battery.
Flow-through
Flow-type devices are used as auxiliary components. In accordance with the instructions, installation of such heaters is carried out on the line in front of the filtering mechanism, in a section. This allows you to efficiently warm up the fuel at startup and during operation of the internal combustion engine. The fuel is first heated and then passes through the filter.
Tape flexible
Such devices are intended for external thermal insulation and heating of fuel system elements. Flexible tape heaters effectively heat not only the body of the filter mechanism, but also the lines. Depending on the need, the devices can be heated either before starting the internal combustion engine or during engine operation.
Heated nozzles
The attachments are mounted on standard fuel intakes. Their installation allows you to take part of the fuel from the gas tank at low negative temperatures down to -40 degrees. In such cold weather, standard systems cannot independently remove fuel from the tank. The nozzles come into operation when the ignition is turned on. They effectively heat the fuel, which leads to a decrease in its viscosity parameter and the volume of paraffins. The attachment systems are connected to the battery.
Special fuel nozzles
Flow type for diesel
Belt type systems
Bandage type device
INSTALLATION ON VEHICLE
We cut the lower hose supplying antifreeze to the car's heater and connect the heat exchanger and the pump from the Gazelle in series into the gap to force the antifreeze to circulate in a small circle. If the pump is not attached to the engine, we connect the “minus” to its housing. When installing the pump, the main thing is not to make a mistake with the direction of the antifreeze flow (there is an arrow on the pump).
We connect one wire to the negative of the battery, and the second through a 7.5-10 A fuse and a switch to the positive. I have an LED connected parallel to the spirals through a resistance of 2 kOhm to visualize the operation of the device. Also, over time, I installed a time relay in the “+” wire gap for 30 minutes (photo 11), so as not to drain the battery in vain. On the side of the car’s center console I installed toggle switches for turning on the antifreeze heating (photo 12).
When, after a long stay in the cold, I need to start the car, I turn on the heater for 20 minutes, then start the engine and, without turning off the heating, start driving or warm up the engine at idle speed. The needle on the temperature sensor does not rise, but from the way the starter turns, it is clear that the engine is much lighter, and it seems that it starts not at -30°C, but at 0°C.
After the engine is started, with the heater turned on, it warms up approximately 1.5 times faster.
This is how, for a small amount, you get pre-heating of the engine, not tied to a 220 V electrical network.
I use this heater all winter. Frosts reached -35°C, the car started up confidently!
- Main parts of the heat exchanger.
- Two plates are welded inside to increase heat transfer.
- To ensure tightness, all seams are welded with a Kempi welding machine.
- Asbestos sheets were used as electrical insulation.
- Asbestos liners will prevent the coils from shorting to the body.
- Nichrome spiral for some household appliance.
- Heating elements.
- The covers are tightened with 25 mm studs.
- The assembled heat exchanger must be checked for leaks.
- The outside of the heat exchanger is wrapped with foam film for thermal insulation.
- To avoid draining the battery, I connected a time relay.
- The power switches are located on the side of the center console.
Homemade engine heater with pump
- To ensure good heating of the soldering area, you can use a powerful soldering iron. However, it will be much better if you use spot or gas welding.
- To ensure high-quality electrical insulation, asbestos sheets should be used.
What will you need?
To complete the task you will need:
- a piece of thick-walled pipe 8 cm long;
- two pipes 2 cm each;
- piece of sheet metal;
- pump from a Gazelle car;
- nichrome spiral, which will serve as a heating element.
Algorithm of actions
Algorithm of actions:
- At the first stage, you need to process a piece of thick-walled pipe so that its appearance and dimensions correspond to what is required.
- Then, two disks must be cut from sheet metal 1 mm thick, the diameter of which must correspond to the internal diameters of thick-walled pipes.
- To ensure maximum heat transfer and high-quality heating, one additional plate is welded to the disks.
- To make a heat exchanger, the seams are sealed with a soldering iron. When performing the task, it is necessary to check the tightness of the heat exchanger, otherwise water may drip from the device during operation.
- During assembly, the heating components are laid in spirals downwards, and the entire device is lined with a sheet of asbestos. To ensure maximum thermal insulation, the structure must be wrapped in heat-insulating material. As the latter, it is recommended to use foam film.
Installing a homemade heater
The device is installed as follows:
- The lower pipe for supplying refrigerant to the heating unit of the machine is cut.
- A heat exchanger with a water pump from the Gazelle is installed in the resulting gap. A pump is required to circulate the consumable material in a small circle.
- To connect the entire structure to the electrical circuit, it is recommended to use a separate switch with an actuator relay. If you plan to organize a timed shutdown of the heating system, then you will additionally need to install another relay.
- All contact elements are connected.
- The pipes and lines are checked for leaks. The initial start-up of the heating installation is carried out and its operation is tested.
Installation of a heater with a pump
We make a pre-heater for the engine. What do you need to know about it?
It is best for beginners to consider making their own pre-heater using its most basic representative - a device that simply heats up the coolant in the engine. True, such a heater requires an outlet near the place where the car is parked overnight. Therefore, let's assume that this requirement does not pose a problem for you. Let's continue.
So, the heater in our case will consist of a heating heating element, which will cut into a small circle of the cooling system, and a pump that forces the coolant to circulate through this system when the engine is turned off.
In addition to the heating element, the heater itself will require some fittings, pipes and fittings. It will consist of and with their help and be connected to the motor cooling system. Now the details.
Standalone devices
Unlike those described above, these devices do not require an electrical connection. In order for autonomous devices to work, the presence of fuel in the car is sufficient, with the help of which they function. Diesel fuel forces coolant to circulate over a small radius.
View gallery
The small arc includes the interior stove. Therefore, as a result of the operation of the device, the car becomes completely warm. The equipment provides expanded functionality, as well as overheating protection.
If you constantly use your car in extreme conditions, it is, of course, better to purchase this type of device. Taking into account the features of the engine and choosing a model from a trusted manufacturer, the car enthusiast will ensure a comfortable ride from the very start of the engine, slow down the wear of parts and eliminate unforeseen situations when the engine simply does not work, "Binar" and "Kamaz"
Since 1995, the companies Teplostar and Advers have been producing diesel engine pre-heaters jointly. Among the models you can find both liquid and air devices.
The most common of them were diesel engine pre-heaters “Binar” and “Teplostar”, as well as air devices “Planar”. They are all compact in size, easy to install and operate, and display temperature data very accurately.
Domestic models are distinguished by reasonable prices and decent quality. Sometimes such devices are purchased for installation on trucks. But for Kamaz they use special pre-heaters for the Kamaz diesel engine that have long proven themselves.
The battery with such a device will never run out, since the standard stove is constantly running. If you need to wait for loading/unloading, there is no need to heat up at idle, wasting a large amount of fuel. At the same time, the engine life will be saved by 400 kilometers each time (this is exactly how much is allocated for wear of parts during a cold start for Kamaz).
View gallery
Electric engine heaters
The first electric heaters appeared on the streets of Scandinavian cities about 20 years ago. Russian newspapers and magazines then wrote about these units as wonders. Over time (or due to a decrease in winter air temperatures in Europe), the devices began to find use in other countries.
The operating principle of an electric engine heater is quite simple: the device itself is attached to the cylinder block, which is connected via a wire to an external 220 V outlet. Its power is small, but it is enough for efficient operation. Some types of such units are also adapted to heat the interior of the car with a certain amount of heat.
Video - electric pre-heater SEVERS M:
In addition to heaters connected to a remote socket, there are types that receive energy from devices that supply electricity to the car itself.
Each of them has its own advantages and disadvantages. The first is good because it doesn’t “eat up” battery power, but it does cause problems with finding sockets. The remarkable thing about the second is that it operates regardless of the presence of wires, but consumes the current that is generated for automotive equipment.
Well, now the very “root” of what we are talking about here. What is a pre-start electric engine heater? If you have ever seen a boiler, then it will immediately become clear to you what the principle of operation of this thing is. Only instead of a glass, it is inserted into the hole in the cylinder block, usually blocked by a plug, and heats up antifreeze, not water.
The only difference from a boiler is that this device is equipped with a timer or thermostat to turn off the heating when the coolant reaches a certain degree of heating.
What are the benefits of using preheaters?
Professional drivers recognize the presence of an autonomous or electric engine pre-heater as a mandatory requirement for a modern car, guaranteeing the necessary healthy working conditions during winter operation. For trucks operating in Europe, this principle has been observed for a long time. From the point of view of ensuring driving safety, their use improves comfort and reduces driver fatigue. Among other things, heaters help improve the efficiency and durability of engines. This is achieved through:
Video: Engine preheater
1. Reducing the number of “cold” engine starts. It is estimated that on average each driver makes from 300 to 500 “cold” starts per year. At the same time, special research in this area carried out by well-known European companies has found that, in terms of one “cold” start, the use of engine preheating reduces fuel consumption from 100 to 500 ml. The amount of savings depends on the outside temperature and the duration of warm-up. Thus, according to rough calculations, the use of preheating from autonomous heaters allows you to save from 90 to 150 liters of gasoline or diesel fuel in one winter season.
2. Reducing heavy operating conditions that increase engine wear. The overwhelming majority of engine wear occurs during its startup. This is due to the fact that at the time of “cold” start, the viscosity of the engine oil is increased and the lubricating properties are reduced. At the same time, the friction of the surfaces of moving parts is increased and wear in the connecting rod, crank and piston assemblies is increased. One “cold” start reduces the life of the power unit by 3-6 hundred kilometers. The Russian climate with 100 days a year of sub-zero temperatures can reduce the engine life in one season by 80 thousand km.
3. Increased safety and comfort in driving. Cold contributes to increased body heat transfer and rapid fatigue. Drowsiness and lethargy increase, and driver attentiveness decreases. Driving mode becomes more irrational. In addition, the risk of contracting such occupational diseases as cervical, lumbar osteochondrosis, and acute respiratory infections increases.