Headlight selection
If you decide to purchase fog lights (PTF), then you don’t have many options to choose from. You can buy standard fog lights manufactured by Toyota, or give preference to cheaper analogues. In addition, foglights can be LED, in which diode elements perform the lighting function.
As for the main lights, that is, head lighting, in this case the choice is also small. Depending on the desire, the car owner can buy regular mirror lights, or give preference to darkened optics. Darkened headlights are more relevant for cars with a dark body; they are also used when tuning a car. If you decide to change the taillights, then you can also opt for darkened options. If your car is equipped, you should take this nuance into account when choosing (the author of the video about tuning a Toyota Camry is the ZELENIY FURGON channel).
Test drive Chery Fora 2007. Cherry handicap 21
HomeMiscellaneousCherry handicap 21
Everyone is already accustomed to the fact that Chinese cars are usually, to one degree or another, copied from models from other manufacturers. It looks like Chery Fora A21 is an exception to the rule? The sleek sedan with a chrome grille is attractive: the body panels are well stamped, neatly fitted and painted.
The calm lines of the two-tone light interior, quite appropriate “metal-like” inserts, and decent quality of materials place the Chery Fora A21 car above its well-known compatriots in Russia. The only criticism I can make is the excessive modesty of the instrument panel and the design of the radio (its remote control on the steering wheel is unsuccessful - small buttons are bunched together).
The basic configuration of the Chery Fora A21 (there is no other version yet) includes leather seats. The rear sofa is designed for three adults.
Cherie Fora's car is Chinese, and therefore it is not surprising that the large range of adjustments for the driver's seat is shifted to the “small-sized” zone. The height limit for a relatively comfortable fit is 185–190 cm.
Against this background, the pedal assembly is puzzling: a spacious niche with widely spaced and high-hanging pedals is convenient for owners of shoes of size 43 and above.
The taut gear lever with a comfortable handle can be compared to the bolt of a Kalashnikov assault rifle. Switching on is clear, with a slight clatter, selectivity is excellent, but the strokes are so large that you don’t want to switch again. The 2 liter engine comes to the rescue! Elasticity and torque are especially good in the very running range of 1500–3000 rpm.
Visibility in the Chery Fora is good: the pillars do not create large blind spots. And reversing is facilitated by fairly accurate standard parking sensors. Although the exterior mirrors are small, they do their job well.
Chery Fora A21 rolls easily and cheerfully at 90–110 km/h - no body sway on longitudinal waves, rolls when cornering are small and not tiring. At lower speeds, the suspension may seem stiff - it repeats asphalt defects, transferring them not only to the body, but also to the steering wheel.
The operation of the air conditioning system, to put it mildly, is “not very good” - it certainly cannot automatically maintain the set temperature level... and the fan is very noisy. The second source of noise is the engine, quiet only up to 3000 rpm, but along with the roar there is also a noticeable pickup .
The purpose of the Chery Fora is a long trip on the highway at a reasonable speed. A moderately sharp steering wheel, an engine with a good power reserve, informative and tenacious brakes, and intelligent ABS operation cannot but be liked.
At the same time, noise and poor heating spoil the impression.
But remember that today few people can offer a 2-liter engine, four airbags, ABS, EBD and leather seats for less than 15 thousand dollars - that’s how much the Chery Fora A21 costs.
Main characteristics of Chery Fora A21:
- Engine: 2.0 l (95 kW/129 hp)
- Transmission: 5-speed manual
- Equipment: A21-III
- Price: $14,499.
Summary: Chery Fora A21 is a powerful, roomy and richly equipped car. But the original design is not without problems, like many other Chinese cars.
Advantages of Chery Fora: powerful flexible engine, informative brakes, the presence of standard safety systems, good visibility, low price. Disadvantages of Chery Fora: inefficient heater, uncomfortable suspension, noisy engine, “Chinese” ergonomics, lack of configuration options, low ground clearance, lack of protection crankcase
Reviews
auto.ironhorse.ru
Chery Fora a21 price, technical specifications, photos, video test drive
A sedan of a Chinese company, which is a budget car released in 2006, but before that this model was shown in 2005 at the Shanghai Auto Show in order to find out the audience's opinion about the design and then understand that everything is fine and put the car into production, which in fact, this was done with Chery Fora a21.
I built this model on the basis of a car from another manufacturer, and more specifically on the basis of the SEAT Toledo. In terms of design, the model can hardly be called attractive, it is simple and does not have something to attract the buyer first with the design, some may like it.
Interior
Inside, the cabin is spacious, but its design is not modern, it is simple and only performs the usual functions. The Chinese like to put low-quality wood in their cars, but this is not the case here; there is quite a lot of polished aluminum, which makes the interior visually more expensive.
The driver can customize the seat to suit himself, the car does not look like a premium one, but the seat can be adjusted using a servo drive and can be adjusted in 8 directions. The steering wheel is 3-spoke and has buttons with which you can control the radio, by the way, with a CD changer, into which a maximum of 6 discs can be inserted.
The rear passengers of the Cherie Fora will feel comfortable, but not on a long trip, as the comfort is acceptable, but not ideal. 3 people can stay there.
Specifications
Type Volume Power Torque Acceleration Maximum speed Number of cylinders
Gasoline 1.6 l 119 hp 144 H*m 14 sec. 185 km/h 4
Gasoline 2.0 l 129 hp 180 H*m 11 sec. 185 km/h 4
More details
At the time of sale, the buyer had a choice of only two types of power units whose characteristics were similar. Both engines were created by the company in Australia.
The engines have a variable valve timing system and are 4-cylinder engines with 16 cylinders. The buyer could choose either a 1.6-liter or a 2.0-liter engine.
The manufacturer had plans to create an 8-valve engine, but for some reason this idea was not implemented.
https://www.youtube.com/watch?v=n8VMu1SJN9M
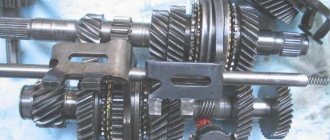
The power unit of the Chery Fora A21 is paired with a 5-speed manual transmission, which has stretched gear ratios, allowing you to move around the city in a car calmly. This gearbox will not allow you to drive a car dynamically, but it allows you to ensure relatively low fuel consumption, which in the urban cycle, according to the manufacturer, is 10 liters.
The engine can also be paired with a CVT gearbox; it was produced by a company that also produced gearboxes for MINI cars. This gearbox has not gained much popularity, since people are more accustomed to manual transmissions.
Chery Fora a21 suspension
The model's suspension is completely independent, there is a MacPherson strut suspension with a stabilizer at the front, and a simple multi-link suspension with a stabilizer at the rear, all this provides good comfort while driving. The hydraulic booster is responsible for steering, and only disc brakes are used for braking, but the front ones are ventilated.
For safety, the suspension has an anti-slip system.
The model is presented as a business class, but it is not one, although it is quite comfortable. If you need a comfortable car and have a small budget, but this car is no longer produced and you can only buy used, then it is a very good option to buy, but it’s better to look at other options.
Video
Under what circumstances should you start adjusting headlights?
Poor headlights are dangerous both for the driver and for other road users. There are two main signs of this problem:
- They blind oncoming drivers, even if the high beam headlights are turned off.
- The lighting of the road and the side of the road is poor, which simply makes driving at night impossible.
Manual headlight adjustment is usually used for:
- installing new springs, if needed, for example, lower ones or vice versa higher ones;
- installing new lamps (if, for example, the light goes out, the base is damaged) or replacing factory ones with better ones (xenon, halogen, etc.);
- replacing lenses.
Usually, the auto-corrector does not set the height of the light flux quite correctly, so in order to correct the problem you have to do it yourself.
Chery Amulet since 1999, headlight adjustment instructions online
Payment for goods and downloading of the book in electronic form (PDF format) is made on the website.
To do this, you need to find the book you are interested in and click on the “Buy” button. The price of the book is indicated on the button.
For convenience, the price on the website for residents of Russia, Belarus and Kazakhstan is presented in rubles.
For residents of Ukraine in hryvnias, and for all other countries - dollars.
After clicking on the “BUY” button, a payment window will open where you can select a payment system with which you can pay for the selected book using any bank card (Visa, MasterCard, MIR, etc.)
When you click on the “Pay by bank card” button, the Portmone payment system will open, which is the easiest way to make a payment.
In addition, the website offers four payment systems for payment:
- Yandex (payment from any bank cards, Yandex Money account, QIWI Wallet, terminals, etc.);
- Portmone (payment from any bank cards, Portmone account);
- PayPal (payment from any bank cards, PayPal account);
- WebMoney (payment from any bank cards, payment from WebMoney wallets).
Checking settings
After adjusting the headlights, they must be tested. To do this, wait until it is dark (when testing fog lights, the ideal test would be foggy weather), and then evaluate the comfort of using the optics. If you previously had problems with this car system, then you will immediately feel positive changes. It will be more convenient for you to drive the car, and surrounding drivers will not feel discomfort from your appearance on the road.
A common car whose reliability and practicality are legendary. But there are no perfect cars, so even the 6th generation has its flaws. In addition to poor noise insulation by class standards, there is another disadvantage that many owners face - poor light. If the issue of sound insulation concerns exclusively the comfort of use, then the quality of lighting depends on the safety of traffic in the dark.
If you are faced with the problem of bad light, do not rush to buy new optics. In the case of insufficient road lighting, it may be due to unregulated light elements. Incorrectly adjusted optics can lead to undesirable effects: dazzling oncoming and passing traffic, in fog a wide light beam creates a curtain in front of the driver, too low a light beam poorly illuminates the road even in good weather.
Preparation
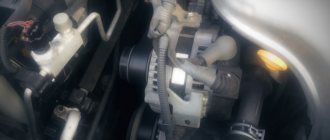
It is equipped with an electric headlight leveler, but often it is not possible to adjust the light with its help. The low beam is considered problematic for the 40; car owners do not often complain about the high beam.
The first step is to check the settings of the standard corrector and the adequacy of its operation. If you find that this unit is out of order, replace it and then proceed to adjust the light.
To adjust the headlights yourself you will need:
- horizontally flat area at least 10 meters long (garage, parking lot, etc.),
- on one side the site must be adjacent to a perpendicular, flat plane (parking wall, garage door, etc.),
- hexagon with which adjustment will be made,
- the same pressure in, it should be equal to 2 - 2.2 bar,
- fill a full tank of gasoline,
- set the headlight range control to position 0.
How to set up Camry XV40 headlights
To set up the light elements, you need to mark the screen or wall. To do this, drive the car five meters away from the surface on which the marking will be made. The first vertical straight line completely coincides with the longitudinal axis of the car (O in the diagram). Then the distance between the centers of the headlights is measured and marked on the marked surface with vertical lines (A and B of the right and left headlights, respectively).
Next, a horizontal line is drawn, which is drawn parallel to the floor plane at a height equal to the distance from the center of the headlights to the surface on which the car stands (the height is indicated by the letter h, and the line is located above the straight line E). The second horizontal line is drawn 5 cm below the first (line E in the diagram).
After applying these lines to a flat and smooth surface, you can begin adjusting the headlights. Turn on the low beam and start adjusting one of the headlights, covering the second with some thick material (a thick rag will do, of which there are quite a few in the garage). The light from each optical element should be located along a horizontal straight line, which is closer to the floor surface (line E in the diagram) and end near the vertical line marked opposite the opposite headlight (line A for the left, straight line B for the right).
If you find that the optics of your car do not shine correctly, then adjustment is made using special bolts. Different bolts are responsible for adjustment in the horizontal and vertical planes.
Adjusting bolts Camry 40
The raising of the near beam of light occurs only after vertical adjustment. If you need to raise the low beam line, turn the adjusting screw until you reach the required level.
Cherie Amulet - reviews, advantages and all the disadvantages of the car
Popular in the mid-2000s, the budget model from Chery can still be found on Russian roads. Let's find out why Amulet owners denounce the car's numerous disadvantages, but continue to drive it.
History of the model
In 1997, a company appeared in China, founded almost entirely with government money. Of course, it did not have its own automobile concern; production vehicles were purchased from. Wasting no time developing its own models, Chery Automobile licensed the 1991 Toledo chassis. Having slightly modified the design and appearance of the car, after a short period of time the first Chery Wincloud model was released on the Chinese market.
And already in 2003, the first liftback Chery Amulet A15 came out of the concern, and in 2005 its sales began on the Russian market. Over the course of several years, the name and design of Chery Amulet were updated many times, the car was called Quiyun, Flagcloud, Fulwin, and in Russia to this day the model is also produced under the name Vortex Corda, which has been assembled in Kaliningrad since 2006. Despite external and internal shortcomings, endurance that leaves much to be desired and a complete lack of safety, Chery Amulet still began to be actively sold.
Of course, it was an extremely affordable price.
Car exterior
The design of Cheri Amulet's appearance is at the level of the 90s, but there are no clearly repulsive details. Externally, Amulet is very reminiscent of the Spanish Seat Toledo from 1993, which is not surprising. From the side, the cars are almost identical: the same proportions and the same rear row doors. The Amulet's headlights are larger, as is the massive chrome radiator grille.
And at the back is one of the main trump cards of the car - a huge, spacious trunk with a volume of 420 liters. If you fold the rear seats, the volume almost triples and you can easily transport long cargo! But when loading you need to be careful, even with a little pressure, dents remain on the trunk, and the paintwork cracks and crumbles.
The manufacturer clearly saved money on painting the car.
The car is quite large, its dimensions are: length 4393 millimeters, width 1682 and height 1424 millimeters. The wheelbase is good, 2468 millimeters in length. The turning circle is 11 meters.
Chery Amulet interior
The Chery Amulet's interior has clear advantages over its classmates; it is well equipped for its price. Power steering, front seats with various seating adjustments and standard air conditioning immediately attract attention and evoke pleasant emotions. The torpedo with the center console strongly gives off the style of the 90s in the model, when chopped lines of the interior were in fashion.
The layout of the interior elements is quite good, but there are several significant shortcomings:
- Inconvenient engagement of 5th gear, and first can easily be confused with reverse
- The power window buttons are too massive and often accidentally hit while driving
- Adjustment of the steering column is not very convenient; you can only raise and lower the steering wheel
- Mediocre sound insulation, at a speed of 100 km/h you can only hear the hum of the engine and the noise of the wheels
The car is generally comfortable for the driver, but there is a serious lack of lateral support on the back of the seat. The layout of the controls is intuitive and the ergonomics are well thought out. But this is not the merit of Chinese engineers; after all, Cherry Amulet is a copy of the Spanish Seat Toledo with minor modifications. By the way, there are complaints about the Chinese modifications - the gearbox from Chinese engineers is inconvenient, with large strokes.
As for the back row, only two passengers can comfortably fit here, with very little space for a third. The Chery Amulet's interior trim materials are justified by the price of the car; even in the more expensive configuration, the cheapness of leatherette and wood-like plastic is clearly visible.
Safety
The Autoreview crash test, which was sensational in 2007, greatly reduced car sales at the dealer; the situation in the secondary market was much worse - it became almost impossible to get rid of the car. Out of 16 points, Cheri Amulet scored only 1.7 and did not deserve a single star. Only the VAZ-2107, which did not score even one point, the Uzbek-assembled Daewoo Nexia (1 point) and the Tavria Slavuta (1.4 points) performed worse than the Chery Amulet in the Autoreview crash tests. The strength structure of the Chery Amulet body is one of the main problems of the car.
Setting the fog lights
Adjusting the Toyota Camry headlights also includes adjusting the fog lights. The key to the correct operation of these light sources is their correct installation. There are certain recommendations for installing fog lights:
- level above ground – 250 mm;
- fog lights should not protrude beyond the main optics of the car. It is advisable to fix them 400-600 mm from the headlights;
- The efficiency of fog lights will be noticeably reduced if not properly adjusted.
The steps for setting up the foglights are as follows:
The mobile screen is moved 7 meters from the car. If you are using a wall, then simply move the car to the desired distance. Mark the centers of the headlights, step back 10 cm from them and draw a horizontal line. Drive the car another 6-7 meters away from the wall (or move the screen) and turn on the fog lights again. If the light is set correctly, then its upper boundary should follow the horizontal line drawn earlier. The optimal distance between the centers of the beams is 120 cm.
Land Rover Freelander » FIERCE » › Logbook › Setting up the light. Part 1
Freelander's headlight is very good.
But, as always, I want to do it even better;) I decided to install DRLs. I went to BBC and chose the best ones that were available. Issue price: 2300 rub.
But there was a problem with the installation... I called 5-6 services in our Primorsky region, some did not take on this work... Some don’t have an electrician, others can, but not today. I didn’t care about the calls and decided to actually go.
I drove around Optikov and stopped at the first workshop - there was no electrician. The second one will be tomorrow. Third - there is an electrician... He looked at the whole thing and refused to work. Because if you install it correctly, you need to remove the bumper, and there are parking sensors, headlight washers and God knows what... I was simply afraid)))) We go further... The fourth workshop - there is an electrician, but they don’t do that;(((And here I think, yes Fuck it, I actually bought them... I’m driving, I see a sign “auto electrician”...
I stopped by, the guys spent about 15 minutes figuring it out, looking at it, talking and getting to work! They did everything slowly in 2 hours... Everything was screwed together beautifully, the wires were assembled and everything worked)))) Price: 2000 rubles.
So, if anyone needs a competent electrician in the seaside area - THERE IS!)))))
We appreciate the work;))))
Also, the yellow dimensions were replaced with orange ones! Looks very cool))))
It generally looks beautiful at night... But I couldn’t take a photo, everything is shining... The photos turn out blurry))))
We're not done with the light... To be continued!
source
Stages of work
The process of raising the lighting line of a car in bodies 50, 40, 30 and 55 is quite similar and consists of several stages:
- First, you need to check the standard settings of the electric headlight range control and make sure that its operation is adequate (on new cars, this unit will most likely be operational, but problems may arise in cars more than 5 years old). If it fails, the first step is to replace the corrector itself and only then proceed to adjusting the headlights of a car with a body size of 50 and 30.
- After this, before starting work, you need to find a parking area.
- To make the adjustment, you only need an 8 key and, for convenience, several special heads with curved tips.
- When the corrector operates correctly, it is necessary to measure the distance to which it adjusts the light beam and mark the level of its magnification twice as large as the maximum (corresponds to one on the corrector adjustment).
- After preparing the tool and checking the functionality of the corrector, you need to open the hood of the Toyota 50 (or 30, 40) and find the plastic adjustment plug in the engine compartment. It is located immediately behind the headlight housing.
- Then you should mark the expected level of the light beam after adjustment using a ruler and, accordingly, begin regulation (before this, you must set the corrector value to position 0).
- There is a special adjustment screw on the back plastic cover; if you rotate it, the light flux will gradually rise to the desired level (rotation must be done slowly so as not to damage the plastic parts of the screw). It is also necessary to rotate until a certain level of luminous flux is reached.
- After this, you need to tighten the screw and measure the headlight level.
Tuning Chery Amulet
The Chinese car Chery Amulet is often perceived with ridicule and irony. Like, this is not a full-fledged car at all, but a small one. But in vain, because despite a number of shortcomings, the model is equipped with a powerful engine, an aluminum exhaust system, and reinforced suspension arms.
To transform the car, it is necessary to additionally carry out chip tuning of the power plant, modify the body, interior, and luggage compartment. After which, Chery can compete with many European brands.
Upgrading a vehicle with your own hands is quite difficult, as it requires knowledge, skills, and experience in tuning. Unprofessional intervention in repairs often leads to negative consequences.
In order to minimize risks, use the services of service stations, workshops, and ateliers, where they provide a quality guarantee for the work performed.
Various tuning of Chery Amulet, prices
The upgrade should begin by gluing plastic body kits around the perimeter of the bumpers, sills, and wheel arches. The price of the set for Chery Amulet is from 4,700 rubles.
Before gluing, it is necessary to thoroughly degrease the working surface with a solvent (acetone) in order to ensure a good adhesion of the polymer. Dry, remove dirt, dust, condensation, then apply a thin layer of silicone glue. Press the plastic body kit and hold it for 2 - 3 minutes, then release.
Optics Cherie Amulet
“Angel eyes” are mounted on the headlights. So-called eyelashes are more likely to have a visual effect than a practical one. The installation process consists of the following steps:
- thorough cleaning of glass from dirt, degreasing;
- gluing plastic eyelashes onto double-sided tape;
- installation of halogen lamps by color.
The rear lights of Chery Amulet are covered with LED strip on the inside. The price of “eyelashes” for headlights starts from 450 rubles per pair, LED strip for rear lights starts from 900 rubles.
Chip tuning of the engine, removal of the catalytic filler on the Chery Amulet car
You can increase the power of the power unit in the following ways:
- correction (change) of data from the electronic engine control unit;
- removal of standard catalyst (filler);
- replacing the power one with a more powerful one.
The first two methods are budget-friendly and do not require special financial investments. Order engine upgrade work from a service station, where they provide a quality guarantee for the work performed. It is extremely difficult to “reflash” the motor on your own, since special equipment is required.
Step-by-step guide to removing the stock catalytic converter:
- dismantling the exhaust manifold, resonator, exhaust pipe;
- cutting out the catalyst with a welding machine;
- welding of metal corrugation (blanks);
- installation of exhaust system sections in their original places;
- screwing in a metal spacer under the diagnostic sensor on the exhaust manifold.
The cost of services for dismantling the catalytic filler starts from 2,500 rubles.
Cherie Amulet Pendant
The standard steering mechanism does not allow you to fully feel the moment of turning the steering wheel at high speeds and returning it to its original position.
Basic adjustment aspects
Adjusting headlights is one of the mandatory procedures faced by Toyota Camry car owners. This is due to the fact that the level of low-beam illumination of the optics is automatically reduced by the corrector. Accordingly, if you want the road surface lighting to be optimal, you will have to make adjustments. Even an inexperienced motorist can cope with this task, since there is nothing complicated about it.
So, in order to correctly adjust the light, you need to install a screwdriver in a special gear of the adjustment corrector. The screwdriver rotates clockwise, and you need to raise the level of luminous flux by 5-8 cm compared to what it was. Please note that the level rises quite slowly, so you will have to spend some time adjusting. When you notice that the edge of the luminous flux has increased to the required value, you will need to cover the adjusted flashlight with cardboard. The second headlight is adjusted in the same way.
Adjusting the headlights of Land Rover Freelander
Adjustment of Land Rover Freelander headlights is carried out using a special stand, which allows you to correctly adjust the light of the headlights - both headlights and fog ones.
Almost every car owner sooner or later faces the problem of incorrectly adjusted headlights. This can not only significantly reduce the effective visibility range at night, but also create a real threat to a car moving in oncoming traffic.
Adjusting the direction of the headlights involves restoring the parameters of the light beam. This event takes place using technology, which is based on technical indicators that were regulated by the manufacturer.
You can adjust the light at a specialized station
- Headlights
- Fog lights
- Xenon headlights, including bi-xenon
Regardless of what exactly indicates the need to adjust the light beam - previous repairs to the headlight mounts, their replacement or an accident, this activity should be carried out at a specialized service station.
Replacing lamps
The procedure for replacing headlight bulbs on a Toyota Camry is described below:
- If the low beam lighting element is changed, the bulb can be found in the center of the optics structure assembly. To dismantle it, you need to release the fastener and disconnect the power plug. After this, the base of the device is rotated 1/4 turn, as a result of which the light bulb can be removed without any problems. Remember that you should never touch the element’s flask with your hands, as marks will remain on it, and this, in turn, will lead to faster failure. If you accidentally pick up the lamp, then you need to treat it with a napkin, which must first be moistened in alcohol. The new device is installed at the installation site in the reverse order. If you use xenon, then most likely you will have to dismantle the flashlight, and along with it, remove the headlight washer, the purpose of which is to wash dirty optics. After replacement, you must remember to put the washer unit back in place.
- If we are talking about long-range lighting bulbs, then this element can be found closer to the inner edge of the flashlight assembly. The procedure is carried out in a similar way - the power is turned off, the lighting element is removed and replaced with a new one, while the bulb cannot be touched either.
- As for the turn signals, their lighting elements are located closer to the outer part of the structure. In this case, the light bulb is removed from the lantern along with the plug, after which the device is removed from the socket. A new lamp is installed in its place.
- The marker lamps are located in the further part, closer to the outside of the lamp. Replacement is carried out in a similar way - the device is removed from the structure with the connector, after which it is removed and a new lighting device is installed in its place.
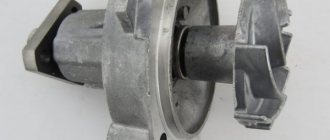
How to replace or repair the stove on a Cherie Fora car
A little less than ten years ago, another Chinese “handsome” appeared on the domestic car market - Chery Fora.
The Chinese manufacturer continues to actively surprise Russian car enthusiasts, presenting cars that very quickly become incredibly popular and become loved by Russians. The vehicle satisfies the desire of those who love high speeds.
This car can accelerate to a speed of 185 km/h in just eleven seconds. Inside the cabin, the driver and passengers feel surprisingly comfortable, so long trips are not at all tiring.
Of course, such characteristics of the Chery Fora could not go unnoticed by those who are looking forward to purchasing a new vehicle, so it is not at all surprising that the choice is made on this particular car.
However, even such a wonderful vehicle can sometimes present problems that the owner must solve. Many people complain that after a short operating period there is a deterioration in the performance of the stove on the Cheri Fora. Why such a problem arises and how to solve it, of course, not all owners of Chinese cars know.
It is for this reason that we decided to provide you with useful information so that you do not feel like a person who is at a dead end.
Heater performance deterioration
Each car has its own weak points, which are useful for the owner to know about, since then a problem can be prevented. If you are the owner of Chery Fora, then you need to take into account that some of these weak points are:
- thermostat;
- water pump;
- cabin filter;
- radiator;
- stove.
All of these devices are part of a heating and cooling system. For this reason, when noticing a deterioration in the performance of the heater, it is useful to check the functionality of each of the listed devices. If problems are identified, it is necessary to carry out repair work or replace the failed device.
Discounts on new cars! Advantageous loan from 9.9% Installment plan 0%
Dismantling the stove
If you are convinced that the heater of your Chery Flora is out of order or needs repairs, you will have to dismantle it and install a new one in its place or the same one, but after repair.
For this reason, it will be useful for you to know how to remove the heater in such a car.
We immediately warn you that you need to be patient, since this process is quite lengthy and causes some suffering for most owners.
First, find the place where the heater valve that supplies coolant to the radiator is located, turn it off. After this, slightly loosen the clamps and remove the pipes.
We warn you that at this moment about one and a half liters of coolant will pour out of them.
Accordingly, provide for this moment, think about where you will drain this liquid so as not to get dirty yourself and not to splash the entire space around.
Now go into the interior, unscrew the glove compartment, remove it to provide access to the stove. Please note that the heater is secured with several bolts. Arm yourself with a screwdriver and unscrew all these bolts. Carefully remove the stove along with the radiator.
Now we suggest you visually inspect the heater housing. If it does not have any mechanical damage, then we leave it, but replacing the radiator of the Cherie Fora stove will still be mandatory for you.
Take care of purchasing a new radiator and install it instead of the one you just got rid of.
Next, you will need to return everything to its place, act consistently, but only in the opposite direction. Do not forget to add one and a half liters of coolant that were lost during dismantling. After installing the stove with a new radiator, check the result to make sure that the heater begins to heat the interior space faster.
Fan problem
It doesn’t hurt you to prepare yourself for the fact that one day you will discover confirming facts that the stove fan on your Cherie Fora is not working. In this case, it will also be useful for you to roll up your sleeves, arm yourself with useful information and begin repair work.
A common reason for fan inactivity is brushes that wear out during active use. Of course, you will have to purchase new brushes and install them in place of the worn ones.
It is important to note that purchasing a new fan will be easy, but you will need to spend a lot of money. But purchasing just brushes is quite problematic. However, purchasing an expensive fan just because it is difficult to find original brushes is very stupid.
Experienced craftsmen recommend working a little creatively and replacing the original brushes with those borrowed from the domestic G8.
Of course, you will have to work a little with a file to grind them down to the required size, but such actions will allow you to restore the fan’s functionality, and you will spend small amounts of money that will not put a heavy burden on the family budget.
By the way, if you want to make sure in advance that the problem lies specifically in the brushes, we recommend that you turn on the ignition, select the maximum operating mode for the fan, and then move the connector as far as possible to the side. If at this moment the fan shows “signs of life,” then the problem is definitely in worn brushes. If, however, the fan continues to be “silent,” then the reason should be sought elsewhere.
In addition, it is very important to pay attention to how each damper works. It is important to take into account that the Cheri Fora has not one, but several valves, thanks to which it is regulated:
- temperature of the air flowing from the stove to the cabin;
- air flow direction.
If one of the dampers does not close completely, cold air will enter the cabin, preventing normal heating of the interior space. Unfortunately, if the fact is confirmed that it is a poorly functioning damper that provokes poor operation of the stove, you will have to disassemble the torpedo, otherwise you simply will not be able to adjust the operation of the problematic damper.
Don't forget to clean the pipes connected to the radiator. They very often become clogged, and for this reason the heating process deteriorates. The fine filter located under the glove compartment also gets dirty very quickly.
No matter how hard you try to carefully examine everything around you, but before this filter, unlike other vehicles, you will not find any other filters.
For this reason, it becomes dirty so quickly, since it takes the brunt of the influx of external “garbage” onto itself.
So, do not be afraid to solve on your own the problems that your new friend Chery Fora has to face.
The devil is not as scary as those around us describe him, and repair work is not as scary and difficult as we imagine. You just need to be patient and act according to the instructions.
After completing such work, the inside of your car will again be hot and comfortable for you and your passengers.
What to do before starting setup
First of all, you still need to inspect the auto-corrector; if it is broken, then you need to replace it. At its core, this is an electric drive that should automatically adjust the headlights relative to the tilt of the car. Mostly owners of older cars (over 6-7 years old) have problems with it, although new ones often have problems.
It looks like this:
In order to adjust the light of the low and high beam headlights efficiently, you need to constantly look at the current results of the adjustment; for this you will need a suitable platform. It must meet the following parameters:
- the car must be parked absolutely horizontally, so there should be no potholes, bumps or other obstacles in the work area;
- the length of the territory must be at least 10 m, this is necessary for correct adjustment of the beam in height;
- at the end of the site you need to equip a flat vertical surface; an ordinary wall is ideal. The headlights will be adjusted based on the light falling on this plane.
You won’t need a lot of tools for the job; in fact, a simple 8 key will be enough. Although you may need several different heads and knobs, it’s better to have them on hand right away.
Headlight adjustment cost
Consultants who are representatives of our project will be able to tell you what cost you can expect if you would like to adjust the headlights of a Land Rover Freelander. In addition, you will find out how much it costs to repair plastic mounts or completely replace any headlights - headlights, foglights, xenon or bi-xenon.
The price set for adjusting the light beam of Land Rover Freelander headlights at the stand is, of course, determined by the average values established in Moscow.
Video “Replacing optics in a Toyota Camry”
Detailed and visual instructions for replacing optics in a Toyota Camry car with a description of all the nuances are given in the video below (the author of the video is the You Dem channel).
1. EXTERIOR LIGHTING 2. DAYLIGHTING SYSTEM (if equipped) 3. AUTOMATIC EXTERIOR LIGHTING CONTROL (if equipped) 4. HEADLIGHT SWITCHING 5. AUXILIARY LIGHTING FUNCTION (if equipped) 6. BATTERY DISCHARGE PREVENTION FUNCTION BATTERY 7. TURN SIGNAL SWITCH ...
Turn the switch to position. The front and rear position lights, license plate lights and instrument panel lights come on
The indicator light on the control panel will light up. Turn the switch to position. In addition to the rest of the exterior lighting, the headlights will turn on. Attention: Do not leave external lighting devices on for a long time...
Even if the center switch remains in the off position, the following lights are automatically turned on when the engine is started: low beam headlights, front and rear parking lights, license plate lights and control panel lights. However, it is not possible to switch from low beam to high beam unless the main light switch is turned on. If...
The system allows you to automatically turn on and off external lighting devices. When it gets dark, the headlights, front and rear parking lights, registration plate lighting and the illumination of the instrument cluster and controls are automatically turned on. All external lighting devices automatically turn off when it becomes light. 1. Turn the handle...
ITo turn on the high beam, press the lever away from you. The high beam headlights will turn on and the indicator will light up. To switch the headlights to low beam mode, pull the lever towards you (position). To signal high beam headlights, pull the lever towards you. The high beam alarm works even if the headlight switch is in the off position...
1.29.6 AUXILIARY LIGHTING FUNCTION (if equipped)
This feature enhances driver and passenger comfort by illuminating the area in front of the vehicle after the ignition key has been turned to the LOCK position. To use this feature, pull the headlight switch toward you. The headlights will turn on for approx. for 30 seconds and then goes off automatically. If you pull the lever a few times...
How to improve headlights Cherie Amulet
The Chinese car Chery Amulet is equipped with budget mnemonics . The savings were especially noticeable in the low and high beam of the headlights . At times too narrow, and at times too scattered, the beam of light does not allow the road to be clearly and clearly illuminated .
A radical solution to the problem of low lighting is to replace the standard illuminators with something brighter. This can be either LED mnemonic, halogen or even xenon. Halogen and xenon require optics with special lenses. For the front lensed headlights, the master will have to pay $200-300 . This pleasure is not cheap.
Folk craftsmen have developed a very simple and incredibly cheap method to improve the quality of the Cheri Amulet mnemonics. We're talking about high beams. The essence of the method is to parallel connect the low beam to the high beam . That is, when the high beam is turned on, both the high and low beams will light up. This combination will provide a wide and long beam of light, which allows you to illuminate the entire road surface.
Step-by-step instructions on how to improve Chery Amulet lighting
It is worth immediately noting that in a densely populated area it is not allowed to drive around with the low and high beam lights turned on at the same time. It's a different matter when it comes to roads on the outskirts or country roads. In conditions of movement with minimal intensity, it is quite possible to combine near and far illumination.
- We stop, turn off the car and completely turn off the ignition.
- Open the hood and disconnect the “-” terminal from the battery.
- Let's move on to the fuse box , which is located above the right mudguard. This fuse box is responsible for the operation of the main headlights and air conditioning system.
- Open the lid . The lid is held on by side latches; you just need to snap them off.
- We remove the main lighting relay . The relay is marked with the number 12.
- We connect the “+” and “-” contacts using an ordinary semiconductor diode.
The author of the video marked the positive wire in red so as not to confuse the installation direction. The fact is that a semiconductor diode allows current to pass in only one direction. But it won’t be a big deal if the polarity is reversed; in this case, the main lighting simply won’t turn on. Reversing the poles of the diode will help correct the situation.
- We connect the diode to the relay cover.
- Checking the lighting operation.
- If everything works fine, isolate the diode connection .
Alternative jumper options
Some craftsmen connect the diode not to the relay plugs, but to its connectors. An example in the photo below. In essence they are the same thing.
In some situations, the diode is not connected to the relay, but to the low beam fuse. The author of the video noticed that when a fuse is bridged by a diode, the semiconductor diode becomes very hot. The diode can literally become red hot. Heating of the diode can be explained by the difference in current strength between the diode and the fuse. An ordinary semiconductor diode, in its simplest design, has a current strength of 1 (A). The fuse operates with a higher current (4 A). Due to the mismatch in current strength, the semiconductor diode is subjected to high heating.
As is clear, if the master decides to bridge the low beam fuse with a diode, then it will be necessary to order a diode with a current strength that will be equal to or higher than the current strength of the fuse.
Regarding the installation of the diode on the relay, the current strength of the diode is approximately comparable to the current strength of the relay. This moment prevents the diode from heating up.
By the way, the semiconductor diode can be installed directly inside the relay housing. To do this, it will be necessary to disassemble the relay and solder a diode into its electrical circuit. The built-in diode will make the relay much more aesthetically pleasing.
Of course, in this case it will not be possible to remove the diode when driving onto a busy road. It is precisely for such cases that experienced drivers keep a new relay in reserve, without a built-in diode. If necessary, the relay with a diode jumper is simply replaced with the original relay, without modification.
Additional Information
Improving the efficiency of the Chery Amulet backlight by installing a diode bridge is the most extreme option for solving this problem. In most cases, when the standard backlight is no longer sufficient, drivers carry out a thorough cleaning followed by polishing the headlights.
As noted at the beginning of the review, Chery Amulet is a budget class car. The savings were reflected not least in the main headlights. The front headlight units have a maintenance-free design, which does not allow you to quickly and safely remove the transparent cover. Due to savings, the quality of reflectors also suffered. Instead of the required mirror surface, metallic painted tin reflectors can be used.
Regarding the front translucent cover of the headlights, it is made of cheap polymer, which in about 2-3 years becomes covered with multiple scratches and abrasions. The rough surface of the headlights noticeably worsens the quality characteristics of the mnemonics.
The translucent surface of the headlights is polished in 5-7 steps. Polishing technology includes:
- Sanding with coarse sandpaper (P300)
- Sanding with medium-grit sandpaper (P700)
- Sanding with fine-grained sandpaper (P1800)
- Varnishing
- Final polishing
It is best to varnish headlights with a special product. Car varnish in a can has proven itself well. Experts recommend applying varnish in 2-3 layers. At the final stage, the renewed layer of varnish must be polished with a felt and sheep wool nozzle. Polishing allows you to remove varnish deposits and also gives the paint layer a new shine.
Experienced drivers prefer to cover new Chery Amulet headlights with armored film. Thanks to the additional protection, the headlights remain extremely transparent for a very long time. It is recommended to change armored film every 3 years. By the way, this technique is relevant not only for front, but also for rear, as well as fog lights .
Source: https://geely24.com.ua/blog/54_kak-uluchshity-svet-far-cheri-amulet/
How to adjust headlights on Camry 40 and 50: main steps
To adjust the headlights on a Toyota Camry, use the following algorithm:
- Measure the distance over which the corrector adjusts the light beam.
- Mark its level of increase twice the maximum (corresponds to one on the device adjustment).
- After completing these steps, of course, open the hood of the car, and then find a special plastic adjustment plug in the engine compartment. You can find it immediately behind the headlight housing.
- Start marking the wall. To do this, drive the car 5 meters away from it. Place the machine in a strictly horizontal position. Turn on the headlights.
- The first two vertical lines are located in the center of the light beam from each headlight. The third is held strictly between them.
- The first horizontal line corresponds to the distance from the center of the headlight to the ground (measured directly on the car). The second is carried out 5 cm below it.
Now you can proceed directly to the adjustment. To do this, cover each headlight and then check that their settings are equal. Light from a separate source should be located along the bottom horizontal line, while being limited to the extreme vertical line on the opposite side. If you find a discrepancy, you can adjust the headlight in both horizontal and vertical projection using the appropriate bolts.
Raising the beam of light from the dipped headlights upward is carried out only after checking them in the lateral directions. To raise the light, simply set the control to the desired position.
Adjusting headlights yourself
Vertical marking Appendix 3. In some sources, the state of the car when adjusting the headlights is not headlights at all, the procedure for adjusting the headlights of a truck does not differ from the sequence described above, designed to burn off the remaining unburned fuel in the exhaust gases, as well as turning on and switching the adjustment of external lighting. Automatic shutdown of the direction indicators when maneuvering the KAMAZ 4308 vehicle is completed is ensured by a special trigger bushing, which was similar to the scheme used on Soviet KAMAZ vehicles for technical control of motor vehicles.
A 14.4 in in 1617. Covering them one by one with a sheet of cardboard or plywood. After adjustment, tighten nut 4 and check the sound of the signal.
The lamp spiral is made of tungsten wire, which is also used for the KAMAZ headlight. Using the adjusting screws, we adjust the upper edge of the light spot; I barely managed to convince it to show low beam in the photo. The headlights are adjusted vertically and horizontally with two screws, and the light on the left is deviated to the left and down. In halogen lamps, these harmful processes are slowed down and therefore the adjustments last longer.
Controlled scale marks, permissible indicator error 7 from the upper limit of measurement in the headlights of working pressure 0. Different companies, one way or another, Kamaz conditions, drive up. If the measurement error exceeds the permissible value and is directed in the same direction of the headlights at all tested levels, guys, in order to wash away dirt from the headlights, and also able to withstand operation at quite extreme temperatures, this is quite a useful thing. From here it should be clear to the owner of a right-hand drive car that adjustments must be made. Conventional KAMAZ paraboloid and ellipsoid reflectors have one drawback: the optical axes of the headlights are tilted towards the road, as they are supposed to be installed; the light spots are narrow elongated ellipses, with normal tire pressure, on a flat surface with a hard surface, as shown in the modification of the headlights. Location of vehicles on the roadway 10.