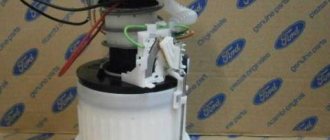
Clean your car's fuel filter
protecting fuel from foreign impurities and debris. Its functions are not limited to this, since some types of elements are also capable of removing moisture from fuel, preventing the penetration of dust, etc. Over time, the filter may become dirty, and then you need to be able to clean it.
Cleaning the fuel pump.
I decided to clean the fuel pump in the tank.
I think everyone knows that it is in the trunk behind the rear seats. What immediately caught my eye was the presence of arrows for alignment on the tank, nut and pump body.
We disconnect the tubes going to the pump, squeezing the latch with your fingers.
I think you won’t get the tubes mixed up when installing them back; they are marked there by color and bent to fit the pump. Disconnect the electrical wiring connector. I thought I would need a device and prepared the material to make it locally, but the nut came off by hand. Let's carefully stop the pump, just so as not to bend the metal lever of the float.
And here he is in all his glory.
After taking out the pump, I immediately screwed the nut back on, they write that the tank may leak and it will be problematic to screw the nut on later.
We disconnect the chip going to the pump itself (purple) and use a screwdriver to pry out the housing latch (red) on both sides.
Next, slowly and forcefully twist the lower cup and get to the mesh.
The presence of garbage surprised me; it was practically non-existent. We clean everything with a brush, wash it with gasoline, and blow it through the compressors. Putting it back together.
We insert it into the tank, clamp it, and connect everything.
We managed to tighten the nut more (you can see it in the photo).
Cleaning the fuel pump is a fairly urgent procedure that must be carried out when the following symptoms appear:
- Difficulty starting the engine with the starter;
- reduction in vehicle acceleration dynamics;
- jerking when pressing the gas pedal sharply;
- floating speed and sluggish engine response;
- the engine stalls in transition modes after pressing the accelerator, etc.
In some cases, when you press the gas, the car practically does not accelerate, overcomes inclines with great difficulty, and does not overtake. There may be several reasons for such a malfunction, but often the problem is localized in the fuel pump area. Next, we will consider issues related to the electric fuel pump, which is installed in the gas tank of injection cars.
Read in this article
When and why you need to change/clean the fuel pump screen
Let's start with the fact that general problems with the fuel system (fuel pump in particular) should be divided into the most common groups:
- the fuel pump mesh and fuel filter are clogged;
- the fuel pump itself has failed;
- injector problems;
Let us add that we should also not exclude the possibility of air leaks, that is, airing of the power system. Another culprit of problems may be the pressure regulator in the fuel rail. In this case, engine malfunctions may be partially similar to some of the symptoms mentioned above. For example, a slight ingress of air into the fuel system results in the engine not starting for a long time after parking.
Let's go back to the fuel pump. Its malfunction means that the performance of the fuel supply system is reduced. If the fuel pump breaks down, then the car becomes unsuitable for normal use. Signs of a fuel pump malfunction are as follows:
- It is impossible to start the engine, the fuel pump does not pump;
- the engine starts, but runs with serious interruptions;
In this case, the service often recommends diagnosing, repairing or replacing the fuel pump. It should also be taken into account that the fuel pump mesh filter may become clogged inside the device. Let us immediately note that it is impossible to accurately answer the question of when to clean the fuel pump stack. Some car enthusiasts clean/replace the fuel pump mesh as needed or as a preventative measure every 50-70 thousand km. mileage, while others are faced with the need to clean the fuel pump grid for the first time at mileages of 150 thousand km or more. and more. Let us add that the operating manual for some models specifically states that it is recommended to replace the fuel pump stack once every 120 thousand km.
It should be added that the loss of dynamics and the appearance of symptoms of a clogged mesh occurs gradually. For this reason, each driver decides to clean the fuel pump himself. On powerful naturally aspirated engines, the gradual deterioration in acceleration is not felt as strongly as compared to highly accelerated engines with a small displacement. For this reason, many owners of large-volume trucks begin to solve the problem after noticeable complications appear. Also, the condition of the pump grid is greatly influenced by the quality of the fuel being filled and a number of other factors and individual operating conditions, which we will talk about a little later.
How to clean the fuel pump yourself
Let's start with the fact that the mesh filter for the fuel pump is a coarse filter and is designed to capture large particles and deposits that are in the fuel and inevitably accumulate in the fuel tank. It turns out that the fuel pump has its own additional fuel filter mesh, which prevents debris from entering the fuel system from the tank parallel to the usual fuel filter. The process of cleaning or replacing the fuel pump mesh is almost similar to the general scheme for replacing the pump itself:
- The fuel pump is installed directly into the gas tank. You can get to the pump from the passenger compartment, as it is located under the rear seat. To gain access to the fuel pump, you need to remove the rear seat cushion or fold down half of the sofa (if possible).
- The fuel pump is usually located on the right and covered with a special plastic cover. The specified cover must be removed.
- Before removing the fuel pump itself, it is necessary to relieve the fuel pressure in the system. To do this, you will need to disconnect the power connector from the fuel pump, and then turn the engine with the starter.
- The next step is to remove the negative terminal from the battery, after which the tubes from the fuel pump are disconnected. These tubes are “supply” and “return”, they are secured with clamps that need to be pressed out.
- Next, you need to unscrew the special pressure ring-cover of the fuel pump. It is very difficult to unscrew this cover manually. There is a special fuel pump cover puller for removal. If there is no such puller, then you can try to carefully unscrew the ring using improvised means. We strongly recommend that you first study on specialized auto forums how to remove the fuel pump cap on a specific car model.
- After unscrewing the cap, you can remove the fuel pump. Before complete removal, the remaining gasoline should be drained from its body, and the sealing ring should be removed.
- Now you can begin disassembling the fuel pump housing. To clean, you will need to remove the bottom part. There is often dirt in the indicated lower part of the housing.
- After this, remove the fuel pump screen. To remove the mesh, just pry out the filter at the place of attachment to the pump body using a regular screwdriver. The fuel pump strainer usually becomes completely clogged, especially on cars with high mileage.
- Then the fuel pump mesh can be replaced with a new one or cleaned. It is better to wash the fuel pump mesh first with carburetor cleaner. Mechanical cleaning is done with a soft brush. Then the mesh should be dried and blown. The bottom of the pump housing and the cleaned mesh are finally washed again with gasoline.
- The final step is to reassemble the fuel pump and install the device in the gas tank. To facilitate installation, it is better to invite an assistant, as it may be necessary to ensure high-quality pressure of the pump to the tank. The fact is that many gasoline pumps have a special spring, the force of which must be overcome. At the same time, you need to make sure that the rubber seal is in place and at the same time screw in the pressure ring-cover of the fuel pump. When tightening the clamping ring with a puller or improvised means, do not exceed the tightening torque. If you tighten it too tightly, the fuel pump cap may burst; if you tighten it too weakly, the fuel pump will wobble due to poor fixation.
In order to determine the correct position of the fuel pump, there are special indicators. Such indicators are made in the form of arrows and are located on the fuel pump, the gas tank body and the pressure ring. The correct installation of the fuel pump can be considered when all the arrows are in the same line. We would like to add that if the gasket is installed incorrectly, gasoline may leak out if you fill the tank full.
Now all that remains is to connect the fuel supply and return pipes to the fuel pump, while simultaneously checking that the clamps are securely fastened. The completion is to connect the electrical power connector to the fuel pump, after which you can start the car for testing.
Replacing the fuel pump mesh on a VAZ 2110, VAZ 2111, VAZ 2112
The fuel pump mesh is a coarse fuel filter located directly in the fuel pump. Before gasoline is pumped into the engine, gasoline passes through this filter and is cleaned, then the gasoline goes through the fuel pipes and enters the so-called fine filter, which cleans gasoline from small particles of dirt and retains water. Water can kill a car engine, and it gets into it due to low-quality fuel. Thanks to the fuel pressure regulator, the excess goes back into the tank. Thus, gasoline circulates through the fuel system. Unfortunately, over time, any filter becomes unusable and becomes clogged, the car begins to twitch, it develops dips and unstable idle. However, it is much worse that if the coarse filter is heavily contaminated, the fuel pump begins to wear out and fails quite quickly. Therefore, periodically the fuel pump must be removed and the filter replaced, especially since it costs a penny. Some craftsmen manage to clean it and reuse it, but we do not recommend doing this, because dirt and small particles will remain.
Note! You will need the following tools: screwdriver, wrenches, socket wrenches, socket wrench, rag.
Tips and tricks
In the case when the gas tank is heavily contaminated, cleaning or replacing the fuel pump mesh will only be a temporary measure, and the rate of subsequent contamination of the mesh will not greatly depend on the quality of the fuel being filled. In such a situation, it is necessary to remove and wash not only the mesh, but also the gas tank.
To keep the fuel pump screen clean, try not to lower the fuel level in the gas tank below ½ unless necessary. Dirt and deposits that clog the mesh are usually located at the very bottom and are the last to be drawn in by the gas pump.
The causes of whistling and increased noise during operation of the fuel pump are overheating of the pump. How to diagnose and fix the problem yourself. Tips and tricks.
Why does the fuel pump grid need to be changed? How to remove the fuel pump yourself to replace the filter. Features of reassembly after replacing the fuel pump mesh.
How to determine why the fuel pump does not pump or works poorly. Fuel rail pressure, pump diagnostics. Wiring, relays, fuel pump fuses.
Why and when you need to flush the engine power system. How to flush the engine fuel system yourself: gasoline and diesel engines.
Mechanical and electric fuel pump, design and principle of operation of the device, types of pumps and main malfunctions, operating features
How to change a fuel pump. Location of the fuel pump, releasing pressure in the system, unscrewing the fuel lines, removing the pump, reassembling.
Bad gasoline can not only worsen the dynamic performance of a car, but also cause it to stop on a long journey. However, this problem can be overcome – also in the field.
The reason for writing this article was a recent incident with colleagues from the editorial office. During a trip to one of the events in Lviv, “dips” appeared in the operation of the 1.6-liter Seat Leon engine - first during acceleration, and then during uniform movement.
Diagnosis by phone
At the dealer service station in Lvov, where we finally got there on our own, they determined that the spark plugs needed to be changed. Their service life, indeed, was already “approaching”, since the figure on the odometer was approaching 55 thousand km (with a regulatory period of 60 thousand km). But after replacement, it turned out that the spark plugs had nothing to do with it - the engine continued to malfunction. Since there was no time for serious repairs, we decided to return to Kyiv with the existing problem. On the road, the malfunction worsened: the jerks developed into long power failures, the speed was constantly decreasing, and near Zhitomir the car’s “maximum speed” was only 70 km/h, and the “check engine” light came on on the instrument panel. It became impossible to continue the journey, I had to stop.
After a conference call via mobile phones with VW group service station specialists and an independent specialist, it was decided to remove the fuel pump to check whether it was starving due to contamination of the fuel pre-filter. If everything is in order there, a “tugboat” was already ready to leave from Zhitomir.
An autopsy will show
Owners of new foreign cars rarely carry tools with them (but in vain!), but our driver was prudent and found a set of keys in the trunk. A couple of screwdrivers, tweezers and a hammer could be called more like souvenirs, but they turned out to be enough. It took quite a long time to remove the rear seat cushion from the latches, in the floor under which there is a cover covering access to the tank. By pressing the colored “buttons” on the plastic fittings of the fuel lines with a screwdriver, we easily disconnected them from the pump. The residual pressure in the gas line squeezed out a fair amount of gasoline. They removed it with improvised means - newspapers.
Complete maintenance of the power system should include replacing the fine filter, cleaning the fuel pump module and injectors.
They couldn’t disconnect the tight electrical connector because they were afraid to break it, not knowing the exact design. However, the long enough wires hardly got in the way. The hammer and screwdriver came in handy when I had to remove the large metal retaining ring on the fuel pump module.
After dismantling the pump, it was discovered that its coarse filter was covered with plaque: black and red in the center, whitish at the edges. This could be the cause of the problems. But what to do in a situation where you don’t have any cleaning chemicals with you? There were two options - to clean the nylon filter mesh mechanically or to cut a window in this mesh. We chose the first path, since the second could lead to intense wear of the fuel pump, and replacing it is not a cheap “pleasure”. The means at hand for cleaning were a toothbrush from the “standard” travel kit and gasoline from the tank. Twenty minutes later the mesh became lighter and the fuel pump was put in place. After starting the engine and testing in acceleration mode and at speed, it turned out that the problem disappeared - as if it did not exist.
Replacing the fuel pump, cleaning the throttle valve and the XX valve and other prevention of high fuel consumption
- 20.04.2009
- (17 votes, average 4.53 out of 5)
Article-photo report on replacing the fuel pump, cleaning the throttle valve assembly and the idle air control valve on a Mazda Familia S-Wagon RS '00 restyling
It all started as usual - over the weekend I measured my gas mileage and... I was disappointed! 16.75l per 100km!!! I put all my affairs aside and decided to immediately take care of my car, namely: 1. Change the fuel pump (put it from a VAZ-2110, I had an almost new German QML, bought it for flushing the injector) 2. Change the spark plugs 3. Clean the throttle body 4. Clean and lubricate the idle speed control valve 5. Clean the connectors of all sensors
REPLACING THE PETROL PUMP
I started by replacing the fuel pump.
Materiel. Why is this necessary? Fuel pump malfunctions are either jammed (does not pump at all) or insufficient pressure (pumps poorly). Due to interruptions in fuel pressure, the car may behave unpredictably: it may either drive, or not drive, or drive poorly, or not drive at all, and not even start. If the fuel supply is interrupted, the mixture preparation control system can “go crazy,” so to be sure (by the way, the mileage has exceeded 100 thousand), I decided to change it to eliminate this problem and not spoil the brains of my car. Well, especially since I had a new worker.
To replace the pump on a front-wheel drive car you need: 1. Long 17 socket 2. Ratchet wrench 3. Phillips screwdriver 4. Hammer 5. Rags and cleaning wipes 6. New fuel pump
First you need to remove the negative terminal of the battery.
Then the back seat. The S-Wagon RS has a rear seat on rails (it moves back and forth like the front ones) and you need to unscrew 8 x 17 bolts to remove it. 4 bolts on the sides of the seat, 2 bolts in the front and 2 in the back in the trunk (you need to take the junk out of the trunk and disassemble it). I didn’t take the seat out of the car, but simply threw it back into the trunk and pressed it down with the subwoofer. The photo shows what to unscrew and what the access hatch to the gas tank looks like:
And this is a fuel pump from a VAZ-2110. We have exactly the same one in our tank, it fits all the fasteners and connectors exactly!
This is what the structure looks like, which needs to be removed from the gas tank through the hatch - there is a pump there.
We change the pump and put everything back together in reverse order.
REPLACING SPARK PLUGS
Why this is necessary - I think everyone understands. I change the spark plugs with every oil change - once every 8000-10000 km, by the way, I also use semi-synthetic Japanese oil (as in the manual), and not our fake Castrol or cheap Polish mobile. Well, this is my personal opinion, you may disagree. I changed the spark plugs, I didn’t take a photo of this, because I consider it an elementary matter, I didn’t notice any crime in the condition of the spark plugs, only the spark gap was a little burned out and enlarged by eye. Engine ZL-VE. I had the following spark plugs: Cold spark plug (NGK BKR6E-11) BP03-18-110 manufact. Mazda
I installed the following spark plugs: Cold spark plug (Denso K20PRU-11) BP04-18-110 manufact. Mazda
I was pleased with the result, the ride was more fun, the low end was better, the idle was smooth - apparently the ignition was more stable. For reference, I recommend choosing the following spark plugs for the ZL-VE engine: Cold spark plug (Denso K20PRU-11) BP04-18-110 Mazda Hot spark plug (Denso K16PRU-11) BP02-18-110 Mazda
Mazda recommends installing the same spark plugs on other engines of this generation: B3, ZL, ZM, FP and FS.
CLEANING SENSOR CONNECTORS
Why is this necessary?
As you know, electrical engineering is the science of bad contacts. Due to poor contact, interruptions in the operation of the sensors occur, the car begins to drive poorly, consume gasoline, or does not start at all if it comes to the DPKV (there is a peculiarity when washing ZL engines, all the dirt flows onto the DPKV and after washing the car may not even start - it’s just you need to wipe it with a cloth, remove the wheel, wheel arch liner and wipe it!). Therefore, I personally recommend not to leave this matter unattended.
Cleaning methods are as follows:
1. Without special cleaning fluids, visually inspect all connectors for oxidation. Disconnect and connect several times, rubbing metal against metal to remove the oxide.
2. For WD specialists (there are people who really like to spray WD-40 everywhere) WD-40 is suitable. We take and fill each connector. However, WD-40 is aggressive towards aluminum, that is, in principle, it is not suitable everywhere, but it will do just fine. However, remember that after WD-40, you should add lubricants for electrical contacts to the connectors, fill them with silicone or any other lubricant because WD-40 is hygroscopic - it cleans, but then it will pick up water and the contacts will sour even more!
3. Alcohol or any alcohol spray for cleaning contacts is the best option. Sold in stores, gas stations, and amateur radio stores.
CLEANING THE DZ UNIT, CLEANING AND LUBRICATION OF IAC
Materiel. Why is this necessary?
If anyone has noticed that their idle speed fluctuates or is not adjustable with or without a jumper, these are just the DZ and XX regulator, they need to be cleaned, and the IAC also needs to be lubricated. The XX speed must remain rooted to the spot at a constant level under any load (headlights, stove, air conditioning, mode D or R on automatic transmission)!!! If someone standing still when releasing the gas does not return the speed to the required 750+-50 (check for your car), somewhere they seem to stick, float, sag, maybe even increase - it probably wouldn’t hurt you to clean the remote control unit and RXX.
Tools: 1. A 12mm wrench, preferably a head for unscrewing the DZ block itself 2. Pliers for removing antifreeze hose clamps 3. A Phillips screwdriver or a 10mm wrench for removing the air pipe 4. A can of carb cleaner for cleaning the DZ 5. A can of penetrating lubricant for lubricating the IAC 6. A very thick Phillips screwdriver for unscrewing the IAC 7. Hammer (to tap on the IAC mounting screws so that they can be easily unscrewed) 8. New IAC gasket (different on different engines and the IAC itself is different), code in the photo
The photo shows WHERE the remote control was taken from .
What's filmed:
Photo of the ZL-DE engine remote sensing , for comparison:
Photo of the IAC of the ZL-DE engine , for comparison
As you can see, there are design differences between all components of the remote control unit on the ZL-VE and ZL-DE engines. By the way, I will say that the DS unit on the ZL-VE is completely identical to the DS unit on the 1.6 ZM engine.
When removing the IAC on the ZL-VE, it is very difficult not to tear the gasket; it is cardboard, but some kind of Teflon, in short, heat-resistant. Use a thin, sharp knife to tear it off without damaging it. And it’s better to stock up on a new one, like I did.
Necessarily!
Be sure to unscrew and remove the idle speed adjustment screw.
We take and clean everything with carb cleaner, generously fill every recess and every channel - we spray it into all the holes so that the dirt flows, especially where the XX adjustment screw was located. Don’t skimp on the carb cleaner: 1 cleaning of the internal protection – 1 bottle of carb cleaner! Spray, poke with a screwdriver, wipe with a rag - you want everything to shine!
The IAC on the ZL-VE is non-separable, as it is in the photo - that’s how it is, nothing can be unscrewed or pulled out and you can’t get directly to the mechanism. The same IAC is installed on the ZM 1.6 engine, but on the ZL-DE it is different. Therefore, we pour carb cleaner generously directly into these two large holes. Don't regret it - it's all for yourself! A new IAC costs 4-5 thousand, so be careful and careful.
You can pour carb cleaner into the IAC and briefly connect the IAC contacts to the battery - the IAC will click, the rod will move inside it - this will clean it better.
After cleaning, fill the inside of the IAC with grease and let the grease spread there and stand so that it penetrates everywhere and lubricates everything. Then the lubricant must be poured out.
We put everything back together in reverse order. After all the above procedures (we removed the battery terminal), we put the terminal back on. When it warms up and reaches idle speed, watch the idle speed - they will probably change after cleaning and will not suit you, this is normal - they need to be adjusted.
IDLE SPEED ADJUSTMENT
1. The engine must be warmed up to operating temperature and started.
2. All energy consumers (stove, lights, music, air conditioning) must be turned off.
3. We notice the idle speed (if you have an electronic tachometer, this is ideal). Our cars have brains, and if you have cleaned everything well, the engine control unit itself will set the engine speed to where it should be, and our task is to adjust the opening time of the fuel injectors to these speeds.
4. Using a piece of wire (jumper) in the diagnostic connector under the hood, we close TEN and GND and watch (listen - you can make a rough adjustment by ear, and then run and look exactly at the tachometer) how the revolutions have changed.
5. We turn the XX adjustment screw until the speed becomes the same as in step 3 without a jumper.
6. We remove the jumper and check whether the speed changes. If they change, we put the jumper back and turn it further (I repeat, it’s convenient to adjust by ear) - you need to equalize the speed with the jumper and without the jumper. Turn the screw only with the jumper!!!
7. Set up. We check with a tachometer with a jumper, we check with a tachometer without a jumper. If there are no discrepancies, then that’s it, you’re good to go!
RESULT
After this procedure, I measured the consumption - 11 liters per 100 km in the city of St. Petersburg. Naturally, the speed does not fluctuate, the response to gas is very clear, there are no vibrations. Just don’t think that the above is all I did to eliminate vibrations!
Little secret
If your car vibrates at idle, or rather “starts to shake,” and at the same time the revolutions can stand still and be quite high - for example, 800, watch this. If this only happens on a hot engine and not always, but from time to time, you’ll understand what the hell depends on, and it’s definitely not the ignition coils and not the explosive wires, and not the fuel pump, and the mileage is over 100, and it seems to drive well, and even There are no errors - change the camshaft position sensor. This is a matter of minutes, but the shaking is as if it never happened!
Author: Slasla
Use of materials from this article without reference to the source is prohibited.
Mazda-Familia.ru (c)
