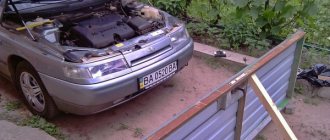
Many owners of domestically produced cars are faced with the problem of low quality standard optics. Most often it is necessary to change the lights in the tenth family “LADA 110”, which consists of 4 brands (VAZ 2110, 2111, 2112, 21123 - three-door coupe). As an alternative, in order not to change the factory equipment, they use VAZ 2112 headlight tuning, which allows you to increase the light output of the optics by 25 - 30%.
Most car owners try to correct incorrect lighting themselves and replace parts. Tuning VAZ 2110 headlights allows you to save on reinstalling standard optics.
Lighting market offers for VAZ 2110 - 2112
Finding high quality headlights is not easy. Spare parts often come to markets from China and Taiwan. According to the results of inspections, the durability and quality of such copies is 5-6 times inferior to standard factory ones. The only way out is to convert to headlights from well-known manufacturers. The most popular brands:
Kirzhach headlights from Avtosvet cost 2,700 rubles. have high warranty characteristics and are designed for installation of standard halogen lamps. For low beam, a lens is installed in the headlamp unit, which provides soft, even light and good illumination of roadsides.
Bosch headlights do not have such advantages. Provide a standard beam of light in a strictly limited area. Cost - from 3000 rubles. In the low beam the roadsides are poorly illuminated. The advantage of the configuration is the high quality of lighting in rainy weather due to the glass seal
If you can’t afford to pay for new optics, you can improve the old one. You can do headlight tuning on a VAZ 2110 yourself. There is an option to contact the service station.
Good optics improve driving safety; tuning a VAZ does not have any difficult aspects and does not require the purchase of expensive equipment.
Tuning of VAZs with replacement of electric lamps
The meaning put into tuning the headlights of this VAZ model is not only to improve the exterior of the car, but also to optimize the performance of standard lighting devices, the quality of which (as, indeed, on models 2111, 2112) leaves much to be desired. There are especially many complaints from domestic (and not only) car enthusiasts regarding electric lamps installed by the manufacturer. The only effective solution to this problem is to replace them with electric lamps that produce a light beam characterized by increased brightness and intensity.
Electric lamps, the most popular among fans of headlight tuning
Modern manufacturers of electrical products are able to offer domestic VAZ 2110 enthusiasts a wide selection of types of automotive electric lamps, each of which has certain advantages and disadvantages:
- Halogen
. Car enthusiasts consider the main advantages to be a wide variety of standard sizes, long service life and an acceptable cost for most. However, such disadvantages as high energy consumption, installation and operation features are rapidly reducing the number of their adherents among motorists. - Xenon.
Despite the obvious advantages of this type of electric lamps (high intensity of the light beam, low energy consumption, environmental safety, proximity of the beam to the daylight spectrum), their widespread use is limited by some disadvantages. This, and a rather high cost, and the need to equip the vehicle with a special control unit (controller). However, the main reason for the frequent refusal to use xenon is said to be the increased risk of blinding drivers of oncoming cars, which, in fact, was the reason for the ban on their use by the traffic police. - "GT" type lamps
. They harmoniously combine most of the advantages of the above-mentioned electric lamps, which quite logically led to a steady increase in their popularity, including for carrying out such an operation as tuning “2110” headlights.
So, we are tuning the external lighting devices of the VAZ 2110 using GT lamps.
The use of the GT lamp in tuning
Understanding the breadth of tuning possibilities provided by the above lamps lies in the plane of careful consideration of their technical and operational features:
- Glow temperature coefficient, Kelvin - 4000-5000.
- Maximum luminous efficiency,% - 45-50.
- An enlarged quartz glass bulb housed in a chrome-plated body.
- Long spiral length.
Electric lamps “GT” are quite widespread in retail chains, which allows a car enthusiast who has decided to tune external lighting devices to purchase them (the lamps) without much effort.
How to disassemble and improve headlights
Tuning of optics is carried out in specific cases:
- Improving the appearance of the car.
- Improving the quality of lighting.
To dismantle the headlight unit, you will need a standard set of tools: a screwdriver, a wrench, and a rag. The work is carried out in stages:
- Disconnect the terminals from the battery.
- Unscrew the bolts from the radiator grille.
- Unsnap the hydraulic corrector cylinder and turn it clockwise until it stops.
- Unscrew the 3 fastening nuts, move the trim to the center, and move the headlight unit back.
- Unscrew the buffer bolts.
- Remove the bottom bolt and remove the lighting.
- Disconnect the turn signal from the power supply.
- Unscrew the fastening bolts or remove the sealant, depending on the model and configuration.
Installation of the headlight unit is carried out in the reverse order, after tuning or other modernization has been carried out.
Finalization
In order to make the glow better, they are refined, which includes the following steps:
- Shifting the lens closer to the reflector;
- Modernization of curtains;
- Changing the shape of the reflector.
These are the main stages that will ultimately lead to the complete modernization of Kirzhach headlights on a VAZ 2110 car. Now it is necessary to consider each individual stage.
Shifting the lens closer to the reflector
The alteration begins with shifting the lens to reduce the area of the lens onto which the light flux falls. As a result, the curvature of the lens will also become smaller.
- Disassembling the module and removing the lens from it. Carefully mark the cut at the intended location of the module. It is imperative to ensure that the lens curtain does not move from its place, but remains at a distance of 50 mm due to the focal length of the lens;
- Cut off the lens at the marked location and attach it to the module. It is attached using the cuts that were made earlier, but the module itself will become shorter. The main thing in all this is that the closer the lens is, the more heating will occur due to its small area. In order not to miss the distance, the most optimal would be to approximate the lens by 10 mm.
Carrying out modernization of curtains
To carry out modernization and modification at the highest level, good and high-quality light distribution is done. The curtain is made straighter so that the light does not blind passing drivers driving in front of the VAZ 2110 into the rear mirrors. This type of curtain was developed according to the European GOST standard and is very successful.
To do this, you will need cardboard from which the curtain template will be made. The prepared cardboard template is transferred to a plate of metal material. To cut it out, metal scissors are used and the finished curtain is attached to the module. Also, if desired, it can be wrapped in foil to provide better light dispersion; it can also be used to install fog lights.
Under the lens on the module body, the edges are cut off. If they are cut correctly (no more than one millimeter along the ring), then the edge of the ring will not interfere with the correct flow of light.
Changing the reflector shape
If you want to change the width of the light output without changing its height, then you can change the shape of the reflectors yourself. By the way, on imported cars the reflectors have an oval shape, which is the best option.
Tuning headlights - main options
Some motorists call the reinstallation of standard halogen lamps to xenon and higher-power halogen lamps the main type of tuning. Factory optics provide minimal light flow and quickly burn out, so many motorists are considering replacing headlights with alternative light sources. When choosing, it is important to install lamps of the appropriate base and optimal color temperature:
- The Nord YADA “Clear” lamp is a budget option, costs approx. 100 rub. a piece. Service life - 2 - 3 months.
- Beacon H1 12V 55W Super Light +50% “ULTRA” - 240 rub. The optics provide increased brightness, the service life does not exceed the factory one.
- Bosch P1+90. Price - 1000 rub. Durable, suitable for low and high beam. The maximum service life is up to 12 - 18 months.
- OSRAM ULTRA LIFE 12V 55W H1 - inexpensive but good lamps. They last longer than standard ones.
- Osram H1 Night Breaker + 90% is ideal for rainy weather.
- Philips X-treme Vision +130% H1 12V 55W. 130 percent increased brightness. Good glow effect and long service life.
When replacing the lamp in one headlight, it is recommended to change the second one, since the service life of the optics is the same.
Procedure for replacing bulbs in Bosch headlights
Drivers often encounter a problem when headlights do not illuminate the road very well at night. This is due to the fact that the manufacturer installs H1 lamps. Experienced craftsmen assure that after replacing the standard lamp with an H 7 analogue, the situation improves significantly.
Such work is performed quite simply:
- all switching is disconnected from the headlights;
- the radiator grille is dismantled, for which you only need to unscrew the mounting bolts;
- the wiring blocks are disconnected from the rotating elements;
- the hydraulic correction device is removed. You just need to press on the locking element and turn it ninety degrees;
- the headlight bolts are unscrewed, the headlight moves back, the eyelash moves to the center to free it from the hook with the wing;
- the buffer bolts are released, the eyelash is dismantled;
- Now, by unscrewing one more of the nuts, you can remove the light source;
- After heating the sealant, open the headlight with a knife;
- the hole for the lamp will have to be slightly expanded with a drill, since the diameter of H 7 is slightly larger than that of H 1;
- The terminals are changed for the lamp; four of them will be required;
- a new lamp is inserted and secured with a fastener;
- the reflector will have to be slightly adjusted to better stay in place;
- some drivers install LEDs;
- The headlight is assembled in reverse order and then adjusted.
Now the road will be illuminated better.
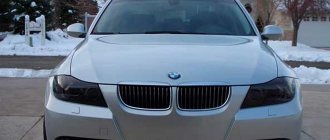
Tinting and replacing factory lamps
You can replace the factory headlights on a VAZ 2110 in the garage; the operation takes 20 minutes and does not require any special tools. Replacing standard lamps is carried out in the following steps:
- Remove the negative terminal from the battery.
- Remove the plug located near the wing.
- Unfasten the spring clip that holds the lamp.
- Disconnect the fastener and remove the lamp.
- Install the new light element in reverse order.
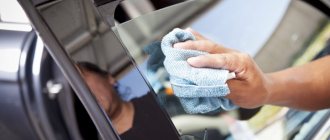
On a VAZ 2110, tuning often involves tinting the headlight housing. Film, painting, and tinting varnishes are used. Tinting of lighting equipment is carried out by tuning studios; the question of whether the procedure is legal or illegal remains open.
According to the rules for operating lighting devices on cars in the Russian Federation, shading of individual parts of the lens can only be carried out by the manufacturer. Set luminous flux color:
- for low and high beams – white, selective yellow;
- all turn lamps are orange;
- rear lights – red.
When tinting the headlight unit, it is not allowed to radically change the color of the lampshade. There is no separate regulatory act that regulates the degree of tinting. There is an official document GOST R 51709–2001 - “Safety requirements for technical. condition of the vehicle and methods of verification.” In 2009, the document removed the ban on installing any type of tinting, film, or additional optical elements on the lens, but did not provide additional clarification as to what type of tuning is allowed to be used for commercial optics. Motorists modernize headlights, adhering to general recommendations - do not change the main lighting parameters of headlights and additional lights.
Installing bi-xenon lenses
Installing bi-xenon headlights is one way to improve road lighting. With their help, visibility in low and high beams in the dark is improved, without blinding oncoming drivers. The difficulty of reinstalling the headlight unit from standard halogen to bi-xenon lies in the different operating principle of xenon lamps.
It is necessary to install ignition units, adapters, and change the headlight design. DIY algorithm for replacing bi-xenon lenses in VAZ 2110 headlights:
- Disconnect the wires from the battery.
- Disassemble the headlight.
- Remove the reflector and old lens.
- Make an adapter from a rigid metal plate, which will be adjusted to the place where the bolts are attached to the module.
- Screw the lamp into the module, connect it to the ignition blocks and screw the block to the frame.
- To connect the ignition unit, follow the instructions that come with the lamp.
- Reassemble and replace the unit in reverse order.
- Reconnect the battery terminals.
- Check functionality and make adjustments.
Installing xenon is not difficult, the main thing is to do it correctly. Installation of bi-xenon on any generation of VAZ is technically possible, but requires permission and legalization from the traffic police with a mark in the technical passport.
An administrative offense for illegally re-equipping a car's optical devices is a fine of 2,500 rubles or deprivation of the right to drive a vehicle for a period of 6 months to 1 year. Prohibited devices will be confiscated.
Improved performance and appearance
It is fair to say that such events will require a fairly large amount of money and effort. They improve the engine, chassis, body part, interior, and dashboard. But today we’ll talk about tuning VAZ 2110 headlights with our own hands.
To carry out similar work on the headlights located at the front and rear, you can use the services of a car service. But if you have the appropriate desire and free time, then the work can be completely done on your own.
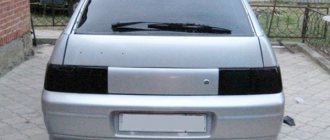
Tuning taillights - main options
- painting rear lights;
- use of tint film;
- installation of LEDs.
The surface is covered with glossy or matte vinyl film. It can be applied completely, partially in a certain place on the glass and removed at any time. Tinting material is produced in different colors and shades. The film has a protective function and can be used to protect the element from mechanical impacts of small stones.
- Wash and dry the headlight unit.
- Wet the surface with soapy water.
- Cut the film to the required size.
- Remove the backing and apply it to the surface of the lampshade.
- Carefully smooth out from the center to the edges.
- Dry with a hairdryer.
- Remove excess film.
Varnish or paint is an economical option, but not always effective if you apply it yourself. To use, you need to wash and dry the lanterns well, then degrease and varnish.
Tinting should not reduce the brightness of lights by more than 15%. Although the traffic rules do not contain clear instructions on tuning rear optics, questions from the inspector may arise.
Tuning LED headlights have increased brightness and clearly define the dimensions of the car. More often, diode strips are used, which are installed around the perimeter of the rear stop.
Using LEDs
To tune the rear lights of the VAZ 2110, installing LEDs and painting the lampshade are most often used. LEDs are mounted in plastic reflectors after dismantling the headlight unit. For the VAZ 2110 it is recommended to choose two colors: red and yellow. The tapes are soldered and placed on the base inside the headlight unit.
To make the light as bright as possible, the base of the headlight is painted black. Tuning procedure step by step.
- Dismantle the headlight, remove the glass, remove the lamps.
- Fill the inside of the block with a thin layer of polyurethane foam.
- Give the foam the desired shape by determining the areas for installing the LED strip.
- Glue the LEDs onto the base inside the headlight.
- Install glass, connect wiring.
When installing LEDs at 6 Volt dimensions, stops and turns at 12 Volt, capacitors are installed, this prevents overheating of the optics.
LED characteristics
Modern single LEDs, matrix blocks, diode strips produced by well-known companies are distinguished by their high service life and reliability. Technical characteristics of LED blocks:
- service life more than 4000 hours;
- operate at minimum on-board voltage;
- good light data;
- no overheating occurs;
- are not subject to vibration and mechanical effects;
- variety of colors.
The luminous flux of such lamps does not dazzle the eyes and is visible from a great distance. Availability allows for inexpensive and high-quality repairs.
DIY LED tuning of rear lights
To perform LED tuning of rear lights you will need a minimum set of tools and an LED strip of the required length. Do-it-yourself tuning of rear lights on a VAZ 2110 step by step:
- Disassemble the headlight.
- Pull out the diffuser.
- Paint the reflectors black.
- Prepare the site and glue the LEDs.
- Solder stabilizers and wires from old lamps to the tape.
- Place the reflector on top of the diodes.
- Assemble the tuned spotlights and install in the reverse order.
LED pinout
Before connecting the wires, you need to pinout the LEDs. To make them glow, you need to pass an electric current through them in the direction from the anode to the cathode. To do this, a positive charge must be applied to the anode, and a minus charge must be directed to the cathode.
It is recommended to check the LED strip before installing it on the car.
Tuning the headlights on your VAZ-2110 with your own hands will not be difficult if you approach this procedure wisely. In this case, the result will please the owner, and his previously unattractive car will look much more modern. The main thing in this matter is to strictly follow the instructions in order to avoid mistakes.
This brand, as a rule, has optics of such types as “Kirzhach” and “Bosch”. The procedure for dismantling old headlights consists of the following steps:
- First you need to disconnect the blocks with wires and remove the upper part from the radiator grille. To do this, take a key of 10.
- After this, you need to remove the boxes with the wires connected to the direction indicators. Immediately after this, the headlight hydraulic corrector is pulled out using a special latch.
- Next, you need to unscrew the headlight mounting bolts and remove the edge from the place where it engages with the wing.
- After completing this work, the headlight of the car is carefully pulled out.
We looked at the procedure for removing a Bosch headlight. Now let’s find out how to remove the Kirzhach optics. This work consists of the following stages:
- A flat screwdriver is inserted into the corner of the headlight, as well as a utility knife, which is used to cut off the sealant. If you can’t cut with this tool, you can use a hair dryer;
- then we proceed to remove the reflector. This is done like this: unscrew 3 bolts around the perimeter and unfasten 4 latches;
- then the headlights are carefully removed.
As we can see, removing the headlights on a VAZ-2110 car is absolutely easy.
The situation is different with the modernization of optics. It is very important to understand what is suitable in a particular case and what is not. Let's try to understand this issue.
Installation of headlights Kirzhach Lada 2110: we carry out preparatory work
Initially, you need to disassemble the turn signals and separate the glass from them. To do this, you can use a stationery knife with a retractable blade.
The difficulty is that the manufacturer solders the glass with the turn signal and separating them is quite problematic. Therefore, this process may take some time, most often from 40 minutes to 1 hour.
Using a utility knife, you need to make a gap between the glass and the turn signal. This must be done carefully so as not to damage the glass. Next, you need to insert a screwdriver into the resulting hole, while continuing to cut the gaps with a stationery knife. The next step is to remove the headlight mask; to do this, insert a utility knife into the hole and cut through the sealant. The procedure is not complicated, and in a few minutes the mask will be in your hands. When working with a stationery knife, you must follow safety precautions to avoid injuries and cuts.
In the process of work, we need a battery; if necessary, it must be recharged.
The masks are coated with chrome plating; sandpaper can be used to remove it; when cleaning the masks, all chrome plating must be removed as much as possible. Let's move on to painting. First you need to prepare and arrange a place for painting masks; any basement is perfect for this. Before painting, seal the glass of the headlight mask with masking tape.
It is better to paint turn signals in several layers; the best result will be obtained by painting in 3 layers. Leave for some time for the paint to dry. We assemble the turn signals and attach the glass to them, we use liquid nails for fastening, this is very convenient in our case, since in the future we will have to re-disassemble the headlight to implant a yellow LED strip into it, or, as it is also called, “angel eyes”.
The work with the turn signals is completed at this stage. Next, it is necessary to fine-tune the headlights, since most manufacturers do not always pay due attention to this small but very important aspect. In the photo below you can see how the new factory headlight shines before fine tuning.
Do-it-yourself headlight tuning on a VAZ-2110: tinting
After dismantling the old headlights, it is necessary to remove the spring in the hydraulic corrector hole. Next, the adjusting screw is unscrewed, after which the optics module with reflector is removed. Before you start painting the part, you need to clean it thoroughly. A degreasing primer is suitable for this. It is not advisable to paint with enamel, since the temperature inside the headlight is always very high. In this case, heat-resistant paint is perfect. It is advisable to carry out the painting procedure itself in a dry room, very carefully, keeping this part at a distance from you.
Eliminating headlight shake
Some owners of the domestic VAZ 2110 noticed that the light trembles when driving. This problem appears more often in Kirzhach headlights, but in this part from Bosch this phenomenon occurs quite rarely. Reason: rattling of the reflector itself.
To eliminate light jitter you need to check:
- Is the reflector in place in the latch?
- Is the adjusting bolt rod in place?
- Does the hydraulic corrector rod rest against the seat;
- Is the thread slack (we swap the high and low beam lamps)
- Is the tube in the hydraulic corrector frayed?
Among the most successful ways to troubleshoot the problem:
- Replacing the hydraulic corrector with an electric corrector.
- Increasing the length of the hydraulic corrector rod, which will help tension the spring.
This popular method allows you to get rid of the twitching of the light by placing a cap on the hydraulic corrector rod.
Use as a cap:
- plastic dowel 8mm long,
- brake fitting cap,
- another plastic cap.
The operating procedure is simple:
- We take out the hydrocorrector from the illuminator.
- We tightly place the cap on its stem. It is important that it does not jump inside.
We insert the hydraulic corrector into the seat.
Types of lighting devices
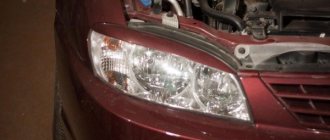
Depending on the year of manufacture, the VAZ 2110 can be equipped with either Kirzhach or Bosch headlights. Both of them are a block that includes high and low beam headlights, side lights, and direction indicators.
No matter how much difference there is, there are some nuances:
- In Kirzhach, the glass is sealed, so both removing it and replacing it with a new one is more difficult. In addition, the low beam glass has a lens that makes the light output more focused, although limited; Left headlight block Kirzhach
- Bosch glass is secured with latches. They are sealed with rubber gaskets. Their low beam boundary is more blurred, since there is no lens in the glass. Right headlight block Bosch
It’s difficult to say unequivocally which headlight unit is better. But disassembling Boshevskys is definitely easier. In any case, it doesn't hurt to know how to do it in both cases.
To remove the headlight unit, you need to open the hood:
- De-energize the VAZ 2110 (this must always be done during repairs, especially anything related to electricity) by disconnecting the negative terminal from the battery;
- Remove the lining from the radiator;
- Disconnect the block with wires from the headlight;
- Press the latch of the hydraulic corrector cylinder and, turning it 90° to the right, remove it from the socket. There is no need to disconnect the hoses;
- Unscrew the three bolts securing the headlight unit, then move it back;
- After which, move the device to the side, towards the center of the car, until it disengages with the wing hook;
- Loosen the upper bumper bolts;
- Press the pad from below until its flange disengages from the buffer, then remove the pad;
- Unscrew the nut securing the headlight from below;
- By pulling the headlight unit towards you and disconnecting the block from the turn signal, you can remove it.
How to remove glass?
Removal will be necessary if, for example, it is necessary to replace broken glass on a VAZ 2110 or it has become cloudy, covered with microcracks, etc.
If you are dealing with Bosch, then you need to release the latches, then easily remove the glass. When installing a new one, it’s worth inspecting the rubber; replacing it won’t hurt either. Some also use sealant, although there is no particular need for this, unless, of course, you are dealing with genuine products and not Chinese fakes.
You'll have to tinker with Kirzhach a little longer. Here, in order to remove the glass, you must first carefully insert a flat-head screwdriver into the corner of the glass, forming a gap. Then connect a thin stationery knife to the process.
So, with the help of a knife and a screwdriver, you may be able to detach the glass. If the sealant “sticks”, you need to warm it up with a hairdryer and immediately continue removing the sealant while it is warm.
When installing new glass, the headlight block can be placed on a softer, construction sealant. In addition, by removing the glass, you can disassemble the reflector from the outside of the car if it also needs replacement.
The headlight unit can be dismantled for repair, replacement with a new one, or for tuning or modification. In this article we will talk about the removal and disassembly of a VAZ headlight of the tenth family, depending on its manufacturer (Bosch or Kirzhach).