Advantages and disadvantages of the method
If the paintwork is only slightly damaged, many people try to avoid an expensive painting procedure.
In addition, this procedure can be carried out on your own by purchasing the appropriate cans of paint. It is important to carry out the procedure in the appropriate room and in compliance with all technologies.
Before that, you can evaluate all the advantages of this method:
- To carry out such painting, no special skills or preparation are required;
- using a spray can you can carry out high-quality repairs;
- any surfaces are covered, hard-to-reach places and bends are much easier to paint; no additional components in the form of a roller, spray gun, etc. are required during the work;
- if you have no experience in painting, you will be able to apply an even layer of paint;
- to apply an even layer you do not need to work with a roller or brushes;
- Spray painting will cost less than other means; this service is available to many motorists.
However, it is necessary to realize that all painting methods have their own nuances and disadvantages.
Spray painting is no exception to this issue, so be prepared for the following disadvantages:
- there are no detailed instructions on the rams for painting;
- Sometimes you come across cylinders of poor quality, so before applying to a car, test on another surface;
- Sometimes the declared shade and the real one may differ, so you should immediately purchase the required amount.
Select the color scheme in accordance with the labeling, but if you are still not sure of your choice, then you should consult with the experts in their field.
He will be able to carry out tinting using special equipment.
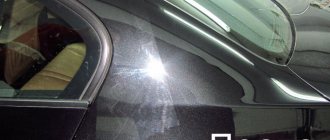
If the depth of the chip or scratch is insignificant, then it is not necessary to resort to painting; you can polish it.
If primer or metal is visible in the damaged area, then the work will be more serious and eliminating the defect will take longer, as will painting the damaged part of the body.
Spray painting a car is a step-by-step procedure that is ideal for doing it yourself, which allows you to save money at the same time.
This method is suitable for working with a small area of damage, but if the problems are serious, then contacting a service station cannot be avoided. All work will be carried out there in a special box.
Advantages and disadvantages
Unfortunately, man has not yet invented anything that would have only advantages, but this is at the same time good, because progress does not stand still, and everything is constantly evolving. Car painting is no exception. So, as already mentioned, drivers have recently begun to use a spray can more and more often, there are enough reasons for this.
- The first reason is ease of use. Regardless of where the chip or scratch is on the car, the spray can reach anywhere and deliver the paint to the right place.
- In addition, the cans have several other advantages, one of which is ease of use. The fact is that on the can itself it is written how to use it, and if you follow the instructions, the layer will fall into place smoothly without drips and will dry quickly for the same reason.
- In addition, no brushes or rollers are required to spray paint from a can, which further saves time and money.
- Well, the last advantage is that the technology of such painting is available to every person who can read.
But besides the positive aspects, the can also has disadvantages, which include the fact that if applied incorrectly, the layer will fall off in the near future, but this disadvantage can not be considered, because if you do everything according to the instructions, the result will last a long time. The second disadvantage is that a small amount of paint costs a large amount of money; you have to buy many cans to paint one part of the car.
Preparatory procedures, how to paint correctly
If you decide to carry out all the repair work on your own, then you should do everything as soon as possible. Once you discover damage, do not delay the process, as the problem may get worse.
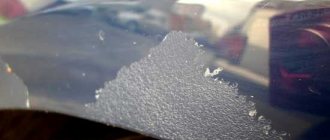
Once the scratch reaches the metal, the oxidation process begins, leading to rust and corrosion. Because of these defects, more serious work will be required.
Before painting, the car is cleaned using conventional detergents. You need to wait until the surface is dry and then degrease it.
For this, special wipes and solvent are used. After saturating one napkin with it, wipe the surface dry with the second. To ensure greater comfort, you need to remove the part that will be worked on.
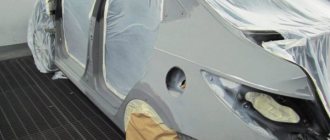
All other areas of the body that cannot be painted are covered with protective film and masking tape.
To prevent painting defects from appearing, a special chamber is needed; the room must be completely clean of dust and other contaminants. Lights, like devices, should be directed toward the work surface to avoid glare.
Work should not be carried out outdoors, as exposure to sunlight will negatively affect the result. At high temperatures outside, only the first layer is subject to drying out; it will take longer to wait for complete drying.
Therefore, before applying a new layer, wait until the previous one dries.
Before spraying the can, you should shake it well. Try not to go overboard and cover up the rest of the components.
If you are not sure of the result, then you can try your hand at an old part that you have.
Don't forget to follow the existing instructions and stock up on the following tools:
- paint,
- sandpaper of different levels,
- putty and primer,
- antisilicon,
- polyethylene,
- masking tape,
- elements for protection.
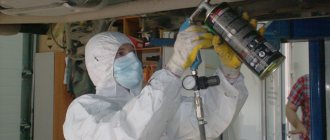
When doing all the work yourself, be sure to consider hand protection; use a rubber or silicone spatula so as not to cause unnecessary damage to the surface.
The work of the aerosol begins only after the primer has been applied, dried and polished.
Applying varnish with a spray can
The varnish must be applied to paints with a metallic effect. Can also be applied over regular paint to add extra shine and protection.
p, blockquote 36,0,0,0,0 —>
The varnish is applied in 2–3 layers.
p, blockquote 37,0,0,0,0 —>
Before applying varnish, the paint must dry “tack-free,” that is, not stick when touched. The varnish in the can, as well as the paint, must be thoroughly shaken for 1-3 minutes before spraying. It is not advisable to spray it under the scorching sun, or on a surface very heated by the sun. Otherwise you will not get a good shine after application. The varnish will dry within 24 hours at a temperature of about 20 degrees Celsius. At lower temperatures, the drying time will naturally increase.
p, blockquote 38,0,0,0,0 —>
The varnish needs to be sprayed at a further distance than the paint. It is necessary that the torch be as wide as possible, but at the same time the varnish does not reach dry, but spreads normally over the surface, forming an even layer. If you spray closely, the varnish will create “stripes” that will be noticeable after drying.
p, blockquote 39,0,0,0,0 —>
If the applied paint has no defects, then the varnish can be applied after drying for 10 minutes, without preliminary sanding.
p, blockquote 40,0,0,0,0 —>
If the paint is to be varnished, it does not have to be glossy. The main thing is to apply it evenly. The final shine will be provided by varnish. If the painted coating turns out to have defects or inclusions of dust, then, after drying, it can be treated with p1000 sanding paper, then degreased and varnished.
p, blockquote 41,0,0,0,0 —>
Instructions for spray painting a car
The dyeing process is divided into a certain number of stages. At the first stage, preparatory work is carried out, which includes cleaning the body, degreasing work, and the use of anti-silicone.
At the next stage, you need to decide on the shade. Having previously checked the body marking instructions, a specialized store will help you choose the required option.
To prevent an error, colorize the body. Specialized equipment and software will evaluate the level of color fading and other factors.
It is worth noting that you will have to spend a lot of money on the procedure. In addition, paint options such as “metallic” or “chameleon” cost much more, because these shades are the most popular.
If there is already rust on the body, then you need to get rid of it, in this case you will need sandpaper, which will turn the surface matte.
After degreasing, we begin the putty process. If the defects are more serious, then you should use putty with windshield washer.
Do not overdo it with a layer, because it may peel off. Layers are applied gradually until the surface is completely leveled.
To make the putty dry faster, there is a secret - you should add a large amount of hardener to the putty. But in this case, you should not overdo it, because you can turn the putty into a crumbling element.
The putty is considered ready when a homogeneous mixture is created. Apply it as quickly as possible, because it begins to harden instantly, already in the seventh minute. If the procedure is not carried out in a timely manner, lumps may form.
The most optimal technique for applying putty is to apply it across scratches and chips, and then level it lengthwise. Thus, it is easy to fill the voids that appear.
The temperature at which the mixture dries as quickly as possible is 25C. Next, sandpaper is used to level the surface. If the damage is deep, use coarse-grained paper; fine-grained paper for smaller scratches.
The next stage is primer. In the modern world, primer in cans is popular; it is easier to apply and saves time. But you can prepare the primer yourself by mixing everything according to the instructions. As a rule, the required proportion is indicated on the packaging.
The resulting mixture is stirred with a wooden stick and filtered through a filter. Many car enthusiasts use a regular stocking as a filter.
The resulting primer is poured into a spray gun, which will help apply it evenly. Remember that the solution can be used for 2 hours, then it begins to dry out.
The dried primer is treated with sandpaper, but a plane is more suitable to save time. Those areas where the old paint will be combined with the new must be prepared: matte them with Brite tape with abrasive paste or sand parts of the body with P1000 sandpaper.
The surface should be cleaned of chips and dust so that the paint lies evenly on the surface.
To avoid other defects, walk over the surface with an antistatic cloth and treat with a degreaser.
Next comes painting. The spray can is held perpendicular to the surface to be painted and strictly at a short distance. Moving upward, painting is done horizontally.
The distance at which the can is held is 30 cm, painting is carried out at room temperature. Thus, uniformity and absence of drips are achieved. When the first layer has been applied, it is worth letting it dry and applying the next one.
It is not necessary to apply all the paint; once you have achieved the desired color you can stop working. When the paint has dried, it must be varnished and polished.
In the process, you will experience how simple and fast it is to spray paint a car. Finally, a clear varnish can be applied to the coating. The application of this substance is carried out according to the same principle as paint.
It is recommended to apply at least three coats of paint within twenty seconds.
If there was a violation of the coating procedure, then certain defects may form:
- If the surface is not properly prepared, the coating may begin to peel off over time. In this case, you will have to do all the work again.
- the paint may be applied unevenly, due to the composition of the paint or thick application, the work will have to be done again.
- In some places the paint may fade; you should strip the coating down to the metal and carry out the procedure again.
By following the instructions above, you will be able to complete all the work quickly and efficiently. The paintwork will delight you for a long time.
Once painting is complete, you can polish the area that was repaired. This procedure is carried out using a paste, and it is necessary to eliminate visible differences between the new paint job and the old one.
After polishing, the surface of the car shines like new.
Popular polishing techniques are abrasive and protective. The most popular polishing pastes contain wax or Teflon.
After carrying out work, leave the car indoors or in the shade. Minor defects can be easily removed with an aerosol can.
The procedures are carried out using our own efforts, which allows us to save money. But significant damage is eliminated by the intervention of specialists in a specialized chamber.
How to paint a car with liquid rubber
Every car enthusiast wants his car to look perfect. A popular technology for protecting paintwork is applying a layer of liquid rubber. The product protects the body from mechanical and chemical influences, and thanks to the range of shades it helps to correct the color.
Next we’ll talk about painting your car yourself with liquid rubber in the garage.
- Preparing the site. Clear the work area. Organize the optimal temperature in the room, which is 20 degrees. Differences within 5 degrees are acceptable.
- Preparing the car. Wash the car thoroughly, paying attention to the parts that need painting. It is recommended to dry the body with a hair dryer or compressed air. Remember, rubber does not fit well on a wet surface - if moisture gets in, bubbles will appear.
- Protection of unpainted parts. Cover the parts that will not be painted - wipers, rims, radiator grille. If it is impossible to safely dismantle the part, cover it with film or paper.
- Degreasing surfaces. Use isopropyl alcohol. Some craftsmen use anti-silicone. I advise you to abandon this remedy, as improper use will not bring any benefit.
- Preparing the paint. Using a mixer or drill with an attachment, mix the paint and pour it from individual cans into a container to control the quality of mixing of the material. If everything is done correctly, there will be no sediment left at the bottom of the jars.
- Laws of physics. Pigments settle quickly, so before refilling the spray gun tank, mix the paint using a stick. Then get started right away.
- Painting. Spray paint your car. If you don’t want to spend money, take a compressor and a paint gun. The nozzle size should be 1.8 mm. I don't recommend saving paint.
- Air supply. Position it so that tiny droplets fall onto the surface from a 30-centimeter distance. You will achieve this result with an average torch dispersion angle and a compressor pressure of 1 atmosphere.
- Number of layers. To get an excellent result, apply at least five thin layers of liquid rubber. Transparency of each is 50%. Applying thin layers will provide a smooth and predictable color change, which is not the case with thick layers.
- Color selection. The best option is to paint it in its original color. But liquid rubber helps change color, and the number of layers is determined by the desired result. Choose fashionable colors and shades.
- Body painting. Start painting the body from the roof, making even and thin layers. Dry each for 20 minutes. Setting up a six-layer coating will take up to two hours. But without experience it will take more time.
- Drying. The last layer should dry for about an hour, then remove the protective agents from the surfaces covered as part of the preparatory work. Complete drying of the paint takes a day, although the coating will gain strength in a few days.
4K UHD Liquid rubber Arizona - PlastiDip killer / Peugeot 408 Arizona Edition
After performing the procedure correctly, the car will receive a durable coating that will reliably protect the body from damage and exposure to aggressive reagents. The car will have a velvety surface and an impressive appearance.
How to paint a bumper from a spray can yourself
If painting work is carried out only on the bumper, then no one has canceled the preliminary work; we are talking about cleaning the surface, puttying, priming, and sanding.
After cleaning, the surface should be treated with a solvent, thus removing traces of accumulated resins.
1. The old paint coating is removed with a sanding machine, and the corners are also cleaned. If work is carried out with sandpaper, then the grain size of the sandpaper used is gradually reduced.
All dents are smoothed out with putty. After the solution has dried, sanding and removing dust after it are carried out.
The final procedure is to degrease the surface.
2. One layer of putty is sometimes not enough; additional coating is often required.
3. Application of the primer is carried out after degreasing the bumper. Often special cans are used, which make all the work much easier.
The primer evenly covers the affected surface, the sandpaper is processed and as a result you should get a matte surface. If irregularities are found, it is worth repeating all the stages of preparatory work again.
Only after this can you begin to paint. The result of spray painting any part of the body depends 80% on the quality of the preparatory work carried out.
The procedure is very simple and is completed by cleaning with an antistatic cloth.
To avoid leaving fingerprints on the cleaned surface, you must wear gloves. Apply paint from bottom to top to avoid drips and lumps of paint.
After creating the first coat, wait until it dries before applying the second coat. Don’t try to use up all the ingredients in the can, because you can overdo it.
Having done all the work from start to finish once, you will already become a specialist, and eliminating small scratches will not be difficult.
A quick solution to the problem at minimal cost is painting using a spray can. You will appreciate the benefits of the method for yourself; it will help provide complete care for your vehicle at the highest level.
How to paint the rear and front fender of a car with your own hands
Painting a car fender is a service for which service stations charge at least 4 thousand rubles, which is too expensive, especially for old cars.
After studying this article, you can do everything yourself, saving money and ultimately getting a result that is no different in quality from professional coloring. Be sure to use a respirator when painting
The publication provides information on the methodology for selecting a composition for restoration painting and discusses the types of automotive enamels. Detailed instructions are also provided, following which you can paint a car fender with your own hands.
Which paint is best to choose for restoration work?
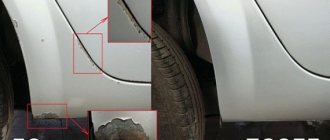
Even with careful driving and careful handling of the car, the car fender is often subject to corrosion and mechanical damage - scratches, chips.
Damage needs to be repaired
The choice of damage restoration technology depends on their size - in case of local defects, painting the entire wing is irrational due to high financial costs, here you can only get by with restoring the damaged area, whereas in case of a significant area of damage you will have to remove, straighten, putty, and only then completely repaint the entire surface.
Grinding
When restoring local defects, accurate selection of paint is important, since a stain that stands out against the background of the body will not add visual appeal to the car. To do this, a table of colors is used, by comparing which with the shade of the car, the required paint is selected.
Subsequent technological operations are performed according to the algorithm below:
- Cleaning the damaged area from contamination;
- Grinding;
- Degreasing the surface;
- Puttying of irregularities (if necessary in several layers);
- Drying the putty with a hairdryer;
- Priming the treated surface;
- Polishing putty;
- Wing painting.
we work with sandpaper
The technological process for restoring dimensional damage to the body is similar to the above sequence, however, painting the car is carried out in a special spray booth using a spray gun, since it is extremely difficult to paint a large surface in a high-quality manner using a homemade method.
In order to paint a car fender after restoration, it makes sense to use nitro paints specifically designed for repair work. They dry quickly (within 25 m) and upon completion of drying they are opened with a layer of varnish.
Types of automotive enamels
To paint the wing of a car, you can use several types of enamels, which have their own advantages and disadvantages:
- Melamine-alkyd one-component enamel - applied in 3 layers, dries at room temperature. The composition includes a hardener that increases the final strength of the coating. Advantages - wear resistance and shine, disadvantages - long drying time;
- Acrylic two-component enamel - the hardener comes separately and is added to the composition before painting, after which the mixture is diluted to the required consistency using a solvent. Acrylic paints give a high-quality result that is resistant to weathering and protect the body from corrosion, but they are more expensive than other enamels;
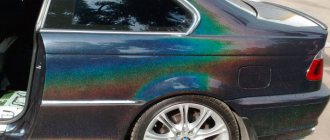
- Enamels with a metallic effect (1, 2 and 3 layers) - applied over the primer, after painting the coating is opened with varnish. The surface dries within 30-60 minutes at room temperature. Three-layer enamels give a “chameleon” effect - their shade differs from different viewing angles.
To paint the wing yourself, we recommend using melamine alkyd or acrylic enamels. Compared to metal enamels, they are easier to use, and metallic painted surfaces are not suitable for local restoration - if the car fender gets a couple of noticeable scratches or chips, the entire surface will have to be repainted.
How to paint a car fender
Painting a wing yourself requires the following tools and materials:
- Masking tape and newspapers (to prevent paint from getting on the untreated surface of the body);
- Spatula, sandpaper with different grain sizes, car putty;
- Spray gun, if not available, a can of paint of your choice;
- Primer;
- Microfiber rags, antistatic cloth;
- Varnish, polishing paste and cloth;
- Degreasing agent (acetone, white spirit, gasoline);
- Gloves and overalls for work.
If you plan to replace the front or rear fender with a new one and paint the product purchased in a store, then you will not need putty.
The procedure for painting car wings
Let's start painting the wing
It is better to paint in the middle of the day in natural light; if you are working in a garage, make sure you have a high-quality light source. Carry out a wet cleaning of the room to remove all dust present in it; if possible, blow off the working surfaces with compressed air using a compressor.
First, the surface to be treated is washed using car shampoo, after which we wait the time necessary for the car to dry completely. Further operations are performed in the following sequence:
- Cover parts of the body that are not to be painted with newspapers and masking tape;
- Degrease the damaged area of the wing and treat it with fine-grained sandpaper. If you are painting a new fender, use sandpaper to remove the factory primer;
- If there are any irregularities or deformations on the wing, it must be puttied. The putty composition is diluted in water to the required consistency, applied to the dent and leveled with a spatula. You may need 2 layers of putty;
- After drying, the putty is treated with fine-grained (P1000) sandpaper;
- Apply 3 thin layers of primer to the surface to be painted (each new layer after the previous one has dried). If you don’t have a spray gun, use automotive primer in cans, apply it in successive horizontal stripes, holding the can at a 20-centimeter distance from the body;
- The hardened primer is sanded with sandpaper - first with medium grains, then the grain is reduced to a minimum. There is no need to be zealous; it is enough to give the surface the roughness necessary for better adhesion of the paint to the metal;
- After sanding, dust is removed from the wing with a rag and the surface is degreased again;
- The last stage is coloring. The paint is sprayed from a can in 3 thin layers, similar to a primer. It is important to prevent smudges - if they occur, wait until it dries and sand the defect with fine-grain sandpaper, then cover the area with an additional layer of paint;
- The dried paint is wiped with an antistatic cloth and varnish is applied to the surface of the wing in 2-3 layers;
- After drying, the varnish is processed with fine-grain sandpaper (2000), wiped with a rag to remove dust and polished with a paste applied to the surface using a disposable polishing cloth.
WATCH THE VIDEO INSTRUCTIONS
Painting the front fender and painting the rear fender are procedures performed using identical technology. The above instructions allow you to paint any elements of the car body yourself.
krasimavtomobil.ru
For this we need:
- Absolutely any deodorant can, the main thing is that it is empty, will work perfectly without a seam, it holds a lot of pressure better.
- Paint, I used fountain pen ink.
- A syringe with a broken needle, which is used to fill the cylinder.
- Nipple from a bicycle tube.
- A pump or compressor to create pressure in the cylinder.
First of all, we fill the container with paint, to do this, remove the spray cap from the container, fill the syringe with paint, insert it into the valve of the container, press the valve all the way and begin to fill in as much as we need, for normal operation of the can, half the volume is enough.
After we have filled it with paint, we need to create pressure. To do this, we put the bicycle nipple on the cylinder valve, also clamp it all the way and begin to pump air using a pump, no more than 3-5 atmospheres.
Then we remove the nipple, put on the spray cap, shake the bottle a little and try to draw.
If you have any questions, watch the video of the process of making and using a can of spray paint.
How to repurpose an existing container
To remake a disposable vessel so that you can fill it with paint yourself, you need to take an already used one, choosing a model with a good, hard bottom and a tube nozzle. Of course, the paint will not be refilled under such pressure as in factory conditions, but refilling can be done repeatedly, and you will pay practically nothing for it, except for the cost of the coloring composition. And this will save almost half the cost of the dispersed spraying process. To do this you will need:
- used aerosol can;
- a nipple that can be cut from an old bicycle tube;
- large medical syringe;
- pressure gauge (not necessarily new);
- car or bicycle pump.
To make a reusable can of paint, these things, which can probably be found in the garage or at a disassembly site, are quite enough. To refill an aerosol can, remove the cap and spray nozzle, draw the paint into the syringe, and insert the syringe into the can all the way, with the safety valve pressed down.
You can also use deodorant containers by adding a few metal balls. Injection is carried out in this manner until the level of the composition reaches approximately 2/3 of the volume of the vessel. Then the bicycle nipple is inserted and the can is filled with compressed air.
On video: installation for refilling aerosol cans.
What to consider, or some nuances
When carrying out partial painting of a car, it must be taken into account that the spray area of the base coating should not be larger than the pre-treated area. Be especially careful that the spray does not extend beyond the boundaries of the area matted around the perimeter of the damage onto the glossy surface of the body. In addition, it is necessary that the varnish coating, which will be applied after the paint, covers the area where the paint base is applied and lies exactly along the border of the matte surface.
Note also that the surface preparation described above should cover an area slightly larger than the volume of damage itself. This is necessary so that the transition zones can be polished later without interference.
Before painting with a spray can, it must be shaken vigorously for about 3 minutes. Then it is advisable to do a test paint job on any metal surface, and best of all, on some old car part. Make sure that your actions completely coincide with those described in the instructions for use of the aerosol paint you are using.
There are also some things to keep in mind when using canned spray paints. All operations for painting a car must be carried out in a clean room, in which there is no dust either on all surfaces or suspended in the air. Make sure that there are no flying insects in the room, as they can stick to the newly painted area.
How to properly spray paint a bicycle at home?
With your favorite bike, time flies by. With frequent trips, it is sometimes not possible to see how the bicycle gradually loses its attractiveness: it becomes dull, becomes covered with small scratches, chips and even rust. All this has a negative impact not only on the appearance of the frame, but also on its service life: pipes that are susceptible to corrosion due to scratches will not last long.
If an old bicycle is “retired” forever, then there is no point in extending its service life. But many cyclists do not want to abandon their comrades and resort to complete or partial renewal.
One of these includes eliminating defects, painting and varnishing the frame. Spray painting has become widespread, and for good reason. You won't be able to apply an even layer of paint to the frame pipes with a regular brush. Due to its ease and speed, this method has found active independent use. How to paint a bicycle using a spray can at home will be discussed in this short article.
Surface preparation
If you decide to use an aerosol can as a means to remove scratches from the body of your car, then you need to know how to prepare the car body before applying enamel to the car. You can do this yourself using a certain technology. As already mentioned, there are two types of scratches, which differ only in depth and length. Of course, their processing is different.
Before you start treating the surface, it needs to be prepared. If in the first case you need to wipe the surface with a clean rag and degrease, then in the second case everything will not work out so easily. In the second case, you will need to wipe the surface, then degrease and inspect for rust on the metal of the car.
If there is rust, then everything is very difficult, because you will have to remove everything down to the metal and cover it not only with paint, but also with primer; you can do this yourself.
If there is such a scratch on the body of your car, then first of all you need to remove the layer of paint yourself, down to the metal itself, and then treat it all with a special primer that will prevent the rusting process from occurring. Then you need to wait until the primer dries, and only after that you can start painting the car body. All this can be done without much effort with your own hands, if you read everything and act correctly, and not at the moment when you already need to redo everything.
Disassembling the bike and preparing the frame
So, we found out that the color of a bicycle is determined by its frame. You will also have to paint the fork and possibly the trunk. Before painting you need to completely disassemble the bike:
- Remove all overhangs: brakes, shock absorbers, etc.
- Remove the front wheel from the fork dropouts and the fender (if equipped).
- Unscrew the steering wheel from the fork.
- Remove the trunk.
- Remove the rear wheel and fender.
When only the bare frame remains, remove the fork from the front pipe.
Preparatory stages:
- Removing the old paint layer.
- Smoothing out irregularities.
- Degreasing the metal surface.
What is necessary? Old paint is removed with a solvent. Using a clean rag soaked in it, we carefully go through all the pipes and especially along the welding joints. You may have to repeat the procedure. This depends on the thickness of the factory paint layer. After cleaning, the frame is thoroughly wiped with a dry soft cloth. If light stains remain, it is not recommended to wet the surfaces with water; it is better to go over it again with a solvent.
The next stage is sanding. All small scratches, chips and corrosion areas are removed with sandpaper. Depending on the depth of the scratches, the grit of the sandpaper is selected: 240 sandpaper will cope with small defects; 80 sandpaper will be suitable for removing chips and rust.
“Sanding” cleaning from unevenness
Removing grease stains is also a necessary procedure to properly paint your bike frame and fork. Fat content reduces the adhesion of primer and paint to the metal, which is why the paint can fall off very quickly. To prevent this from happening, be sure to use a degreasing agent, such as white spirit.
The cleaned frame of the bike can be primed
Sequence of operations when working with a spray can
Depending on the level of damage to the paint layer, its restoration may vary. Therefore, first of all, it is necessary to inspect the car and decide on further actions. If only the layers of varnish and paint were damaged, that is, small scratches or chips did not affect the putty and primer, then they can be eliminated by polishing the body element. It is worth noting that polishing is possible only when the paint coating around the defect is held firmly and does not have a tendency to peel off.
When the damage to the paint layer of the body has reached the primer and, especially, the metal, it is necessary to carry out local touch-up of the car. The cheapest and easiest way to do this is to use automotive spray paint. Don’t forget to first find out the color number of your car and use it to select the required container.
It should be noted that repairs to such chips and scratches must be carried out as quickly as possible. If the damage exposes the metal, it will inevitably begin to oxidize, which will start the corrosion process. To repair such defects, before painting they must be primed with an anti-corrosion compound and then puttied. Otherwise, even under layers of paint and varnish, the damage will begin to increase in volume and a pocket of rust will appear in this place.
Priming surfaces for painting
The finished frame and fork are freely placed or suspended. The second option is more convenient; there will definitely be no unprimed areas left. Work should be carried out in well-ventilated areas. If you will be painting at home, then this will be a canopy or utility room in a private house and a balcony in an apartment. The parts need to be hung firmly and at the same time freely, so that it is easy to apply the primer. You need to take care in advance that the composition and paint do not get into the wrong places, as well as about your own safety: prepare gloves, a mask and goggles.
We buy a can of primer in the store and evenly distribute the composition over the surfaces of the parts to be painted: frame, fork, trunk. The optimal number of layers to be applied is 3. Before applying the next portion, you need to wait for the first layer to dry.
When all the primer has been applied, the parts are left for a day. The area where priming and painting is carried out should not be too humid and there should be no source of open flame. After a 24-hour break, the primer is sanded with fine-grained sandpaper (from 400 to 600) in places where the layer thickens. The bike is now completely ready for paint.
Applying paint using a spray can
Using a disposable spray can is very simple, so there are usually few questions about this type of work. However, there are several rules to achieve better results. Following these simple recommendations will help you paint quickly and at the same time correctly:
- apply paint gradually, in a thin layer;
- keep the sprayer at a distance;
- paint from top to bottom;
- Avoid using too much paint.
The recommended number of layers is up to three. A lack of paint will cause it to wear out quickly, and too much paint will cause cracking and chipping. We make sure to let each layer dry, and only then do we begin applying the next one. Fully painted parts should be cured for 1 to 2 days.
Painting the frame
Acrylic paints in spray cans are best suited for bicycles. They lay down easier and set faster. The color scheme in stores is presented to suit every taste, the main thing is to think about the shade in advance. It’s unlikely that you’ll be able to get by with just one can, so it’s recommended to take two or three at once. Is it necessary to sand dry paint? In principle, if it was distributed evenly and accurately, then it is not necessary. Small smudges are removed with fine-grain sandpaper. We pre-wet it in water so as not to leave even a small scratch.
Metallic painting using a spray can
When painting metallic from an aerosol can, it is better to apply all layers at an increased distance and quickly. Light metallics have low coverage. To completely cover the surface to be painted with such paint, many layers may be required.
p, blockquote 32,0,0,0,0 —>
When spraying metallic paint, too thick a coat of paint or insufficient drying time between coats can cause uneven metal flakes. The last layer of metallic should be sprayed at an increased distance from the surface. This will help position the metallic flakes more evenly.
p, blockquote 33,0,0,1,0 —>
Finishing touches: drawings and varnishing
Some will not limit themselves to a monochromatic coloring of their two-wheeled friend, and rightly so. Emblems and symbols will give the bike its own originality, and it will look more elegant. You can use stickers as a simple option, but paint-applied labels look much more reliable and beautiful.
Additional elements are created using stencils - special self-adhesive films with free cut out designs. There are various options on sale: stripes, patterns, figures, letters, etc. If you wish and have a penchant for creativity, you can cut out stencils yourself from simple sheets of adhesive film.
Film with a pattern for dyeing
Important: when gluing stencils, you must make sure that the base paint has already dried, otherwise when removing the film it will peel off or smudge, and you will have to redo everything all over again!
The procedure for creating patterns is simple. You need to do the following:
- Attach the stencil tightly to the frame tube or fork.
- Using a spray can, spray paint onto the stencil.
- Wait until completely dry.
- Peel the film from the surface. The drawing is ready!
When spraying, it is allowed for the paint to extend onto the film itself - the design will have smoother edges. We make sure that it does not flow beyond the stencil. To be on the safe side, you can additionally cover the surface with a simple film along the edges of the painting area.
And finally, the last stage is applying varnish to the surface. It’s not hard to guess that varnish must be bought in cans, just like paint and primer. The protective coating must be applied in the same way as layers of paint, the number of layers is one or two. Do not leave unvarnished areas free, otherwise the paint in these areas will begin to age faster. There is an opinion that varnishing is a waste of time. This is debatable, since the varnished surface not only looks more beautiful, but also lasts much longer.
Spray painting is an easy and effective way to update your bike without professional painting skills. One time is enough to remember how and what is done to gain invaluable experience in this area.
As a rule, the bumper is painted with a primer or special paint. However, if you only need to paint a small part of the part rather than the entire bumper, spray painting the bumper may be quite acceptable.
How to spray paint a car
Very often our cars acquire minor damage to the paint layer: scratches, abrasions, chips. They are caused by various reasons: unsuccessful parking, acts of vandalism and hooliganism, exposure to small pebbles and objects while driving, hail, etc. With such a small area of damage, there is no point in taking the car to a service station. In this case, the best option would be to paint the car with a spray can yourself.
Bumper preparation
The bumper is rightfully considered the most vulnerable part of a car. Its direct purpose is to absorb the force of impact in a collision. In addition to taking the impact, it can be damaged if parked incorrectly. Repairing a bumper after deformation can be very expensive. Therefore, many car enthusiasts refuse such painting at a service station. Doing the painting yourself may be cheaper, and the procedure itself is not very complicated or difficult.
Repairing a plastic bumper may require certain materials and tools. Among them are a grinding and polishing machine, an electric drill with attachments - it is used for the same purposes. A powerful soldering iron that will be able to connect broken parts, sandpaper of varying hardness, solvent, primer, putty, varnish and paint. The dyeing technology is simple, but requires knowledge and a certain sequence. If you want to see for yourself exactly how the preparation and painting process goes, you can watch a video that describes in detail all stages of the work.
Without dismantling it is impossible to paint a car bumper really well. The stages of preparation for painting include removing the bumper, washing in warm water, and treating the damaged areas with sandpaper after drying. After this, washing and drying are repeated, and the surface cleaned with sandpaper is treated with anti-silicone. Surface degreasing can be done with a special compound for plastic. The best in this case is still anti-silicone. After treatment, you can know for sure that the paint will behave normally, covering the part and the treated areas, since different paints may react inadequately to different types of solvents.
The complexity of the damage may vary. Depending on how heavy it is, the method of repair and painting also varies. However, the technology for painting the front and rear bumpers is almost the same and differs little. What reasons could there be for you to resort to spray painting your bumper yourself?
- Cosmetic damage and defects. Small scratches and damage can significantly affect the effectiveness and appearance of the bumper. In such cases, they resort to minor cosmetic repairs. The procedure is simple and does not require significant financial costs or complex instruments. Careful sanding and applying paint can completely solve the problem.
- Chips, cracks and dents can be a more serious problem. Such damage requires preparation before removal and a more complex work process. Before painting, the bumper must be leveled. For this, hard plastic or putty is used.
- If the bumper is cracked, it will need major repairs. Such repairs can be difficult, but in most cases it is quite possible to restore the bumper to an acceptable condition.
Preparing for painting
Before you start painting your car, you need to purchase the following materials:
- rubber spatulas;
- sandpaper of different grain sizes;
- two-component primer and putty (acrylic for deep scratches and chips);
- spray paint;
- solvent;
- polishing emulsion or autovarnish.
Preparing the car for painting
Experienced mechanics advise painting a car in the summer so that the paint dries quickly and the room is well ventilated. Since the paint itself is highly toxic.
The room should be free of flies, mosquitoes and other insects that could stick to the painted body.
Steps to prepare for painting after the necessary materials have been purchased:
- Park the car in a garage or any other room.
- Dilute the detergent in warm water and wash the car.
- Let it dry for half an hour at a temperature of 18 to 22 degrees.
- Degrease the surfaces that will be puttied and then painted.
- Dampen a rag with solvent and wipe the scratches.
- Then wipe them with a dry towel.
- Apply tape to those surfaces that should not be affected by the paintwork.
- Prime scratches or severely chipped areas on the body.
- Degrease again with solvent and wipe dry.
- Putty the surface with a special solution using an aerosol can. Spray carefully from the edge of the part. Cover vertically, not horizontally.
- Wait until dry, sand with sandpaper. The sandpaper will be easier to use if you put it on a sanding machine or a small block.
After all the scratches have been primed and sanded, you can begin spray painting the car.
DIY car spray painting
Putty and primer
Puttying the car will be necessary in case of leveling chips, and plastic putty is used for this purpose. Sometimes it can be replaced with a regular car one. For 50 parts of putty use one part of hardener. If you have enough experience, the process of creating a repair mixture can be done by eye. The mixture begins to harden quickly, so it must be applied almost immediately. This putty dries within twenty minutes.
When the putty dries, the most difficult areas of the bumper undergo additional preparation. They are processed with sandpaper, which is cut and placed on a small wooden beam. A sanding machine can also serve a very good purpose. During the second stage of sanding, you should pay attention to the junction of the previous place and the new sanded layer. There is no need to treat all damaged areas with putty in one day; you can divide the work process into two or three times.
Primer. After puttying, the bumper is primed and degreased. It is cleaned with water and sandpaper, and acrylic primer is also used for this. It is diluted with solvent and hardener. The primer is applied with a spray gun. After drying, the bumper is cleaned with sandpaper, washed and dried. Another degreasing process is done with special means that are aimed at treating the plastic surface. During degreasing procedures, surfaces are wiped with dry or damp wipes.
How to paint a car fender with your own hands? Practical recommendations.
Stages of work
It is the car fender that most often undergoes minor repairs. It suffers most from minor collisions or poor parking. In this case, painting the car fender is required, which you can easily do yourself.
In fact, this is not such a difficult job and therefore you should not contact a car repair shop every time. After all, at home you can perfectly cope with this task, but you must meet a number of conditions and have all the necessary tools and materials.
Preparatory stage
It is the preparatory work that will take the most time. But without them, it will not be possible to achieve the desired result. First of all, you will need to prepare the place where painting will take place. This is usually done in the garage.
- To prevent any dust present from getting onto the freshly painted surface, you need to thoroughly vacuum the garage and wash it well.
- It is better to take out all unnecessary items or move them to a far corner and cover them.
- Before painting, the concrete floor must be thoroughly washed and watered.
In order not to waste extra time, you should collect all the necessary materials.
This includes:
- metal and rubber spatulas;
- sandpaper with index from P80 to P3000;
- automotive putty and primer;
- selected paint and varnish;
- technical solvent and degreaser;
- stripping planes;
- antistatic wipes, tape, films and old newspapers.
You will also need a set of necessary tools for disassembly and equipment such as a compressor and a spray gun. Only after this can you begin to carry out the work directly.
Preparing and polishing the wing
Before painting, you must thoroughly wash the entire car and dry it well. It would be best to remove the front fender. True, you will have to unscrew the fender liner, headlight and bumper to do this.
To make it easier to work on the rear fender, it will be necessary to remove the door seals, feet, hatch and other components.
Then the entire car, and especially the adjacent areas with the wing, must be well covered with film, masking tape or paper. This will prevent any primer or paint from coming into contact.
The wings need to be thoroughly degreased and inspection begins. It is necessary to identify all the scratches and defects that have appeared. To do this you will need a stripping plane.
The resulting rust is removed using P120-180 sandpaper or using a converter that quickly reduces iron oxide.
While working, keep white alcohol or another solvent on hand and degrease immediately. At the same time, we must try to carry out this stage as quickly as possible.
Primer and putty
The primer will prevent further spread of rust. It dries in about half an hour, and then it is also sanded with a fine abrasive material and immediately degreased.
Automotive putty is applied using a special spatula. With its help, it is necessary to eliminate all deep and remaining minor defects.
- The putty comes complete with a hardener. After thoroughly kneading, you need to make sure that there are no lumps. The time for working with putty is limited. There are only seven minutes before it starts to harden.
- Using a spatula, take a small amount of material and apply it across the dent. Only then can it be gradually spread along the length and leveled out.
- After applying the first layer, you need to clean the spatula with a solvent and wait until it dries completely. This will take approximately 30 minutes. Then you need to clean and degrease the layer and apply a new one. If the dent is large, you will have to fill it several times.
- When the putty has completely dried, you should begin cleaning and removing excess dried particles. You will need sandpaper P60-180, which needs to be changed more often. It is best to use a sander, although a simple wooden block with an abrasive material screwed onto it will also work.
- During this operation, under no circumstances should water enter, which could erode the putty. Many people wet fine sandpaper and then wipe everything dry.
- P500 is used to treat the edges of putty to smooth out the transition. For this you will also need matting paste or P1000-1200. True, sandpaper is still preferable.
Surface preparation
Preparation also includes several steps regarding stripping, sanding and priming. In many ways they are similar to previous operations.
- The surface is again cleaned of dust and well degreased.
- Sanding occurs in stages and using different sandpaper (from P180 to P240). The processing area is gradually increased to avoid uneven transition. It must become absolutely smooth to the touch, otherwise the difference will be visible after painting. Therefore, it is necessary to remove all dust and degrease the surface more often.
- For priming, epoxy or reactive primer is suitable, although a two-part primer can be used. Before doing this, it is important to read the instructions and follow all proportions. After all, you will need to mix the primer with a solvent and a hardener. Since it hardens quickly, it is better to take a small amount. For one wing, 150 grams of soil is usually enough.
- When applying the primer, you should try to maintain parallel lines. You may have to do two or three layers, leaving a 20-30 minute break between each coat. This will eliminate unnecessary drips.
- After complete drying, sanding with a fine-grained abrasive will be required again. Mostly they use P800. All generated dust is removed and the degreasing process occurs.
One point must be taken into account. If the front fender is to be painted, it is better to put it back in place before priming. It is better not to touch the body with your hands anymore, since the painting process itself remains.
Dent Removal
But before that, you need to once again pay attention to the resulting dent or damage.
If it is small, then simply filling it with putty will be enough. If the surface is not severely damaged after the impact, then it is not necessary to remove all the old paint and primer.
If the damage is large enough, then you need to remember that many layers of putty can cause severe shrinkage over time. This is especially true for alkyd and nitrocellulose putties. The total thickness should not be more than 0.3 mm. But epoxy allows you to apply up to 2 mm. The shrinkage here is minimal.
Paint color selection
Of course, the selection of the required shade is best done in workshops or specialized services. To do this, they have the necessary equipment and experienced personnel.
Therefore, it is not enough to name the factory paint markings. Over time, it may change color slightly. A small painted part will allow you to quickly select the right paint. Even the gas tank flap is good. The main thing is that it is not plastic.
If you can find suitable canned paint in the store, that will be nice. But you can make a computer selection. True, it is not so cheap and costs on average $15 per 100 grams.
The most commonly used coating is automotive enamel. It contains not only a coloring pigment, but anti-corrosion, water-repellent and fire-resistant elements. Three types of such coating are mainly used.
- Nitroenamel lays down in a fairly thin layer and is suitable for minor damage. Otherwise, at least 10 layers will be needed to cover. In addition, it lays down somewhat unevenly and does not have the desired glossy tint.
- Alkyd enamel is usually applied in three layers. The dense structure is provided by nitrocellulose. The wing gains shine, and the enamel actually does not crack and is not afraid of gasoline. But we must take into account that it takes a long time to dry and is difficult to polish.
- Acrylic paint appeared relatively recently. It consists of a combination of different resins, polyurethane and various stimulants for hardening. Therefore, it not only applies quickly and easily, but also dries and polishes well. In addition, the wing acquires a glossy shine. It is worth adding about a long service life and good resistance to various external influences.
Only after this do they begin the final stage.
Painting the rear fender, like the front fender, will not require much effort or time.
Material application process
If the paint is in a can, you will need a compressor and a spray gun. Although very often it is found in cans, which greatly simplifies the entire procedure.
- Applying the first layer will immediately reveal many defects that were not eliminated during previous operations. It’s not for nothing that it’s called a darkroom. Therefore, it is not necessary to try to do it with special care. You just need to carefully draw horizontal parallel lines and start from the top.
- All defects and errors that appeared during the application of the developing layer are immediately eliminated using putty and primer. The technology for their application remains the same as before.
- The second layer is applied perpendicular to the first. This method is considered the most effective for evenly distributing paint.
- In order to prevent unnecessary drips in any case, the spray gun or spray can should be kept at a distance of about 30 centimeters from the wing. If you increase or decrease it, you may get a non-uniform surface.
- Each layer should dry at least a little. This requires 10 to 20 minutes. It's a good idea to wipe it down with an antistatic wipe every time.
- To ensure that the layers dry out more successfully, you should monitor the room temperature in the garage. It should be 20-25 degrees. A lower temperature will require more time.
Wing varnishing
Preparation for this stage begins already during the application of the third layer of paint on the wing.
The varnish must be mixed in advance along with the hardener and solvent. The required proportions are usually indicated on the packaging.
The process of applying varnish is similar to painting. There's just a slight difference. You don't need to use too many layers here, two will be enough.
After applying the first layer, you need to wait for it to dry for 20 minutes. Then you can apply a second layer. The main thing is to prevent leaks. Therefore, the same rules are followed as when painting.
It should be noted that the varnish can dry completely only within two days. Only after this the updated wing will be able to serve for quite a long time.
krasimauto.com