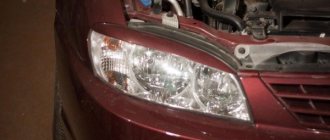
Due to numerous situations on the roads, the appearance of the car may suffer. Due to mechanical damage, a crack may occur on the headlight glass. This breaks the seal of the optics and leads to a decrease in its service life (in particular, reflectors). In addition, water begins to flow inside the headlights and dust begins to fly in. In order to prevent undesirable consequences, cracks in car taillights and headlights must be promptly removed, and more specifically, glued together.
However, before you start gluing new sealant or tape when repairing headlights, a car enthusiast may be faced with the problem of getting rid of the old layer of sealing substance that was used to secure the car glass in the headlight or lantern.
How can you restore headlight reflectors with your own hands? The easiest way to get rid of the old layer of sealant is to remove it by heating it with a construction (or household, but its power is less) hairdryer. Direct a stream of hot air onto the surface - the composition will heat up and lose its properties. The heated sealant can be easily removed with a sharp screwdriver or knife. Do not heat plastic car parts to high temperatures - they can also melt, like sealant.
To glue car lights, you will need the following tools and materials:
How to seal a headlight on a car
Due to numerous situations on the roads, the appearance of the car may suffer. Due to mechanical damage, a crack may occur on the headlight glass. This breaks the seal of the optics and leads to a decrease in its service life (in particular, reflectors). In addition, water begins to flow inside the headlights and dust begins to fly in. In order to prevent undesirable consequences, cracks in car taillights and headlights must be promptly removed, and more specifically, glued together.
However, before you start gluing new sealant or tape when repairing headlights, a car enthusiast may be faced with the problem of getting rid of the old layer of sealing substance that was used to secure the car glass in the headlight or lantern.
Removing old sealant from a car headlight
How can you restore headlight reflectors with your own hands? The easiest way to get rid of the old layer of sealant is to remove it by heating it with a construction (or household, but its power is less) hairdryer. Direct a stream of hot air onto the surface - the composition will heat up and lose its properties. The heated sealant can be easily removed with a sharp screwdriver or knife. Do not heat plastic car parts to high temperatures - they can also melt, like sealant.
To glue car lights, you will need the following tools and materials:
How to remove sealant?
Before you start gluing the headlights, familiarize yourself with the methods for removing the sealant. You will need this knowledge at the beginning of work, when before applying a new sealant you need to remove the old one, and sometimes at the very end, if there are traces of dried material on the headlight or car.
- The most effective way is to heat the dried sealant with a powerful hairdryer. Under the influence of heat, the composition softens and can be carefully removed. This must be done very carefully so as, firstly, not to melt the protective plastic cover of the optics, and, secondly, not to cause mechanical damage.
- Remaining material can be removed by scraping with a knife or screwdriver, but there is a risk of scratching the optics.
- Apply the solvent and after 20 minutes carefully remove the composition.
Types of materials for gluing
To glue the headlight, glue is most often used. The following basic substances are used to glue car headlights:
- Terostat - 8600 2K;
- Terostat - 8599, 8597, 8596
- Terodicht - Black;
- Terodicht - Elastik;
- Permatex;
- Abro;
- Body.
Adhesive sealant for glasses and headlights PERMATEX 65 AR Silicone Glass Sealer
The second way to glue cracks in car headlights is with butyl tape. According to the manufacturers, it has enough advantages:
- ensures durability and reliability of fasteners;
- resistant to significant temperature changes;
- quickly sets to the surface;
- seals glass.
Butyl tape for gluing car optics
Sealed adhesive for repairing car headlights is made in the form of pastes or liquid mass. After that, it is packaged in jars, tubes or other containers. The tubes are equipped with dispensers, which helps to accurately direct the substance to hard-to-reach places.
There are 2 types of sealed glue:
- one-component . Sold in a tube and initially ready for use, presented as a liquid mass;
- two-component . Presented in the form of a paste or dry mixture. As a rule, it is sold together with a solvent. Before gluing, it is diluted to the desired consistency before use.
One-component adhesive for car optics
Preventing the transparency of auto optics
Is it possible to avoid yellowing and clouding of car headlights? Yes, if you regularly care for them and install, for example, anti-gravel film as additional protection. It is homogeneous in structure and extremely durable, completely transparent and will reliably protect the headlight surfaces from mechanical damage for a long time.
Experts recommend using only branded film, since the correct direction of the light flux and the brightness of the headlight will depend on its quality and reliability.
In conclusion, it should be noted that restoring the transparency of car headlight reflectors is an insignificant problem that can be dealt with on your own and without expensive cleaning products and polishes. All you need to do is use baking soda, toothpaste and polishing pastes with fine adhesive to completely restore the optics of your car.
Let us remind you that polishing car headlights should be done very carefully so as not to remove the factory protective coating. After restoring the headlights, you should drive out onto the road at night and check the brightness and correct focusing of the lighting.
Important requirements: car optics, like any components and elements of the body, are subject to increased mechanical, climatic and chemical loads, and therefore wear out quickly. Your task is to regularly care for your car's headlights, since good lighting in poor visibility on the highway will protect you from an accident.
Stages of work
To seal the glass you will need:
- prepare the glue itself. To do this, dilute it and, if necessary, heat it to the melting temperature indicated on the package;
- clean, dry and degrease the surface;
- To seal a crack, heat its edges, where the mixture will be applied next. This is done due to the fact that many types of glue can only be glued to hot (warm) surfaces;
- lubricate the surface and glue it without any effort;
- fix the crack on the tail light. For this purpose, fiberglass and wire are suitable, which must be secured with a frame on the damaged surface to prevent the development of cracks;
- allow the composition to dry (drying time is indicated on the packaging), then remove excess material.
Sealing glass on a car headlight
Alternative ways to glue a car headlight are as follows:
- If you want to glue imperfections on car glass the old fashioned way, you don’t have to buy glue, but get by using a soldering iron. It is suitable if your headlight is made of plastic, as it can melt its edges and glue them back together without the use of foreign substances.
- You can also glue a damaged tail light using plastic tablets. You just need to heat one tablet and then spread it on the damaged glass. After hardening, the surface is treated with a fine-grained abrasive (sandpaper, abrasive clay) to eliminate excess material.
- Sealant can seal cracks of different sizes well. The algorithm of actions here is similar to working with glue. You can choose a “native” sealant (the one used by the manufacturer of your car model) or buy a high-quality analogue. The main rule is to strictly follow the instructions, especially in terms of diluting and heating the composition.
- You can glue the cracks with a special cloth. It is laid at the crack site and filled with acetone. Acetone begins to dissolve the components of the fabric, transforming them into an adhesive composition. Car enthusiasts note the fast drying time of this mixture - approximately 1-1.5 hours.
Using plastic tablets we seal the rear light
If none of the above methods work for you, or you have not yet purchased sealant, you can temporarily seal the surface with tape. Pre-treat the surface as you would with glue and glue the crack. Scotch tape, depending on the quality of the work and the material itself, can glue a crack for a period of from several days to several months.
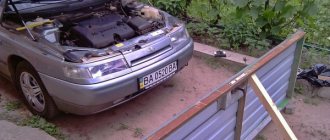
How to remove and disassemble the front optics
In most cases, this will require removing the bumper. Any car headlight consists of two parts: the body and the glass. The first of them contains a corrector, reflector, and fasteners. The glass is installed in a U-shaped profile. It is secured using special latches or sealant; small self-tapping screws are less commonly used.
Sealing the headlight is carried out using two methods:
Determining what exactly was used is not at all difficult: insert a thin flat-head screwdriver between the glass and the case. If heat sealant is applied, it will stretch and lighten, staining the instrument. If this does not happen and the screwdriver enters with great difficulty, then you are dealing with rubber glue.
Disassembling the headlight using thermosealant
Inspect the part from the back: if you see fasteners in the form of screws, then unscrew them (usually 4-6 hardware). To repair the headlight yourself, take a hair dryer and turn it on to maximum mode. Place the headlight with the glass facing up. You need to warm it up around the perimeter for 5-8 minutes: this will not harm the plastic, since it is heat-resistant. After completing the procedure, pull back the latches and use a screwdriver to move the glass away from the body. It should come out almost freely. The heated sealant will begin to stretch - it needs to be cut off. If it gets on the reflector, let the material cool - this makes it easier to clean up.
Disassembling optics using glue
This has its own specifics. First, inspect the headlight from behind: if there are screws, remove them. The next stage is to warm up the headlight, as in the previous case, but in sections of 8-10 cm. After intense exposure to heat, insert a flat-head screwdriver into the slot and bend the edge, at the same time tearing off the glue. This should be done around the entire perimeter. But after this, the headlight will not open, because there is glue on the inside. To completely dismantle the glass, warm everything up again in a circle. Now insert a screwdriver between the edge of the case and the glass: move it until the adhesive has cooled.
Headlight polishing
This procedure is the final stage of repairing headlights on your own. Coarse grinding is first carried out in several stages, then treated with polish.
As you can see, repairing a plastic case can be done easily and quickly yourself. The main thing is to prepare the right tool and be patient.
Video repair instructions
- Author of the material
- Other materials
Author Auto mechanic
For 15 years I have been repairing various types of cars, including brands such as VAZ, UAZ, Chevrolet, Mazda, Kia and many others. Everything related to the gearbox, engine or chassis. You can write me your question below in the comments and I will try to answer it in detail.
Polycarbonate is the most popular building material, which is used not only for the construction of the civil and industrial sectors, but also in mechanical engineering. After all, for several years now the industry has been trying to minimize the use of glass, since acrylic is 200 times stronger and safer, while not inferior in its functional features. That is why more and more experienced car enthusiasts prefer headlights made of carbonic acid polyester. In this review, we decided to tell you how polycarbonate headlights are made.
Headlight mount repair
The optics latches are designed in such a way that they should break upon impact. If this does not happen, part of the optics or the attachment point to the body will break. Then the cost of repairs will increase significantly.
There are several ways to restore fastenings:
- The most reliable method is to use a machine for welding plastic, from which the vast majority of headlight housings are made. The plastic composition includes polypropylene and 40% talc, which makes the plastic more durable and resistant to heat. Such materials are very well welded;
- We will talk about a method available to any car owner. In this case, no special equipment is required: you need a soldering iron, scissors and a metal mesh. The best option is protection from speakers. A similar mesh can be purchased at a radio store. Cut it into strips 5-7 mm wide. During operation, the mesh must be heated with gas, but not to the point of redness, otherwise it will begin to rust even in plastic;
- Gluing. There are some difficulties here: the main problem is that not a single glue is properly attached to polypropylene. Therefore, surface treatment is of great importance, which needs to be made very rough. To do this, use coarse sandpaper, and you can even create irregularities with a soldering iron.
Demand
Making headlights from polycarbonate is an excellent marketing ploy that significantly increases the initial cost of the car. One of the most important requirements for the material used to make headlights is strength. As mentioned above, polycarbonate is 200 times stronger and more durable. And if you remember the quality of the road surface, then polycarbonate becomes a favorite. In the event of a minor accident, the front or rear of the car is the first to be affected. Most often, headlights break, and replacing them requires significant financial investments. Unlike glass, polycarbonate products remain intact. At the same time, they retain their functional properties at temperatures from - 50 to + 100 degrees Celsius.
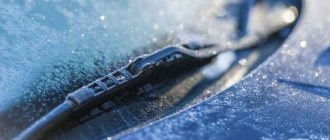
Defogging
Foggy optics significantly reduce the lighting efficiency, which can lead to an emergency situation. Another problem caused by high humidity is the possible failure of the car's electrics. To effectively combat headlight fogging, it is necessary to determine the cause of the phenomenon. Any optics cannot be completely sealed, because there is a heat source inside - a lamp. If the volume is closed, then as the temperature increases, the pressure increases, and this will inevitably lead to rupture of the housing. Therefore, it has small holes equipped with valves that prevent water and dirt from penetrating inside. But moisture still forms due to condensation. It usually goes away when you turn the light back on.
The main causes of fogging:
- destruction of the sealant at the joints of the main elements of the headlights;
- cracks in glass;
- clogging of the holes that provide access to air inside;
- violation of the seal of the housing.
To solve the problem, you need to get rid of excess moisture. Inspect the headlight housing: if there are cracks, repair them by welding. If the valve does not work, you will have to restore it, since such a spare part is not sold separately from the headlight. Remove the optics and find the valve - it is usually located on the back of the housing. Clean the part from dirt and select a rubber plug for it. It will protect the headlight from dirt, moisture and allow air to circulate inside. You also need to check all the joints: eliminate the increased gaps with sealant.
Sometimes silica gel is used to remove moisture (bags of it are placed in shoe boxes). However, this substance can be used as a temporary measure. This is due to the fact that silica gel swells over time, which leads to deformation of the case.
Replacing lenses
First, you should understand what a bi-xenon lens is. This is a set of elements that are integrated into the standard car optics.
- lamp;
- lens;
- metal curtain;
- reflector;
- ignition unit (not always);
- parts for installation.
The essence of how the lens works is as follows. The reflector forms the light of the lamp into a beam, and the high and low beam are switched thanks to the operation of the curtain. It rises slightly when the low beam is on, and opens completely when the high beam is on.
Before installing the lenses, remove the negative terminal from the battery, and disconnect the wiring from the headlights and pull them out. Place the dismantled optics in a cardboard box with a hole. Insert a hairdryer into it and turn it on at full power for 6-8 minutes. The sealant will soften and the glass can be separated from the body. Then remove all internal elements from the headlight: spring, lamp, reflector. The latter can be painted black, having previously been treated with sandpaper so that the enamel adheres better.
Take the silicone adapter with the lens and insert them into the body, screwing them with the fasteners included in the kit. Next, glue the backlight ignition unit to the body with double-sided tape. Bring the wiring out and glue the glass. The next point is installing the ignition unit. The best place for it is under the headlights. To do this, drill holes in the mounting ribs and secure the blocks with clamps. Don't forget to make holes for the ground.
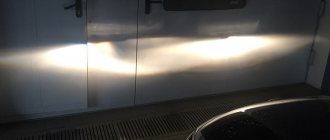
Adjusting the light beam
Adjusting the luminous flux allows you to achieve maximum efficiency of the equipment and prevent dazzling of oncoming cars. To properly adjust the light, you will need a vertical surface, a marking tool, such as chalk and a tape measure. Draw a line on the wall corresponding to the vertical axis of the car. Drive the car 5-7.5 m and draw a line that will connect the centers of the lamps. Then draw vertical stripes from these centers. You will also need an additional horizontal line below the line between the centers of the lamps. Maintain the distances shown in the diagram below. Turn on the low beam and adjust it as shown below.
The method is suitable for adjusting optics with combined low and high beam (it will be adjusted automatically). If it is separate, you will have to configure each lamp separately. Remember that you can perfectly adjust the light only with specialized equipment in car services.
DIY car headlight glass repair
If the damage is minor, then you can restore the glass yourself: repairing car optics is not that difficult. It all depends on what material the transparent part of the device is made of.
Glass headlights
This optics has many advantages: long service life, excellent light transmission, aesthetic appearance. But the glass scratches “well” and cracks with a strong impact. If the cracks and chips are small, you can try to polish them using sandpaper (the best size is 320). For large damages, use numbers 180, then 400, 600 and 800. However, the work is long and requires patience. Restoring a glass headlight on a car with severe defects on your own is unlikely to be possible: special equipment is required
Polycarbonate optics
The material is highly resistant to mechanical stress, it is 200 times stronger than glass and is “indifferent” to temperature changes. But there is also a minus: clouding during long-term use or due to exposure to substances containing acids. To restore a car headlight with cloudy optics, it is best to use a special restoration fluid (evaporator), usually sold as a kit with a repair kit. First, the glass must be cleaned and treated with sandpaper, gradually increasing the number (up to 600). When sanding, immerse it in water. Wrap adjacent parts with masking tape. Then:
- Put on a respirator, pour 100 ml of vaporizer into a mug, warm it up for 5 minutes until barely noticeable steam appears coming out of the tube (it should be in a vertical position);
- Bring the mug 10 mm closer to the glass;
- Process the optics slowly, gradually moving from bottom to top for 3 minutes;
- Pre-drying time is 10 minutes; complete drying will take several hours.
Acrylic (plexiglass)
One method is to use dichloroethane, which is a molecular glue (preheat it with a soldering iron). First, clean the plastic and prepare the compound gun. Fill the cracks with it and dry it with an ultraviolet lamp. Sand and polish damaged areas (microcracks, small holes, etc.). You can use epoxy resin. The only difference with the previous method is that after applying the composition you need to add a hardener and wait for it to dry. Another repair method is soldering with a hairdryer. However, completely making glass for headlights with your own hands at home is difficult.
Repairing chips and cracks in plastic headlights
To repair a headlight made of plexiglass or polycarbonate , you need to prepare the appropriate material from which the damaged optics were made.
It is impossible to combine materials of different quality; it will be impossible to weld them properly.
Plexiglas with a thickness of 6 mm is selected for the headlights, and 4-5 mm for the rear lights.
The procedure for restoring a headlight that has a crack, chip or scratch:
- first you need to prepare the glass (clean off dust, wash and dry the chipped area);
- then prepare a gun for the adhesive composition;
- carefully fill with glue ;
- dry ultraviolet lamp ;
- Apply hardener to the surface and allow it to harden well;
- sand the area of damaged plastic material;
- polish the glass until it shines.
Read also: Mitsubishi L200 clutch replacement
Repair with dichloroethane
To eliminate defects, we can use dichloroethane (molecular glue). This multi-component substance helps to firmly connect headlight fragments; this mixture can fill all cracks and scratches. The procedure for repairing a headlight is described above. Please note that the glue is preheated using a soldering iron.
It is worth considering that dichloroethane is a toxic mixture; when working, one cannot ignore the risk of the substance getting on the skin; when gluing pieces of headlight glass, you must wear gloves and protect your eyes with goggles.
Repair with epoxy glue
The chipped area can be filled with epoxy. To use epoxy resin, you need to prepare a bandage in advance.
Epoxy is a two-component mixture consisting of a resin and a hardener. The components are mixed according to the instructions, a viscous consistency is obtained.
Before gluing plastic headlights, it is necessary to remove dirt, sand the joints, degrease and dry. Then the fragments of headlight glass need to be spread out and joined together, after applying epoxy glue to the joints. Afterwards, gauze or fiberglass is used: a second layer of epoxy is applied to the material, and excess glue is removed. The surfaces of the headlights are well dried.
Soldering damaged headlights
Soldering is another way to restore headlights with your own hands if the glass is cracked. All fragments of the damaged plastic case can be connected using a technical hair dryer. If parts are lost, you must first make patterns and cut them out of the material from which the body itself is made, for example, ABC plastic. We heat all the parts with a hairdryer and install them in their place.
What to do about cracks in rear signal lights
If the auto optics are made of polycarbonate, use dichloroethane or the special compounds described above. For plexiglass it is better to use epoxy glue. Cracks in glass optics will need to be polished if they are not too wide.
The ability to restore the head and rear optics yourself will seriously save your money. It is only important to choose the right recovery method.
Advantages and disadvantages
Automotive products made from polycarbonate substances are in great demand. Many foreign manufacturers make the front parts of cars non-solid, for which polycarbonate is used. Indeed, today there are a number of specific regulations on pedestrian safety, which state that the front part of vehicles should not be made of hard materials. In addition to all that has been said, the following positive properties can be identified:
- If you have the appropriate tools, you can make polycarbonate glass with your own hands;
- If you lack skills in the production and installation of polycarbonate, you can contact a car repair shop; the cost of the product is affordable for every car enthusiast;
- Resistant to various types of detergents;
- The durability of the product lies in a special protective film, which is directly applied to the polycarbonate product. Even if the film eventually becomes unsuitable, the product continues to serve for years;
- If small scratches are detected, the service life can be increased using sandpaper, polish, abrasive paste, etc.;
- High impact resistance. Withstands strong impacts from metal objects.
A number of disadvantages of polycarbonate headlights:
- Does not resist ultraviolet rays. Over time, the product becomes yellow and cloudy, reducing the transmission of emitted light;
- Cannot withstand alkaline substances;
- May dissolve to a small extent in esters, ketones and aromatic hydrocarbons.
Let's sum it up
In this article, we sought to talk about the most popular material for the production of headlights - polycarbonate. After all, its functional features are in no way inferior to glass. In addition, you can design them with your own hands within one day, the quality and appearance of which will be no worse than in the photo in glossy magazines.
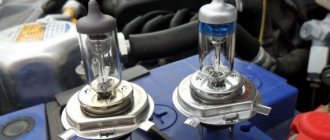
What sealant should I use for headlights?
Types of automotive headlight sealants
Every motorist knows about the need to periodically replace glass on headlights. The reason for this is stones found on the road, clouding of lenses over time and exposure to ultraviolet radiation. Installing bi-xenon lenses, angel eyes, and flexible DRLs into headlights involves disassembling them and then reassembling them. However, this operation requires the use of a special sealing agent.
The sealant for gluing headlight glasses protects the housing from moisture, dust, and air. Modern insulating materials are produced, as a rule, on a polymer base using fillers and hardeners. They come in liquid and paste forms, packaged in tubes, bottles and aerosol cans. What sealant is best for gluing headlights?
For this, depending on the operational properties and purpose, the following types of products are used:
- silicone;
- anaerobic;
- polyurethane;
- heat-resistant sealants.
Some materials are capable of releasing volatile compounds, which during installation negatively affect health and may form a cloudy deposit on the inner surface of the glass during operation. Often there are sealants that make the connection practically inseparable, which makes repeated replacement much more difficult. You need to be very careful about the question of which sealant is best to install the headlight glass on.
The appearance of deposits on glass when using silicone sealant
Advantages of butyl sealant
This professional product
for sealing headlights is a thermoplastic mass consisting of synthetic rubber (polyisobutylene).
The polymer has a carbon-chain structure and has good resistance to oxygen, bleach, acid-containing solutions and other chemical compounds. The advantages of the sealant
include:
- ease of use - it quickly softens when heated and instantly hardens under normal conditions;
- absence of volatile compounds (odorless, does not stain hands and is harmless to health);
- UV resistance;
- high adhesion to almost all materials, facilitating the formation of a tight and durable connection;
- excellent waterproofing performance;
- increased reliability;
- possibility of repeated use;
- ease of use and cost-effectiveness (one standard set provides sealing of 4 headlights).
How to glue headlights using butyl sealant?
How to remove old sealant from headlights
The most labor-intensive stage of headlight assembly is considered to be removing the old sealing layer. Don’t let the question of how to remove sealant from plastic headlights scare you. The easiest way to do this is by preheating the part with a hairdryer. The waste material should be cut off in small sections, then it will not have time to cool. Avoid overheating to avoid damaging the plastic. The heated mass can be easily removed with a flat screwdriver or a sharp knife. Don’t be afraid to scratch the body or glass in places of future installation; artificial relief will only increase the adhesion of the sealant to the surfaces.
Before gluing, degrease the glass and headlight housing with white spirit, solvent, purified gasoline or a special degreaser. Acetone or motor gasoline should not be used for these purposes. Acetone can corrode the plastic of the headlight, and gasoline contains many impurities in the form of heavy resins.
Next, a piece of tape cut to the required length is stretched to a thickness corresponding to the dimensions of the headlight housing channel. Lightly pressing the material, you need to place it evenly in the heated groove until all the gaps are filled.
Next, you need to heat the headlight to a temperature of 120°C. To do this, it is better to use an oven (be careful, your beloved other half may start swearing) or a hair dryer. Do not use open fire for work!
Then the connected elements are tightly compressed for several seconds. After cooling, the headlight can be heated and compressed again for better joint strength.
Ready. If everything was done correctly, then the appearance of moisture in the headlight is excluded for many years. Now your headlight is reliably sealed, it is not afraid of rain, snow, heat and short-term immersion under water.
By the way, you can buy butyl sealant for headlights by placing an order in our online store using the link >>
How to save money on headlight repairs using paper clips and a soldering iron
To break the headlight mount, you need to “try”, because the mounting lugs break off, as a rule, only from the impact that accompanies the collision of the headlight with an obstacle. To put it simply, a breakdown is usually preceded by an accident. On the other hand, much effort is not required, since in order to preserve the headlight, the cost of which can be calculated in three- and even four-digit sums, manufacturers often deliberately provide weak sections in the mounting lugs.
Along these sections, the fastenings are the first to break off; out of everything, the headlight can be damaged in the event of an impact. And if the impact was not too strong, the headlight will actually remain intact, with the exception, of course, of the fastenings.
However, in this case, manufacturers provide something else in the design of the headlights. Lugs with holes located on both sides of the standard mounting lugs are intended for fastening repair lugs installed to replace broken ones.
To return the headlight to service, it is enough to secure the repair ears with self-tapping screws in the bosses. All that remains is to find such ears and buy them, but this may turn out to be a problem. The ears are inexpensive - 6-15 USD. per piece, but retailers do not stock such a product, and some have no idea about its existence. Dealers have their own “rakes”: they deal mainly with cars under warranty; in the event of breakdowns in such cars, dealer service stations adhere to the policy of aggregate repair, that is, replacing the entire faulty unit, regardless of what is broken in it. Therefore, you won’t be able to find repair lugs in the spare parts warehouses of dealers; you will have to order them, wait and purchase them at the dealer price, and not at the above price.
However, it is easy to get out of this situation. All you need is a soldering iron and paper clips. First, we align the broken eye with its base on the headlight housing. This is an important point. How the headlight will shine is determined by the installation of its housing in the body, and it depends on the correct location of the mounting lugs.
Then, using a heated soldering iron, we grab the ear to the base.
Once again we check its correct location, remembering that plastic that has been subjected to heat treatment significantly loses its strength. If the eye is positioned skewed relative to the body, after the repair is completed and the headlight is installed in place, the eye will be deformed, as a result of which unwanted stresses will appear in the seam area, which will subsequently cause cracking of the plastic.
We compensate for the deterioration in the strength of plastic by reinforcement. At some service stations, when soldering, the seam is reinforced with mesh. However, the mesh holds the eyelet well in the longitudinal direction, preventing it from coming off the base, but does not resist bending satisfactorily. In addition, it is almost impossible to “drown” the mesh into plastic so that traces of repair are barely noticeable.
For reinforcement, we will use paper clips, which can be purchased at any office supply store. Place the staples alternately across the seam.
Using a soldering iron, heat the paper clip and, pressing, press it into the plastic.
If necessary, the paper clips must be bent so that they follow the curves on the headlight mount.
The more often the staples are placed, the more firmly the ear will hold.
We reinforce the side ribs of the ear in the same way.
If there are fragments of plastic, it is advisable to melt them and apply an additional layer over the staples. This layer, along with the reinforcement, will also strengthen the repair site and at the same time finally hide the fragments of paper clips that could not be drowned.
To give the surface of the repaired ear a normal appearance, smooth it with a soldering iron.
Next, we level the surface and remove burrs using a scraper and a knife.
Headlight wire or seal
The last method is quite simple and yet effective. Suitable for cases where the corner of the dashboard is damaged.
- In this case, you can correct the situation using a wire. To do this, you need to place it in the resulting gap using a screwdriver. Then the hole will be well camouflaged and will not be particularly noticeable at a quick glance.
- You can also use a headlight seal for this. In this way, it will be possible to return the fallen corner to its place; For this you need polyurethane foam. It is first necessary to thoroughly degrease the surface, after which the foam will better help the cladding adhere to the metal frame. You need to apply foam with extreme care, removing excess with a damp cloth. To best fix the corners, you can use special paper clips. The last step is to wait for the foam to dry completely and remove the excess with a utility knife. It is important to wait until the foam has completely hardened, because otherwise it will simply smear.
Each dashboard repair method is suitable for a specific type of damage.
If you follow the given instructions correctly, the result will definitely be worth the effort, and there will be practically no traces left of the actions performed. Do-it-yourself panel repair will be very cheap compared to a full replacement. Now we have a Telegram channel with the latest news. Subscribe and stay updated!
disassembling and assembling headlights using thermosealant and rubber glue
Good day, dear motorists! =) Today I will tell you how to independently disassemble the optics of a car to install various devices without damaging it. So, in order to do something, I will make it absolutely clear
1. To dismantle/install the headlight in most cases, you will have to remove the bumper.
2. Absolutely all headlights have 2 main parts: transparent glass (plastic) and a body (base). All reflectors, fasteners and headlight range control are installed in the housing. The main thing: the glass is placed in a U-shaped horizontal profile, along the entire perimeter. Basically, it is held in place by sealant and latches, but sometimes there are a couple of small screws. After dismantling, carefully inspect the headlight for their presence.
3. All headlights are sealed in two ways: with heat sealant and with rubber glue. It is very simple to find out how the sealing was done; just take a thin flat screwdriver and insert it into the outer joint of the transparent plastic and the headlight housing, and bend it a little. If the headlight is sealed with heat sealant, you will see how this sealant stretches (from dark to light), staining the screwdriver (it can be easily wiped off with solvent). If the screwdriver does not get dirty, and the edge of the body comes away from the transparent plastic with great force, then it is rubber glue.
4. Disassembling the headlight. Disassembling optics on thermosealant.
Carefully inspect the optics from the rear. See additional fastening the glass to the body - screws. If there are any, unscrew them (usually there are 4, 5 or 6, depending on the manufacturer).
5. You will need a hair dryer. Prepare both headlights for disassembly (see point 4). Turn on the hair dryer at maximum temperature. Place the optic on the back so that the glass is on top. Start heating around the perimeter of where the glass meets the body. We heat it like this for 6-8 minutes. In a circle, moving slowly. Transparent plastic is very durable and heat-resistant, it is difficult to damage it due to temperature (unless you specifically start heating it in one place). When the required time has passed, put the hair dryer aside (remember that its nozzle is metal and very hot, so be careful where and how you put it away). Carefully release the latches. Using a large minus screwdriver, begin to move the glass away from the housing, inserting the screwdriver into the gap between the plastic glass and the headlight housing. If the sealant is heated well, the glass gives in without much effort and comes out with a U-shaped profile. At this moment, the warm sealant stretches, forming fibers. Carefully cut them with a knife. If sealant gets on the reflector, do not rub it immediately. Let it cool, the cold sealant will not smear and can be easily removed. ===================================================== ===================================================== ==============
4.1. Disassembling the headlight using rubber glue. This type of headlight is a different story. To disassemble such optics you need patience and more patience.
We inspect the optics from the rear; if there are screws that secure the glass to the body, we unscrew it.
4.1.2 Take a thin flat screwdriver, 10-15 cm long. 4-5 mm wide.
5.1. We warm up the optics according to point 5.
First we heat it for 6-8 minutes in a circle. This will soften the rubber cement and plastic. Next, we heat sections 7-10 cm long. For each section, 30-50 seconds of intense heating (do not overheat the base plastic, it will become very soft, you will have to wait for it to cool). Immediately after warming up the area, insert a screwdriver into the gap between the base and the transparent glass, begin to bend the edge, simultaneously tearing off the glue (heated glue usually easily comes off one of the surfaces when we bend the edge). We perform this operation as many times as necessary to open the entire perimeter. After this, the headlight will not come apart yet, since it now holds the glue on the inside of the U-shaped profile. In order to completely demotivate the glass, it is necessary to warm up the optics in a circle again for 6-8 minutes. Then, locally, heat 10-12 cm areas for 30-40 seconds. And insert a screwdriver through the bent upper edge of the base (housing) of the headlight, under the plastic glass, between the glass and the lower edge of the headlight housing. Move the inserted screwdriver until the glue cools (usually 3-7 cm at a time). Tape especially carefully at corners. In the process of disassembling the optics, minor cosmetic defects in the edges of the headlight housing are inevitable: when we heat the outer part of the U-shaped profile, we bend it around the entire perimeter. The edge is deformed and becomes wavy. To correct this defect, after removing the glass on both headlights:
a) using a sharp knife, cut off the remaining rubber sealant from the headlight housing and from the glass,
6. After disassembling 2 headlights. After the 2 headlights have been disassembled, it is necessary to remove the decorative chrome panels covering all the insides of the headlight from the transparent glass. To do this, inspect the part. Usually, small latches and always 2,4,5 screws are used to fasten chrome decorative parts (if we install lenses, then step 6 is not necessary).
7. Next, we proceed to install the additional device. How to install gadgets is described in the article: “
Disassembling headlights based on polyurethane sealant
Hello “residents” of Pikabu. You can scold, scream, poke, slap, etc., anyone you want, but not me!