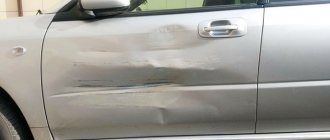
It is difficult to protect your car from scratches; often you don’t even notice how they formed. Scuffs and chips appear from dirt, impacts, pebbles, and branches. The bumper (buffer) is located in front, in a vulnerable spot. It is easy to damage and therefore chips/cracks are found on this car part more often. Then the slight defect in the paintwork increases, and the metal parts rust. To eliminate such problems, it is not necessary to go to a car repair shop or pay a lot of money for small repairs.
Diagnosis and subsequent repair of bumper damage
You can remove scratches from a car bumper yourself using car cosmetics or sanding. But first we need to assess the damage - classify it.
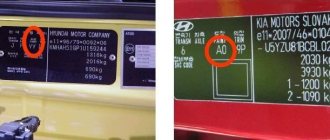
In passenger cars, bumpers are made of durable thermoplastic (ABS plastic) that can easily withstand impacts. Made from polypropylene, polyurethane, fiberglass. To find out what kind of plastic is used, study the markings on the inner surface.
To determine the depth of the defect, the body is washed. It is better to notice defects on a clean surface. The assessment is carried out according to the severity and depth of damage:
- small, shallow abrasions without damaging the paintwork;
- deeper scratches, cracks clinging to a fingernail;
- dents, severe surface damage to plastic;
- rupture, cracks with rupture.
After diagnostics are carried out, problems are eliminated.
When the paint is not completely damaged, the problem is removed by polishing. There is no need to remove the bumper from the car; it is more convenient to work with it secured.
Severely scratched areas where the crack has completely damaged the paint can be eliminated by heating and painting. Minor damage can be corrected with a wax pencil. You can remove scratches on the car with the bumper removed, if the damage area is large.
Before you begin masking or eliminating damage, degrease the defects with special solutions.
When removing dents and severe scratches that occur during a collision, the buffer is removed. Professional restoration methods are used. When you can see impacts in parts or large dents, it is better to buy a new painted part or take the car to a car service center. It is difficult to repair the damage on your own.
The procedure for polishing a car after painting and its features
Why polish a car body after painting? It is needed to eliminate paintwork defects that arose after painting, and besides, polishing will add shine to your pet.
Types of polishing
There are 4 different ways to carry out the procedure. Each has its own nuances.
- Restorative polishing. In this case, the paint coating is partially removed using abrasive sandpaper. Then a coarse abrasive paste is used, then a non-abrasive paste, which gives the body a shine.
- Protective is used to protect the top layer of varnish after restorative polishing. In this case, the surface is polished with special products containing polymers, silicone and wax. This procedure is carried out to restore the appearance of the car.
- Soft polishing of the body is a process that follows the application of protection.
- Deep polishing does not mask, but eliminates scratches.
If you decide to carry out protective polishing, you should use protective pastes with a shine. Usually these are car polishes with wax or Teflon. To achieve the desired effect, be sure to carefully read the manufacturer's instructions. After application, the polish should be spread over the surface. It is better to do this with a special device that allows you to gradually increase the speed of work.
It is advisable to polish the car body in a garage or in dense shade, since under the influence of direct sunlight the polish will dry out too quickly. In addition, you need to choose a place with minimal dust. Firstly, it can stick, and secondly, dust is an abrasive, which means the desired effect will not be achieved.
After painting the car with your own hands, you must polish the body. Painting is a rather complex and labor-intensive process that includes several stages. If you have sent your car to a service center, this is not your headache. But if you take a risk and want to paint the car yourself, you need to be patient, time, and buy the necessary tools. And it doesn’t matter at all whether you paint the whole car or just part of the body. Still needs polishing
Local polishing of minor scratches and abrasions
The appearance of small scratches may not be noticeable on the dark color of the car. But if the car is painted in light colors, then dirt gets clogged, making all defects visible. To get rid of imperfections on the body surface, the body kit is polished with silicone restorative polish.
- thoroughly wash the chipped area with water;
- degrease the surface;
- Using fine-grained sandpaper (moisten generously before work), polish until the abrasion disappears;
- wipe with soft felt;
- use wax polishes, make sure there are no abrasive particles;
- When finished, wipe the part with a woolen cloth.
In difficult cases, after using sandpaper, rub the damaged coating with felt and tooth powder.
This type of damage is considered simple; it can be removed in 15 minutes. The body kit remains on the body; there is no need to paint the bumper. The polish penetrates the structure of the flaw, covering it with a thin film. It holds tightly and is difficult to wash off under high pressure in a sink.
Removing deep scratches with a hair dryer
Heat is used to repair deeper damage. At high temperatures, the plastic material becomes fluid and fills chips and scratches. Use the method on an unpainted part of the body; the paint does not tolerate heat.
Slowly, carefully, at the same distance, warm up the bumper. You can’t rush, the plastic will float, forming holes and pits in the plastic parts of the machine. With careful work, the defect is eliminated within ½ hour, the time depends on the number and depth of the cracks.
Repairing scratches and chips with a wax pencil
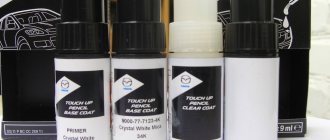
To correct cracks that have affected the paint layer with primer, use a wax pencil. Available in 2 types:
- Colorless, similar to a felt-tip pen. The chemical composition is similar to paint and varnish. Used when only the varnish and paint are damaged.
- Corrector - a bottle with a brush. A color similar to the coating is selected. Used when the soil layer is damaged.
The product made from polymer synthesis can withstand 3-4 washes using shampoos, is easily applied to the surface, and does not damage the primer or painted areas.
They produce pastes with Teflon, which are rubbed into the coating (after cleaning and degreasing). Withstands 12 wash visits. The cost of synthetic paste is higher.
Eliminate the problem of a flaw using a wax pencil in the following steps:
- the bumper area is washed, degreased, and dried;
- the pencil is pressed and passed over the problem area;
- strong cracks are treated 3-4 times, depending on the depth;
- remove the remaining pencil with a rag.
Solvents containing acetone should not be used for degreasing. It damages varnish and paint. White spirit and gasoline are suitable for this.
Subtleties that are observed when working:
- Degrease, wipe with a rag. Don't wait for it to dry on its own; traces will remain.
- After removing the cap, work across the scratch, then along. Apply a second time when the first layer dries.
- Don't press too hard.
- Leave until completely dry.
Work to remove damage must be carried out in a warm, draft-free room. The final stage of eliminating the problem is to apply polish, then wipe the treated areas with a dry cloth and restore shine. The work is completed, there are no problematic marks on the coating.
How to get rid of scratches?
Light defects
Removing small scratches using a wax pencil.
Minor abrasions and minor scratches can be removed using a special wax pencil. To carry out the work unnoticed, it is recommended to first remove the body kit part and place it on some hill. Then completely clean the surface to be treated of any contaminants using a product for treating plastic parts, gasoline or white spirit.
To avoid damaging the paintwork, drop a few drops onto a flannel cloth and wipe the damaged area without much effort, and remove the residue. After disinfection, the defects are carefully covered with a wax pencil, moving crosswise, and the second layer is applied vertically. When the operation is completed, the part is placed in a warm place until completely dry. Before installation on the car, the bumper is polished with a dry cloth and polish.
Medium scratches
After using the sander, it is necessary to paint the damaged areas.
Moderate damage that has affected the paintwork can also be repaired on the removed bumper, but in this case painting is indispensable. Therefore, work begins with complete cleaning and grinding of the part. For sanding operations, use a 2000-grit sandpaper, and for hard-to-reach surfaces use sandpaper 2. Then wipe everything with a rag and treat it with a degreaser. Next, coat the part with a primer and wait until it dries. Then the dried bumper is cleaned and painted. The paint is poured into a spray bottle and applied in three layers. At the end, everything is polished with a dry cloth and polish.
Elimination of scratches, chips and abrasions by painting
They paint when the area of damage is significant, there are many cracks. They work with the body kit removed, installing it on the stand. Cleans away dirt. It is difficult to choose a shade, so painting the part completely is impossible.
- Remove paint by sanding. Use a grinding machine with a 2000 marking wheel and sandpaper.
- Wipe with a dry cloth.
- Degrease with a special treatment agent, gasoline, white spirit.
- Prime twice - the first layer dries before applying the second.
- The body kit dries naturally indoors.
- Clean the primer and degrease it.
- The paint is poured into a spray bottle and applied to the bumper in 3 layers from a distance of 20cm. Apply along the scratch.
Filling deep scratches
If the plastic is damaged, when the scratches are deep, use a special putty. Remove the body kit and eliminate the defect as follows:
- polish the clean damaged bumper;
- degrease;
- stick a special fiberglass tape;
- mix the auto putty and thickener;
- applied in one layer, sanded (with a grinding wheel at low speed);
- after wiping with a rag, apply another layer of the mixture again;
- the dried surface is sanded with sandpaper;
- Then the entire surface is painted and polished.
Experts recommend one more method - apply a layer of primer, then putty, then primer again.
To solve the problem of damage to a passenger car, you should take into account the advice of experienced car enthusiasts and know the secrets. After reading the recommendations described above, you can get the job done without going to a car service center, saving money and time. Once done once, the next elimination will take place without fear.
During the operation of the vehicle, the owner will certainly have to face a situation where the car’s bumper is damaged. Often we are talking about minor defects in the form of scratches or chips. The situation is worse with cracks, which compromise the integrity of the part and make the operation of the machine dangerous. Many drivers are interested in the question of how to remove scratches on a car bumper.
How to use a wax pencil
Having bought a pencil for removing scratches, you can immediately start working, because repairs in this way do not require special conditions other than positive air temperature.
The work must be carried out in the following order:
- Wash the bumper thoroughly and dry it.
- Degrease the scratch and let it dry.
- Open the pencil and fill the scratch with wax. To do this, you do not need to press too hard, because even with slight pressure the wax will protrude beyond the edges. Any excess that appears must be carefully removed with a dry cloth.
- Polish the scratch with polish following the instructions on the package.
Now you know how to remove a scratch on a bumper using a wax pencil, but don’t rush to rejoice. The effect of such repairs is temporary, since the wax will melt and wash out during the operation of the car. To thoroughly repair even minor scratches, more serious methods will be required, which we will discuss below.
Types of damage and the choice of ways to eliminate them
If the owner scratches the bumper, even the smallest marks will be visible during the day. As practice shows, owners have to deal with the following types of damage:
- complete destruction of the bumper when it broke into several pieces. Often such damage occurs when involved in an accident. What to do in this case? The most preferable option is to carry out a complete replacement. Although if you have all the pieces on hand, you can try to solder it with special equipment;
- cracks. They arise as a result of strong mechanical impact on vulnerable areas - for example, when driving along a curb. A special soldering iron or fiberglass with a special resin can solve the problem. Repairing cracks on a car is quite simple, the main thing is to understand the technology;
- chips. As practice shows, a chip on the bumper is a common occurrence. Chips appear as a result of small stones hitting the surface, flying out from under the wheels of cars in front. It will not be possible to eliminate deep abrasions without painting, since the paintwork in this case has received serious damage. Local painting is carried out;
- scratches. The most common type of defect. If the owner left a small scratch, it can be removed without the use of specialized equipment. The defect can be eliminated in a garage, provided that the appropriate repair tools are purchased in advance.
As you can see, there are quite a large number of types of bumper defects. Often it is he who suffers, since its surface has to reflect crushed stone, tree branches, sand, and so on.
How to remove a scratch from a bumper
Have you noticed that a new scratch has appeared on the surface? Do not rush to go to the service center for help. First, we recommend going to the car market. To repair your car, you will need a special scratch remover. It looks like a regular marker, or a small container with a brush inside. In other words, it looks exactly the same as office corrector or PVA glue. More modern models have a nozzle with paint on the surface.
After purchasing this product, you need to go to the garage and clean the surface to be treated in advance. To consolidate the positive effect, you should additionally degrease the surface with alcohol. Make sure that there are no traces of dust or dirt on the paint layer.
To repair a scratch on a bumper, you need to lightly press the marker over the surface and then check the result. If the shade of the marker is not expressive enough, run the tip over the scratch again. Do this until the defect is completely hidden.
The advantage of this method is that the owner does not have to spend additional time and money removing the old paint layer and applying a new one. Almost immediately after the procedure is completed, you can use the vehicle.
DIY methods for removing small scratches
As practice shows, small scratches can cause the most problems. The reason is simple - there are a lot of them, but at the same time they are clearly visible in direct sunlight. To remove minor scratches yourself, you can use several methods.
- Mask the damaged areas with a marker. We discussed this method above, so we won’t talk again about how to paint over a scratch on a bumper.
- Treat the surface with a special polish. There is a special restoring polish on the domestic market that can be used to hide traces of scratches on the surface. The chemical penetrates the structure of the scratch and forms a thin film that is very difficult to clean even with a high-pressure washer. To improve the quality of the result, additionally polish the surface with a soft cloth.
- Polish using special equipment. Protective polishing of the bumper against scratches helps prevent their occurrence in the future. Practice shows that in the case of protective polishing, plastic bumpers get their original appearance. The bottom line is that scratches are not covered up, but literally abraded. After the owner has been able to sand the surface, he must use special car cosmetics to protect the coating from re-scratching.
Machine polishing
A sander is an indispensable tool when repairing scratches on a bumper. One of the advantages of such repairs is the wide processing area. If several small scratches appear on your bumper at once, then a grinder will remove them in one short treatment. This polishing method is also suitable for removing shallow abrasions.
It is necessary to polish the bumper indoors so that dust does not fall on the treated area. The absence of direct sunlight is also important, because expansion of the workpiece when heated will negatively affect the result of the work done.
Polishing a bumper is a fairly one-time task, so it makes no sense to buy a grinder. We recommend renting one, or asking friends to save money. In addition to the machine itself, you will also need:
- grinder wheels;
- sandpaper No. 2000;
- starting and finishing grinding paste;
- white spirit for degreasing;
- corrector with paint to match the color of the car;
- rags;
- glasses for eye protection.
What to do with deep scratches
Often you have to deal with deep scratches. To eliminate them, more serious work is required. To repair the bumper yourself, you can resort to a radical option - painting it. The paint should be selected in accordance with the shade of the paintwork of the remaining body parts. This is quite difficult to do, but if there are deep scratches, this is the most acceptable option.
When painting, the paint is applied as evenly as possible to prevent streaks from appearing on the surface.
When restoring a car yourself, you may also need putty. It is required when scratches have led to the appearance of sharp contours to which cobwebs, dust, and so on constantly stick.
The next stage of restoration consists of applying several layers of varnish with the additional use of a special protective polish. After completing the procedure, removing scratches on the bumper can be considered complete.
After painting the bumper, refrain from using the car for 1-2 days. This is required so that the new layer of paint and varnish is completely cured. Failure to do this will cause the surface to become wavy, wrinkled, or the new paint will fall off. Storing the car at a temperature slightly above room temperature – from 25 to 30 degrees Celsius – can reduce the waiting time. The areas where the bumper is painted should be illuminated with a regular table lamp. Direct sunlight has a positive effect on paint hardening time.
How to prepare a bumper for polishing?
Polishing is not such a complicated procedure, and therefore you can do it yourself.
First, you should prepare all the tools and necessary tools that may be needed during the work process.
- Polishing machine;
- Polishing agents;
- Coarse and fine pasta;
- Car shampoo;
- Product with wax and Teflon;
- Solvent;
- Rag;
Once everything necessary is prepared, you can begin polishing the bumper.
According to experts, to perform this task better, it is better to remove the bumper, but if you are not confident in your abilities, you can do without dismantling.
Next, thoroughly wash the bumper with car shampoo. We wait until the working surface is completely dry, after which we proceed to the next stage, which is degreasing. It’s better to do this with a solvent. This way we prepared the bumper for polishing.
Repairing chips
To get rid of chips on the bumper yourself, it is highly recommended to sand the surface down to the plastic base. This will require local painting, so you should take care in advance about the choice of paint and varnish material. The selection of paints and varnish is carried out in accordance with the service book - often the name of the shade according to the RAL palette is indicated here. Already on the Internet you can find instructions for preparing paint, familiarize yourself with the proportions, recommendations regarding the choice of manufacturers, and so on.
If you want to properly fix the surface of the bumper, eliminating chips from it, you should do the work only in direct sunlight to see exactly where the defects are located. To sand the surface, you will need fine-grit sanding paper. Never use coarse sandpaper as it can create a large number of small scratches on the surface.
Removing small paint chips and deep scratches
To remove such scratches, you will have to put a lot of effort and time, but doing the repair yourself will save a lot of money.
View gallery
To repair bumper scratches you will need:
- fine-grained sandpaper No. 1500;
- White Spirit;
- stationery knife;
- primer, paint and varnish;
- toothpicks;
- everything for polishing, which we talked about above.
Before starting work, you also need to wash the bumper from dirt and dry it. The work can be carried out outdoors, but the last stage – polishing – is best done indoors.
How to remove a scratch on a bumper:
- Use a utility knife to remove all dirt from the depths of the chip, and also break off pieces of paint that do not adhere well to the primer.
- Rinse the hole with white spirit and let it dry.
- Moisten sandpaper with degreaser and sand the surface within a radius of 3-5 cm around the chip.
- Spray the primer into a container and pick it up with a toothpick. Next, fill the inside of the chip with primer and let it dry.
- Carry out the staining in the same way.
- Sand the surface again with sandpaper and white spirit.
- Apply the varnish with a toothpick so that you end up with a small bump above the chip, which must be removed with sandpaper after drying.
- Carry out polishing in the same way as described above.
conclusions
Removing scratches and chips on the surface of the bumper yourself is not a difficult task. The vehicle owner must correctly select all the necessary materials and familiarize himself with the technology for performing the work in advance.
If you learn how to repair the front and rear bumpers on your own, in the future you will be able to save thousands of rubles on the services of specialized service centers. The choice of materials, including paint, varnish, repair marker, and so on, should be made only in time-tested stores. If you buy cheap Chinese paint, you will not achieve the desired result.
Every car enthusiast, at least once during the entire operation of the car, has encountered the problem of removing scratches from the bumper. An awkward exit or drive onto a curb, careless parking, small stones hitting the bumper at speed, emergency situations or deliberate damage to the car by ill-wishers - all this can cause scratches on it.
If the scratch is not serious, and the bumper is made of plastic and is not badly damaged, then you can restore its aesthetic appearance yourself. The photo and video instructions below will help you figure out how to do this.
How to remove scratches on a bumper without painting
The bumper is scratched, but you don’t have the time or money to paint it at a car service center? It doesn’t matter, you can remove scratches from the coating without painting, by doing it yourself.
Let's consider popular methods of restoring the aesthetic appearance of a bumper without the use of painting materials.
Polishing minor scratches and abrasions
Polishing with chemical products can be used to remove scratches and abrasions on a plastic bumper only if they are shallow and the bumper itself is not cracked. To polish and remove chips you will need WD-40 and an ordinary rag.
Any chemical is suitable for polishing. composition intended for such purposes. The product can be purchased at almost every auto store for little money.
The process of eliminating minor damage and abrasions using a VD-shki:
1) Using a sponge with water, clean the damaged area from dust and dirt. Let it dry a little.
2) Spray the spray onto the damaged area.
3) We vigorously rub and polish the scratched area with a rag until the surface is smooth and no scratches are visible.
- Simplicity and accessibility;
- Speed of execution.
Cons: the method is only suitable for plastic surfaces with minor damage and abrasions.
You can learn more about the polishing method from the video.
If we talk about the classic method of polishing plastic parts with a special paste, then this method is much more effective, but also more complicated.
Removing deep scratches with a hair dryer
The method is easy to perform and does not require any special skills or knowledge.
The tools you will need are a hair dryer and a chemical. degreaser. Please note that only unpainted areas .
- The damaged surface must be treated with a degreasing compound to remove dust and dirt.
- Next, the damaged areas are intensively heated with a hairdryer; under the influence of high temperature, the plastic melts and straightens. Warming up should be uniform.
Advice: when warming up damaged areas, make sure that the plastic does not get too hot, otherwise the bumper may become deformed.
Benefits of treating scratches with a hairdryer:
- Speed and accessibility;
- It requires special skills;
- Cheap.
- There is a high probability of plastic deformation;
- The method is only suitable for unpainted bumpers.
How to remove scratches on a plastic bumper by painting
Not all mechanical damage to the body can be eliminated without a trace, without resorting to painting. If deep cracks or wide scratches have formed on the bumper, they can only be eliminated with the help of special paint.
Painting any surface of a car, including a plastic bumper, consists of three stages:
- Sanding - the damaged area must be thoroughly cleaned and sanded;
- Primer - used to level damaged areas using a primer mixture;
- Painting - applying paint to the entire bumper or damaged areas.
Let's look at each stage in detail.
Grinding
To sand a scratched car bumper at home you will need the following materials and tools:
- Sandpaper “on water” R-800;
- Rubber squeegee;
- Emery wheel R-2000;
- Sander;
- A rag and a bucket of water.
Please note that repairing wide cracks and damage requires painting the entire bumper, as finding a suitable paint color can often be problematic.
The grinding process proceeds as follows:
- To make it convenient to work with the bumper and have access to all its areas, you need to remove it and secure it in a horizontal position on a stand.
- Rinse thoroughly with water, clean the damaged areas and the entire bumper from dirt and dust.
- First, we process the entire surface of the bumper with coarse sandpaper, using an emery wheel and a grinder.
- Next, using a rubber squeegee and fine-grained sandpaper, we process the surface manually, sand and level the layers.
Video instructions for sanding are available here.
Primer
Required tools and materials:
- Degreaser (white spirit, etc.);
- Moisture-absorbing cloth;
- Primer mixture;
- Spray.
Priming is done like this:
- After the bumper has been sanded, you need to wipe it with a dry cloth so that it completely absorbs the moisture.
- The entire surface is degreased with a solvent or similar reagent.
- Carefully, in several layers, the surface of the car bumper is covered with a primer mixture.
- The part is left to dry for a day in a ventilated area.
Link to video instructions for priming.
Coloring
Tools and materials:
- Spray bottle or can of paint;
- A can of paint and solvent (if a spray bottle is used);
- Polishing mixture;
- Dry soft cloth.
- First, the primer is stripped so that the surface to be painted is smooth and without roughness;
- Afterwards, the paint is diluted with a solvent (usually the proportions are indicated on the packaging) and poured into a spray bottle. If a spray can is used for painting, then no solvent is needed, just shake it before starting work.
- The surface of the car bumper is evenly coated in several layers of paint and left to dry.
- After the paint has dried, you need to polish the updated car bumper until it shines. For these purposes, use a polish or you can get by with a rag with wax.
You can learn how to paint a car bumper using a spray can from the video instructions.
How to polish a bumper with a grinder
Before removing a scratch on the bumper, remove it, wash it thoroughly and dry it. If the scratches appeared as a result of an accident, then paint from another car may remain next to them. It can be removed with gasoline or white spirit.
Further work is carried out as follows:
- Place the sandpaper on the block.
- While wetting it, clean out the scratched areas, but be careful not to rub into the paint layer.
- Rinse the bumper again, dry and degrease.
- Apply a coarse abrasive polish to the damaged area and polish with a machine. We recommend setting the speed to about 2000 per minute so as not to overheat the surface, but you will still have to control the temperature with your hand. It should easily withstand the temperature of the treated area.
- Wash and dry the bumper. If scratches in the paint are visible on its surface, then cover them with a corrector that matches the color of the car and let it dry.
- Apply final polish and sand. We recommend polishing the entire bumper so that it appears uniform. You may also have to repeat the sanding procedure several times, but here you will have to evaluate the final result yourself.
Now you know all the ways to remove a scratch on a bumper without painting. Next, we'll move on to removing more serious damage that requires partial touch-up or complete repainting.
How to protect a plastic bumper from chips and scratches
There are several types of car bumper protection from scratches and chips that you can do yourself:
- Kenguryatnik is a metal grill that is installed on the front or rear bumper. Made from metal pipes. Depending on the design, it can protect not only the car bumper, but also part of the underbody of the car;
- Molding is a plastic strip that is glued to a car bumper and protects it from minor damage. Can be secured with self-tapping screws or glued;
- Masking tape and wrapping film - this method protects more from dirt and small insects than from actual damage;
- The liquid cover is a special silicone gel that can be used to treat your car bumper before long trips. The coating protects against minor damage, but it is ineffective during impacts and collisions with obstacles.
As you can see, even an inexperienced car owner can restore a scratched and damaged plastic bumper to a normal aesthetic appearance with his own hands.
Bumper Condition Assessment
Damage to the bumper can vary in nature and depth. Depending on this, the method of eliminating them is selected. Therefore, before starting repairs, it is necessary to correctly assess the general condition of the bumper.
Attention! Before starting the inspection, you should thoroughly wash, dry and degrease the damaged areas. This is the only way to identify the smallest damage and scratches and correctly assess the amount of work to be done.
The identified damage must be carefully examined and touched to get an idea of its depth.
Defects that are discovered after inspecting the bumper can be divided into the following categories:
- small scratches and scuffs. As a rule, they can be eliminated without resorting to dismantling the bumper,
- deeper scratches and cracks. Elimination of such defects requires removing the part and painting the damaged areas or the entire bumper,
- dents,
- ruptures and breaks.
It should be noted that if there are ruptures and breaks in the bumper, repairing it seems difficult. You can try to solder or weld them, but most likely if such defects are present, you will have to buy a new bumper.
