How to adjust headlights on a VAZ 2110 with your own hands (video)
It's no secret that most accidents on the road occur precisely when the sun goes down and darkness sets in. Some motorists simply forget to turn on their headlights, for others they do not work, and still others completely blind oncoming cars with their incorrectly adjusted lights.
Headlight adjustment
In order not to create problems for yourself and other road users, it is necessary to make adjustments. This need arises when replacing headlights, or after long-term use of a vehicle in which, due to vibrations and unevenness on the road, the glow geometry of the head optics is disrupted.
Features of PTF operation
How can you clean car headlights? How to clean car headlights. Removing the top plaque
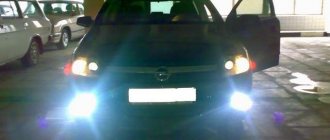
These lighting fixtures differ in the light they emit. They can glow with yellow or white light, their main feature is that they do not illuminate the fog ahead, resting the beam on it, but create a flat, wide beam that spreads along the road.
Road lighting
To ensure good visibility in bad weather conditions, the following two rules must be observed:
- Adjust precisely the boundary of the light beam emitted by the optics. The beam should not shine above the specified horizontal plane.
- The lamp must be at a minimum distance from the road surface. Under such conditions, it is easier to precisely adjust the boundary of the light beam.
Adjusting fog lights on a car
It becomes clear that these lighting sources are necessary to ensure good visibility on the road under difficult weather conditions.
Nuances of domestic cars
Owners of modern foreign cars are in many ways happy people. Of course, their cars are “stuffed” with electronics and automation, so a huge part of the settings is performed by the car automatically or using a computer.
Adjustment screws
Domestic cars, including the VAZ 2110, are deprived of these advantages. Light adjustments have to be done manually. If this is not done, problems will be difficult to avoid.
Frankly speaking, it is still better to perform the settings at specialized service stations. But if you don’t have the money for this, or car service services are too expensive for your budget? In this situation, you can resort to the help of your own hands, as well as a pair of hands of a friend. You won't be able to do it without an assistant.
PTF service
At the same time, many owners of the first ten cars do not know where the fog lamp fuse is located. And if it malfunctions, they don’t know how to replace it.
To get to the PTF fuse, you need to remove the mounting block from the instrument panel niche with your own hands
On models after 2000. fuses are grouped in a single block.
Their technical parameters are as follows:
- The rear PTF fuse is marked F20 and is designed for a current of 7.5A;
- Fuse F4 at 10A is responsible for protecting the front right fog lamp;
- Fuse F 14 at 10A is responsible for protecting the front left fog lamp.
Side of VAZ fuses of the tenth family
The algorithm for the operation of fog lights has also been changed.
In particular :
- The headlights are turned on by pressing a button that supplies power to a relay type 113.3747 installed in the mounting block;
- Turning on the PTF on VAZ 2110 cars is only possible if the headlight switch is set to the exterior lighting position.
In other words, PTFs are activated only with side lights or low beam headlights. At the same time, the activation is indicated to the driver using a light indicator on the button and on the instrument panel.
There are no particular problems with replacing lamps in the headlights, since they were installed in an open position for service. But with the rear lamps we had to struggle a little, since the entire structure of the headlight unit was located in the trunk lid.
To replace a burnt-out lamp, you must remove the entire unit
Preparing for adjustment
To get started, we recommend watching a video on adjusting headlights on a VAZ 2110. Training lessons will allow you to understand the nuances of the procedure in more detail and pay attention to the important points of the operation.
Everything is not as complicated as it might seem at first glance. First, prepare the car appropriately for adjusting the optics.
- Wash your car headlights to keep them as clean as possible.
- Examine the condition of the optic glass. In some cases you will have to polish it. The procedure is not complicated, but requires a careful and careful approach.
- Now check the reflector for defects or damage. If they are, it is better to immediately replace it with a new one.
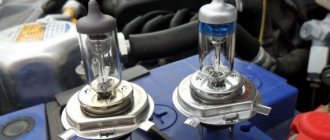
- If the car has been in use for a long time, then the existing lamps are unlikely to be modern and highly efficient. Experts recommend using modern halogen bulbs, which do an excellent job of illuminating the road surface.
- Pay attention to the standard indicators specified in the owner's manual for your vehicle. Before adjusting the headlights on a VAZ 2110, you must: fill the fuel tank, inflate the wheels to the required levels, and check the spare wheel.
Having completed the preparation to obtain the necessary conditions, you can proceed directly to the settings.
conclusions
As you can see for yourself, in order to carry out a competent and correct installation of the PTF on the Grant frets, great skills and knowledge are not required. You just need to strictly follow our instructions and maintain skill and patience.
The last step will be to adjust the PTF so that driving the car is safe not only for you, but also for all other drivers traveling in the opposite direction.
Lada Granta has become a popular car in Russia from the first days of sales. The automaker offers three configurations that drivers are happy to buy and use every day. Adjusting headlights on a Grant is rarely required; the procedure is carried out with special equipment in a car service center, as well as with your own hands using a minimum number of tools.
When using a special circuit and certain requirements, adjusting the Granta headlights will take 20-30 minutes.
Self-adjustment
Adjustment diagram
Before you start adjusting, you will have to remember your geometry lessons, and also use your draftsman skills. After all, to adjust the glow of the optics, you will need to draw something on the wall.
- Find a wall that has a flat area adjacent to it. Surfaces must be absolutely flat. Without this condition, adjusting the headlights makes no sense.
- The light should be directed towards the wall without any obstructions. That is, there should be no foreign objects in the path of the light.
- Move 5 meters away from the wall.
- Put a friend behind the wheel who will help you. It is advisable that his weight matches yours. If it weighs less, add some weight to the interior.
- Now we proceed to drawing the drawing according to the image we offer.
- The E marks are the middle of your car's headlights. Three vertical lines are drawn through them - A, O and B. They must be symmetrical to the axis.
- Measure the distance from the base of the platform to the middle of the front optics. According to the standards, it is 600 millimeters.
- On the wall, draw a horizontal line 1, which is located 600 millimeters from the base of the floor.
- Draw line 2 parallel to line 1. It should be 75 millimeters below line 1. This line will be the middle of the light spots.
- If you have a hydraulic corrector, an assistant will need to turn the corrector handle to the position without a passenger load.
- Now turn the optics to low beam mode.
- Take turns blocking the light with cardboard or cloth that blocks it out.
- Turn the adjustment screws to achieve the desired result.
- The right headlight is adjusted first, and then the left.
- According to the instructions, the upper edges of the light spots should run along the second line, and the inclined and horizontal sections should coincide at points E.
The procedure looks quite complicated, but in reality you just have to draw a few lines and take precise measurements in millimeters.
It is more than possible to correctly adjust the optics with your own hands. But in practice, it is better to entrust this task to specialized service stations. They have the necessary equipment and, most interestingly, a flat floor and a perfectly flat wall.
Installation and connection of PTF in VAZ 2110
Not all cars of the tenth family have factory-installed fog lights (FTL). What is needed to connect PTF to a VAZ 2110 ? Is there wiring for the PTF from the factory or do you have to install it yourself? Let's try to figure it all out in this photo report. To install PTF you will need :
- Ready-made PTF set (GKPTF) (if the dashboard is an old model, then (GKPTF) must be bought at 2110, if Euro-torpedo, then (GKPTF) at 2115 (the difference is in the PTF power buttons))
- Control (control lamp)
- Multitester (multimeter)
- 1 set of double female and male connectors
- 8 pcs. female connectors
- Insulating tape
- Heat shrink packaging
NOTE. All electrical circuits are in (GKPTF).
Installation of PTF
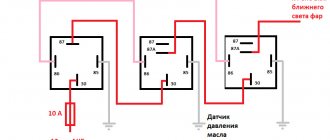
| We open the fuse block (BP), unscrew 1 screw and unscrew the BP itself, marked in green, red wires (which I didn’t have from the factory, I had to add). |
| 2 wires, about 15 cm long, female-type connectors at both ends. Number 1 is the red wire in the red plug (BP), this is a constant “+” (check with a tester), which we pull to the relay on pin No. 30 (see on the reverse side of the relay) here it is also marked with the number 1. |
| Under the number 2 is the red wire, this is “+” from the relay from pin No. 87 back (BP) in the white plug. here it is marked with number 2 |
| There are 2 fuses marked here (they are already installed from the factory, 10A each) for our PTFs to which the red wire with “+” goes after the PTF switching relay, i.e., it turns out that the red wire “+” goes to the fuses and is divided into 2 “+” for each fog light. |
| In this photo, 2 wires are marked, yellow and yellow-black, these are 2 “+” outputs to the PTF lights. |
| For convenient installation, I took the connector with the “2nd female” and extended them with wires by approximately 30cm, at the end of each, also with a “mother” |
| We plug 2 wires, yellow and yellow-black, into the white plug on the (power supply), as in the photo under numbers 1 and 2 |
| And we bring out the connector with the “2nd mother” above (BP) and connect it to the “2nd father” connector; it also has 2 wires, yellow and yellow-black, which is located behind the trunk opening button |
| In this photo, marked with number 3, the black wire is “-“, it is connected to the relay on the leg at No. 86. “-” it’s better to take it from above (BP), there from the factory, on a 10mm turnkey nut, other black wires are already screwed on. And under the number 4, the control wire for turning on the PTF. |
Where to get it from, depending on what is more convenient for you, there are many ways:
- Method 1. from the dimensions directly without a button, i.e., when the dimensions are turned on, the PTF will automatically turn on
- Method 2. from the dimensions sequentially through the button, i.e., when the dimensions are turned on, press “+” to the PTF power button and only when this button is pressed will the PTF turn on
- Method 3. from the ignition through a button, i.e., when the ignition is turned on, “+” will appear on the PTF power button and only when this button is pressed will the PTF turn on
There are many more ways to turn on the PTF, but I chose method 3, because, in my opinion, it is very easy to install, practical to use and has many advantages.
Installation of PTF on a VAZ of the tenth family:
- Remove the plug and insert the PTF into the bumper.
- We install the PTF cladding.
- Using a Phillips screwdriver, screw in two self-tapping screws securing the cladding.
- We connect the block with wires.
Connecting the PTF power button
| The photo shows number 1 PTF activation relay, number 2, previously there was an ESP relay (electric glass lifts) from it I took 2 wires, a thin pink “+” on it when the ignition is turned on and a thin black “-” and using an extension brought them to the PTF power button. The connection diagram for the PTF button is in (GKPTF). |
Connecting fog lights
The left output to the PTF is located at the radiator under the left headlight (can be tied with a plastic clamp to the car body) The right output to the PTF is located at the radiator under the right headlight (can be tied to the car body with a plastic clamp)
Instructions for connecting PTF to a VAZ 2110
Another photo report, the meaning is the same, only from a different angle:
- Connection diagram for PTF on VAZ 2110
- Connection diagram of the relay block and connector block Ш1 and Ш2.
- PTF kit
- We take the PTF block and lay the pink wire to the black box (BY). We insert it into relay block 85.
- We insert the wires from the relay into block Ш1. From terminal 30 of the relay block to contact 3 of the Sh1 block.
- From terminal 87 of the relay block to contact 5 of the Ш1 block.
- We connect the remaining black wire of relay block 86 to the black wire of block Ш2 pin 4 using a connector.
- We insert the PTF wires: into contact block 1 of connector Ш1 (to the left PTF - short yellow wire).
- To contact block 6 of connector Ш1 (to the right PTF - a long yellow wire with a black stripe).
- Insert the block into the connector.
- We place the relay block on the back wall of the CY, assemble and put the CY back.
Let's return to the dashboard.
We take the green wire of the PTF block from pin 10 and insert it into the exterior lighting switch block at pin 58R (green wire at the top in the photo). Next, we connect the white wire of the PTF block to the white wire of the exterior lighting switch using a connector. Black wire to black. We put the instrument cluster, combination visor and buttons in place.
- We put the wires with the PTF button in place.
- The remaining 2 wires (black contact 7 of the PTF block and pink contact 9 of the PTF block) go to the PTF turn-on indicator. We insert the wires into the block. We connect the block to the PTF power indicator.
- Checking the button illumination
- PTF on indicator
Now that we have sorted out the PTF wires, do we need to choose fog lights, install hella or PTF Priora?
| Can install and connect PTF in VAZ 2110.. |
Photo source: Keywords:
xn--2111-43da1a8c.xn--p1ai
Preparing to adjust the light output
In order to improve visibility on the night road, without dazzling drivers of oncoming cars, it is necessary to adjust the headlights. You can do this in a service center, or with your own hands. Knowledge of the basic rules for adjusting headlights will help improve the luminous flux on a VAZ.
So let's get started:
- Serviceability. Make sure that your hydraulic corrector or electric headlight corrector is working correctly (depending on the configuration). Please note that the corrector plays an important role, therefore, before the adjustment takes place, you need to be sure that this mechanism is working properly;
- Position. Having chosen a completely flat area, install the car. The area must be checked with a level to prevent distortion, otherwise it will not be possible to adjust the headlights correctly;
- Build a kind of vertical shield screen at a distance of 5 meters from the car on which you can draw;
- It’s not bad if you have a flat area in front of the garage door. They are also unlikely to be particularly harmed by chalk;
- Loading. A car that is being adjusted must be “fully equipped” - fueled, with normal tire pressure, and a load of the driver’s weight (or a person of approximately the same weight) placed on the driver’s seat;
- Vertical markings. On the screen, wall or garage door, draw three vertical lines and mark them: “O” - there will be a line in the middle of the car (this place is usually indicated by the sign of the car, in our case it is the usual VAZ sign); “L” means right;
- Horizontal marking. Draw a horizontal line through the centers of the headlights, marking it N, and 65 mm below it, draw another line, which is marked “P”. Now it becomes possible to adjust the light with your own hands.
Do-it-yourself headlight adjustment
Adjusting the headlights yourself is not that difficult. However, before starting the procedure, it is necessary to properly prepare the car to avoid incorrect settings. To prepare the vehicle you will need:
- check the tire pressure (should be the same in all four wheels);
- remove all unnecessary items from the trunk and interior (except for the spare wheel, first aid kit and motorist kit), ensuring the curb weight of the vehicle is in accordance with the operating instructions;
- fill a full tank of gasoline and add technical fluids to the appropriate containers;
- thoroughly clean the optics from dust and dirt;
- Apply WD-40 to the adjusting screws as they may have become sour.
It is equally important to choose a suitable place for work. Find a flat area, without slopes or holes. The selected area should be close to a vertical fence or wall.
Rules for marking
After the preparation of the car is completed, you can begin to apply the markings that will be needed to adjust the headlights. Stock up on a tape measure, a long bar, a marker or chalk. The marking scheme is applied in accordance with certain rules.
- Drive the car close to the wall and mark the center of the vehicle. Mark a corresponding point on the wall that coincides with the central axis of the machine. We also mark the distance from the floor to the lamp and from the lamp to the center of the machine.
- Measure 7.5 meters from the wall and drive the car to this distance (this distance may differ for different models, please check the instructions).
- Using a horizontal line, connect the center points on both lamps.
- Draw vertical lines through the center points of the headlights and another through the center point of the car. Finally, at a distance of 5 cm down from the horizontal line connecting the centers of the headlights, we draw one additional strip.
After completing all these steps, the marking will be ready for work.
Scheme for self-adjusting headlights
This scheme is relevant for combined optics. For a separate version, you will need to draw two horizontal lines. The second line should correspond to the distance from the ground to the high beam lamps. Segments are marked on it in accordance with the location of the outer lamps.
Adjustment diagram
Once the markings are applied, you can begin to adjust the light flows. While it is better to prepare markings on the wall during the day, the adjustment work itself is possible only in the dark. To successfully adjust headlights you must:
- Open the hood and turn on the low beam (to avoid draining the battery, you can first start the engine).
- Completely cover one car headlight. Start turning the vertical adjustment screw on the second headlight. The screw is located in the engine compartment, on the rear surface of the optics. You need to rotate the screw until the upper boundary of the light beam aligns with the upper horizontal line.
- Next, using the same method, you need to adjust the optics in the vertical plane. As a result, the projection point should fall into the crosshairs of the lines, at which the flow of headlight light begins to deviate upward and to the right at an angle of 15–20°.
- As soon as work on each headlight is completed individually, you should compare the coincidence of the resulting light fluxes.
If the machine is equipped with remote control of the headlight angle from the passenger compartment, the adjusters must be locked in the zero position before starting work.
Adjusted low-beam headlights will make driving in the dark more comfortable for the driver.
It is important to remember that driving in the dark with unadjusted headlights is dangerous not only for the driver, but also for other road users. Therefore, you should not save your time and neglect the timely correction of light fluxes. By properly adjusting your headlights, you can ensure the most comfortable and safe ride possible.
Low beam
The sequence of actions is as follows.
- We drive as close to the wall as possible. The road surface must be level so that the car does not stand at an angle.
- We determine the central axis of the machine and draw a line on the wall from bottom to top.
- To adjust the low beam, turn on reverse gear and drive 4-5 meters back. We measure the distance vertically and horizontally.
- We mark the obtained measurements on the vertical plane. Draw a horizontal stripe on the wall five centimeters below the vertical mark. Next, we apply a range from the central part on each side. We draw vertical lines from the obtained points.
- After applying the markings, set the light. Turn on the DRL and adjust the light so that its horizontal direction matches the lines drawn on the vertical surface. Then we check that at the point where the two strips intersect, the beam goes slightly upward at an angle.
Note! Correctly setting the low beam headlights on a car is possible in the evening or at night, when the light beam is easier to see.
To quickly adjust the low beam headlights, the diagram will help.
This is interesting: Replacing the main brake cylinder on a VAZ-2110: checking, repairing the GTZ
High beam
To get the factory high beam, you need to use the adjusting screws located on the inside of the plastic housing. To do this you need to open the hood.
The technique is good for car owners where the headlight housing has a combined low and high beam. Using the system described in the previous section, the range will be corrected automatically.
Setting up PTF
Adjustment of fog lights should be carried out using the same method. Before the procedure, be sure to load the car with a full tank of fuel and 70 kg of weight in the driver’s seat. The machine should be installed at a distance of 5–10 m from the stand.
The marking is carried out on the basis of a horizontal strip, which is drawn through 2 points - these are the centers of the PTF position. You should measure the height of the strip and multiply it by 2 times, then draw another segment with the calculated height.
Now, using a point, you need to establish the center of the car and indicate the distance to the position points of the fog lights. Using the screws to adjust the beam, you need to position the headlights so that the light falls on the bottom strip.
Setting up lensed headlights
Lensed headlights come in two types - adjustable and non-adjustable. Devices that do not support adjustments will cost a minimum, but you should not use them. Some lensed devices have an automatic regulator.
To adjust the beam, regulators located in the rear of the body, in the engine compartment, are used. There are no clear recommendations, because different products must be used for each car. Typically handles or adjusting bolts are used. The packaging contains general setup instructions that are suitable for basic correction.
Adjusting xenon headlights
Among all existing types, xenon headlights hold the lead in light intensity. Therefore, they require fine tuning. The sequence of actions is as follows.
- We choose a flat road and a flat wall.
- We drive the car as close to the wall as possible.
- We draw a straight line along the wall vertically. It should match the center part of the headlight.
- Having found the center, draw 2 vertical lines relative to the center. They should be exactly in the center of the lens.
- Draw a horizontal line through the center, mark 7.62 centimeters and draw another similar line.
- We drive the car back 7.5 m.
- We use clamps to move the headlight.
- Using the regulator, we direct the light beam in the appropriate direction.
- We direct the beam of light so that its level matches the bottom line.
- We adjust the direction of the light flux.
For fine adjustments, it is advisable to go to a service center where there is a computer stand.
Please note! In a number of European countries, the operation of vehicles equipped with xenon and bi-xenon lenses is prohibited.
Adjustment algorithm
We sequentially perform the following:
- Cover the right headlight with cardboard or other material that does not transmit light;
- Turn the hydraulic corrector to the first position (I);
- Open the hood, find the screws used for adjustment, and turn them. At the same time, if the left headlight is adjusted, then it will be correct if its light at the top reaches the line N, and at the bottom – P;
- Having adjusted one, the adjustment of the other begins, closing the previous one.
Remember, if the headlights shine too low, they need to be raised, otherwise you may not notice the pedestrian in time, especially if there is slush on the street and he is wearing black clothes. If the light is set high, that is, you deign to raise them high, oncoming drivers will not thank you because you will blind them. Therefore, do-it-yourself adjustment on the VAZ must be done very carefully.
Installation and connection of PTF in VAZ 2110
Not all cars of the tenth family have factory-installed fog lights (FTL). What is needed to connect PTF to a VAZ 2110 ? Is there wiring for the PTF from the factory or do you have to install it yourself? Let's try to figure it all out in this photo report. To install PTF you will need :
- Ready-made PTF set (GKPTF) (if the dashboard is an old model, then (GKPTF) must be bought at 2110, if Euro-torpedo, then (GKPTF) at 2115 (the difference is in the PTF power buttons))
- Control (control lamp)
- Multitester (multimeter)
- 1 set of double female and male connectors
- 8 pcs. female connectors
- Insulating tape
- Heat shrink packaging
NOTE. All electrical circuits are in (GKPTF).
Installation of PTF
| We open the fuse block (BP), unscrew 1 screw and unscrew the BP itself, marked in green, red wires (which I didn’t have from the factory, I had to add). |
| 2 wires, about 15 cm long, female-type connectors at both ends. Number 1 is the red wire in the red plug (BP), this is a constant “+” (check with a tester), which we pull to the relay on pin No. 30 (see on the reverse side of the relay) here it is also marked with the number 1. |
| Under the number 2 is the red wire, this is “+” from the relay from pin No. 87 back (BP) in the white plug. here it is marked with number 2 |
| There are 2 fuses marked here (they are already installed from the factory, 10A each) for our PTFs to which the red wire with “+” goes after the PTF switching relay, i.e., it turns out that the red wire “+” goes to the fuses and is divided into 2 “+” for each fog light. |
| In this photo, 2 wires are marked, yellow and yellow-black, these are 2 “+” outputs to the PTF lights. |
| For convenient installation, I took the connector with the “2nd female” and extended them with wires by approximately 30cm, at the end of each, also with a “mother” |
| We plug 2 wires, yellow and yellow-black, into the white plug on the (power supply), as in the photo under numbers 1 and 2 |
| And we bring out the connector with the “2nd mother” above (BP) and connect it to the “2nd father” connector; it also has 2 wires, yellow and yellow-black, which is located behind the trunk opening button |
| In this photo, marked with number 3, the black wire is “-“, it is connected to the relay on the leg at No. 86. “-” it’s better to take it from above (BP), there from the factory, on a 10mm turnkey nut, other black wires are already screwed on. And under the number 4, the control wire for turning on the PTF. |
Where to get it from, depending on what is more convenient for you, there are many ways:
- Method 1. from the dimensions directly without a button, i.e., when the dimensions are turned on, the PTF will automatically turn on
- Method 2. from the dimensions sequentially through the button, i.e., when the dimensions are turned on, press “+” to the PTF power button and only when this button is pressed will the PTF turn on
- Method 3. from the ignition through a button, i.e., when the ignition is turned on, “+” will appear on the PTF power button and only when this button is pressed will the PTF turn on
There are many more ways to turn on the PTF, but I chose method 3, because, in my opinion, it is very easy to install, practical to use and has many advantages.
Installation of PTF on a VAZ of the tenth family:
- Remove the plug and insert the PTF into the bumper.
- We install the PTF cladding.
- Using a Phillips screwdriver, screw in two self-tapping screws securing the cladding.
- We connect the block with wires.
Connecting the PTF power button
| The photo shows number 1 PTF activation relay, number 2, previously there was an ESP relay (electric glass lifts) from it I took 2 wires, a thin pink “+” on it when the ignition is turned on and a thin black “-” and using an extension brought them to the PTF power button. The connection diagram for the PTF button is in (GKPTF). |
Connecting fog lights
The left output to the PTF is located at the radiator under the left headlight (can be tied with a plastic clamp to the car body) The right output to the PTF is located at the radiator under the right headlight (can be tied to the car body with a plastic clamp)
Instructions for connecting PTF to a VAZ 2110
Another photo report, the meaning is the same, only from a different angle:
- Connection diagram for PTF on VAZ 2110
- Connection diagram of the relay block and connector block Ш1 and Ш2.
- PTF kit
- We take the PTF block and lay the pink wire to the black box (BY). We insert it into relay block 85.
- We insert the wires from the relay into block Ш1. From terminal 30 of the relay block to contact 3 of the Sh1 block.
- From terminal 87 of the relay block to contact 5 of the Ш1 block.
- We connect the remaining black wire of relay block 86 to the black wire of block Ш2 pin 4 using a connector.
- We insert the PTF wires: into contact block 1 of connector Ш1 (to the left PTF - short yellow wire).
- To contact block 6 of connector Ш1 (to the right PTF - a long yellow wire with a black stripe).
- Insert the block into the connector.
- We place the relay block on the back wall of the CY, assemble and put the CY back.
Let's return to the dashboard.
We take the green wire of the PTF block from pin 10 and insert it into the exterior lighting switch block at pin 58R (green wire at the top in the photo). Next, we connect the white wire of the PTF block to the white wire of the exterior lighting switch using a connector. Black wire to black. We put the instrument cluster, combination visor and buttons in place.
- We put the wires with the PTF button in place.
- The remaining 2 wires (black contact 7 of the PTF block and pink contact 9 of the PTF block) go to the PTF turn-on indicator. We insert the wires into the block. We connect the block to the PTF power indicator.
- Checking the button illumination
- PTF on indicator
Now that we have sorted out the PTF wires, do we need to choose fog lights, install hella or PTF Priora?
| Can install and connect PTF in VAZ 2110.. |
Photo source: Keywords:
xn--2111-43da1a8c.xn--p1ai
Modernization
With a little modification, you can significantly improve the Kirzhach headlights with your own hands and make their glow brighter.
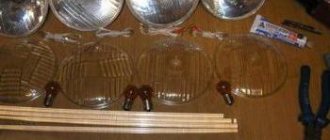
First, the headlight must be removed, then disassembled in the following sequence:
- To remove glass from Kirzhach, use a hairdryer - you need to heat the sealant, then use a sharp knife to separate the glass;
- Remove the reflective pad;
- The modernization will only affect the low beam units, so unscrew them;
- And then you have a choice: with Kirzhach you can either move the lens towards the reflector by 10 millimeters, or grind off the modular ring, making it shorter. This will help improve the luminous flux of the Kirzhach headlights, raise it and make it wider.
What does the manufacturer offer?
AvtoVAZ
Initially, a platform was launched into the series, which should already have fog lights in the front bumper. But due to various circumstances, among which the lack of rhythm in the supply of high-quality PTFs played an important role, the plant in Togliatti produced cars in different configurations.
Fog lights 2110 “received” at the design stage
And, nevertheless, the company prefers a classic rectangular headlight with a reflector and specially selected glass lenses that perform the following functions:
- Devices that distribute luminous flux;
- Protecting internal components from moisture and dust.
Bulbs for this headlight are suitable with socket H1 and H3
Bogdan
Ukrainian assembly of VAZ 2110 cars is carried out at the Bogdan enterprise. It was organized to reduce the retail price on the Ukrainian market and offers cars from imported car kits.
VAZ 2110 comes off the assembly line with standard PTF
The Ukrainian automaker gives preference to Russian suppliers:
- "Autolight";
- "Automotive Lighting" (Ryazan);
- "Ray".
In the photo - xenon in PTF from the Ryazan manufacturer
Alternative to mechanics
Even if you adjusted it yourself according to all the rules, if the VAZ load changes, you also need to change the angle of the light beam. A hydraulic corrector was invented for this purpose. Moreover, the corrector is designed non-separable, it is also not adjustable.
Accordingly, if it fails, the corrector is simply replaced with a new one. And the most common reason that the hydraulic corrector fails is a “wedge” of the pistons or a fluid leak.
If the need arises, it would be advisable to replace this corrector with a more modern and high-tech electrical corrector. The kit, which provides for an electric corrector to be installed on the car, consists of a headlight range control, the mechanism itself with rings - seals and wires.
Removal and replacement
Remove the negative terminal of the battery. By pressing the latch, turn the hydraulic corrector towards you and remove it. Having removed the sealing ring in the headlight housing and installed a new one in its place, we insert the electrical corrector into it. In the same way, we remove the hydraulic corrector of the other headlight and replace it with an electric corrector.
Already in the cabin, we disconnect the switch to which the hydraulic corrector is connected, and connect the electric corrector using wires.
Thus, the new corrector has been installed and will be able to perform its duties on the VAZ 2110 more clearly. Almost everyone who changed the hydrocorrector to an electric corrector is more satisfied with its performance than the previous corrector, which behaves more “gently”, often unpredictably.
Installation and connection of PTF in VAZ 2110
Not all cars of the tenth family have factory-installed fog lights (FTL). What is needed to connect PTF to a VAZ 2110 ? Is there wiring for the PTF from the factory or do you have to install it yourself? Let's try to figure it all out in this photo report. To install PTF you will need :
- Ready-made PTF set (GKPTF) (if the dashboard is an old model, then (GKPTF) must be bought at 2110, if Euro-torpedo, then (GKPTF) at 2115 (the difference is in the PTF power buttons))
- Control (control lamp)
- Multitester (multimeter)
- 1 set of double female and male connectors
- 8 pcs. female connectors
- Insulating tape
- Heat shrink packaging
NOTE. All electrical circuits are in (GKPTF).
Installation of PTF
| We open the fuse block (BP), unscrew 1 screw and unscrew the BP itself, marked in green, red wires (which I didn’t have from the factory, I had to add). |
| 2 wires, about 15 cm long, female-type connectors at both ends. Number 1 is the red wire in the red plug (BP), this is a constant “+” (check with a tester), which we pull to the relay on pin No. 30 (see on the reverse side of the relay) here it is also marked with the number 1. |
| Under the number 2 is the red wire, this is “+” from the relay from pin No. 87 back (BP) in the white plug. here it is marked with number 2 |
| There are 2 fuses marked here (they are already installed from the factory, 10A each) for our PTFs to which the red wire with “+” goes after the PTF switching relay, i.e., it turns out that the red wire “+” goes to the fuses and is divided into 2 “+” for each fog light. |
| In this photo, 2 wires are marked, yellow and yellow-black, these are 2 “+” outputs to the PTF lights. |
| For convenient installation, I took the connector with the “2nd female” and extended them with wires by approximately 30cm, at the end of each, also with a “mother” |
| We plug 2 wires, yellow and yellow-black, into the white plug on the (power supply), as in the photo under numbers 1 and 2 |
| And we bring out the connector with the “2nd mother” above (BP) and connect it to the “2nd father” connector; it also has 2 wires, yellow and yellow-black, which is located behind the trunk opening button |
| In this photo, marked with number 3, the black wire is “-“, it is connected to the relay on the leg at No. 86. “-” it’s better to take it from above (BP), there from the factory, on a 10mm turnkey nut, other black wires are already screwed on. And under the number 4, the control wire for turning on the PTF. |
Where to get it from, depending on what is more convenient for you, there are many ways:
- Method 1. from the dimensions directly without a button, i.e., when the dimensions are turned on, the PTF will automatically turn on
- Method 2. from the dimensions sequentially through the button, i.e., when the dimensions are turned on, press “+” to the PTF power button and only when this button is pressed will the PTF turn on
- Method 3. from the ignition through a button, i.e., when the ignition is turned on, “+” will appear on the PTF power button and only when this button is pressed will the PTF turn on
There are many more ways to turn on the PTF, but I chose method 3, because, in my opinion, it is very easy to install, practical to use and has many advantages. Installation of PTF on a VAZ of the tenth family:
- Remove the plug and insert the PTF into the bumper.
- We install the PTF cladding.
- Using a Phillips screwdriver, screw in two self-tapping screws securing the cladding.
- We connect the block with wires.
Connecting the PTF power button
| The photo shows number 1 PTF activation relay, number 2, previously there was an ESP relay (electric glass lifts) from it I took 2 wires, a thin pink “+” on it when the ignition is turned on and a thin black “-” and using an extension brought them to the PTF power button. The connection diagram for the PTF button is in (GKPTF). |
Connecting fog lights
The left output to the PTF is located at the radiator under the left headlight (can be tied with a plastic clamp to the car body) The right output to the PTF is located at the radiator under the right headlight (can be tied to the car body with a plastic clamp)
Instructions for connecting PTF to a VAZ 2110
Another photo report, the meaning is the same, only from a different angle:
- Connection diagram for PTF on VAZ 2110
- Connection diagram of the relay block and connector block Ш1 and Ш2.
- PTF kit
- We take the PTF block and lay the pink wire to the black box (BY). We insert it into relay block 85.
- We insert the wires from the relay into block Ш1. From terminal 30 of the relay block to contact 3 of the Sh1 block.
- From terminal 87 of the relay block to contact 5 of the Ш1 block.
- We connect the remaining black wire of relay block 86 to the black wire of block Ш2 pin 4 using a connector.
- We insert the PTF wires: into contact block 1 of connector Ш1 (to the left PTF - short yellow wire).
- To contact block 6 of connector Ш1 (to the right PTF - a long yellow wire with a black stripe).
- Insert the block into the connector.
- We place the relay block on the back wall of the CY, assemble and put the CY back.
Let's return to the dashboard.
We take the green wire of the PTF block from pin 10 and insert it into the exterior lighting switch block at pin 58R (green wire at the top in the photo). Next, we connect the white wire of the PTF block to the white wire of the exterior lighting switch using a connector. Black wire to black. We put the instrument cluster, combination visor and buttons in place.
- We put the wires with the PTF button in place.
- The remaining 2 wires (black contact 7 of the PTF block and pink contact 9 of the PTF block) go to the PTF turn-on indicator. We insert the wires into the block. We connect the block to the PTF power indicator.
- Checking the button illumination
- PTF on indicator
Now that we have sorted out the PTF wires, do we need to choose fog lights, install hella or PTF Priora?
| Can install and connect PTF in VAZ 2110.. |
Photo source: Keywords:
xn--2111-43da1a8c.xn--p1ai
The right choice of headlights for VAZ 2110
There are 2 types of headlights installed in a VAZ car:
- "Kirzhach", which are domestically produced. The lenses emit a beam of light. On the one hand, adjusting the VAZ 2110 headlights should be without problems, but when passing through the external lens, the light is distorted. Bad weather conditions also contribute to the dispersion of light.
- Bosch is an imported manufacturer. Due to the high quality of the components, the light beam is characterized by a clear directionality.
Both types have different designs. However, adjusting the headlights of the Bosch VAZ 2110 is no different from its domestic counterpart.
TOP manufacturers and models of PTF
| PTF model | Manufacturer | Type of emitter and lens | Price |
| VAZ 2110 | Kirzhach Avtosvet | LED lamp, transparent, chrome base | 600 |
| Bosch VAZ | Bosch | Incandescent lamp, transparent, smooth | 900 |
| VAZ 2110 | Magneti Marelli Automotive light | Incandescent lamp, clear, corrugated | 950 |
| VAZ 2110 | LADA | Incandescent lamp, yellow, corrugated | 540 |
| LD 088 | DLAA | LED emitter, transparent | 1000 |
| PL 519 DLB | DLAA | LED emitter, transparent | 1300 |
Rules for adjusting headlights
Often, adjustment of VAZ 2110 headlights takes place without removing such devices from the car. At a car service station, adjustment of VAZ 2110 headlights is carried out using stands on which there are markings applied to the individual car model. At home, setting up VAZ 2110 headlights requires a homemade template. It is made from sheets of plywood. If possible, markings are applied directly on the wall. The position of the devices is changed using 2 regulators. One of them is responsible for changing the position of the headlights horizontally, and the other vertically.
On a VAZ 2110 car, adjusting the headlights is necessary so that the flow of light from incorrectly adjusted devices does not blind drivers of oncoming cars. It consists of the main stage and several preparatory stages:
- preparation of the car, site and stand;
- inspection of adjustable elements;
- adjustment process.
Let's sum it up
When operating a car, it is important to understand that properly adjusted headlights are the key to the safety of not only the driver and his passengers, but also the safety of other road users. For this reason, it is necessary to monitor the condition of the optics, as well as the quality of the car headlight adjustment.
We also recommend reading the article on how to choose fog lights for a VAZ 2110. From this you will learn about the features of selecting fog lights for a VAZ, as well as nuances that must be taken into account separately when selecting.
In turn, adjusting the headlights of the VAZ 2110 can be done either independently or at a service station (using a special stand-screen). If the work is carried out independently, it is necessary to take into account that in general the procedure for carrying out adjustment work is not complicated, but requires accurate measurements.
One way or another, by reading the above instructions, you can achieve correct adjustment of the VAZ 2110 headlights. This will improve the quality of road lighting, reduce eye strain when driving at night, and also increase overall safety, etc.
Breakdowns that prevent adjustment
The question often arises of how to adjust the headlights of a VAZ 2110 if the headlight is damaged or the hydraulic corrector breaks down. The latter device is necessary so that when driving, the headlights are automatically adjusted. If the car is stationary loaded, then the light flows onto the road. If the rear part of the machine is heavily loaded, the front part rises up and the light beam begins to hit the sky. At this moment the corrector is turned on. With its help, the headlights are automatically lowered.
Eliminating headlight diff
If adjusting the VAZ 2110 headlights does not give the expected results, the inspection begins with these devices. Their disassembly is carried out as follows:
- All fasteners are turned out and the headlights are removed from the socket.
- The lamps are removed from them.
- A hairdryer is used to separate the diffuser. It is used to melt the sealant. Separation is carried out with a screwdriver or other flat object. If it is a Bosch headlight, you will also need to remove the brackets holding the glass.
- The reflector is removed. It is supported by 3 points.
- All parts of the disassembled headlight are washed. Faulty elements are replaced with new ones. Then assembly is carried out in the reverse order. Silicone is used as a sealant.
In what cases may it be necessary to adjust the headlights?
Factory adjustments of lighting equipment in a car can be disrupted by long driving on uneven roads. Numerous holes, potholes and cracks in the road surface lead to a gradual failure of the settings. As a result, the optics begin to direct light beams in the wrong direction.
Adjusting the headlights may also be necessary if:
- there was an accident, as a result of which the front part of the car was damaged;
- the motorist replaced the headlights or headlights on the vehicle;
- fog lights (FTL) were installed on the car;
- tires or wheels were replaced with analogues that differ in size;
- repairs have been made or the vehicle's suspension rigidity has been changed.
If oncoming motorists regularly flash high beam headlights at you, it means that the optics of your car are blinding them and require adjustment.
It is also worth adjusting the luminous flux if you yourself notice a deterioration in visibility while traveling in the dark.
Finally, car owners are advised to adjust their headlights before going for a vehicle inspection or driving long distances.
Not only high beams, but also improperly adjusted low beam headlights can blind the driver.
Causes of light adjustment problems
Many drivers are concerned about the problem of why one headlight is brighter than the other when looking at the car from the side. This indicates that the adjustment of the headlights is impaired and the appearance of light in the area of the cut-off strip.
Factors that influence optic tuning include:
- hitting a large pothole at high speed;
- corrector malfunction;
- consequences of a minor accident;
- installation of lamps of dubious quality.
Car owners wonder why their headlights don't shine well after replacing the bulbs. The reason may be either new light elements or carelessness during installation. Low-quality lamps are manufactured without complying with the rules and requirements, and therefore often have a misaligned spiral. The reflector cannot catch the beam, shape it and direct it onto the road. In this case, only buying new light bulbs will help. Another factor could be accidental movement of the mechanism during lamp replacement. In both cases, the optics will not be able to correctly illuminate the road.
When hitting an uneven surface, the flashlight shakes and the reflector jumps to another position. The same effect occurs in a minor accident. Correctly adjusting the headlights will help correct the situation and completely eliminate the problem.
When the corrector sours or the control board burns out, the lights freeze in one position and blind all road users when loading the trunk or interior of the car. In this case, you will need to check all components and replace broken parts.
Consequences of incorrect optics adjustment
The number of factors that can lead to an accident increases significantly at night. Therefore, properly functioning headlights are the main guarantee of driver safety. Automotive low beam optics should illuminate the road 30-40 meters ahead, while capturing a small part of the right shoulder. If this condition is not met, the headlights must be adjusted.
At night, properly adjusted headlights are the key to a safe trip.
The consequences that can result from incorrect adjustment of car optics can be extremely unpleasant.
- A strong downward tilt of the headlights leads to increased stress for the driver: he has to constantly strain his eyesight in order to peer more carefully into the poorly lit roadway.
- If the headlights are directed at a large upward angle, this can lead to dazzling of motorists traveling in the opposite direction and create an emergency situation on the road.
- Insufficient roadside lighting can also cause a traffic accident if the driver does not notice a person or obstacle on the edge of the road in time.
The first adjustment of car optics is always made at the manufacturer. Subsequent adjustments to the headlights are carried out by the owner himself as necessary. The motorist can turn to a car service center for help or do the work himself.
How to adjust headlights on a VAZ-2110: tips
Many owners of this brand have repeatedly encountered the problem of headlights not working properly.
Because of this, visibility deteriorates in poor conditions or at night. If a car enthusiast understands the features of his car, he knows how to adjust the headlights on a VAZ-2110 himself. There is nothing overly complicated in this procedure. If all rules are strictly followed, the headlights will work at the highest level and the owner will not have problems with visibility. Adjusted headlights guarantee excellent visibility, thereby reducing the risk of an accident. That is why, at the first signs of poor-quality operation of the car’s optical system, you need to immediately begin work to improve the luminous flux. This can be done in the following ways:
- contact a specialist who will adjust the work;
- purchase a special device for adjusting the light flux;
- do this work yourself.
Some people believe that headlights cannot be adjusted without special knowledge and skills. However, this is not at all true. This work can be done with your own hands, saving money that would have to be paid to a specialist, and the time spent waiting for a specialist to visit. How to adjust the headlights on a VAZ-2110 yourself? In order to do this, you need to know some rules. So, the procedure begins with the following steps:
- First you need to mark according to the diagrams on the wall.
- After this, we move on to marking the location of the lamps.
- Next we adjust the light.
It is necessary to understand that the direction of the light flux depends on the following factors:
- car tire pressure;
- serviceability of springs;
- load on suspension distribution.
It is very important that all components of the car are in good working order, otherwise the headlights will shine at the wrong angle.
Directly adjusting the headlights includes taking measures such as:
- First you need a flat wall that needs to be placed opposite the machine. The distance between objects must be at least 7 meters.
- After this, you need to prepare chalk and adhesive paper, which will be useful for marking.
- Before setting up, it is important to very carefully mark the surface based on the parameters of the car.
Replacing a fog light: how even a lazy person can cope video AvtoNovator
Very often, as a result of an accident, the front part of the car suffers, sometimes after such troubles it is necessary to replace the fog lamp, and you cannot delay this, because this optics plays an important role in the car. We will try to do everything ourselves.
Features of fog lights
The main feature of “fog lights” is the light emitted; it can be white or yellow, but the wide and flat beam spreads along the road surface and does not illuminate the thickness of the fog. Thus, they are indispensable during fog, snowfall, and rain, since ordinary headlights emitting diffuse light are simply not able to properly illuminate the road. In order to ensure good visibility in difficult weather conditions, you need to adhere to two main rules:
- the boundary of the light beam from the headlight should be adjusted extremely precisely, since the light cannot propagate above the specified horizontal plane;
- The location of the headlight should be as close as possible to the road surface, so it will be easier to adjust the beam boundary.
Obviously, this element is simply a necessity, as it ensures safe movement in poor visibility conditions. In order for the light to be clear and provide sufficient visibility, the headlights must be maintained and polished in time so that scratches do not reduce the throughput of the optics. You can do this work yourself or at a car service center. We will discuss polishing in another article, but here we will talk about something else.
Replacing a fog light - dismantling instructions
Fog lights can become unusable for a number of reasons, but most often this is a consequence of an accident. In addition, over time, scratches, cracks and chips form on their surface, which significantly deteriorates the quality of the light beam, but this can be solved by polishing, as we have already noted. It is also not uncommon for a lamp to burn out, in which case it needs to be replaced. If the fog lights stop functioning, or the quality of the emitted light has dropped sharply, then it is necessary to replace this entire unit or only the non-working element.
In any case, you should begin your actions by dismantling this lighting device. Unfortunately, this stage most often involves removing the bumper. If the car is also equipped with protective arches, then you need to unscrew the screws with which they are attached to the bumper, and one piston located under the protection. Then, by bending the arches, you can disconnect the two plugs from the headlight. Having opened the hood, you need to remove the four pistons and two bolts that secure the grille and bumper; the bolts located at the bottom of the bumper (3 pieces) are also unscrewed.
And the last step in dismantling the bumper is to unclip the plastic latches located along its edges. Now you can safely remove it and open access to the fog lights. To remove the lighting device, simply unscrew the mounting bolts, then remove its housing from the bumper and disconnect the plug connector.
In order to disassemble the headlight itself, exposure to high temperatures is necessary, since the plastic cap is held in place by a sealant. Place it in the oven (100°C) for ten minutes, this sealant will soften. Before further work, it must be thoroughly cleaned from the hood.
Replacing a fog lamp using an accelerated algorithm
Replacing the fog lamp lamp can be done without dismantling the entire structure; it is done as follows. First of all, the mudguard is removed; it is best to do this on an overpass or inspection ditch. Next, the block is disconnected from the lamp; to do this, use a screwdriver to press out the plastic clamp of the block. Now you can unscrew the lamp itself. We install a working lamp in the free space and carry out all the steps in reverse order to assemble the lighting device.
To replace the entire fog light, you need to use the instructions given above to dismantle it. To install a new light fixture, perform the same steps, only in reverse order. Please note that there are “+” and “-” wires coming out of each fog light. The pluses of both headlights are connected and go to the battery, and then, rising on the relay, they are connected to the desired connector, but the minuses (separately) need to be routed to the body.
Learn more about marking and adjusting headlights
First you need to approach the wall at a distance of 2-3 meters.
Next, you need to mark the center of the headlight axes on the wall. After this, you need to move 8 m. Then the centers of each lamp are connected by a line. You will also need another marking line. It should be parallel to the first line, but located at a distance of about 6 cm. This completes the marking. Before you start setting up the optics, you need to wash it thoroughly. It happens that due to dirt it is not possible to adjust the light flux correctly. Regardless of what type, “Bosch” or “Kirzhach”, it must be clean and free of defects. If there are scratches or cracks, you need to replace the headlight, since adjustment will not help in this case. If everything is in order, you can begin the main work. The process of adjusting the light flux occurs as follows:
- First you need to take the car to a spacious area where there is a wall.
- After this, the VAZ-2110 must be placed opposite this wall.
- Then you should draw lines passing through the center points of the headlights.
- Next, turn on the light of one of them, and cover the second with cardboard. This must be done in order to understand whether the light corresponds to the marked lines. If it matches, then the job was done successfully. If not, the procedure must be repeated.
How to replace a lamp yourself
Just replacing the lamp
a fog lamp is not difficult to manipulate, and if the lamp is replaced with one similar to the burnt one, practically no problems arise. Before starting work, for example, on a VAZ family car, it is advisable to drive the car into a pit, use a lift or raise the front part with a jack. This way it will be much more convenient to work, and less time will be spent.
Before changing the light bulb in the fog light, you should buy a similar one - in this case, it is better to give preference to well-known brands with a good reputation. For VAZs, the process of replacing a light bulb is as follows:
- the fog lamp power supply is found, the rubber protection moves away from the headlight;
- after this the block is carefully disconnected;
- the spring clips on the headlight reflector are unlocked;
- the light bulb is removed along with the wire;
- a new lamp is installed;
- The headlight is reassembled and checked.
It is enough to perform this manipulation once, so that the next time it takes only a few minutes to replace the light bulb in the fog light. The replacement process on other models depends on the design features of the foglights. On some cars, the PTFs are located in a block with the headlights - here you will have to disassemble the optics a little. An example of a replacement on a domestic Kalina in the video:
How to adjust fog lights
This work is carried out using the rotation method. The optical device must be rotated in the vertical plane and horizontally. It is also important to loosen the bolts that secure the parts. There are special devices for this. If they are not there, the procedure is as follows:
- as when adjusting conventional headlights, you need to place the car against a high wall and make markings;
- It is very important to check how good the tire pressure is;
- after that, turn on the headlights and see what direction of light we have. Along the way, you need to adjust the light flux by covering one of them with cardboard;
- the same procedure is performed with another part.
This completes the work on setting up the functioning of the car headlights. If you feel that you are unable to do this yourself, contact a specialist who will quickly and successfully adjust the optical device.
Adjustment options: independently or with the help of a car service
The car owner can adjust the headlights either independently or with the help of car service specialists.
This is interesting: Do-it-yourself repair of Daewoo Nexia and operating instructions - detailed instructions
The main advantage of self-tuning is the absence of financial costs. However, if you are not sure that you can carry out the adjustment competently and efficiently, it is better to contact the service.
At service stations, headlights are adjusted using devices specially designed for this purpose. It is not advisable to purchase such a device for yourself: its cost is far from the most affordable, but at the same time you will have to use the device infrequently.
It is recommended that owners of cars with automatic control elements for lighting devices contact the car service first. Adjustment of automatically driven optics should only be trusted to specialists, without trying to do it yourself.
Setting up optics at a service station
Not every driver knows how to adjust the optical device correctly. In this case, the best solution would be to go to a service station, where they will adjust the headlights using special devices, and the accuracy will be higher than with manual adjustment. If the procedure was performed for the first time, then it is also worth contacting a service station to check the accuracy of the work performed. As a result, you will know how correctly you are doing everything.
In service station conditions, headlights are adjusted using special equipment
Self-adjustment
To adjust the optics with your own hands, they resort to the standard scheme. At the same time, some car and lamp manufacturers offer their own adjustment methods. As a rule, a diagram of the adjustment process should be attached to the technical documentation for the machine. A universal method that is suitable for most cars involves the following sequence of actions:
- markings are made on a flat vertical surface (wall), which will be used as a stand;
- The car is placed in front of the wall on a flat horizontal platform at a distance of 7–10 m.