Many car owners care about the attractiveness of their cars: they charge their “iron horses” with the latest fashion and technology. But only a few of them successfully combine beauty with the technical qualities of the car, wisely using an aerodynamic body kit. It not only makes the car attractive, but makes it more dynamic and easier to drive.
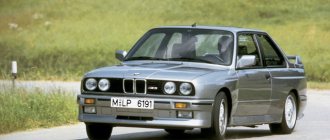
Car with aerodynamic body kits
It just so happens that production cars are produced without this important detail. This is explained by elementary savings on the part of the manufacturer, as well as the absence of the need to install aerodynamic tuning, because most car owners use their car only for transportation purposes. Well, for those car enthusiasts who value the speed and appearance of their four-wheeled friend above all else, aerodynamic tuning helps improve the car’s dynamics and handling by installing additional parts that also improve the external image.
We choose and buy body kits for your car
Many people decide that the prices for these materials are too high, so they can make the aerodynamic body kit themselves. We warn that without good equipment and sufficient skills in this area, you can only spoil the appearance of the car, therefore we urge you to abandon the production of body kits.
Moreover, today you can buy budget body kits for any car, buy equipment of different price segments and types. There is equipment made from different materials, as well as different shapes and appearance. Therefore, it is important to choose bumpers and body kits according to all the appropriate characteristics. The most important points in this matter are the following:
- high strength body kits that will be subject to constant influences and loads;
- unpretentious appearance, normal perception after installation on the car;
- no negative impact on the technical characteristics of the car, lower ground clearance;
- the possibility of simple installation without compromising the integrity of metal body parts;
- made from good materials and without the risk of losing shape over several months of use.
These are the important points you should observe if you need to buy body kits. Today, body kits for your car can be found in plastic, fiberglass and metal. The latter will be more preferable, but the most expensive. Most car enthusiasts prefer plastic options - the cheapest. Fiberglass is the most optimal offer in this area.
Choose the design of bumpers and body kits very carefully. If you do not want to get a problematic appearance of your car as a result of repairs, give preference to calm and discreet designs. Sometimes the front bumper separately from the car looks quite modest, but after installation it turns out to be too pretentious.
Installing body kits on a car with your own hands
Securing all the purchased equipment is the most difficult task assigned to you. To do this, you need to acquire the appropriate tool, which will depend on the chosen type of body kit. Metal body side parts may often require welding, which is a difficult process reserved only for professionals.
In the case of plastic parts and fiberglass body kits, you can use simpler mounting options and start the process of assembling the body kit in your own garage. Otherwise, it is better to immediately contact bodywork specialists and get professional help. The sequential steps when installing a plastic body kit are as follows:
- remove the front and rear bumpers of your car to make room for purchased parts;
- remove the fender liners, which will be put on after installing all the body kits;
- attach the front bumper to the same fasteners that held the factory version;
- then you should immediately install the rear bumper using the same factory fasteners;
- with the side parts of the body kit everything is much more complicated - you need to position them as accurately as possible;
- after an even and precise position, use the fasteners that come with the set of body kits;
- Next, all that remains is to install the fender liners in place and evaluate the appearance of the car.
Often the body kit is purchased unpainted, so it is necessary to pre-paint it. This must be done before installing the body kit, otherwise you will have to deal with rather complex painting of an already installed part. You can fully count on an excellent visual result if all the tools and materials were selected with high quality.
If certain inaccuracies occurred at the stage of selecting materials, paints and fastenings, installing the body kit yourself will not go so smoothly. Some Chinese body kits do not have fasteners, which forces the driver to use self-tapping screws, screwing them into the car body. This will cause corrosion of the body in the drilled areas after just a few months of use.
Ekb-plast.ru
ATTENTION: packaging in cardboard and freight forwarding in Yekaterinburg to the transport company amounts to:
300 rub. — for one or two trims, or one thresholds (1 place)
500 rub. — for one or two bumpers (1 place), or one or two sill covers (2 places)
700 rub. — for a set with one or two bumpers and sills (2 places).
1. How to pay?
- 100% payment to a Sberbank card - only after this we begin production, payment for delivery upon receipt in transport companies - railway forwarding, ratek, auto trading, energy, etc.
-50% to the Sber card, before sending we send photos of the parts, after receiving the remaining 50% the parts are sent
-prepayment of 10-20% upon pickup from the warehouse, the balance upon delivery of the goods. We are located near Ekateriburg
2. What guarantees will I receive?
-we have been working in Russia for more than 10 years, and we value our reputation, which is earned over the years and hard work), and it is easy to lose it... so there is no point in cheating someone and hiding for a penny) https://vk.com/topic-19319920_28280187
3.Does it need to be customized?
-all products have been repeatedly supplied by our customers, so we only make proven products, making curves more expensive for ourselves, they are discontinued...
-on an undamaged car, all the parts fit normally, and for fiberglass, adjustment within 1-2mm is normal, so it’s better to entrust the work to those who deal with fiberglass, or yourself
-BEFORE PAINTING, IT IS MANDATORY TO CHECK EVERYTHING, TRY ON IT, SHARPEN WHERE IT IS NECESSARY, CUT HOLES... AND ONLY THEN SEND IT FOR PAINTING!!
4. How does the paint apply?
- the materials used for painting are the same as for ordinary cars, only fiberglass does not like heating above 40 degrees, post-curing is possible, which can cause loss of geometry, especially in the wrong position, be careful!
5. Why is there no body kit for my car? can you do it from a photograph?
If something is not in the catalogue, it can be done - BUT ONLY BY CAR, matched from other cars, and it will be at least 2-3 times more expensive and longer. This type of work is by appointment only.
6. WHY IS IT SO EXPENSIVE TO sculpt from a sketch??? or I saw it over there at the market for 3 kopecks , make the same one https://www.drive2.ru/users/figorov/blog/4899916394579109943/
Rules for fitting, installation and painting
Before purchasing a body kit, do not be lazy to read these instructions. We also recommend installing body kits from professionals who know how to work with fiberglass. But if you don’t have a specialist in your city or you just decide to do it yourself:
1. Before painting, you need to try the part on the car.
Even if you bought an “original” Japanese-made bumper made of fiberglass, first of all, be sure to try it on your car before painting. Quite often we need some minor adjustments. Parts are made by hand, so such cases are not rare and are not manufacturer defects, and this must be taken into account when installing bumpers and trims.
Of course, not always and not all body kits require performing all the steps listed below, but as they say, hope for the best and prepare for the worst. Additional knowledge will not be superfluous.
2. When fitting a fiberglass body kit, use high heat.
It is not uncommon for the geometry of a part to be disrupted during transportation or under incorrect storage conditions. And at the first fitting it turns out that the gaps are too large, the bumper does not match in width and other delights. And all attempts to place the product on the mounts result in a crash, and the bumper quickly straightens back. The solution to this problem is to heat the positioning area to a temperature of 50-60 degrees. Heating the product makes the fiberglass more elastic and helps it take on a new shape without excessive pressure and resistance. To avoid the appearance of creases and uneven planes, it is important to evenly heat as large an area as possible.
An excellent method for installing a crooked body kit is to fix the part on the car directly in the drying chamber. At a temperature of 60 degrees, after 15 minutes while the elements are hot, the craftsmen quickly install the product in the designated places and allow it to cool on its own. Of course, if it is not possible to use a drying chamber, an industrial hair dryer will do. Also keep in mind that the older the body kit, the less elasticity it has, and a few months after production it will be extremely difficult to do anything with the parts.
3. Putty does not harm the body kit if used wisely.
If parts are damaged or if it is necessary to increase the thickness, it is permissible to use standard automotive putty. It also happens to find air voids in body kits between the top, front layer of gelcoat and the bulk of the resin and glass mat; again, this is not a defect, although it happens due to the carelessness of the craftsman who made the body kit. And in this case, of course, putty is the best option. Modern putties are made on the basis of polyester resin, like the body kits themselves, so the putty adheres well to the fiberglass product.
4. Installation of fiberglass skirts and door sills.
The threshold is applied to the car body, if necessary, it is sharpened, and the places that prevent the threshold from sitting tightly are cut off. In some cases, it is also necessary to heat the ends with a technical hair dryer. If there is not enough length, the threshold is increased by the following method: we cut it crosswise from the inside and at the distance that needs to be added, fiberglass is applied and glued with polyester resin. You can get the accompanying materials at any auto chemical store from a bumper repair kit, which includes a sheet of fiberglass and a resin with a hardener. After fitting and painting, the thresholds are installed with glass sealant. They sit on bolts under the wings. We degrease the part and the surface, apply sealant and fix the part for several hours so that the sealant dries. When applying sealant, keep in mind that it will be extremely difficult to remove later, so apply it pointwise and not in a solid line.
5. Mesh and installing it in the bumper.
It is better to cut the mesh in advance, and you should also take care of the fastenings in advance. There are many ways to install the mesh - on car glass sealant, putty or wires around the perimeter for reusable use. The simplest method is to bend the edges of the cut mesh around the air intake - thus pressing the edges of the mesh to the inner surface of the bumper and, after painting, carefully apply sealant for gluing car glass to the contact areas of the pre-prepared pieces of mesh and press the mesh tightly in place for several hours. Do not use regular or silicone adhesives for a heat gun - this is not a very reliable method.
6. A few words about painting.
Under no circumstances use a drying temperature higher than 35 degrees; the best drying method is natural drying, it will help avoid deformation of parts. If the body kit is already old and was made more than 4 months ago, then the parts can be dried at a higher temperature. Make sure that the painter knows about such properties of fiberglass, because if he makes a mistake and heats up the part, then all the adjustment work may be in vain, as we know, when heated, a fiberglass product takes the shape of what it lies on, and In this case, the painting stand is not the best shape. It will be difficult to return the shape to its original position.
7. Body kit storage.
If you suddenly decide to postpone installation of the body kit, then make sure that the parts lie on a flat surface, in the position as installed on the car. If you do not take care of this, the bumpers may bend under their own weight or the influence of some external objects.
Good luck to everyone on the roads and tune your cars, our cause is just, we make the roads more beautiful
Problems and methods for solving them. Instructions.
A very important stage of working with styling kits. Regardless of the manufacturer or country of manufacture, as well as the cost of parts, everyone usually faces the same problems.
1. Pores. Pores, microbubbles in the laminate. Carbon layer with air.
Micro-air bubbles that are so easy to miss when preparing parts.
Air bubbles or pores are quite common in fiberglass body kits or carbon parts. Usually they are not visible when working with sandpaper and when turning parts due to their very small size and rapid clogging with dust from sandpaper and putty. To detect pores before painting, when it is not too late, you need to thoroughly blow out all surfaces with a high-pressure hose using a blow gun.
The reason for the appearance of micropores in fiberglass, as a rule, is too deep grinding of the surface, when the top layer of (colored) gelcoat is pierced and gaps without gelcoat are clearly visible. In this case, it is best to cover difficult, “punched” areas with liquid putty. Another reason for the occurrence of an excessive number of micropores may be an incorrect combination of hardener and accelerator in the resin at the time of production, which is quite common in the winter, when manufacturers experience difficulties with the temperature conditions of production and speed up the process of molding body kits by increasing the percentage of hardener in the resin.
2. Preparing the body kit.
Preparing the body kit for painting. Leveling the surface. Putty.
Any fiberglass body kit, no matter how wonderful it is, requires careful preparation for painting.
All surfaces and recesses are polished and leveled “ideally”. At first glance, the smooth surface turns out to be rough and has chips and potholes. All these defects can be easily removed using a plane, sandpaper and putty. Remember to use dry development to identify large waves and changes in plane. Good advice! Never use materials! Any professional will tell you that the putties from this company are terrible, they are disgustingly processed, they crumble and sag heavily after painting the part, leaving behind a lot of problems and disappointments. We recommend buying products from the following companies: CAR System as the most convenient to use, professional and of the highest quality. Remember, a stingy man always pays twice!
3. Preparation with water:
Never do this!!! Preparing a part for painting. Never use water when preparing to paint any parts! Especially fiberglass ones.
The ancient method of “sanding” surfaces by first wetting them with water leads to terrifying consequences! When wet, putty absorbs moisture like a sponge and is able to retain it inside for a very long time. Subsequently, you will be unpleasantly surprised how bubbles under the paint begin to appear on the recently painted surface, or even worse, pockets of corrosion and rust on metal surfaces. When preparing parts for painting, use dry sandpaper and “developing” powder to control the quality of the preparation. When working with primers and liquid putties, you should also not use water. When treating surfaces, it is enough to blow the part with air from a compressor and wipe it with a cloth with a degreaser.
4. Primer for fiberglass:
pokraska_obvesa_top-tuning_ru-5 The choice of material for priming fiberglass can be anything. You can use standard primer for metal or plastic, sticky primer for plastics. However, be aware! Many plastic primers for plastic are not used alone and after their application, it is necessary to use a regular pore-filling primer, which can be processed using the usual method. It is very important! The reason is simple - the sticky layer of primer on the plastic acts as an adhesive that firmly binds the plastic and the primer-paint together. Therefore, these compositions should not be considered full-fledged primers; we would rather call them primers – (ed.). Increasingly, in practice, we are noticing a refusal to use sticky primers and a transition to conventional two-component void-filling primers. This is not prohibited and is quite viable. However, during operation, we notice the appearance of numerous chips and crumbling of paint in places of active resistance to air flow. This happens much more often on parts where primer (sticky primer) was not used, most quickly on bumpers or on sills, in places close to arches. Otherwise, when using a primer, the surface remains securely fixed and is less susceptible to chipping and destruction.
5. PAINTS AND VARNISHES for fiberglass body kits:
pokraska_obvesa_top-tuning_ru-14
The choice of these components is limited only by the choice and wallet of the customer. Acrylic enamels. Bases, varnishes. Two- and three-component bases. Metallics, chameleons, temperature-resistant, fluorescent and many others. All these paints will suit our body kit perfectly. It is much more important to take care of the choice of varnish. We recommend using Hi-Solid varnishes with maximum hardness. Or ceramic varnishes with unique strength characteristics and temperature-resistant conditions. It is especially important to take into account the strength of varnishes when painting fiberglass hoods, since most of the unpleasant chips during operation occur on these parts.
The optimal solution would be to choose materials from one manufacturer. Check with your colorist about the manufacturer of the base paint and try to purchase varnish from the same company. In the case of a special color or complex multi-component 2- and 3-layer paint, be sure to buy solvents and hardeners from the same company as the paint itself - otherwise you are guaranteed a fatal “mismatch in color.”
6. Drying the body kit in the chamber:
pokraska_obvesa_top-tuning_ru-3
Dry parts only at room temperature! Do not use a high heat dryer after painting. This can lead to deformation of the body kit we previously fitted. We know that when heated, fiberglass becomes 30% more elastic and remembers the shape of what it lies on. In the case of drying the body kit in a chamber, the bumper is on the painting table and when the temperature rises under its own weight, it will change shape. This is due to the presence of rather toxic styrene gas in fiberglass, which in turn is the main substance used to harden the part during the production of the body kit. Since styrene is present in the body kit in a small concentration, its presence does not cause difficulties at average temperatures. Do not dry parts above 30 degrees and everything will be fine. Modern paints and varnishes harden perfectly at a natural temperature of 23-25 degrees Celsius. It is enough to leave the freshly painted parts in the chamber overnight and in the morning you can start installing them on the car.
7. Polishing the body kit after painting.
pokraska_obvesa_top-tuning_en-16Parts after painting fiberglass and final drying can be polished only after 2-3 days. In winter, at low temperatures, much longer, up to 1 month or more. The same applies to car washing and body kit parts. It is important to understand that Karcher is not as scary as his close-minded friend, the washer. After all, it is after the so-called non-contact washing with active detergents that the surface of the car is wiped very “contactly” with rags that are not quite fresh, often with sand and dirt. This is how the car body receives up to 80% of all scratches over its entire service life.
There is no need to use special polishes or compounds. A thick layer of varnish and minimal surface polishing will bring much better results. The use of abrasive polishes and sanding the surface gives a glassy shine to the car, but leads to a catastrophic reduction in the thickness of the varnish by several times. Such procedures are usually recommended to be carried out before selling a car and giving it the effect of a new car.
8. Body kit protection.
pokraska_obvesa_top-tuning_ru-4 Transparent films appeared on our market not so long ago, but very quickly became widespread and began to be used in car protection along with common methods of protective polishes and other “nano-technologies”. Applying film to a freshly painted body kit is not recommended, especially in winter. It is necessary that the paint and varnish dry as much as possible and finally polymerize. In summer, when the outside temperature is at least 20-23 degrees Celsius, at least 1 week should pass after painting. This is necessary so that when replacing the film after a year or two, you do not have to repaint the protected parts again and the paint remains in place. If you follow our advice and perform high-quality painting, after removing the film, your bumper or threshold will still look just as great as a freshly painted and new element.
We order the installation of body kits to professionals
The surest way to install body kits on your car and make visual tuning of the car is to contact specialists who will complete the tasks in a few days, and will also help you purchase good equipment for performing external tuning. Specialists who deal specifically with this issue can provide you with the following services:
- independent selection of several options for tuning device kits;
- modeling the exact appearance of your car in the future;
- ordering high-quality equipment to carry out all work during the tuning process;
- painting of parts and excellent processing to give the desired appearance;
- installation of body kits on a car, taking into account all the important features of this process;
- servicing body kits, repairing plastic parts and painting chips and scratches in the future.
For these reasons, using the services of specialists is always more profitable than doing the work yourself. But many motorists enjoy working on their cars, so you can use your personal skills and get the necessary external tuning capabilities for your car without extra financial costs. True, you will have to work quite a lot.
We invite you to watch a short video about making a fiberglass body kit in a special form:
It's really worth the "hang"
Sellers are unanimous in the opinion that the presence of a body kit affects the car’s handling and its aerodynamic performance. Ordinary motorists are more skeptical and say that the body kit is exclusively a decorative detail of the car’s appearance. This is where they are wrong.
The advice to install only a certified body kit on a car, which has passed a number of tests and was used on racing cars, may seem sensible, but it cannot be called cheap. So compare your desires with the thickness of your wallet.
Many motorists pin all their hopes on improving vehicle dynamics and achieving optimal fuel consumption only on body kits. This is wrong. A serious factor is all kinds of gaps between body panels, by eliminating which you can expect a slight increase in speed and a slight decrease in fuel consumption.
Therefore, a more or less honest car mechanic will say that wings, spoilers and other tuning equipment, apart from a noticeable blow to the wallet, will not significantly change anything in the car’s characteristics. And it’s good if they help create a harmonious and attractive appearance. It is possible that the funds that will be used to purchase a not-so-cheap body kit can be invested in fine-tuning technical components such as the engine, suspension, steering and transmission. Ideally, all such “maneuvers” should be carried out comprehensively and in a serious auto repair shop.
Well, what if the car owner does the car tuning on his own and, despite having some experience, overestimates his skills and makes a mistake? It’s not so bad if the car’s exterior suffers in this case, but the handling and dynamics may decrease, which can directly and indirectly lead to an emergency situation.
More on InDrive.Net:
Airbrush for your car, tuning or art?
Let's sum it up
To obtain the necessary goods and services in terms of external car tuning, many people prefer to turn to specialists to save time and money. However, you can complete all the processes yourself. Buying kits of body kits and installing them will not be difficult for you. The main thing is to choose the right kits, as well as paint them well.
Take advantage of the exterior decoration options for your car that you will love. But remember that excessive pretentiousness does not always suit your car. If you have experience in external tuning your car, share your conclusions in the comments.