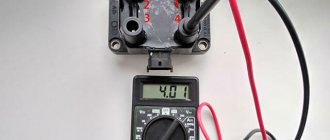
Adjusting Kia Spectra headlights
In this article we will look at the issue of adjusting Kia Spectra headlights, and we will do the work ourselves.
To accurately determine the angle of correction of the illuminated space, work should be carried out in a darkened room. It is also necessary to have a wall; it is along this wall that we will adjust the angle of the light bulbs. The wall must be vertical and its surface rough. We park the Kia Spectra so that it is on a flat horizontal platform and the longitudinal axis is perpendicular to the wall. Only if all these requirements are met will we be able to make high-quality headlight adjustments. Each headlight is checked individually.
So, turn on the low beam of the Spectrum and cover with a thick sheet of cardboard the headlight that is not being checked at this moment. The light from the car should be directed at the road, it should be well lit and at the same time adjust the light so as not to blind the driver of oncoming traffic.
We open the hood of the Kia Spectra, inspect the area where the headlight is mounted, there are a couple of screws there that can be used to adjust the lighting horizontally and vertically. We stop the car 10 m from the wall, cover one headlight with a sheet of cardboard and begin adjustment. However, before reaching this stage, preparatory work needs to be done.
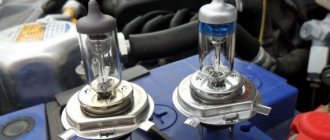
First things first, make sure your tire pressure is correct. Next, we check the position of the light bulbs in the headlights, their glass, etc. If there is a malfunction in any lighting element, you need to fix the damage or replace it. Now we move 13 meters away from the wall and begin to swing the Kia Spectra from the side. It is advisable if a person with the same body weight as you sits in the cabin.
Attention! The headlights are adjusted with the headlights on low beam. There must be special markings on the wall. We draw two points that correspond to the centers of the headlights; they should be at the same distance from the floor and from each other. You need to draw a line between them, draw a second line parallel to it, it is 12 cm lower, and the third parallel line is 22 cm lower than the first. Now we return to adjusting the headlights.
Please note that the upper limit of the light spots of the main headlights on the wall should coincide with the second line, and the upper limit of the light spots of the fog lights should coincide with the third line. The intersection points of the horizontal and inclined sections of the light spots should be 12 m 22 cm below the points corresponding to the centers of the Kia Spectra headlights.
Adjusting the headlights continues until the readings completely coincide with these values, only then can the work be considered complete. As for xenon lighting, its light is much brighter than the luminous flux of standard Spectra bulbs; in this case, adjustment must be made without fail.
In addition, the car must have auto-corrector and headlight washers, only then you will not have problems with the law. In any case, you should be more respectful of other drivers on the road; the safety of road users, including yours, depends on this. After all, a driver blinded by headlights is unable to fully assess the situation on the road for some time, and it turns out that the car becomes uncontrollable.
Some time ago at BP we talked with a friend _GoodNight_ about where the light-shadow boundary (STB) in the headlight comes from: bikepost.ru/blog/76591/Obzor-svetodiodnykh-lamp-NOVSIGHT-A359.html The conversation then in general reached a certain dead end when everyone remained with their own opinion. As you know, the criterion of truth is practice, so let’s move on to it, perhaps. I had fun with the change in the STG back in the 90s, when Japanese cars began to be imported. In those days, technical inspection was not such an interesting procedure as it is today and was carried out exclusively at the traffic police. They “wrapped it up” even if your fog lamp simply burned out, and even more so with the wrongly adjusted light. The easiest way was to rotate the lamp around its axis. In some places it was done quite simply, in others it was more complicated, in others it was not done at all; we had to change the headlights to European ones or simply glue pieces of electrical tape or some other opaque film onto the headlights. I rebuilt the headlight for the owner of a BMW back in about March, and even over the past season I came across several motorcycles with the very same headlights that _GoodNight_ was talking about for the H4 base, but with the “American” STG. Traditionally, I didn’t take photos for myself (besides, I’m not a good photographer), and in spring and summer it gets dark too late, so it’s still not possible to photograph the border properly. And then, quite by accident, during the BMW guy’s next visit, I remembered and photographed it. So, BMW R1100RT straight from Japan, standard square headlight, STG “Japanese” (daw to the left), on the headlight glass there is a corresponding notch, the pattern of which exactly corresponds to the daw to the left. Changes in the headlight:
By the drop and traces of either glue or sealant, you can clearly see how far the lamp was turned counterclockwise. Nothing else in the lamp was changed, moved, sealed, etc. The lamp is just turned. Results: It is clearly noticeable that the checkmark to the left has completely disappeared. A checkmark to the right has appeared, but it is small, the motorcycle is standing quite close, at a greater distance it is more noticeable, but it still falls short of a full-fledged “European” headlight.
Regarding the “American” headlights for H4: the ones that came into my hands had a pattern on the glass in the form of the letter V, only with a very large angle (150-160 degrees), i.e. The beam coming out of the headlight is clearly not horizontal, as it should be according to the DOT standard. Which is not surprising, because... the lamp under H4 has a low-beam screen with just a “bird”.
What can I say from looking at the results: for now I remain of the opinion that the light-shadow boundary is formed primarily by the lamp. The reflector and glass can only influence to a certain extent (the reflector is larger, the glass is smaller) on the flux already formed by the lamp, but nothing more.
KIA Spectra headlight: how can you modify it
Did you like the article? Follow our channel for new ideas of useful car tips. Subscribe to us in Yandex.Zen. Subscribe.
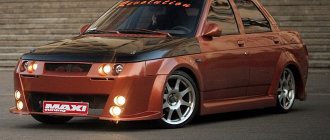
The popularity of KIA cars is growing every day. There are many reasons for this, but the main thing is that as a result of the purchase, the domestic car owner gets a high-quality and multifunctional car that does not require anything in terms of improvement. However, not all car owners think so, so they strive to change the appearance of the vehicle.
Popular ways to “improve” a car include tuning the headlights of the KIA Spectra, the most popular model on domestic roads in recent years.
Conventionally, these methods can be divided into:
- Modernization and tuning of head optics;
- Equipment and modification of KIA Spectra fog lights;
- Modernization of rear lights.
For reference: improvements also include plastic eyelashes on the KIA Spectra headlights, which add individuality to the overall style, and the production of stickers on the headlights, which can protect the surfaces of lighting fixtures from road stones.
The reason why some LED headlights work well while others are blinding
LED technology has come a long way in the last five years, although it was discovered at the beginning of the last century and subsequently introduced into production in the early 1960s in the United States.
At the moment (as of 2020), there are a huge number of brands in the world that produce high-quality and not very compact lighting elements on the market. High-quality, bright (and therefore expensive) ones are increasingly being installed as headlights on new cars. The vast majority of these new cars are in the premium segment, and therefore are very expensive and not every motorist can afford to buy them. But what to do if you still want to illuminate the road with bright white light? A solution has long been proposed: LED kits.
In this material we will not touch on the legislative side of the issue (this is the topic of a separate article, especially since we previously wrote on this topic: Is it possible to lose your rights for LED lamps in headlights, Is it possible to install LED lamps in fog lights) and the variability of legislation in this matter . Poor-quality LEDs and their makeshift installation can easily lead to emergency situations on the road - blinded drivers of oncoming cars, a poor, dim, uneven beam of light that interferes with the car owner, with an incorrectly installed or low-quality kit.
These are the important nuances that motorists should remember in order not to break the law and not create difficult situations on the road when replacing halogen lamps in the headlights of their car.
Therefore, we also cannot recommend any LED kits; Anyone who wants to install LED headlights on their car will have to study the legislation of the Russian Federation on this topic on their own or contact a certified company that will help make the replacement without deviating from the letter of the law.
Modernization of head optics
So, what is included in this concept:
- Installation of new generation incandescent lamps into the housing;
- Installation of tunnel type illuminators (bi-xenon);
- Painting of headlight reflectors (integrated - front and rear optics);
- Installation of PTF and running lights.
Warning! Often, tuning headlights on a KIA Spectra goes so far that not only the lighting device is modernized, but the color of the light flux emitted by it also changes, which is unacceptable. Such “improvements” include “angel eyes,” which you can learn about from the video in this article.
Independent work
Disassembling the headlight
All of the above methods require complete or partial disassembly of the headlight. And this process should be given maximum attention so that owners do not allow unnecessary damage to an expensive product.
But first, the headlight (left or right, it doesn’t matter) must be properly removed from the car.
The instructions will be as follows:
- Open the hood of the car;
- Disconnect the terminals from the battery;
- We arm ourselves with a 10-mm open-end wrench and unscrew the headlight mounting screws from the inside;
- We push the KIA headlight out, keeping it from falling to the ground;
- We remove the wire from the base, not forgetting about the drive that goes to the KIA Spectra headlight range control.
Note! Our technique will help those drivers who do not know how to remove the headlight on a KIA Spectra, mistakenly believing that this will require removing the front bumper.
Now we have to separate the headlight into its component parts. The difficulty is that the transparent part of the diffuser is connected to the body using sealant.
To separate the parts, this sealant must be heated simultaneously along the entire length:
- You won’t be able to do this with a hairdryer or a torch, because... the length of the seam is quite long, and it is impossible to warm it up immediately;
- But you can get uniform heating in a regular gas oven in any kitchen in a multi-story building;
- Place the washed headlight in the oven, preheated to 80-85 degrees;
The main reasons why glare from headlights occurs
- Banal inattention, accident, etc. Often those who blind with headlights do it unintentionally, this happens due to inexperience or absent-mindedness, often this is typical for beginners and the fairer sex.
- Installed xenon. Xenon lamps, despite the advent of LEDs and various laser and matrix headlights, are extremely popular. They provide bright light and good visibility, but if after installing the xenon you do not adjust it, you will one way or another blind oncoming cars.
- Incorrect or lack of headlight adjustment. Here, I think, there is no point in explaining that if the headlights are not adjusted and shine “at random and wherever,” then blinding cannot be avoided. As a rule, the need for adjustment arises after removing the headlight, disassembling or repairing the front part of the car.
- "Right-hand drive cars." Cars with right-hand drive require adaptation of the optics, and sometimes a complete replacement. I already wrote about the differences between American and European headlights, and right-hand drive cars also have their own characteristics. In short, the problem is that unlike right-hand traffic, where the curb and sidewalk are on the right, for right-hand drive cars the opposite is true. As a result, it is not the right side that is illuminated more strongly, but the left side, resulting in blinding of the oncoming lane. To eliminate this, it is necessary to adapt, adjust or replace the front optics.
- Tall cars. SUVs, minivans and trucks can often cause discomfort with their headlights, as they are located much higher compared to passenger sedans, station wagons and hatchbacks. It may seem to you that the car is driving in the distance, although in reality this will not be the case. Here it is important to understand the line between “the headlights are blinding” and “the headlights are high.”
Restoration work
Unfortunately, not all car owners remember that, like any other component in a car, regardless of condition, headlights require maintenance.
In particular, adjustment of KIA Spectra headlights is provided:
- Korean manufacturer regulations;
- Road safety requirements;
- Requirements of domestic GOST 25476-91.
And even more so when the KIA Spectra headlight was removed and “modified” with my own hands. In such a situation, adjustment is the only correct way to return the car to factory settings.
Adjustment
In practice, not knowing how to adjust the headlights on a KIA Spectra, many car owners let the situation take its course. You shouldn’t do this, especially since you can adjust the headlights yourself.
- In the evening, park your car opposite a blank wall at a distance of 5 meters;
- Check the tire pressure;
- Place a partner or family member in the driver’s seat so that the condition of the vehicle complies with the operating regulations;
- Apply chalk markings on the wall in advance (as in the photo below);
- Cover one of the headlights with a piece of cardboard;
- Turn on the low beam headlights;
Note! The headlights on the KIA Spectra are adjusted from the hood side by rotating the adjusting bolts.
- Combine the light spot with the marks on the wall;
- Repeat the same sequence of actions with the second headlight;
- At the final stage, open both headlights and check the direction of the light flow.
That's it, adjusting the KIA Spectra headlights is complete and you can operate your car in the evening without fear that the headlights will blind oncoming traffic.
Polishing
Mechanical polishing is another technology for restoring the factory parameters of lighting fixtures. The fact is that road dust and dirt act on the plastic of the headlights as an abrasive, constantly bombarding the surface with grains of sand, which leads to a decrease in the transparency of the plastic.
The repair technology consists of step-by-step grinding of the top layer of the headlight with your own hands or by service station specialists using special grinders using auto chemicals. Thus, it is possible to restore the light transmittance of the headlight surface to its original value, thereby saving on the purchase of a new one, the price of which is quite high.
Why do you need headlight adjustment?
Adjustment of headlights must be carried out without fail. First of all, it is necessary after replacing the lights, but some drivers do not even know that they are driving with the wrong light.
It is worth understanding why you should pay special attention to debugging.
- Better lighting;
- Safety for others;
- Maximum efficiency.
Car maintenance is a top priority for owners. Wrong actions lead to disasters that cannot be corrected. Using the available instructions, you should adjust the light to see the result in the photo.
Better lighting
After adjusting the headlights, the driver receives excellent illumination of the road surface. Due to this, he manages to eliminate dangerous situations associated with invisible objects. You have to deal with such cases at every step at night, so you can’t go out without preparation. Yes, people think that they get used to inconvenience, but there is no point in agreeing to unnecessary discomfort. To achieve the desired result, you don’t have to visit a service station, which means it’s worth spending a little of your own free time.
After adjusting the headlights, the driver receives excellent illumination of the road surface
Safety for others
Proper adjustment of all headlights ensures safety for surrounding vehicles. Collisions constantly occur because the driver is blinded by the lights of other cars. At high speed, he instantly gets lost and cannot assess the situation. On a wet road, this leads to an accident that cannot be avoided. The reason turns out to be a mistake made out of habit. Previously, car owners did not perform such maintenance, but it is necessary. Now experts advise taking seriously all details that can affect movement.
Maximum efficiency
If the road remains dark when there is close light, the cause is incorrect adjustment. Some people believe that they need to install a more powerful bulb, but this is a mistake. In such situations, the car owner should only think about setting it up. After this, maximum efficiency will be ensured, which will show how useful the headlights become during the trip. This is said by professionals who know very well what their car is capable of.
There are specific settings for headlights. Previously, they were only tested in workshops, so drivers were confident that it was impossible to change the insufficient lighting and discomfort. Today there are simple instructions that allow you to change the angle of the rays. After which the road surface in front of the vehicle becomes visible. While the car is moving, this nuance remains the main one, so you cannot forget about it if you want to calmly go on a long-distance trip.
How to polish a KIA Spectra headlight at home
The article is recommended for those car owners who really want to improve the appearance of their car. But instead of popularizing all kinds of angel eyes, bi-xenon strobe lights under the radiator grille and wheel arch lighting, we will offer a more important method for improving the performance of lighting devices - polishing the headlights .
A couple of hours of work along with preparation and the headlights will regain their lost transparency
After all, if you look at modern cars with mileage on our roads, especially at night, many have headlights that “shine brightly,” but this brightness is of little use, because the light spot on the road surface is blurry, and the KIA Spectra headlight range control cannot help in this case. And why this happens - let's figure it out together.
Differences between plastic and glass
Plastic headlights
The fundamental difference between modern block headlights and classic ones is the abundance of plastic . You could even say that plastic has replaced the metal and glass used in headlights of yesteryear.
Modern look of the KIA Spectra headlights
There are several reasons for this:
- Plastic can be easily shaped into any shape;
- Plastic does not rust;
- Easily tolerates temperature changes;
- Withstands light impacts.
Headlights with glass do not have these parameters; in addition, automotive fashion dictates its own trends, experimenting with sizes and shapes, which led to automakers refusing to use them, thereby giving the green light to plastic.
Preparation for polishing
Let's clarify that you can return the lost headlight parameters in two ways:
- Buying a new one, which is in no way justified, because... the price of such work is too high, but the old headlight is in good condition and can last for many more years;
- By polishing, which is less expensive (the cost of work and automotive chemicals will not exceed 10-15% of the cost of a new headlight).
And now is the time to be puzzled by the way this works. If you do not have sufficient experience and skills, we recommend removing the headlight from the car while polishing.
Tip: You can read about how to adjust the headlights on a KIA Spectra after dismantling in the article KIA headlight repair on our website.
If a grinder and grinder don't give you awe, then you can polish the headlights directly on the car.
In the photo - a way to really help a car
Note! Such tuning of KIA Spectra headlights will not only allow you to return the lost parameters with your own hands, but will also set the right tone in your relationship with your car.
Removing headlights
So, for safety reasons, let’s remove the headlight from the car. Which one will be first - left or right, it makes absolutely no difference, because... the work algorithm will be the same.
- Open the hood;
- Disconnect the battery by removing the terminals from its terminals;
- We arm ourselves with a 10-open-end wrench and, from the engine side, unscrew the 3 bolts holding the headlight;
We dismantle from the hood side
Tip: If you have eyelashes installed on the KIA Spectra headlights, then you need to remove them before dismantling so as not to damage them. Most often they are attached with double-sided tape.
- Don't forget to disconnect the wiring and remove the lamp;
- We disconnect the drive with which the KIA Spectra headlight range control is activated;
- Carefully push the headlight forward, preventing it from falling to the ground;
- We repeat the same procedure for the second headlight.
Both headlights are ready for polishing
Useful information: for those who do not know how to remove the headlight on a KIA Spectra and will be performing this operation for the first time, we inform you that the screw parameters indicated on the body do not correspond to reality. Instead of a key for 8, it fits for 10.
Tools and auto chemical goods
For polishing we need:
- Angle grinder, better known as an angle grinder;
- Grinding wheels;
- Special polishing solution, for example Anti-scratch;
- Clean rags that do not leave streaks or lint.
Mandatory polishing kit
Summary
In the video in this article you can see some of the nuances of polishing. In general, with due care, the work will turn out to be of high quality, thereby saving considerable money in the family budget. Plus, you will learn how to care for your car, which will also be beneficial.
Check and adjust the headlights when the vehicle is equipped (with a fully filled fuel tank, a set of tools and a spare wheel).
You will need a Phillips blade screwdriver.
1. Pre-check and, if necessary, adjust the tire pressure to normal.
Rice. 4.5. Adjusting the headlights
2. Place the car perpendicular to a smooth wall (for example, a garage) at a distance of 3 m. Place an additional weight weighing 75 kg on the driver’s seat. Mark the screen on the wall as shown in Fig. 4.5. The longitudinal plane of symmetry of the car should pass along line 0 on the screen. Rock the car sideways so that the suspension springs self-align.
Read more: Who is not charged transport tax?
3. Measure the height of the headlight centers to the floor on the vehicle. This will be the distance h on the screen.
4. Set the headlight electric adjustment control on the instrument panel to position “0”, corresponding to the load of a car with one driver or with a driver and a passenger in the front seat.
5. Turn on low beam.
6. It is recommended to adjust the direction of the light spot for each headlight separately. Cover the second headlight with opaque material during adjustment.
7. If the location of the light spots does not correspond to the picture, move the brightest sections of the light beams to the points of intersection of the lines on the screen using adjusting screws 1 and 2 vertically or horizontally, respectively.
The photo shows the left headlight. The adjustment screws on the right headlight are located symmetrically.
8. Open the hood and, using a screwdriver, rotate the gears of the adjusting screws to adjust the position of the light spot on the screen for each headlight vertically.
9. . and horizontally, if the location of light spots on the screen does not correspond to the picture.
10. The headlights are considered adjusted when the upper boundaries of the left parts of the light spots coincide with line 4 (see Fig. 4.5), and the vertical lines 1 and 2 pass through the intersection points E1 and E2 of the horizontal and inclined sections of the light spots.
11. If fog lights are installed on the car, then the direction of the beam of their light is adjusted only in height. The adjustment screw is located at the rear of the light.
12. Place the car at a distance of 3 m from the screen and, by rotating the adjusting screws, ensure that the upper boundaries of the light spots are 6 cm below line 4.
Did you like the article? Follow our channel for new ideas of useful car tips. Subscribe to us in Yandex.Zen. Subscribe.
The popularity of KIA cars is growing every day. There are many reasons for this, but the main thing is that as a result of the purchase, the domestic car owner gets a high-quality and multifunctional car that does not require anything in terms of improvement. However, not all car owners think so, so they strive to change the appearance of the vehicle.
Popular ways to “improve” a car include tuning the headlights of the KIA Spectra, the most popular model on domestic roads in recent years.
Conventionally, these methods can be divided into:
- Modernization and tuning of head optics;
- Equipment and modification of KIA Spectra fog lights;
- Modernization of rear lights.
For reference: improvements also include plastic eyelashes on the KIA Spectra headlights, which add individuality to the overall style, and the production of stickers on the headlights, which can protect the surfaces of lighting fixtures from road stones.
Polishing process
Now you need to fix the headlight while polishing. The best fit for fixing is the back cover of the KIA Spectra headlight, which must be secured to the table so that there is access to the surface that we will polish.
Advice: if you don’t have an angle grinder on your household, you can rent one from construction companies or supermarkets that sell equipment and tools.
The work instructions are as follows:
- We install an adapter for the grinding wheel on the grinder;
- Let's adjust it to the lowest speed;
- Install a 600 grit sanding wheel;
- With its help, we will remove the oxidized layer of plastic (first stage);
- Let's replace the circle with a smaller one - 1200 grit;
- Using a spray bottle, apply water to the headlight;
- We continue cleaning the surface;
- Wash off and apply a little polishing paste to the surface of the headlight;
- Set up the polishing wheel and start polishing.
The described method is also suitable for other brands and models of cars. If you want to learn how to repair fog lights on a Suzuki SX4, you can also read the material on the website.
Masters recommend the following cycle of polishing operations:
- First, rub the paste over the entire surface of the headlight;
- At low speeds, walk twice over the entire surface;
- Increase speed and repeat the cycle.
At the end of the process, all that remains is to wash off the remaining polishing paste and wipe the headlight with a special polish . Do not forget that after installation on the car you will need to adjust the headlights on the KIA Spectra .
Features of polishing without removing headlights from the car
Let's consider a situation where you do not remove the headlight and perform all operations directly on the car. Before carrying out similar tuning of the headlights on the KIA Spectra, the following parts and components must be secured before starting work:
- Cover the surface of the hood with newspapers and masking tape;
Preparing for work - protecting the hood and bumper with tape and old newspapers
Tip: Pre-wash the hood, bumper and headlight glass.
- Using a soft rag, apply polishing compound to the headlight ;
- Pick up a grinder with a polishing wheel and start rubbing the paste;
How to adjust headlights on a Kia Spectrum? — AutoExpert
The adjustment screw is located at the rear of the light. Place the car at a distance of 3 m from the screen and, by rotating the screws, ensure that the upper boundaries of the light spots are 6 cm below line 4.
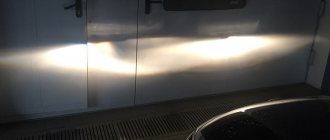
My fog lights were shining even lower than they should. I didn’t raise them so that I only use them during the day as DRLs. In the evening I drove around the city, and now the border between far and near is clearly visible.
Setting up headlights on a Kia Spectrum with photos
To this day, apparently I am a persistent offender who blinded oncoming cars: But I have corrected myself and ask you to understand and forgive me: Question price: If the grinder and grinder do not awe you, then you can polish the headlights directly on car.
In the photo - a way to really help the car Adjusting Kia Spectrum headlights We learned how to make good analogues, it makes us happy, buy on the website, write in contact. Kia Spectra Izhevsk headlight, ideal analogue.
Note! Such tuning of KIA Spectra headlights will not only allow you to return the lost parameters with your own hands, but will also set the right tone in your relationship with your car.
Removing headlights So, for safety reasons, let’s remove the headlight from the car. How to remove the radiator grille on a Ford Focus 2.
Adjusting the headlights - logbook KIA Spectra Diamond Silver 2007 on DRIVE2
Recently I began to notice that many oncoming cars began to blink at me and turn on their high beam lights. After which I started thinking about adjusting the headlights and doing it myself. I found a murzilka with pictures and got down to business.
A clear picture of what should be and how it should be.
Let's go step by step 1. Pre-check and, if necessary, adjust the air pressure in the tires.2. Place the car perpendicular to a smooth wall (for example, a garage) at a distance of 3 m. Place an additional weight of 75 kg on the driver's seat. Mark the screen on the wall as shown in Fig. The longitudinal plane of symmetry of the car should pass along line 0 on the screen. Rock the car sideways so that the suspension springs self-align.3. Measure the height of the center of the headlights to the floor on the car. This will be the distance h on the screen (I have h=600).
4. Set the headlight electric adjustment control on the instrument panel to position “0”, corresponding to the load of a car with one driver or with a driver and a passenger in the front seat.
I got this picture.
5. Turn on low beam.
6. It is recommended to adjust the direction of the light spot for each headlight separately. Cover the second headlight with opaque material during adjustment.
The right headlight, of course, shone higher, which is exactly what I was guilty of. In the photo I lowered it a little more.
Lowered it to the required level.
The left headlight was in perfect order. Right on target.
7. If the location of the light spots does not correspond to the picture, move the brightest sections of the light beams to the points of intersection of the lines on the screen using adjusting screws 1 and 2 vertically or horizontally, respectively.
8. Open the hood and, using a screwdriver, rotate the gears of the adjusting screws to adjust the position of the light spot on the screen for each headlight vertically...9. ...and horizontally, if the location of light spots on the screen does not correspond to the figure.10. The headlights are considered adjusted when the upper boundaries of the left parts of the light spots coincide with line 4, and the vertical lines 1 and 2 pass through the intersection points E1 and E2 of the horizontal and inclined sections of the light spots.11. If fog lights are installed on the car, then the direction of the beam of their light is adjusted only in height. The adjustment screw is located at the rear of the light.
12. Place the car at a distance of 3 m from the screen and, by rotating the adjusting screws, ensure that the upper boundaries of the light spots are 6 cm below line 4.
My fog lights were shining even lower than they should. I didn’t raise them so that I only use them during the day as DRLs.
In the evening I drove around the city, and now the border between far and near is clearly visible. Until this day, apparently I was a persistent offender who blinded oncoming cars :). But I have corrected myself and I ask you to understand and forgive me :)
Adjusting the headlights
How to remove the radiator grill of a Kia Sportage 3. Which one will be first - left or right, it makes absolutely no difference, since the algorithm of work will be the same.
Open the hood; Disconnect the battery by removing the terminals from its terminals; We arm ourselves with how to adjust the headlights on a Kia Spectra to 10 horn type and from the engine side we unscrew the 3 bolts holding the headlight; We carry out dismantling from the hood side. Tip: If you have eyelashes installed on the KIA Spectra headlights, then you need to remove them before dismantling, so as not to damage them.
Most often they are attached with double-sided tape. Don’t forget to disconnect the wiring and remove the lamp; We disconnect the drive with which the KIA Spectra headlight range control is activated; Carefully push the headlight forward, preventing it from falling to the ground; We repeat the same procedure for the second headlight.
How to Adjust the Valves of a VAZ Instead of a wrench 8 fits Tools and auto chemicals Angle grinder, better known as an angle grinder; Grinding wheels; Special polishing solution, for example Anti-scratch; Clean rags that do not leave streaks or lint.
Mandatory polishing kit Polishing process Now you need to fix the headlight while polishing. Or use a Phillips screwdriver to insert it into the hole in the corrector, or use a wrench to turn the headlights on how to adjust the headlights on a kia spectra. Can't you put the original halogen lights in there?
How to adjust headlights on a Kia Spectrum?
So, in order to adjust the headlights on a Kia Spectra, let’s remove the headlight from the car. Adjusting the headlights continues until the readings completely coincide with these values, only then can the work be considered complete. Kia Spectra. First, rub the paste over the entire surface of the headlight; At low speeds, walk twice over the entire surface; Increase speed and repeat the cycle.
At the end of the process, all that remains is to wash off the remaining polishing paste and wipe the headlight with a special polish. Do not forget that after installation on the car you will need to adjust the headlights on the KIA Spectra.
Features of polishing without removing headlights from the car Let's consider a situation where you do not remove the headlight and perform all operations directly on the car. Before carrying out similar tuning of the headlights on the KIA Spectra, before starting work it is necessary to secure the following parts and components: Cover the surface of the hood with newspapers and masking tape; Preparing for work - protecting the hood and bumper with tape and old newspapers Tip: Pre-wash the hood, bumper and headlight glasses.
Using a soft rag, apply polishing compound to the headlight; Pick up a grinder with a polishing wheel and start rubbing the paste; Applying paste to the surface of the headlight Tip: There is no need to rush this process. Check the instructions for the polishing paste - it indicates the time required for polishing; Make sure the surface becomes more transparent.
You can increase the speed, avoiding strong pressure; At the end, be sure to apply a polish that protects the surface from exposure to ultraviolet rays. Polish is a must! Note!
After any work on the headlights, adjusting the KIA Spectra headlights is mandatory. As a result of vibrations caused by the sander, the direction of the light flux may shift.
What to do when you are blinded by headlights?
Note! For those who like to be dazzled by distant lights, I would like to remind you that switching from low to high beam is clearly regulated by law (within 150 m you must switch from high to low if an oncoming vehicle is approaching). Therefore, by blinding someone on the road, you not only create discomfort and provoke an accident, but also directly break the law.
- First of all, stay calm and slow down. Notify the car that is blinding you that its headlights are blinding you. It’s not difficult to do this, just blink your high beams and, if a person accidentally forgot to switch, he will understand you and turn on the low beams. If you are blinded by headlights from behind, that is, a car moving behind you blinds you, you need to turn on the emergency lights for a couple of seconds. This will make it clear that you are blinded. Although it happens that a blinking alarm signal is perceived as gratitude, so be prepared for the fact that you will have to blink for a long time.
Read more about light signaling on the road in this article.
If none of the suggestions help, and you are still dazzled, try to abstract yourself and take your gaze away from the source of the dazzle, you can also lower the sun visor. Next, you should concentrate on the right side of the road, that is, on the edge of the shoulder, approximately at the right angle of the hood of your car. This technique allows you not to lose control, maintain control over the road situation and at the same time you can avoid direct blinding. The idea is to move your primary gaze away from glare from headlights and into your expensive peripheral vision, which is not as susceptible to glare.
- Visor. It is unlikely to help completely remove blinding, but it will help hide your eyes for at least some time. In addition, because of it you can carefully observe the road, avoiding dazzling.
- Buy anti-headlight glasses. Special glasses for drivers can effectively find a spectrum of a certain color, thereby preventing glare. There are also special visors on sale that have a similar effect. Many people have been successfully using glasses for drivers for a long time and speak quite well about them.
- Drastic measures. If a person does not respond to your requests and signals, you can try to act on the principle of “wedge with wedge...”, that is, turn on the distant one and let the person feel what you feel. It should be understood that in this case you may blind other road users. In addition, if the driver of the car blinding you gets into an accident because of your trick, you will have to answer for your action. And believe me, it will be difficult to prove who blinded whom first, besides, it is unknown how such mutual “courtesy” will end... Think carefully before responding to evil with evil!
If none of the above helps, try to move to the right as quickly as possible, if possible, turn on the emergency stop signal and try to come to your senses. Give your eyes a rest, then continue moving.
Let's sum it up...
Remember that road safety comes first! Always think about other road users, be respectful and think carefully before you act. Do not forget about adjusting the headlights, and also correct any malfunctions of the headlights in a timely manner. I would also like to separately mention tuning headlights, which is so popular among motorists. Before installing a powerful light, think about those whom it will blind every day, as well as the possible consequences of such modifications.
Source: FaraInfo