What does the ch2 button mean on the alarm key fob?
This system has an additional channel 2 (dark blue wire), which allows you to control various additional devices connected to the system.
Basically, this channel can be used for: remotely opening the trunk of a car,
remote car engine start, etc.
To send a control signal to an additional device via channel 2, press button 3 on the transmitter key fob and hold it pressed for more than 1.5 seconds.
1. Service impulse. The CH2 channel output is connected to ground as long as button 3 is held on the F7/1 transmitter key fob. 2. Service impulse. The CH2 channel output is connected to ground for 1 second F7/2. 3. Service trigger. The output of channel CH2 is connected to ground for a time until the next moment of channel control in any ignition position F7/3. Channel CH2 is turned off by pressing and holding button 3 again for more than 1.5 seconds.
Note For paragraphs. 1,2: if the channel 2 output was activated while the system was in security mode, the system will simultaneously turn off the shock sensor and the hood/trunk trigger for a while so that opening the trunk does not trigger the system. After the trunk is closed, the system will automatically arm this circuit and turn on the shock sensor. When a channel is activated in trigger service mode, the system disables only shock sensors
I decided to make a revision of Trunk buttons. And connect the alarm itself to the Sheriff ZX755 on the CH2 channel opening the trunk (while preserving the opening from the button). We get 4-pin relay, a couple of meters of wire. To do this, it was necessary to program the signaling as follows.
Ignition on Ignition off On (press the Valet button 1 time) Ignition off On (press the Valet button 1 time) Off On (press the Valet button 3 times) look for our CH2 channel (press 19 times) on the remote control we press the arming button (we need one squeak) after which we press on the CH2 key fob until the sound signal (maximum length). Ignition is off, programming is completed. We are looking for a dark blue wire from the signaling and connect as follows. It turns out that the activator of the trunk comes constant (minus), but the positive wire comes from the 4-pin relay when turned on from the signal button or from the key fob.
There is a section in the instructions that comes with the alarm that you should definitely read. This is “Manual setting of the alarm system”, as well as “Manual disabling the security system”, which tell in great detail how to manually turn on or off the security system, repair it, etc.
Installation instructions for Starline A96
To install the Starline A96 alarm system on a car you will need:
- set of wrenches with socket heads;
- drill with drills;
- soldering kit: blowtorch, rosin, tin, etc.;
- heat shrink tubes, insulating tape.
- Car alarms are installed exclusively on cars with an electrical circuit of 12 volts. It is advisable to place the main unit in a place protected from vibrations. The most preferable installation location is under the dashboard - this guarantees concealment from prying eyes, as well as a minimum length of connecting wires. The block is fixed using self-tapping screws or double-sided tape to eliminate the possibility of spontaneous movement.
- A transceiver with a signal diode is mounted on the windshield of the car. The main condition is a distance of at least 5 centimeters from metal parts in order to avoid interference or distortion when receiving signals. The interior temperature sensor is mounted so that it is away from heat sources or direct sunlight for it to work correctly.
- The engine temperature sensor must be mounted on its body using one of the M6 bolts. It is advisable to attach it closer to the crankcase cover rather than the cylinder head.
- A siren is also mounted in the engine compartment. The main condition is to avoid moisture, and also place it away from large heat sources to prevent the horn from melting. Also, the siren connection wires should not be accessible from under the car so that an attacker cannot cut them.
- The shock sensor is located near the center pillar. It is advisable to mount it so that you can access sensitivity settings if it triggers too often.
- The Valet service button is installed in an accessible but hidden place. The inner sides of pockets for small items, the central tunnel between the seats, the plane under the decorative plugs of the front panel, etc. are suitable.
- Also, to connect and configure automatic start on cars equipped with a manual transmission, you will need to program the neutral and connect the limit switches to the handbrake. If the car is equipped with an automatic transmission, then the owner must move the lever to the parking position, otherwise autostart will not occur.
First, all components are mounted, and then the system is connected according to the diagram below. Power is supplied through two main wires:
- black. The negative terminal that needs to be attached to the car body is ground;
- red. The positive wire, which is recommended to be connected to the battery or ignition switch.
If the car can be started using the Start button, then the connection is made in a slightly different way:
- the red contact is attached to the battery, but through a fuse designed for a current of no more than 30 amperes;
- The blue wire is connected to the brake pedal;
- the yellow-black cable connects to the start button;
- the yellow and green contacts remain unused.
To implement autorun and turbo timer, an additional algorithm is used:
- the red wire connects to the battery;
- yellow cable to the ignition system;
- green – to the ACC output;
- blue is redundant;
- the black and yellow contact is connected to the starter.
Below is an installation map that will allow you to install a car alarm on any car with an automatic or manual transmission, including Haval H9, Nissan Murano Z51, Toyota or KIA Sportage.
Description, characteristics and types of key fobs for sheriff alarms and their repair
ATTENTION! A completely simple way to reduce fuel consumption has been found! Don't believe me? An auto mechanic with 15 years of experience also didn’t believe it until he tried it. And now he saves 35,000 rubles a year on gasoline! Read more"
The instructions contain a table that lists in detail all the functions supported by sheriff key fobs. The “Secret Code” function is not initially programmed (to deactivate the system you need to enter a security code), or use the Valet key. Make sure which method was used to program your particular system, and read about it in the instructions section. The instructions also describe system repairs and major malfunctions.
The Sheriff security system includes six independent (with a pair of remotely controlled) channels. Essentially, these are six programmable lines, the functionality of which can be flexibly configured. The remote control supports the following functions:
- remote control of turbocharged engines using a key fob;
- control over auxiliary devices using a timer;
- information about the location of the car;
- protection of a car with a running engine and without an ignition key;
- remote activation of the siren during “NIGHT” using an auxiliary pager or other transmission channel;
Remote control with protection against radio signal interception (Keeloq)
The Sheriff security system remote control uses a transmitting signal, which is undoubtedly the most secure among all existing analogues. Hijackers often use a code interception system, or so-called code grabber. The system reads the signal that the remote control transmits and stores it. When the owner leaves, the attacker repeats the command and thus takes possession of the car.
The sheriff system remote changes the transmitted code every time, so it is simply impossible to take possession of a car using a code interceptor. If a key on the key fob was pressed more than thirty times while the remote control was out of reach of the car (for example, the key fob is in the hands of children), the car will stop responding to the key fob commands when you try to use it. This approach excludes service repairs of the model and the highest safety.
In order to carry out repairs and restore the system, the remote control will have to be resynchronized with the machine. To do this, press the security key twice within a second. The system will recover and continue to function normally. No need for service repairs.
Sheriff family key fob controls:
- enabling and disabling protection.
Full activation of the security system
- Briefly press, drop, and then again press and hold (from 3 seconds) the VALET key until the corresponding signal notifies you that the car has turned on the protection.
- The LED will flash, waiting for all doors to close. If all the doors were locked, the system will wait until one of them opens and closes again. When the last door is locked, three seconds will pass and the alarm will be activated.
- If there is an auxiliary locking circuit and function F23 (automatic door locking) is active, then all doors will be locked. If the door was open, the system will wait for it to close.
Important! When the ignition is turned off, turning on the alarm in manual mode will only be possible after five seconds.
Setting up the key fob
Starline A9 remote controls make it possible to remotely configure the operation of the anti-theft system. With their help, they turn on and off the security mode, open and lock doors and trunks. They allow automatic engine starting. All remote control settings are simple enough to program them yourself, using the instructions from the manufacturer, illustrated with photos of the elements.
How to set the time on a Starline A9 key fob
The correct operation of many functions of the device depends on the correct setting of the time of the built-in chronometer. The format is twelve-hour, where the time before noon is designated as AM, and after that as PM. When replacing batteries, the clock is reset to zero.
- hold down the third button of the main key fob and wait until a double melodic sound appears and the time indicator flashes;
- set the hour readings using buttons one and two - the first of them is responsible for increasing, and the second for decreasing, and a quick change occurs by holding down the key;
- to go to setting the minutes, briefly press the third key;
- The minutes are set according to the same algorithm as the hours;
- at the end, press the third button again until the remote control signal sounds.
List of protective functions
- When any of the doors, luggage compartment or hood is opened, the siren will immediately sound. The side lights will flash for 30 seconds. When the siren subsides and the side lights go out, the system will continue to block all power circuits. If the intruder left the door open, the system will sound an alarm in six thirty-second intervals and the power circuits will remain blocked; Automatic activation of the security system
- Stop the engine, leave the car and close the trunk, hood and all doors.
- The LED will begin to flicker slowly, warning you of the start of the thirty-second period before the protection system turns on.
- After thirty seconds, the security mode is activated.
- The side lights will flash once.
- One beep will also follow.
Remember! If during the thirty-second period of arming the car, one of the doors, the luggage compartment or the hood lid opens, the activation of the security system will be suspended. When all the doors are closed again, the system will restart the 30-second countdown; upon completion of the countdown, the security system will turn on.
Valet Push Button Switch
The Valet key makes it possible to briefly deactivate the alarm system, so as not to hand over the remote control to a service station or parking attendant. While the alarm is in the Valet state, all security systems are turned off, except for remote control of the “Panic” mode and unlocking the door locks.
Enabling Valet Mode
- Deactivate the security system from the key fob button or Valet key, you can also do this by entering your personal code.
- Turn on and then turn off the ignition system.
- Within five seconds, press and throw the Valet key.
- The LED on the panel will turn on continuously.
- The system switched to Valet mode.
Note. Valet mode accompanies each turn of the ignition key with a short sound signal.
Turning off Valet mode
- Turn the ignition system on and then off.
- Within five seconds, press the Valet key.
- The LED on the panel will go off.
- The system returns to normal mode.
Alarm systems "Sheriff" have a high-quality service base, their repair will not cause difficulties for specialists, and the extensive service network will not force you to send a spare part or go to another city. Expert technicians will carry out repairs, check compatibility and quickly fix the problem. Sheriff systems are very reliable and most often repairs are simply not necessary.
Why doesn't the key fob see the car?
Reasons why the communicator cannot synchronize with the alarm control unit:
- The battery in the remote control is low. If the power supply goes down, this may affect the remote control's communications. At first the signal will deteriorate and then disappear altogether. To fix the problem, the battery must be changed. The back cover of the communicator is removed and the battery is inserted into the free compartment, taking into account the polarity.
- Incorrect installation of the antenna module. If the device is located close to metal parts or electronic devices, the connection quality will be poor. You need to reinstall the transceiver unit to another location.
- Failure of the antenna or damage to its wire. If the device breaks down, the problem can only be solved by replacing it. You can determine a damaged electrical circuit using visual diagnostics; if this does not help, use a multimeter. If the cable insulation is damaged, the signal quality will also decrease. A bad wire must be replaced.
- The vehicle is in the interference zone. This often happens in large cities, near transformer substations, as well as manufacturing plants. The car owner needs to either wait until the interference disappears on its own, or move the vehicle to another location.
- The communicator is broken. If you suspect that the key fob is faulty, you should try to control the alarm with a spare remote control. To determine the cause of the failure, detailed diagnostics will be required. You can unscrew the device case yourself and check the integrity of its circuitry. The user can re-solder faulty or worn contacts on the buttons with his own hands, but changing the firmware should be entrusted to specialists.
- Malfunctions in the operation of the control unit. Communication may be lost if the microprocessor module is exposed to moisture. To fix the problem, the device can be disassembled and dried in a dry place, but not near a stove, under ultraviolet rays or a household hair dryer. It is possible that the contacts on the module block have oxidized, then the connector will need to be cleaned. Reflashing the device will allow you to fix the software problem, but it is better to entrust this procedure to specialists.
- Bad weather conditions. Sometimes the signal from the communicator is “lost” in strong winds, thunderstorms and rain. You need to bring the key fob as close to the car as possible to control the alarm.
Badges and buttons on the key fob
On the main “signaling” pager with an LCD display there are 4 keys that have the following purposes:
- ARM—activate the security mode.
- DISARM - disarming.
- Used to control CH2 - a programmable channel, ignition support, engine auto-start, modes when disarming or disarming the car.
- F is a button for remote selection of parameters and functions of the complex.
The additional Sheriff key fob without a display, in addition to three keys duplicating the main transmitter, has a button for controlling other pager functions and the CH3 channel.
The LCD display contains keys and indicators:
- antenna - lights up if there is a stable connection between the transmitter and the central unit;
- temperature and onboard voltage;
- "Turbo timer";
- saving power;
- "Valet" mode;
- system sensors;
- alarm clock, clock, time of day;
- locking doors;
- turning on or off the siren;
- "Anti-Hi-Jack";
- door locks;
- turning on the ignition;
- door limit switches, trunk;
- engine operation;
- calling from the car;
- 2 and 3 additional channels;
- autostart based on temperature;
- turning on the automatic start timer;
- Automatic transmission.
Overview of models and operating and installation manuals
An extremely primitive system without feedback, which is controlled by two key fobs with minimal functionality: one button controls arming/disarming, the second activates an additional channel, and in combination with the first, it implements arming with disabling sensors or silent mode.
- Open the door with the key.
- Turn on the ignition.
- Press the Valet button within an interval of no more than 10 seconds.
Therefore, for the owner, setting a secret code is a mandatory measure to ensure at least some security. Here its length is fixed, two numbers from 1 to 9, which theoretically gives 81 different combinations. However, the instructions prohibit choosing the number 3 as the first digit of the code, which reduces the number of combinations to 72.
To set a secret code, you need to disarm the car:
- Turn on-off-on the ignition.
- Dial the first digit using the Valet button.
- Turn off, then turn on the ignition again.
- Dial the second digit.
- Turn off and turn on the ignition.
- After waiting for a short signal from the siren, turn off the ignition again.
But in order for the alarm to start working with a secret code, you need to activate the corresponding function:
- After disarming the car, turn on the ignition.
- No later than 3 seconds later, press Valet three times (this is why you cannot use 3 in the first digit of the secret code).
- Turn off and turn on the ignition.
- Press Valet 9 times, going to the F9 function.
- Press the main key fob button - the system will give two siren signals, indicating that the F9 function has been switched to value 2 (secret code).
The procedure for disabling the security status using a secret code is the same as entering it.
Installation instructions for alarm system Sheriff APS-2500
A minimally modernized version of the APS-2500, which now has arming and disarming buttons on the key fob of the same design.
Installation instructions for alarm system Sheriff APS-2600
The system differs from the APS-2500 model only in the updated design of the key fobs, where the arming and disarming buttons are separated, and the presence of a built-in power relay for an additional channel in addition to the low-current output. The remaining capabilities and level of protection of this alarm system are in no way superior to the APS-2500. True, the restriction on the first digit of the secret code has been removed, which, however, cannot be called a serious achievement.
Installation instructions for alarm system Sheriff APS-35 PRO
Two-way communication system on the main key fob. Operates with wideband modulation on the 433 MHz band without using any form of dialog code. In modern urban conditions, this reduces the radius of reliable communication, and you can’t count on protection from code grabbers even more so. The only more or less relevant protection function is the control of a digital blocking relay, which, however, is not included in the package.
Emergency deactivation of the alarm also occurs by pressing the Valet button once, if the secret code is not installed and activated (function F13).
Installation instructions for alarm system Sheriff ZX-750
The system, while maintaining common features with the ZX-750, received an increased number of additional channels. Of these, two can be used to control external blocking relays with normally open contacts, and three can have roughly adjustable response time intervals.
The system does not meet modern requirements for anti-theft protection, just like those described above.
Installation instructions for alarm system Sheriff ZX-900
The first alarm with auto start in the line. Supports dialogue code only in the main key fob; it is used only for disarming. To fully use all key fobs from the kit, you must disable the F21 function activated at the factory.
Timer autostart after activation allows you to start the engine every hour, or every 2, 4 or 12 hours for no more than two days. After 48 hours the function is blocked.
Temperature-based autostart occurs no more often than every 40 minutes if the temperature drops below the set temperature (+5, 0, -5, -10, -15 or -20 degrees). At the same time, unlike even many systems of the same level, setting the temperature is extremely inconvenient, since it lacks a digital indication. Instead, the instructions literally offer the following:
- Press the F button twice (the cursor is positioned on the IMMO indicator).
- Press the same button again.
- The indicator flashes to indicate the set temperature (for example, three flashes with a pause indicate a setting of -5 degrees).
- Button 1 activates the function and changes its value in a circle, button 2 disables it.
Moreover, even the state of enabled autostart based on temperature on this alarm is indicated by the lighting of the IMMO indicator. To be honest, you still need to try harder to find an alarm system that is more inconvenient and difficult to set up. Taking into account the minimal protection against theft, the overall impression of it is sharply negative.
Installation instructions for alarm system Sheriff ZX-1070
Friends, good afternoon! I want to say thank you to everyone who subscribes, comments and motivates me to create quality content =)
Today I want to highlight the installation of the SHERIFF ZX-1070 alarm system.
Car alarm Sheriff ZX-1070 is a fairly popular budget model with two-way communication. This alarm system has an auto-start function, but I won’t connect it today.
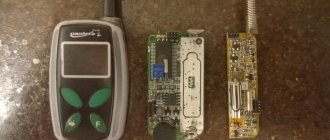
The kit includes the main unit, connection wires, locking relay, shock sensor, 2 key fobs, battery, installation instructions. The alarm kit does not include a siren, so it had to be purchased separately. I removed the autostart and additional channels wires, since they are not involved in this installation.
Alarm connection wires. On the large block there are 2 “pluses” and an ignition wire.
Next are 6 wires to the central locking. The client’s car does not have an electric door drive, so I will connect these wires according to the power circuit indicated in the instructions.
Next there are 2 white wires - turns. White with a black stripe - exit to the siren. The orange wire is a normally closed interlock. Black wire is ground. Red-white - “+”, power supply for the alarm itself. Dark green - hood end. Dark green and black - trunk end. The brown wire is the door switch. Gray - hand brake. Brown-black - input from brake lights.
Also coming from the alarm system is the Valet button and wires to the shock sensor. There is also a connector for connecting the transceiver antenna, which I have already installed in the car.
As usual, I divide all the wires into groups and wrap them into braids that will go to different ends of the car.
Under the hood it is necessary to place a hood switch and a bell (siren). The limit switch will fit into the connector that was already there, and I secured the siren under the power steering expansion tank. The bell was placed on a standard bolt and additionally tightened. We stretch the wiring to the limit switch and the bell, and make the appropriate connections. In this case, I use twists, which I insulate with 3M electrical tape.
How to register
It is possible to register four transmitters for the Sheriff alarm system. During the process, all previously recorded codes are erased. Therefore, you need to encode all key fobs at once, without interrupting between them for more than 5 seconds.
- Disarm the car and turn on the ignition.
- Press “Jack” 3 times. A short beep will sound.
- Press “Valet” 3 times again. The system is considered ready after a long beep from the siren.
- On the key fob, press and hold 1 key until a long sound signal is heard and the indicator blinks rarely.
- To link all key fobs to the alarm, you need to repeat the procedure.
Programming mode will turn off after 8 seconds of inactivity or after turning off the ignition. The indicator will go out and 2 beeps will sound - short and long.
How to enable or disable the Valet button
To turn off the alarm using the Valet button , you must activate the corresponding mode.
To do this you need:
- Open the car door with a regular key (the alarm will go off, the siren will scream, the turn signals will flash, etc.);
- Turn on the ignition for just a few seconds and immediately turn it off;
- Press the Valet button and hold for a few seconds;
- The alarm will respond with one characteristic squeak. Threat mode will be disabled and the security system will be deactivated.
Most modern car alarm models provide remote activation of the service mode.
To remotely enable the Valet function, you must perform the following steps:
- Disarm the system;
- Turn the ignition on for a few seconds and turn it off;
- After 10 seconds, simultaneously press the buttons on the key fob indicating the open lock and the speaker.
- Keep the buttons pressed for several seconds until the security system responds with a short siren.
Please note: As long as the security system is in Valet mode, each time the ignition is turned off, the alarm will give two short signals to remind you to activate the service mode.
VIDEO INSTRUCTIONS ” alt=””> To reset the Valet button, you need to turn on the ignition, after 10-15 seconds, press and hold the Valet button for a couple of seconds. The alarm indicator (LED) will go out and the security system will return to normal mode.
Remote control programming
Number 11 is the system shutdown code specified by the manufacturer. It can be replaced during programming with a personal one. For this:
- Exit security mode and deactivate the ignition.
- After 5 seconds, turn on, turn off and turn on the ignition again.
- Press the “Jack” button the number of times corresponding to the first number of the previous code within 10 seconds.
- Turn off and on the power. Repeat the procedure for the second number of the code.
- Switch the ignition back on. A short sound signal confirms the correctness of the actions.
- Turn off the ignition within 5 seconds. Write down a new code.
- Press “Jack” 5 times. After a short and long beep of the siren, the “signal” is ready for coding.
- Press 1 key on the key fob within 5 seconds. After the sound signal, press “Valet” as many times as the first number of the new personal code. You need to do it in 10 seconds.
- The system will confirm the number with beeps. Then press key 2 on the key fob.
- 2 siren signals will sound. The second digit of the code is entered.
Will the Starline A9 key fob fit A8 and A6?
Due to minimal differences in design and functionality, remote controls for Starline A9 are highly compatible with Starline A8 and A6 car alarms. To connect them, there is no need for additional complex reprogramming - just register them in memory. Moreover, it is possible to simultaneously register the A9 remote control with the original key fobs of these alarms.
All I needed from it:
1. Reset to factory settings
It is possible to reset the values of all programmable functions to factory presets. To do this, you need to do the following procedure: 1. Turn on the ignition and press the service button 10 times. 2. Turn off the ignition. The siren will sound 10 times indicating entry into reset mode. 3. Press the service button 1 time. 1 siren signal will follow. 4. Press button 1 of the key fob. There will be 1 short beep, confirming the reset to factory settings. 5. To exit the reset mode, switch the ignition or wait for the system to automatically exit. As confirmation, there will be 5 flashes of dimensions and a melodic signal from the key fob.
How to set up an alarm on a new key fob
The operating instructions indicate how to remotely turn off or turn on the alarm functions and configure their parameters via the Sheriff two-way communication key fob.
To do this, you need to enter the programming mode by pressing the F button twice within 1 second. To select the required function, you need to navigate through the icons using pager key 1 counterclockwise, or key 2 clockwise. The active function will flash.
Basic settings options:
- If you press the F button twice and select the “V” icon, you will be able to turn off or turn on the “Valet” service mode.
- To set the turbo timer parameters, you need to select the appropriate icon and press the F button once. The parameter active for setting will flash on the display.
- If you select the “Check” icon on the LCD screen, the function of displaying the value of the on-board power supply voltage and temperature at the location of the sensor installation on the LCD display will become available.
Using the transmitter keychain, it is possible to disable shock sensors, set the autostart mode, change the siren and door lock modes.
Is it possible to link from another alarm system?
Sheriff key fobs cannot be exchanged for transmitters from other security systems. Each of the brands of signaling devices existing on the market uses its own encoding algorithms and keys.
Depending on the year of manufacture and models of security systems, the methods of encoding commands may differ even from the same manufacturer.
You should choose key fobs that match the system installed on the car.
Alarm sheriff instructions for use keychain photo
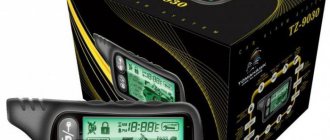
Sheriff aps95lcd b4 alarm key fob is supplied complete with Sheriff ZX-750, ZX-1070 security systems. The remote controls for these alarms are not interchangeable. The product comes with an instruction manual that details the function of each button. The body of the remote device contains: an information display and four control keys.
- “Closed lock” symbol – arming (ARM).
- “Open lock” - removed from protection (DISARM).
- “CH2” emblem—control of a programmable channel.
- Button “F” - remote selection of functions, change parameters.
Next, the operating instructions for Sheriff APS95LCD-B4 will be presented.
Download the official instructions Sheriff APS95LCD-B4.
Key Features
From the key fob you can control functions: arming and disarming, panic (turning on and off), setting up a turbo timer, searching for a car, etc.
Let's look at how to lock and unlock a car using a pager.
- Briefly press button 1.
- A CHIRP will sound.
- The LED located on the antenna module will flash slowly. The car is secured.
Carrying out the following steps, disarm the car.
- Click button 2.
- The dimensions will blink twice.
- A double siren signal will follow.
Programming an additional key fob
When the new remote control code is written to the control unit's memory, the data from the old key fobs is erased. You can register up to four remote devices in the system memory. In order to attach the key fob to the ZX 1070, 750 security complex (Valet state), follow the steps.
- You are given five seconds for any action. If you exceed the time limit, the system will automatically exit the settings.
- Set the mode to “Disarmed”. Turn on the ignition.
- Press the Jack button three times. One siren CHIRP will follow. Click “Valet” three more times. The alarm will emit a long beep. You can enter pager data.
- Press the 1st button of the first device. A long squeak will follow. The LED indicator will flash slowly.
- Repeat the previous step with the remaining remote controls.
- Exit recording mode by turning off the ignition. You can exit in another way, without doing anything for eight seconds. The action will be confirmed by one short and long squeak of the siren. The LED will go out.
Firmware for old remote control
Reprogram the aps95lcd b4 key fob according to the algorithm.
- The recording is made in the “secret code” system state. The code is entered using the “Jack” key.
- Turn the ignition on and off, then turn it on again.
- By pressing the “Valet” button, enter the first value of the individual code. One click – number 1, two clicks – number 2 and so on.
- Deactivate and then activate the ignition.
- Enter the second code value in the same way.
- Turn off and then turn on the ignition. A beep will sound indicating that the code has been entered correctly.
- Triple-click the “Valet” button. The system will emit a short beep. Press “Jack” three more times, a long signal will follow.
- Click the 1st button on the first remote control. The sound will confirm the communicator recording.
- Enter the details of the remaining pagers in the same way.
- After all the steps, turn off the ignition, thereby exiting the recording process. A short siren signal and a long one will sound. The LED will go out.
Key fob Sheriff aps95lcd b4 does not work: reasons
Has your remote control stopped following your commands? You cannot arm or disarm your vehicle. Even binding the switch to the system does not help. What is the reason? One solution to the problem may be a new activation of the key fob. Remove the battery from the remote control for a few seconds and reinsert it. Does not help? Let's look at other reasons:
- damage to the contacts of the printed circuit board located inside the switch. Repair the remote control yourself, or give it to specialists;
- interference that prevents normal communication between the communicator and the control unit.
How to remove the pager body
Tools and accessories:
- small shaped screwdriver;
- thin plate or knife.
- Remove the battery by opening the cover located on the back of the remote control.
- There is a self-tapping screw in the battery compartment, unscrew it.
- The case is held on by plastic latches. Carefully pry them off with a knife or thin plate. Open the keychain.
- Preventative and repair work can be carried out.
Aps95lcd b4 setup instructions
Author of the material: Dumchenkov Mikhail
Did you like the material? Share with your friends:
The American Sheriff alarm system will reliably protect your vehicle from theft and other criminal attacks. An expanded set of functions will make driving more comfortable. The main drawback is the range of the main communicator, which in practice turns out to be less than stated.
Design and principle of operation
The alarm device includes a head unit, an antenna complex, control key fobs and some other elements, for example, an engine blocker. All Sheriff anti-theft systems have the following functions:
- Vehicle condition monitoring. The system notifies the user using the key fob. The function works like this: if there is an attempt to steal or damage the car, the sensor transmits information to the head unit. The latter sends data to the key fob, on whose screen a message appears.
- Remote control of the car. Depending on the alarm model, the system provides various options for remote engine starting. The user can send a command from the key fob, set the motor activation time, or set frequency indicators.
- Security coding. The Sheriff car alarm operates using a separate channel. It is impossible to crack the security code using standard means.
- Power window control. The function is implemented only in the presence of automatic closers.
- Remote door opening. When the protective mode is turned off, the head unit sends a command to unlock the door locks and trunk.
- Silent mode. When the anti-theft system is turned off and on, the system will not sound an alarm. By making the appropriate settings, the user can achieve automatic activation of the security mode when closing the doors.
- Activation of alarm mode. At the same time, sound and light indications are triggered. The mode is designed to deter criminals.
Source: https://ravon-r2.ru/signalizacija-sherif-instrukcija-po-primeneniju/
Why is it not programmed and other problems
It happens that when you bind a car alarm key fob, it does not connect to the system.
The Sheriff alarm manual does not describe this problem, since with the correct selection of a replacement transmitter, most often the binding to the system is carried out without any problems.
In these cases, installers of car security systems recommend carefully checking the correctness of the user's actions when programming pagers.
It is important to follow the sequence of operations, and when pressing the service button and the key fob buttons, maintain the required time of pressing and pauses between them.
One of the options for “treating” the system is to overload it by disconnecting the battery terminal.
The performance of the system is affected by the presence of electromagnetic interference at the location of the vehicle, the condition of the wires of the main unit and antenna, and the ingress of foreign liquids when used at the locations of system elements.
“Native” key fobs are untied from the car alarm when attackers try to gain unauthorized access to the car by using stun guns or signal grabbers.
Download instructions for alarm systems Stalker 600 in pdf format
You can download service manuals for use and installation using the following links:
| Manuals in Russian for operation and installation of alarm systems | |
| Operating instructions Stalker 600 Light3 | |
| Installation instructions Stalker 600 Light3 | |
| Operating instructions Stalker 600 LAN 3 | |
| Installation instructions Stalker 600 LAN 3 | |
| Alarm connection diagram Stalker 600 LAN3 | |
| Programming table for the Stalker key fob |
Page 29
•
If the F13 function is in Valet mode and the alarm is triggered, turn off Anti Hi
Jack" as follows: turn off, then turn on the ignition again and press the "Valet" button switch for 10 seconds.
•
If function F13 is in the “Secret Code” mode, turn off and turn on the ignition 2 times,
then enter your personal secret code to disable the system.
Additional service functions for system management
Remote control of the siren (on/off, night mode of the system)
If operating conditions of the system require maintaining silence or sending alarm signals using other additional devices (pager), you can completely disable the audible alarm signal from the siren in the “Security” mode. The alarm lights and additional channel signals will remain operational. Use the key fob transmitter to enable the function of turning off siren signals (see “Remote (two-way key fob) turning on/off system functions”). Also, enabling/disabling a function can be done directly by programming it through the programmable functions table.
Automatic door unlocking when the ignition is turned off (function F11)
Technical specifications
Overview of technical characteristics of the anti-theft complex Stalker 600:
- data transmission is carried out via a radio channel, the frequency of which is 433.92 MHz;
- the range of the communicator when transmitting commands is no more than 1.2 km;
- the operating time range in alarm mode is 25-30 seconds;
- in message receiving mode, the operating radius can be up to 3 thousand meters, provided there is no interference;
- to power the security system, a voltage in the range of 9-15 volts is required;
- the current parameter for powering the microprocessor module in protection mode is no more than 3 mA, the siren is 1.5 A;
- temperature level for car alarm operation from -90 to +85 degrees;
- The maximum permissible supply voltage is 18 volts, provided that the duration of its exposure is no more than 1 hour.
Despite the declared versatility of Stalker Light, Lan and other models, their use is not possible on all types of vehicles. You can install and connect Starline security systems only on cars with a 12-volt on-board network. The use of these car alarms in cars with a voltage of 9 and 24 V is not allowed.
In accordance with the instructions for using the Stalker 600 alarm key fob, alarm signals can be sent in several variations:
- light pulses from hazard warning lights or car side optics;
- siren sound signals, the use of both autonomous and non-autonomous devices is allowed;
- automatic notifications of the communicator with feedback.
The 9Stalk channel briefly talked about the technical features and capabilities of the Stalker 600 anti-theft systems.
What do the buttons on the Starline and Sherkhan alarm key fob mean?
One of the main control elements of a modern two-way security system is the key fob - a compact device equipped with a miniature display, an antenna for data transmission and control buttons.
The car alarm performs the functions programmed into it automatically or according to encrypted commands sent from the key fob by pressing the corresponding buttons.
The number of buttons may vary depending on the brand and model of car alarm. As a rule, there are 3 or 4 of them, but some buttons perform several functions at once (determined by the duration of pressing).
In addition, there are combinations of two keys, which expands the functionality of the device.
Some of the functions provided by the manufacturer and some presets of a modern car security system can be changed by managing the settings and flashing (reprogramming).
what the buttons on car alarm key fobs from different manufacturers mean and what functions they perform.
Symbols on the car alarm key fob display
Nobody has been arguing about the benefits of security systems for a car for a long time. The question: to put it or not to put it, this is a slightly different discussion.
Almost all modern cars are already equipped at the factory with an immobilizer, and some with alarm systems.
But given our Russian climatic conditions, I often really want autostart. It’s nice to get into an already warmed-up car and a warm interior without wasting time on warming up.
Car alarms are now sold in many, even non-specialized car stores. In this article we will consider such a nuance as using an alarm system without an instruction manual.
Quite often, when purchasing a car on the secondary market, the buyer receives an already installed alarm system and very often without instructions for use.
Our people are knowledgeable and literate even without any instructions, and therefore they don’t bother too much.
However, in addition to universal literacy, our people are characterized by curiosity and meticulousness.
Turning the alarm keychain in your hands and looking at the letters and symbols, the question arises: “What do they mean?”
The designations of all manufacturers are almost the same, and if you cannot find instructions for the system you have (which is at least strange given the current omniscience of the Internet), you can take a description from another.
Basic symbols on the car alarm key fob.
The Magicar keychain is taken as an example.
Besides indicating battery level, signal strength, clock and the like, other special symbols are also actually quite intuitive.
- “The lock is closed” - the car is guarded.
- “The lock is open” - the car is disarmed.
- “The trunk of the car is open” - opening the trunk lid without disarming the doors.
- “Hammer” - the shock sensor was triggered.
- “Smoke is coming out of the chimney” - accordingly, the engine is running.
- “Key” – service mode.
The main symbols on the display of the car alarm key fob and their interpretation
But the best option is, of course, to obtain the original instructions for your alarm.
You can also get it on the manufacturer’s website or, as a last resort, ask the seller to scan (copy) the necessary pages.
psa-perm.ru
Basic functions of the Starline alarm key fob buttons
Let's look at the functionality of the control key fob using the example of the popular car alarm StarLine A63/A93. There are a total of 4 keys on the key fob, they are conventionally numbered from left to right (if you hold the key fob with the display facing your face).
First button of the Starline key fob:
- Short press - activation of the security mode (setting the alarm);
- Double short press - turns on the shock sensor of the first zone (front of the car), pressing again switches to the second zone (rear of the car).
- Short press - disarm;
- Pressing button 2 for 3 seconds switches to the cursor function selection mode.
- Short press - request about the current state of the car (the battery charge and temperature inside the cabin are displayed on the remote control monitor);
- Pressing twice quickly turns on the tilt sensor;
- Pressing the third button and holding for 2 seconds + short - adjusts the sensitivity of the shock sensor of the first zone. When you press this combination again, we enter the second zone of the shock sensor, in which you can also adjust the sensitivity (with buttons 2 and 3).
- Double short press - search for a car, at the same time the engine temperature is displayed;
- Pressing button 4 for 5 seconds goes to the key fob programming menu (setting the time, alarm clock, adjusting the volume of the key fob beeps, etc.).
Basic key combinations:
- Long press of the first button + short press of the second - setting to silent security mode;
- Simultaneously pressing the first and third keys on the remote control turns on the “anti-robbery” mode;
- A short simultaneous press of the second and fourth keys will block all key fob buttons (you can unlock the lock by pressing the 1st and 4th buttons).
Other combinations of pressing Starline buttons are used depending on the connection method, individual settings and installed additional modules.
VIDEO REVIEW » alt=»»>
Is it possible to attach a key fob from another alarm system to Sheriff?
Sheriff alarms allow the use of non-native remote controls from security modules of this brand. There may be the following compatibility.
- Absolute: the communicator will function like a “native” one, even the appearance is no different.
- Complete: all the buttons are the same, only the design of the remotes differs.
- Partial: the key fob is registered in the system and will work for arming and disarming. Many customizable features are not available.
- Absent: Pagers are completely non-interchangeable.
On the forums you can find a compatibility table for Sheriff alarm remotes, according to which the ZX 925 feedback key fob is replaced by models 900, 910, 930, 1000, 1050, 1055, 1060. You can also find out which communicators are compatible with the Sheriff 7000HHU and 1090 car alarms, etc. .
The alarm key fob broke, but the spare one didn’t fit