06/24/2020 437 Security system
Author: Victor
The Starline A93 operating instructions include an electrical diagram that must be followed when connecting the alarm. The service manual will allow you to perform the initial setup of the security system, including programming anti-theft options and automatic engine start.
[Hide]
General description of the alarm
Car alarm StarLine A93 with feedback and smart auto engine start. There is protection by an interactive control code with 128-bit encryption keys, which protects against interception of the radio signal by code grabbers. The car alarm works great in urban radio interference conditions.
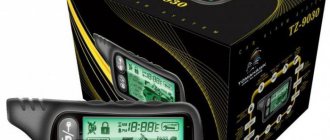
StarLine A93 is equipped with a shock-resistant key fob with an internal protected antenna. The built-in color LCD display displays the clock, timer, vehicle interior temperature and charge level of the AAA battery used. Operation is ensured in the temperature range from -50 to +85 °C. Communication range is guaranteed at a distance of up to 2000 meters.
Alarm characteristics
Security functions of STARLINE A93
- Dialogue protection: the presence of a convenient interactive 128-bit control code, which cannot be penetrated by any of the known code grabbers (devices that allow reading the system code);
- Radio interference protection StarLine works reliably in conditions of extreme urban radio interference
- SUPER SLAVE (optional) Control of vehicle security using a standard key fob with reliable additional interactive authorization using an additional StarLine key fob. Option available when integrating 2CAN or CAN+LIN interface
- Extended temperature range Operates at temperatures from minus 50 to plus 85 ° C
- Record energy efficiency Battery charge lasts up to 60 days in security mode
- Communication channel monitoring Constant communication channel monitoring checks whether the key fob is within the alarm coverage area
- Authorization by PIN code (optional) Additional authorization by entering an individual PIN code. Option available when integrating 2CAN or CAN+LIN interface
- 3D shock and tilt sensor will work when jacking up and evacuating the car
- Telematics (optional) Remote control of vehicle security, with the integration of optional GSM-GPRS, GPS-GLONASS etc
- Control from your phone GSM interface allows you to control and receive alerts on your phone
- Free monitoring (optional) When you connect StarLine GPS-GLONASS-Master, you can find out the location of your car with an accuracy of several meters
- Autostart Intelligent autostart allows you to start the engine based on temperature, at a specified time or periodically
- 2CAN (optional) Integration of the 2CAN interface ensures installation of alarm systems on vehicles equipped with several digital CAN buses
- CAN+LIN (optional) Integration of the CAN+LIN interface ensures quick installation on vehicles equipped with CAN, LIN buses, such as: Lada Kalina, Lada Kalina II, Lada Priora and Lada Granta
- Flexible service channels Can be programmed: hazard warning lights, folding mirrors, customizable seats and much more
- Shockproof keychain with protected antenna
Specifications
The main distinguishing feature of this alarm system among others in the same price category can be noted
- Three stages of protection. First comes the password, then the immobilizer, then the standard system
- Smart engine start, based on temperature time, timer, alarm clock or after a time interval
- The range of the key fob reaches two kilometers
- Quick installation, without interfering with the vehicle system
- Remote adjustment function
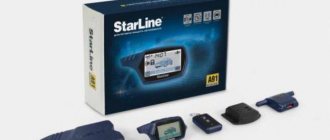
Scope of delivery of the Starline A93 alarm system
Starline a93 delivery set
- Brief operating instructions;
- Warranty card;
- Memo;
- Main control keychain with feedback and LCD display;
- Central processing unit;
- Main key fob battery (AAA);
- Additional relay together with block;
- Additional keychain;
- Power module;
- Standard immobilizer bypass module*; siren*; — power cable for power supply and control of light signals;
- Transceiver module (transceiver)
- Cable for connecting the power module and engine temperature sensor to the car alarm unit;
- 2CAN interface connection cable;
- Central locking cable with 6-pin connector;
- Cable with 6-pin connector for connecting car alarm inputs;
- Main cable with 10-pin connector;
- Transceiver connection cable;
- LED indicating alarm status;
- Wire for connecting the hood limit switch;
- Service button;
- Engine temperature sensor;
- Adapter for connecting additional sensors;
- Hood limit switch, 2 self-tapping screws, ground terminal, 1N4007 diodes
Video review of the configuration:
Important functions of the Starline A93 alarm system
What areas does Starline A93 protect:
- All opening parts: doors, hood, trunk, parking brake, brake pedal, control, through limit switches
- Body, vibration response, two-level shock sensor, tilt sensor
- Ignition, control via input to the ignition circuit
- Engine - blocking relay, code relay StarLine R3 (optional)
- Interior space - additional sensor (optional)
Anti-theft device options:
- Security mode with sound and light alarms
- Providing alarm alerts to a key fob with an LCD display
- Silent activation/deactivation of security mode
- Silent security mode
- Security mode with engine running
- Turning security on/off without using a key fob
- Automatic return to security mode in case of accidental shutdown
- Automatic arming
- Immobilizer mode
- Anti-robbery mode
- Panic mode
- Programmable personal code for emergency disarming of the security mode
- Engine blocking and its preservation when dismantling the car alarm
- Programmable 2-step engine lock release
Self-diagnosis and fault detection functions:
- Indication of trigger causes for 11 zones
- Alarm of a faulty zone when arming
- Automatic monitoring of the status of security sensors with disabling faulty ones and reporting their malfunction
- Indication of the fact of activation by sound signals
- Indication of car alarm by LED and on the key fob display
- LED indication of limit switch serviceability
What service functions does this model have:
- Activating sensors before turning off the interior lights and bypassing the door area
- Disabling security, adjusting the volume of signals
- Remote disabling of the shock and tilt sensor in security mode
- Remote control of the central locking system (central locking)
- Central locking control from the ignition switch
- Two-step lock opening
- Two-pulse closing of door locks
- Six channels for controlling additional equipment
- Car battery voltage monitoring
- Determining the temperature inside and outside the car
- Search from car
- Light alarm for open doors
- Turbo timer mode
- Remote programming of functions and key fobs
- Service mode
- Car interior light control
- Call from car
- Insurance against accidental pressing of key fob buttons
- Registering new key fobs and deleting lost ones from the system memory
- Setting the time, alarm clock, timer
- Main key fob charging control
- Possibility of working together with GSM modules StarLine M20, M30 and StarLine M21, M31 (car alarm control and monitoring its status via GSM channel
- Remote and automatic start, extension, engine stop
- Remote engine start in cars with a start-stop button
- Works with any engine: gasoline/diesel
- Transmission choice: manual or automatic
- Monitoring engine operation using signals from a tachometer, generator or mains voltage
- Protection against starter overexposure when starting the engine
- Understanding the remaining engine operating time on the key fob
Initial alarm setup
The instructions for preliminary adjustment of the StarLine a93 automobile security system provide for the following stages:
- Installation of a personalized access code for the facility and emergency change of states;
- Adjustment of the level of perception of external influences by shock and slope sensors;
- Changing software settings for interaction via CAN and LIN buses;
- Entering identification codes for radio-equipped power unit blocking relays.
Recording key fobs in the complex memory
Adaptation of A93 car alarm key fobs with remote start is carried out in a state of inactive protection.
- The VALET key must be pressed seven times. Then the ignition system is turned on. The system notifies with seven acoustic signals that the control unit is in program change mode;
- On the key fob, keys No. 1 and No. 2 are pressed simultaneously. The siren gives an audible warning and the pager responds with a short sound. The second key fob is registered using the same method. The time interval between communicator adaptations should not exceed five seconds;
- Once the adaptation of all communicators is completed, the ignition is turned off. Dimensions respond with three flashes.
Entering the main menu for programming functions
To enter the settings correction mode, a combined action is taken on the service button and the communicator buttons.
- Turn off the ignition, press the service button five times, turn on the ignition;
- Select the AF icon on the pager display, then press button No. 3 twice. The first press is long until there is an acoustic notification. The second is short;
- By briefly pressing buttons No. 2 and No. 3, the mode number is selected in accordance with the list of options;
- The required mode is selected by briefly pressing button No. 1;
- To return to the main menu, press button No. 3. Long until the sound alert, then short;
- After completing the work, turn off the ignition, which will allow you to exit the mode.
Table: programmable security and service functions
| Functionality options. | Option 1. | Option 2. | Option 3. | Option 4. | |
| 1. | Period for closing/opening door locks. | 0.8 seconds. | 3.6 seconds. | Two lock signals 0.8/0.8 seconds. | Comfort mode activation 30/0.8 seconds. |
| 2. | Auto mode for controlling locks. | Closed by pressing the brake pedal. They open when the ignition is turned off. | They open manually, close from the ignition with a pause of 10 seconds. | Closed from the ignition system with a pause of 10 seconds. | The mode is not active. |
| 3. | Bypassing the operation of the interior light, delaying the activation of control units when the protection is turned on. | Before turning off the lights inside the cabin (60 sec.) | Pause is not active. | 30 sec. | 5 sec. |
| 4. | Locking door locks when the protection is automatically turned on. | Door lock block. | Door lock block. | No blocking. | No blocking. |
| 5. | Secondary activation of protection. | Door lock block. | No blocking. | The mode is not active. | The mode is not active. |
| 6. | Siren control. | Siren. | Siren. | Steering signal. | Steering signal. |
| 7. | Identification during remote and autostart of the engine (Slave is not active). | The entire launch period. Security is disabled. | Protection is disabled from the pager. | When turning off object protection. | When turning off object protection. |
| 8. | Blocking when the “Anti-robbery” mode is turned on. | By pressing the brake pedal in cars with automatic transmission, releasing the parking brake on cars with manual transmission. | The blocking is activated by alarm beeps. | The mode is not active. | The mode is not active. |
| 9. | Personal code for immediate deactivation of security, “Anti-robbery”. | Factory firmware code "3". | Single code. | Two character password. | Three character password. |
| 10. | Engine blocking test. | Normally closed option. | Normally open option. | Normally closed, in parallel with relay R2. | Normally open, in parallel with relay R2. |
| 11. | Two stages of engine blocking removal. | The mode is not active, the blocking is removed when the system is disarmed. | Shutdown via Valet. | Shutdown via Valet. | Shutdown via Valet. |
| Slave identification. | The state is not active. | Identification via radio tag. | Identification via Valet. | Engine blocking by entering a password. | |
| 12. | Operation of the 4th additional channel without a CAN bus. | 20 sec. when protection is enabled. | Reptilian changes on the way out. | The central locking is blocked according to the signals from section No. 1. | 20 sec. when the protection is disabled. |
| Operation of the 4th additional channel with the CAN bus. | Variable central locking control. | Variable central locking control. | Variable central locking control. | Variable central locking control. | |
| 13. | Operation of the 1st additional channel. | 0.8 sec. to open the trunk. Pager control. | Reptilian changes on the way out. | In parallel with code relay R3. | Latch status. Turn on and off using the communicator buttons. |
| 14. | Operation of the 2nd additional channel. | 0.8 sec. two stages of removing door locks. | Reptilian changes on the way out. | In parallel with code relay R3. | Interaction with the ignition system |
| 15. | 3rd additional channel. | Sound lasting 3 seconds. after 2 seconds have elapsed. from the moment the engine is turned off. | Signal 1 sec. 1 second after the motor is turned off. | Duplicated by size flashes. | Duplicated by size flashes. |
| 16. | Alert management. | Disabled. | One after a period of 3 minutes. | The period is 5 minutes. | The period is 7 minutes. |
| 17. | Differentiation of polarity of locks. | Minus. | Plus. | Plus. | Plus. |
| 18. | Working with the GSM module. | Connection of M20 and M30 with program generation not higher than A9. | Connection of M20 and M30 with a program higher than A9. Connection M21, M31, M32, CAN. | Connection of M20 and M30 with a program higher than A9. Connection M21, M31, M32, CAN. | Connection of M20 and M30 with a program higher than A9. Connection M21, M31, M32, CAN. |
| 19. | Operation of channel 5 without CAN. | Starter block. | Reptilian changes on the way out. | The central lock is unlocked. | Latch status. Turn on and off using the communicator buttons. |
| Operation of channel 5 with CAN. | Variable lighting control. | Variable lighting control. | Variable lighting control. | Variable lighting control. | |
| 20. | The work of Channel 6. | 0.8 sec. | Reptilian programming. | In parallel with code relay R3. | Latch status. Turn on and off using the communicator buttons. |
| 21. | Selecting a channel for working with a mobile application. | Channel No. 1. | Channel No. 2. | Channel No. 4. | Channel No. 5. |
| 22. | Anti-theft function. | Slave is disabled. | Slave is active with 15 second authentication. | Slave is active with 20 second authentication. | Slave is active with 30 second authentication. |
| 23. | Starting the authentication protocol. | Protection is disabled. | The locks are unlocked. | The ignition is on. | The ignition is on. |
| 24. | The work of Channel 7. | The central lock is unlocked. | Reptilian programming. | Reptilian programming. | The locking relay is not active. |
| 25. | The work of Channel 8. | The central lock is unlocked. | Reptilian programming. | Reptilian programming. | The locking relay is not active. |
Table: programmable trigger functions
| Functionality options. | Option 1. | Option 2. | Option 3. | Option 4. | |
| 1. | Car engine starting mode. | Not active. | Active. | Active. | Active. |
| 2. | Duration of engine operation after autostart. | 10 min. | 20 minutes. | 30 min. | No limits. |
| 3. | Operation of shock and tilt sensors when the engine is running. | Sensors are not active. | Sensors are active. | Sensors are not active. | Sensors are active. |
| 4. | Engine shutdown at 50ºС. | Inactive. | Active. | Active. | Active. |
| 5. | Remote motor start. | Security is on. | Security is on. | Security is on. | Security is on. |
| 6. | Light warning during remote start. | Headlight flashing. | Disabled. | Disabled. | Disabled. |
| 7. | Control of locks during remote start. Protection is active. | Does not work. | Blocking after starting from a distance. | Block after stopping the engine at a distance. | Block after the start-stop cycle of the motor. |
| 8. | Output of the power unit when starting at a distance. | Repeat the “accessories” signal. | Repeat the ignition signal. | Simulates pressing the brake pedal in cars with keyless entry. | With key access. |
| 9. | Starter cranking time. | 0.8 sec. | 1.2 sec. | 2 sec. | 6 sec. |
| 10. | Type of power unit according to the power supply system, remote start delay. | Gasoline, delay 2 sec. | Diesel, delay 5 sec. | Diesel, delay 10 sec. | Diesel, delay 20 sec. |
| 11. | Control of the operation of the power unit. | By voltage. | Plus from the generator. | Minus from the generator. | According to the tachometer. |
| 12. | Activating ignition support while the engine is running. | Ignition is turned off. | Pressing button #2 | When the parking brake is applied. | Inactive. |
| 13. | Bypass management. | Active during the engine operating phase, but turns off during the turbo timer operation. | Activates for 30 seconds. while the engine is running, it is switched off for the duration of the turbo timer operation. | Active when both the engine and the turbo timer are running. | For 30 sec. when the engine is running and remains active when the turbo timer is running. |
| 14. | Starting the engine (options 1,2,4 modes No. 8). | Key access. | Key access. | Key access. | Key access. |
| Option 3 mode No. 8. | Keyless 1 pulse. | Keyless 2 pulses. | Keyless 3 pulses. | Keyless 6 second pulse. | |
| 15. | Transmission type and program neutral option. | Manual transmission, disabling program neutral with active protection. | Manual transmission, disabling program neutral when the doors are locked. | Manual transmission, disabling program neutral when the doors are locked. Pause 20 sec. | Automatic transmission |
| 16. | Power block output. | Ignition system repeat. When the starter is running, the output does not turn off. | Repeat the “accessories” signal. | Ignition system repeat. When the starter is running, the output is switched off. | Repeat the “starter” signal. |
| 17. | Stops the motor when the protection is turned off. | The mode is not active. | The mode is active. | The mode is active. | The mode is active. |
Personal code programming
The following sequence is required, as provided for in operating instructions A 93:
- Turn off the ignition, press the service button five times, turn on the ignition;
- Select the AF section on the remote control, then press button No. 3 twice (the first before the sound alert, the second briefly).
- Buttons No. 2 and No. 3 select the number of the corresponding option in the list. When registering a personalization code, you need step 9. If parameters No. 2, 3 or 4 are configured, the “PIN code” icon will be highlighted on the communicator screen;
- Four clicks on Valet go to the service mode for setting up a personal access code. The LED blinks with each press;
- Turn off the ignition. The system will respond with 4 acoustic signals;
- Press the service button once. The siren will notify you with one beep. Enter the first character of the code. Brief clicks of buttons No. 1,2,3 correspond to code values 1,2,3. Double pressing the buttons (long, followed by short) respectively 4,5,6. Between the entries of individual password characters, the service button is pressed;
- To complete the process, turn off the ignition. Three flashes of dimensions will follow.
Setting the sensitivity of the shock and tilt sensors
The method for changing the sensitivity parameter is provided in the software manual for StarLine a93:
- The ignition and protection are first turned off on the car. Then button number 3 is pressed twice. The first press is before an acoustic notification, the second is short. The siren operates, accompanied by three flashes of the dimensions, signaling the readiness to configure the warning area of the shock sensor;
- Use buttons No. 2 and No. 3 to select the required level;
- To enter the alarm zone adjustments, press button No. 3 twice (long and short);
- The required sensitivity level of the alarm zone is selected;
- Settings are saved by double pressing (long, short) button No. 3.
Resetting the slope sensor sensitivity threshold:
- Ignition and protection are not active. Press button No. 4 twice (long and short);
- Using buttons No. 2 and No. 3, the required sensitivity level is set;
- To record settings, double press (long until the signal and short) on button No. 4.
Programming the CAN + LIN interface channel
In vehicles equipped with fast digital communication technology, there are additional capabilities for monitoring and controlling peripheral actuators. There are options for opening and closing windows, and separate control of door locks.
Entering programming mode
The setup is carried out in stages:
- The connector is removed from the complex control unit, digital communication is disconnected;
- While holding the VALET button, apply power to the unit connector. In this case, the system responds with five consecutive acoustic alerts;
- VALET is released - four long beeps;
Selecting a car number
- After entering the state of changing settings, pressing the service key selects the required sub-item;
- By a certain number of presses, corresponding to the numbers of the car number, on the service key, the vehicle number is entered into memory;
Setting CAN+LIN interface parameters
A93 systems are configured according to the following algorithm:
- We enter the mode for changing program settings;
- Select a section in the list of settings using the service button;
- The function is activated, and therefore the alarm responds with the number of beeps corresponding to the sub-item number in the menu;
- The service button changes the selected parameters. The system uses short pulses to indicate whether the mode is on (one - on, two - mode off);
Recording digital engine locking radio relay codes
- Adaptation of the radio relay to the unit occurs as follows:
- With the ignition off, press Valet five times and turn on the ignition;
- On the pager screen, select the AF item, after which button No. 3 is pressed twice (the first for a long time before the beep, the second briefly);
- By briefly pressing buttons No. 2 and No. 3, a function is selected according to the table;
- The GND wire is thrown like a mass onto the car body;
- Turn off the ignition, press Valet seven times;
- Turn on the ignition - seven beeps;
- After which you have five seconds to connect the black conductor marked +12V to the ignition.
- Turn off ignition
How to set the time on Starline A93
Press button 4 until there are three signals: one melodic and two short. At this time, the clock image will start flashing.
Setting up the clock must begin within eight seconds, otherwise the key fob will exit the function menu
The hours are set with button 2, minutes with button 3. After setting the hours, the transition to minutes is carried out using button 4.
Another press of button No. 4 leads to setting the alarm clock. The alarm clock is set in the same way as the time. Exit the alarm clock setting mode using button 4.
Select the section you are interested in about Starline A93
Car alarm Starline A93 (Starline A93), including the Eco and Dialogue series, comes with a full set of necessary accessories for self-installation. Before purchasing a system, you should familiarize yourself with its characteristics, functions and operating instructions.
Specifications
The characteristics of alarms with auto start are as follows:
- The device operates at a frequency from 433.05 to 434.79 MHz.
- The number of radio communication channels is 128 pcs.
- The range of the main pager reaches 800 meters when sending commands. Reception is possible from a distance of up to 2 km.
- The model is equipped with a 3-axis integral tilt controller.
- The temperature range at which the alarm operates without failure is -50 +85 degrees Celsius.
- For efficient operation of the device, an on-board voltage of 9 to 18 V is required. At the same time, current consumption in active mode does not exceed 22 Ma.
- The CAN module is installed optionally. This also applies to satellite communications and the GSM module.
- Power plant blocking is provided.
- Automatic activation of security functions - available.
- Activation of security when the power unit is running is provided.
- Availability of “Panic”, “Silent operation”, “Fault bypass” modes.
- Supports flexible remote start settings based on time interval, temperature, on-board voltage, etc.
- Additional functions: “Valet” service mode, automatic start alarm clock, remote monitoring of system status, lighting control, auto-arming, battery voltage display. The user can also track the car’s coordinates and control the system from his mobile phone.
- Pagers are powered by AAA standard elements, CR2450.
Setting up security and anti-theft functions of the complex
- The list of actions and security states consists of:
- Security with sound alerts;
- Protection without sound;
- Silent operation state;
- Activation of safety when the power unit is running;
- Trigger the security state automatically;
- Disable protection;
- State of "panic".
Table: security mode management
| Mode. | Manipulation. | Circumstances. | Data on display. | Complex alerts. |
| Enabling acoustic protection. | Click on button #1 briefly. |
| · 1 beep; icons will appear on the communicator screen . | · 1 beep; · 1 gloss dimensions; · Access blocking; · the diode flashes. |
| Silent protection mode. | Press button No. 1 long and short. |
| · 1 beep; · Icons will appear on the communicator screen . | · 1 beep; · 1 gloss dimensions; · Access blocking; · the diode flashes. |
| Activation of silent state. | Button No. 1 before the beep, button No. 2 briefly. |
| · 1 beep; Icons are highlighted on the display . | · 1 beep; · 1 gloss dimensions; · Access blocking; · the diode flashes. |
| With the power unit running. | · The handbrake is turned on, the door opens, button No. 2 is pressed; · The key is removed from the ignition switch; · Doors are closed. Press button No. 1 on the remote control. | · Manual transmission in neutral, automatic transmission in parking; · Turbo timer is turned off; · The hood is tightly closed and the engine is running. | · 1 melodic, 1 alarm beep; · The screen shows the motor running and the protection is on. | · 1 siren whistle; · 1 gloss dimensions; · Door block; · Protection works; · Shock sensor is disabled. |
| Security is turned on automatically. | · Pointer to the “Auto” icon; · When the doors are locked, the ignition is turned off and the driver leaves the cabin; · After 10 sec. object protection is activated. | The handbrake lever is raised. | · Notification with 1 beep; · Picture on display | · 1 beep; · 1 gloss dimensions; · Access blocking; · the diode flashes. |
| Turn off protection. | Press button No. 2 of the key fob. | · Ignition is turned off; · Parking brake is on; · Access blocked; · Security is working. | · Two beeps per pager; · Picture display | · double siren signal; · Two headlight flashes; · The diode does not light up; · Access is unlocked. |
| State of panic. | Buttons No. 1 and No. 3 are pressed simultaneously. | Ignition is turned off. | · The pager emits one signal; Icons are highlighted on the screen | · Three siren blasts; · Three flashes of headlights follow; · Access will be blocked; · Protection is activated. |
Activation and deactivation of security mode without a communicator
You can activate the protection mode without using a communicator. Why is it necessary:
- Open the door, turn off the ignition;
- Click on Jack three times;
- Get out of the car, close the doors, the car will be armed.
Disable:
- The door opens with a key;
- Within 20 seconds, turn on the ignition and enter your personal identification code.
Table: immobilizer mode
| What to do. | Information from the machine. | Information from the key fob. |
| Enabling the immobilizer. | ||
| Press key No. 3 until you receive one melodic notification and one short beep. | — | The communicator will beep twice, then the icon on the display will light up. |
| Briefly press keys Nos. 2,3,4 to select the “Immo” mode. | — | The display lights up the “Immo” icon |
| Turning off the immobilizer | ||
| Either key No. 2 or Jack is held for 2 seconds. After the button is released, the ignition must be turned on no later than 2 seconds later. | The motor is unlocked. | — |
Table: anti-robbery mode
| What to do. | Information from the machine. | Information from the key fob. |
| Enabling the anti-robbery mode. | ||
| When the engine is running, keys No. 1 and No. 3 are pressed simultaneously. | · The alarm signals of the siren and head lighting are turned on; · Access to the salon is blocked;
|
|
| Turning off the mode | ||
| · When the door is open, a personal access code is entered; · When the ignition is on, key No. 2 is pressed. | · Two siren blasts; · Two glimpses of optics; · Access is unblocked; · Protection is disabled. | · Two beeps per pager; · The picture looks like this: |
Controlling the anti-robbery mode without a key fob
Without a key fob, this can only be done through a personal access code:
- Open the car with the key;
- The ignition turns on. Valet enters the first digit of the code;
- The ignition is turned off;
- The algorithm is valid for entering all code characters.
To enable:
- The doors close;
- When the ignition is on, the Valet is clamped for 2 seconds;
- The door opens. Waiting is activated with a period of 60 seconds;
- After 60 sec. all alarms are activated;
- After 30 sec. the unit is blocked;
Options
The Starline A93 alarm system with auto start is quite extensive. It includes not only the alarm itself, pagers and sensors, but also a lot of useful accessories and elements necessary for the successful installation of the system at home. All models, regardless of their cost or functionality, are supplied in the following kit:
- Detailed operating instructions.
- Guarantee for service in case of breakdown.
- User's note.
- The main key fob, equipped with an information screen and supporting feedback.
- The microprocessor unit that controls the system.
- Battery for the main key fob. It uses a AAA battery.
- Another pager. It does not have a screen, but is indispensable in case of loss of the main one.
- Power element.
- Signal transmitter and receiver.
- Inspector of standard immobilizer.
- Sound indicator.
- Wire for connecting batteries and controlling pulses.
- Cable connecting the module and temperature sensor to the microprocessor.
- An electrical cable for connecting 2CAN interfaces, if the system supports operation with this bus.
- All kinds of diodes.
- Self-tapping screws and terminals for grounding installation.
- A diode element that determines the state of the alarm system.
- Service mode key.
- Temperature sensor.
- An adapter for connecting sensors and devices.
- All kinds of diodes.
- Self-tapping screws and terminals for grounding installation.
The Starline 93/93a car alarm of the Eco series belongs to the budget price segment, but at the same time it has a lot of useful settings and functions. The system provides reliable machine protection and supports the following security functions:
- Dynamic security code with an individual encryption key.
- Control of the communication channel and the availability of an option to independently check the functionality of working nodes.
Alarm components and versions
Regardless of the model, the alarm equipment will be as follows:
- control module used for processing, receiving and transmitting pulses;
- instructions for setup and operation;
- set of wires for connection with connectors and connectors;
- shock and tilt sensors;
- tilt controller;
- key fob equipped with a liquid crystal display;
- antenna adapter with LED indicator;
- warranty card;
- siren.
Read more: Friction discs, clutches, purpose, device, principle of operation and common malfunctions
The main difference in alarm configurations belonging to different market segments is the number of shock and tilt sensors.
The Eco version is considered one of the most affordable in terms of cost. This alarm model has standard functions aimed at ensuring vehicle safety.
This is about:
- security code with individual encryption keys;
- increased level of energy efficiency;
- a stable pulse regardless of conditions, we are talking about protection against interference;
- control of the communication channel and self-diagnosis.
The model uses service channels for setting up and servicing the anti-theft system. The owner of the car independently adjusts the sensitivity of the controllers, the volume of the siren and other functions.
A detailed overview of the model is given in the video filmed by the Avtoteatr 74 channel.
It is possible to integrate modules, including:
- a device for accessing a car without a key, it all depends on the specific car and the module equipped with a CAN bus;
- GSM block;
- CAN LIN or 2CAN 2LIN module, if the vehicle supports them.
The main disadvantage of this version of the alarm is the lack of advanced security options and monitoring functions.
This configuration is more advanced; by default, it has the following options:
- noise immunity;
- interactive code protection;
- ability to work in a wide temperature range;
- resistance of the control module and other system elements to voltage surges in the on-board network;
- option for monitoring the communication channel and self-diagnosis;
- use of special connectors for service maintenance.
A full description of this model can be seen in the video filmed by the Gizma channel.
In addition, the alarm system has the following functions:
- Super Slave is an option that allows you to control the system not only through the remote control, but also through another device, for example, a smartphone;
- the ability to authorize using a PIN code;
- invisible lock option.
This model has a telematic security complex, which includes:
- option for monitoring the condition and determining the coordinates of the vehicle via GPRS and GSM channels;
- vehicle status control function via the same channels;
- use of flexible communication channels for servicing and setting up the anti-theft system.
User Andrey Zamkovoy spoke about the features of the application for this model of anti-theft systems.
CAN LIN
This version does not use advanced long-range monitoring options. But if necessary, this drawback can be eliminated by adding additional units to the on-board network. These models of anti-theft systems are not intended for installation on older types of cars. If you install an alarm system on such a car, some of the functions will be unavailable to the car owner due to the lack of necessary connectors. Regarding compatibility, we recommend consulting with the seller or visiting the official Starline website.
The CAN LIN model has the following features:
- security code with individual encryption key;
- noise-protected channel;
- increased level of energy efficiency;
- the ability to control the communication channel;
- self-diagnosis option, which allows you to identify non-working areas and individual components of the anti-theft installation;
- The alarm functions reliably in any weather conditions, even the harshest.
Separately, the following Canlin alarm options should be highlighted:
- Super Slave, thanks to the option, the car owner can control the car using a third-party, pre-configured device;
- authorization function using a personal password;
- Hidden car lock option;
- availability of keyless access.
2CAN 2LIN
The 2CAN 2LIN model is similar to the alarm system described above in the presence of control modules. In its basic version, this anti-theft system does not contain advanced options for monitoring the car over a long distance. If necessary, you can additionally install GPS and GSM modules, this will correct the shortcoming.
The Garage Amateur channel showed in a video the process of unpacking this “alarm” model.
Basic alarm options 2CH 2LIN:
- protection by dialogue from signal interception;
- noise immunity;
- wide operating temperature range;
- possibility of stable operation during voltage surges in the machine’s electrical network;
- possibility of self-diagnosis;
- communication channel monitoring function.
This model has the same functions as the KAN LIN alarm system. There are almost no fundamental differences between these versions; they all lie in compatibility with different car models. A more advanced option is ideal for those who require high-quality protection, but monitoring functions are not important. The use of modern technologies in production allows us to prevent the possibility of signal interception.
This version of the anti-theft installation is considered one of the most advanced among the model range. The alarm system is a full-fledged security complex that has many functions and provides high-quality protection thanks to the remote monitoring systems used. One of the main features is the presence of a crypto-resistant dialog code. The anti-theft system can be installed on cars manufactured between 2010 and 2020 and sold in the Russian Federation and the CIS countries.
The system implements dialogue protection, as well as an interference immunity option. The alarm can operate in wider temperature ranges, and power surges in the on-board network will not affect its functionality in any way. The anti-theft installation has the same functions and equipment as the two models described above. The only difference is the maximum range of options required to protect the machine.
Functions
The functions and capabilities of Starline alarms are quite extensive. They include the following items:
- “Super Slay” option, which guarantees enhanced protection according to three principles: dialogue encoding, standard security system and validator-blocker of the power unit. To change the alarm settings, the user uses a flip or simple key.
- GSM-GPRS and GLONASS modules are used as communication and positioning interfaces. The presence of telematics makes it possible to effectively track the coordinates of the vehicle via a smartphone. Any data about the condition of the car and its location will be transmitted in the form of SMS messages to a mobile phone. The user is also given the opportunity to use the official web resource.
- Ability to operate in conditions with increased radio noise. Protective capabilities are provided by a 128-channel transceiver.
- 3D shock sensor with the ability to remotely change operating parameters. Its presence allows the user to track the fact that the car has been stolen or towed.
- Remote start of the power unit based on temperature or time interval.
- Saving battery life. With this feature, the user can extend the battery life up to 2 months when using protective mode. This is due to proprietary technologies and software solutions that reduce electrical energy consumption.
- Flexible service channels for setting up the Starline A93 alarm, light indication and other functions. The user can independently control mirrors, seat adjustments and other parameters.
Advantages and disadvantages
If you study the reviews of owners and specialists about Starline, they will include both positive and negative aspects. The advantages include:
- The ability to remotely start a car power plant and start driving in a warm car. To set up a remote start of the power unit, you do not need to look for special components and elements.
- Using engine and interior temperature sensors, it is possible to select automatic start based on temperature values.
- Expansion of basic options by installing additional modules and accessories.
- A complete set that includes important elements and accessories for self-assembly.
- Feedback support, which provides the driver with full control over the state of his vehicle, signaling and engine.
- Easy to set up and maintain.
In addition to the advantages, Starline signaling also has disadvantages. First of all, it is unprofitable to use on cars manufactured before 2010. An old car is simply not capable of using the advanced functions of a security system, because... does not have corresponding nodes and interfaces.
Users also note frequent malfunctions of the communicator, especially after intensive use. They are explained by a malfunction of the working elements due to the incorrect functioning of the pager from the moment of purchase; This may be due to increased levels of radio interference or a manufacturing defect.
The disadvantages also include the inconsistency with the “price + quality” ratio. Many drivers claim that the model is unreasonably expensive.
How to reset settings
The Starline A93 alarm system allows you to return programmable sections to factory values:
- To reset the parameters described in 2 tables, you need to press the key to enter the setting (Valet) 9 or 10 times, respectively.
- Apply current to the mixture ignition support circuit.
- After sound signals are given, indicating that the signal is ready for the procedure, you need to press the key again.
- A short beep will sound. After this, the driver presses the red button on the remote control.
- To reset the parameters in the second table, you must repeat the procedure.
- Exit from the adjustment mode occurs automatically or after the ignition support circuit is broken.
Resetting the parameters makes it impossible to remotely or automatically start the power unit. Resetting the settings of the central unit may make it impossible to start the engine using the normal method, as well as cause malfunctions in the operation of the security system and vehicle electronics. The owner sets up the car alarm in accordance with the instructions and technical features of the car.
How to install correctly
Installing Starline A93 with your own hands is not an easy process, but if you study the installation instructions and a number of other operating points, it will be completed flawlessly. To carry out installation, just follow these instructions:
- We disconnect the battery, because The on-board network must be de-energized. You also need to deactivate the ignition circuit.
- We install a microprocessor unit to which wires and other system components will be connected. It is better to install the part in a secret place that is protected from prying eyes. It is advisable to place it behind the instrument panel.
- A siren is located in the engine compartment. It should be fixed with the horn facing down so that moisture does not accumulate inside. You cannot yet place the siren near the engine.
- Limit switches are fixed to the hood or trunk. They must be placed in such a way that when the doors are locked, the system is isolated from unauthorized access.
- A shock and tilt controller is placed in the center of the body. You can install such parts on the partition separating the interior from the engine.
- We install an antenna with light indication. It's better to do this on the windshield.
- We install a service button that activates emergency mode.
- We connect other communications using the CAN bus. The wiring is placed under the interior trim, having previously removed it. Electrical tape is used as additional insulation for wires.
User manual
Instructions for use include the following sections.
- Safety actions when operating the security system. This section provides general recommendations for the operation and installation of the alarm, and also recommends that the driver familiarize himself with the functions so that operation is safe for the car and the driver. For example, how correctly should the owner arm the car, or automatically start the engine.
- Technical capabilities and characteristics. This part of the user manual describes in detail the energy consumption of the security system, the requirements for the vehicle’s on-board network (current, voltage), as well as the compatibility of the alarm system with the vehicle’s equipment. The canlin function (programming for combination with machine equipment) is also described.
- Equipment included in the kit. This section provides a clear list of equipment and components that are included in the kit, their description (for example, key fob, block, connecting wires).
- Service functions, as well as security capabilities. This part of the user manual contains a description of the zones that will be protected, possible alarm malfunctions and methods for eliminating them, as well as how to perform independent technical diagnostics of individual parts and the entire security system. The procedure for signaling in case of unauthorized entry, and also indicates how to turn off the alarm in case of unforeseen circumstances (for example, the key fob fails), or set up the flip key (set a code for it and the ignition switch).
- Procedure for working with the alarm. This part of the instructions describes in detail how to operate the security system and the procedure for operating the key fob. In addition, it describes in general terms how to configure individual functions.
- Key fob display indication. This section contains detailed information with a description of the various icons, as well as its response to given commands. For example, what indication will appear when the car doors are closed.
- Security and anti-theft functions. In this section you can familiarize yourself in detail with all the alarm functions. For example, how to enable auto start on the Starline alarm system, what alarm signals (sound, light) will appear when someone tries to break into the car, or, conversely, the driver locks the car.
- Service capabilities. This section describes in detail all the service capabilities of the security system, and also describes additional features, for example, how to change the auto-warm-up time, set a timer, turn on the security function without emitting light or sound signals, the number of automatic engine starts if it does not start the first time, and also their time sequence.
- Description of remote start of the power unit. In this section you can find recommendations for setting up the autorun function, its operating mode (timer, ambient temperature), and also describe step by step how to set it up.
- How the functions are configured (programmed). This is the last section, which contains a table, after carefully reading which the car enthusiast will be able to independently configure all the functionality of this car alarm. For example, how to close car doors or the hood from a distance, or how to automatically start a power unit.
It is important to remember that this part of the user manual does not contain recommendations for installing an alarm system, so the car enthusiast can set up all functions independently if he carefully reads the instructions.
How to use
The Starline alarm operating instructions are the best assistant for a novice driver. It describes in detail all the subtleties of setting up the system with setting operating modes, locking buttons and other tips for use.
Purpose of the icons on the keychain
To use the security system correctly, you need to understand the purpose of the indications on the pager. The main symbols characterize the following functions:
- Activation of autorun by time interval.
- Periodic start option.
- Trigger by temperature.
- Service mode.
- Turbo timer.
- Immobilizer.
- Current engine temperature.
- Activation of this Starline “anti-robbery” mode.
- Current time.
- Condition of door locks, etc.
Key fob control commands
Knowing the basic key fob control combinations, you can easily set up an alarm or perform autostart. Basic control commands look like this:
- Turning on the motor - 1 day.
- Shutdown - 1+4 Mon.
- Setting autostart based on temperature - click on the clock icon.
Slave mode
To learn how to activate the Slave mode, you should carefully study the instructions for use.
Remote engine start
Remote engine stopping or starting is possible after the option is configured correctly.
Setting the sensitivity of the sensors
To disable the tilt sensor or adjust the sensitivity of the shock sensor, it is important to study the specifics of changing this parameter in the instructions.
How to set the time on a key fob
When setting the time on the key fob for the Starline A93 alarm, you should study the setting instructions first.
Entering a car number
The car number is entered in the corresponding settings menu.
Programming
Programming Starline A93 requires preliminary study of the parameters of the programming table. Otherwise, the programming features of Starline 93 remain clear.
How to turn off the alarm urgently
To perform an emergency shutdown of the alarm, you need to study the corresponding paragraph in the manual.
Reset to factory settings
Resetting to factory settings is only possible using a secret code.
Setting up Starline A93 key fob, alarm programming table
The StarLine A93 car security system, as you know, has many functions that are available by default. Let's look at the key fob controls: there are 4 conditionally numbered buttons (from left to right). The key fob interface is controlled by short, long, sequential and simultaneous presses of a combination of buttons responsible for different commands.
- To turn on the security mode, you need to briefly press the first button, to disable this mode, press the second button (shortly).
- By pressing the third button (briefly), a survey of the vehicle’s condition is carried out, while the car’s battery voltage and the temperature inside the cabin are displayed on the LCD screen.
- A double short press on the fourth button searches for a car in the parking lot, and the engine temperature is displayed on the screen.
- When you press the first button (long) and then the second (short), it turns on the silent security mode. This mode is disabled by long pressing the second button, and then by short pressing it.
- Long simultaneous pressing of the first and third buttons turns on the “Anti-robbery” or “Panic” mode, and an alarm is triggered to scare away intruders. You can turn off this mode by briefly pressing the second button.
- The buttons are locked by briefly simultaneously pressing the second and fourth buttons, and in order to unlock the key fob, you need to briefly and simultaneously press the first and fourth buttons.
- A short double press of the first button turns on or off the shock sensor of the first zone; when pressed again, the shock sensor of the second zone is checked. To exit this menu, you need to make a short double press on the first button again.
- Double short press of the third button enables or disables the tilt/motion sensor.
Setting up the key fob
ATTENTION! A completely simple way to reduce fuel consumption has been found! Don't believe me? An auto mechanic with 15 years of experience also didn’t believe it until he tried it. And now he saves 35,000 rubles a year on gasoline! Read more"
The sensitivity of the shock sensor is adjusted when the security is disarmed, by pressing the third button (for a long time) and then by pressing it briefly. The first zone is turned on, the sensitivity of which can be changed by briefly pressing the second (more) and third key (less).
When you press the third button again (long) and then briefly, we go into the alarm setting mode based on the sensitivity of the second zone, here the control is the same as in the first zone. To save the setting, you need to press the same keys as to enter the menu.
In order to adjust the sensitivity of the tilt sensor, you need to disable the security mode and press the fourth button (long), then the same button (short). Control is performed by the second (more) and third (smaller) buttons. To save the setting, you need to press the same key combination as to enter the menu.
To switch to the manual function selection mode of Starline A93, you need to hold down the second or third button for 3 seconds. By short pressing button 3 we move the cursor to the right, and by short pressing button 2 we move the cursor to the left. In this menu, you can select the functions of starting the car engine by alarm clock, by timer, or by temperature (buttons 1,2,3 respectively).
The fourth point is called “Service mode”, which is set to transfer the car to a service station. The "Turbo" icon is intended for vehicles equipped with diesel engines with a turbo timer. Enabling the “Auto” function allows you to automatically arm the car 10 seconds after all doors are closed.
“Immo” mode, or immobilizer - in this mode, the car engine will be blocked from unauthorized starting 30 seconds after the ignition is turned off, and it can be unlocked by briefly pressing the second button of the key fob.
Setting up the key fob, or rather its additional functions, is done in a separate menu, which is entered by long pressing the fourth key for 5 seconds.
Here you can set the current time, alarm time, enable/disable alarm functions, countdown timer and enable/disable it.
Here you can increase the volume of the action confirmation signal, as well as select a quieter or silent mode, in which only the vibration of the key fob will work. Also in this menu there is a function for selecting the alarm sound from two options: siren, or trill, as well as adjusting the volume of the siren.
Auto engine start
The A93 alarm settings with auto start can be found in the full version of the manual for car owners. The installation map will simplify the process of setting up different types of system.
By alarm
The time trigger setting is configured as follows:
- Press the first key on the clock display and indicate the required time.
- Press the first key again so that the indication blinks.
By timer
- You need to hold down the first red key and release it.
- The following message will appear on the monitor: “ZPUS” and icons of a running engine.
By temperature
To activate temperature triggering, you need to place the pager cursor on the thermometer display, select the required temperature value and confirm it by pressing the first key.
Disabling automatic start
To disable the option, you need to find the corresponding indicator using the pager buttons and press the button again so that the headlights blink once.
Why autorun doesn't work
There are plenty of reasons for autostart not working on the Starline A93. But in most cases they are explained by incorrect mode settings or improper condition of the vehicle.
I’ll tell you briefly about the installation because... If someone installs this alarm on their own, there is almost no information on installing this alarm on this car. Before installation, I scoured the Internet myself, but there were no instructions. There are installation instructions from the official Starline website for the Starline E90 CAN+LIN alarm system, but the information regarding the electrical package control unit is slightly incorrect there. Yes, and I simplified the task a little in terms of laying the wires. I won’t describe the whole process in full, because it’s very long and why should you read unnecessary information)))). I will only indicate the connection points.
Briefly about the diagram: 1) I removed the first connector (central locking control), 6-pin, completely because... the central locking is controlled from the CAN+LIN bus 2) The second connector (4-pin) is left unchanged 3) From the third connector (10-pin) I removed everything except the GRAY and PINK wire 4) From the fourth connector (6-pin) I removed everything except BLUE-RED and ORANGE-GRAY 5) On the power unit I left RED, YELLOW and YELLOW-BLACK 6) I removed the engine lock relay.
The rest is unchanged.
Now briefly about the installation: 1) I threw two positive wires from the battery for the power module and the alarm unit, the ground can be taken anywhere. 2) We throw three wires to the dashboard connector. This is BLUE-RED (parking brake), BROWN AND BROWN-RED (this is the CAN bus) from the CAN+LIN interface connector. We connect the blue-red to the brown-blue in the dashboard connector according to the diagram (this is the handbrake)
We connect the brown and brown-red ones with the CAN+LIN interface in parallel to the yellow-red and gray wires in the dashboard connector. in order - brown to gray, and brown-red to yellow-red.
3) LIN bus (white-red and white-blue) with CAN+LIN connected from the electrical package control unit.
4) We also connect the hood switch (white and black) in the electrical package control unit.
5) Connect the power module to the wires in the ignition switch.
6) We connect the standard immobilizer bypass to the gap of any wire (white or green)
7) I connected the turn signals in the turn signal switch connector (blue and blue-black). (DO NOT DO THIS AS THE TURN SIGNALS WILL NOT WORK. I don’t know what this is connected with, but I think that this connector only works through the ignition. Now I’m looking for information about the connection location). In short, in the end, it was not possible to connect the turn signals because I could not find the wiring diagram for the 2014 Priors 106 hp.
 We install the temperature sensor, siren, service button, antenna and light bulb according to the instructions included in the kit.
Setting the volume of siren confirmation signals
To determine the sound volume of the Starline A93 alarm when controlling security functions, you will need:
- Make sure that the external siren control mode is active (configured via the central unit).
- Activate the main menu by pressing the setting key 5 times.
- After activating the ignition, find the SOUN section on the display (switching is done using buttons with a triangle symbol).
- Long and then short press the key located next to the button with the circle icon. The owner adjusts the volume in the range from 1 to 9, the parameter is displayed on the display. Silent operation mode involves setting the value to 1.