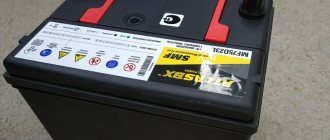
The starter battery is primarily designed to start a car engine. When the engine is running, the functioning of the electrical equipment is ensured by the generator, while simultaneously recharging the battery. On the other hand, modern electronics consume a large amount of electricity even when the power unit is turned off.
If you do not control these processes, then at the most inopportune moment the engine may refuse to start. A small device called a multimeter will help solve these problems. Every responsible driver should have one in their glove compartment.
The main symptoms and causes of problems with the battery
Testing the battery for performance is usually carried out in two cases: when purchasing a new battery or if it begins to show obstinacy during operation. In most cases, if we exclude manufacturing defects, the causes of premature battery failure are either constant undercharging or regular overcharging of the battery. All other reasons can be called secondary and derived from these two.
A consequence of undercharging the battery, which occurs when using a car with frequent but short trips, or when the relay-regulator malfunctions, is sulfation of the plates, leading to a decrease in battery capacity.
Overcharging risks boiling of the electrolyte and shedding of the plates, which is even worse than sulfation, since such a battery clearly cannot be restored.
Can a car owner who has no experience in servicing batteries independently diagnose it in order to correct the existing problem in time?
There are several main symptoms indicating that something is wrong with the battery and a more thorough check of its condition is required:
- The most obvious sign of a bad battery is the illuminated battery light on the dashboard. Usually it lights up only when the engine is started and goes out as soon as it starts working. If the indicator lights up constantly or flashes while the car is moving, the battery is not receiving a charge from the generator, and we have already talked about the dangers of undercharging. You need to immediately look for the cause of the problem and eliminate it.
- A visual inspection performed while checking the oil level may reveal signs of swelling in the battery case. This is a consequence of overheating or the result of exposure to negative temperatures (freezing and expansion of the electrolyte). Such a battery cannot be used.
- Some batteries have transparent windows to check the electrolyte level. If you notice that it has turned from transparent to dark or cloudy, this is evidence that the plates have begun to crumble and the battery will soon “die”.
- Finally, the unpleasant smell of rotten eggs in the engine compartment, which is a consequence of the release of sulfuric acid vapors, may indicate a constant overcharging of the battery with all the ensuing consequences.
In all the described cases, diagnostic procedures are required to clarify the diagnosis and avoid the most unpleasant consequences.
Checking voltage with a multimeter
A well-charged battery produces a voltage that matches its documentation. In most cases, the numbers range from 12.5 to 12.8 volts when fully charged.
Some manufacturers claim that the voltage in their batteries is higher than 13 V. If you take a measurement immediately after charging the battery, the numbers may be equal to or greater than 13 volts, but this data is false.
After a full charge, the voltage in the battery exceeds the norm. This occurs due to the properties of the electrolyte. To get accurate data, take the measurement 2 hours after the battery has finished charging.
Instructions:
- Set the multimeter to DC mode.
- Install the red probe into the socket to measure current in the range from 10A to 20A.
- Touch the test leads to the battery terminals.
- The contact time of the multimeter with the battery should not exceed 2 seconds, otherwise the battery may be damaged.
- Check the readings obtained with the data specified in the battery documents.
Using a multimeter to check the condition of the battery
Of course, the most accurate and informative way to check a car’s battery for performance is to use a multimeter.
You don't need to be an auto electrician to use it. Setting the device to constant voltage measurement mode is not difficult; setting the measurement range to a value greater than 15 V is also easy. All that remains is to lean the black probe against the negative terminal, and the red one against the positive terminal.
This can be done without removing the battery from the car.
To check whether the battery is working or not, this simple test is not enough. If the voltage is below 12 V when the engine is turned off, this indicates that the battery is severely discharged (more than 50%) and needs to be recharged. A voltage of less than 11.7 V indicates a completely discharged battery, a range of 12.4–13.2 V corresponds to a fully charged battery.
To clarify the diagnosis, you should check the performance of the car’s battery with the engine running and electricity consumers turned off.
With values exceeding 14.2 V, we can talk about a discharged battery, but after 10–15 minutes of running the engine, even at idle speed, the voltage should return to normal (13.4–14.2 V). If this does not happen, most likely the cause must be sought in faulty electrical equipment.
In addition to measuring the battery voltage, to complete the picture, it will be necessary to check the charge level and capacity of the battery, as well as measure current leakage.
Current measurement
Now let's try to check the current strength:
- Set the lever to A - (may also be DCA or I -) because we need to know the amount of DC current.
- Before checking the battery amperage with a multimeter, you must definitely find a third object in the electrical circuit - the easiest way for these purposes is to take a regular 24 W light bulb. In no case can you do without it, otherwise you will get a short circuit.
- A metal tip with a red wire is connected to the branch leading to the positive of the battery, and with a black wire to the negative.
- Now you can check the amps on the display.
This method is also suitable if you were looking for a way to measure the current of regular batteries - a multimeter does an excellent job of this task.
Other ways to independently check your car battery for performance
If you don’t have a measuring device at hand, you can determine the performance of the car’s battery without it. To do this, it is necessary to load it with consumers, the power of which is approximately half of the battery capacity. The easiest way is to connect several car light bulbs in parallel. If after 5–8 minutes the brightness of their glow drops, you can begin to worry about the condition of the battery.
But this is a very conditional test, and if suspicions arise after it, you should proceed to a more thorough diagnosis.
Visual inspection
It is carried out to identify visible defects in the body, such as cracks, swelling, and leaks. The presence of cracks and swelling is a direct indication of the need to purchase a new battery. Electrolyte leaks, leading to the appearance of leakage currents, are eliminated using a weak soda solution (a teaspoon of powder per 100 ml of water).
You can check for self-discharge of the battery by connecting one of the multimeter probes to the positive terminal of the battery, and moving the second one along the cover in places where there is contamination.
Checking the electrolyte level and density
If the battery is maintenance-free and does not have a special transparent window, it is not possible to check the electrolyte level. Although manufacturers claim that this is not necessary for this type of battery: the level of loss of working fluid is negligible, and it should be enough for the entire service life. In serviced models, in order to find out whether the electrolyte has boiled away, you need to unscrew all 6 plugs and take measurements in each of the cans. This is done using a glass tube, which is lowered into the filler hole until it rests against the separator mesh. Then the upper hole is clamped with a finger and the tube is pulled out, assessing the level of liquid in it. Normally this is about 10 mm. If there is less electrolyte, this threatens to expose the plates, and this part of them, in contact with air, will be actively destroyed. Correct the situation by adding distilled water or a ready-made sulfuric acid solution.
The density of the electrolyte is measured with a hydrometer, which is lowered into the jar so that the float of the hydrometer does not touch the walls. This figure for the middle zone in the warm season should be 1.28 g/cm3. In the northern regions, it is necessary to use a more dense solution, 1.30 g/cm3, in the southern regions, on the contrary, a less viscous solution, with a density of 1.23 g/cm3. In any case, a decrease in density by 0.04 g/cm3 indicates a drop in the charge level by 25%; a battery discharged by 50% will have a density that is 0.08 g/cm3 less than the nominal value.
Visual inspection
This type of battery test is the simplest, but no less important. After all, the performance of the battery largely depends on the external condition. During inspection, you should pay attention to the presence of moisture on the surface of the battery; its presence leads to self-discharge of the battery. Dust accumulated on the lid can also conduct electricity; this also leads to a decrease in battery charge. Moisture and dust should be wiped with special care in the area of the battery terminals.
Something is clearly wrong with this battery.
Particular attention should be paid to the condition of the battery pole terminals. They must be clean, free of any deposits and undamaged. Contact with the wires must be reliable; loose clamps are not allowed. Penetrating damage and cracks of the housing are not allowed; electrolyte leaking through them will lead to short circuits of the plates and damage to vehicle parts. If the battery has filler plugs, they must be tightly wrapped in the case.
Load Fork Testing
You can also find out the state of charge of the battery using a load plug - a device that is a combination of a voltmeter with an electrical load (usually a spiral with a high resistance or just a resistor of a certain value).
The check is carried out according to the following algorithm:
- the external temperature should be within 15–25° C;
- the plug wires are connected to the battery terminals observing polarity (red wire to the positive terminal, black wire to the negative terminal);
- at the moment of connection, measure the voltmeter readings;
- wait 5–6 seconds, record the readings of the device and disconnect the load plug.
The purpose of the measurements is to simulate a switched-on starter, consuming from 100 to 200 A for a short period of time. If the battery was fully charged, after such a test, a drop in the voltage level to 10.2 V indicates its normal condition. If the indicator is lower, the battery is in unsatisfactory condition, having lost part of its rated charge. Thus, a value of about 8.4 V indicates a drop in the state of charge of the battery by 75% of the nominal value.
Automobile
Many car owners look at the capacity when choosing a battery. It is measured in Amperes/hours. According to GOST, all battery manufacturers are required to indicate the battery capacity on the label, but how can you find out whether the declared indicators correspond to reality?
You can check the capacity of a car battery in several ways: with a multimeter, a load plug, or devices that send special signals to the battery and then display the readings taken on the screen. But unlike a multimeter, such equipment is difficult to find, and it is not cheap.
Find out the charging time of your battery
To measure battery capacity with a multimeter, do the following:
- Fully charge the battery.
Determining the capacity of a car battery - Assemble an electrical circuit that includes:
- Load – a lamp used in a car to illuminate the road is suitable. Power – 35-40W. It must be remembered that the load must have a value equal to half the capacity. Example: for a capacity of 7 A/h, the load should be 3.5V;
- A multimeter connected to a battery to monitor indicators;
- Connect the light bulb to the battery and measure the time. It is necessary to take readings from the battery and strictly monitor the moment of voltage drop. As soon as the readings drop below 12V, the discharge process has begun.
- Calculate how much time has passed from the moment the circuit is connected to the discharge.
- The capacity is calculated by multiplying the value obtained at the 4th time point by the current consumed by the light bulb. The resulting value will be the battery capacity.
car battery
If the capacity is much different from what is stated in the passport or labeling, then this means only one thing - it is better not to buy a battery. When measuring a used battery, a change in indicators means that the capacity is decreasing and it is time for replacement.
When the deviations are minor, it is possible to continue using the car battery without experiencing problems with the battery.
Important: you must remember that a multimeter is a universal device that includes several devices. Therefore, when taking measurements, you need to monitor the operating modes (voltmeter, ammeter).
Checking the batteries
In conventional batteries, the voltage practically does not drop when discharged. Instead, internal resistance increases and the supplied current decreases. To test the element, the short circuit current is determined. It is measured with an ammeter and decreases in a discharged battery a few seconds after the start of measurements.
Important! In a working device, the short circuit current reaches several amperes.
Knowing how to check the battery capacity with a multimeter without using expensive instruments will help you replace or not install a faulty element in time.
How to check battery density
To check the electrolyte density, use a hydrometer or a commercially available electrolyte density float indicator. We collect electrolyte from the battery jar into a glass flask and lower the hydrometer. We determine the density using the scale and compare it with the table:
| Electrolyte density, g/cm 3 | 1,27 | 1,23 | 1,20 | 1,17 | 1,12 |
| Degree of charge, % | 100 | 75 | 50 | 25 |
Depending on the battery model, the initial density of the electrolyte may differ (see the battery instructions). The process of determining the density of the battery electrolyte is shown in the video:


