Washing machine inlet valve
The filling valve of the washing machine allows you to draw in water, preparing the equipment for washing. The valve can be in 2 functional positions: open and closed.
More often it is closed. When current is applied to the valve coil, an electromagnetic field is generated, creating optimal conditions for its opening. When the rod is tightened, the membrane opens. Having gained access to the dispenser hopper, the incoming water washes away the washing powder, which will later be poured into the washing machine tank.
As soon as the required amount of water is collected, the supply of electricity to the coil stops, and along with it the water supply stops.
What are the types of water supply valves?
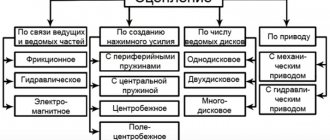
There are several types of valves. They differ from each other in the number of sections. There are valves that have 1 coil , others have 2 coils , and others have 3 coils . Each section is a specific path that incoming water takes. Different washing machine models require different fill valve designs, with one, two or three coils available.
If the model has only one valve, then the direction for water supply will be controlled by a mechanical lever of the command device. This allows water to flow into different sections of the plastic dispenser. This design is typical for all older models of washing machines. They provide for close cooperation of the single-valve system with the command apparatus.
Washing machines that are modern are equipped with an electronic control module. There is no mechanical drive at all. Models can use valves with 2 or 3 sections. If one coil supplies water to one compartment of the machine’s plastic dispenser, then the other – to the second. To make it possible to supply water to the third section, you will need a 3rd coil. However, if only a two-coil valve is available, this can be accomplished by simultaneously turning on 2 coils at once.
Fault diagnosis
Many people who are not particularly savvy in the auto repair industry often ask the question: “How to actually check whether the solenoid valve and its control unit are working or not?” There are no particular difficulties in this, but there are a number of basic nuances. In order for every reader of our resource to understand exactly how to identify problems with EPC, our resource has prepared a step-by-step diagnostic algorithm. In general it is as follows:
- First you need to find the place where the economizer is located specifically on your make of car. It often looks like this;
- Then start the engine, drive the car, turn it off and analyze its operation at idle. If the XX fails at all stages of engine acceleration, first of all it is worth checking the solenoid valve;
- Next, when the engine has cooled down, you need to start it again and disconnect the EPHH from the carburetor by carefully removing the corresponding terminal with tweezers. After which it is worth observing the operation of the engine. If everything is normal and the economizer rod (needle) has moved out, then it is unlikely to be faulty. In this case, most likely there is a problem with the main idle jet or other carburetor components. If the rod does not extend and the car quickly stalls after turning off the economizer, then the latter is faulty;
- Now you need to remove the EPHH from the car and connect it to an alternative power source (for example, directly to the battery). After 10-120 seconds, the rod of the operating economizer should extend and make a characteristic click. If this happens, but when connected to the car’s network, the EPHV needle does not extend, then either its control unit or the valve wiring is faulty. If the rod remains in place in both cases, then the economizer needs to be changed, or even attempted to be repaired.
Do not forget that the final malfunction of the solenoid valve can only be determined if all other carburetor components are guaranteed to be in good working order. Under other circumstances, specific conclusions should not be drawn.
This concludes, perhaps, the most important information on the EPC of modern carburetors. We hope the material presented above was useful to you. Good luck on the roads and in repairs!
Checking the washing machine fill valve
When you need to check how functional this part is, you will need to remove it. After this, the filling hose is connected to the valve and 220 volts are supplied to all sections in turn. A functioning valve must open to allow water to flow through. And if there is no electricity, it closes and does not let water through. This experience requires you to be attentive and careful. Accidental entry of water while the wires are live can cause a short circuit. Try to plan everything to prevent this from happening. It is better to prepare a container for water in advance.
Verification steps
First check the intake valve screen . A blockage inside it may cause an obstruction to the water supply. If you find contamination, remove the part and clean it, and then return it to its place.
When electricity is supplied and the valve does not open, the coil is burnt out . To make sure of this, carry out another check using a multimeter (tester). Use the meter to measure the resistance. A value between 2 and 4 kOhm is normal and the coil can be replaced.
In addition, you need to find out whether there are plastic inserts in the fittings . Their presence reduces the amount of water entering the washing machine. They are used on the inlet or inlet fitting. After removing the insert, the water pressure increases. But too much pressure is undesirable. A valve that has failed is easier to replace with a new one than to repair.
Is the filling valve of a washing machine repairable?
This valve is a non-separable type, so attempts to repair it will most likely be unsuccessful. The experiment may end with the same thing it started with, a faulty state of the part. It is recommended that those with at least basic technical knowledge attempt to repair the valve themselves. Otherwise it's a waste of time.
Also see how to clean your washing machine drain filter.
Checking, cleaning or replacing the idle speed solenoid valve VAZ 21093
Tool:
- L-shaped socket wrench 14 mm
- Pliers
- Needle for cleaning the jet
- Tester or indicator lamp
- Medium Phillips screwdriver (when replacing the EPHH unit)
Parts and consumables:
- Solenoid valve (2108-1107420) (replacement if necessary)
- EPHH block (5003.3761) (if replacement is necessary)
Notes:
This manual is suitable for all cars of the Lada Samara family equipped with the same carburetor engine.
VAZ cars with a carburetor have an electromagnetic valve (EMV) with an idle jet in the idle system. This valve is controlled by the electronic forced idle speed unit (EFI). There are three most common reasons for the disappearance of idle speed on VAZ 2108, VAZ 2109, VAZ 21099, VAZ 21093 cars:
- clogging of the idle jet of the solenoid valve;
- solenoid valve burnout;
- lack of power supply to the EMC.
1. Place the car on a flat, horizontal platform and open the hood. The VAZ 21093 solenoid valve is located under the air filter housing, on the left side in the direction of travel of the car.
2. Turn on the ignition on the car. Remove the power wire from the solenoid valve (EMV).
3. Try touching the power wire terminal to the solenoid valve terminal several times. At the moment of contact, distinct clicks should be heard.
4. If there are no clicks in the solenoid valve, use a 14 mm wrench to unscrew the solenoid valve of the VAZ 21093 carburetor from the carburetor cover. Using an additional piece of wire, apply the “+” from the battery to the terminal of the solenoid valve, with its body touching the “-” terminal of the battery several times. If there are no clicks in this case, the solenoid valve (EMV) has burned out. Replace the solenoid valve with a working one. But if the valve makes a clicking sound when connected directly to the battery, then it is working and there is probably a loss of power on the valve power wire. What to do in this case is described at the end of the article.
Checking the EMC by connecting to the battery
Helpful advice:
Replacing the fill valve in a washing machine
We recommend that you entrust valve replacement to a washing machine repairman.
Typically, manufacturers place the valve on the rear wall side at the top of the washing machine. To make it easier to remove the valve, the cover is removed. This part of the body is secured with 2 self-tapping screws. They need to be unscrewed. The lid is pushed from the front side to the back wall. After this it can be easily removed.
In washing machines where loading is vertical, the valve is located at the bottom of the rear part of the body. To get to it, you need to remove part of the housing from the side of the washing machine.
Before you start removing the valve, be sure to turn off the water supply. The wire terminals or hoses must be disconnected from it. If fixation is planned using disposable clamps, they must be prepared in advance. In addition, reusable products can also be used.
The bolts securing the part need to be unscrewed. There are models in which it is securely fastened using latches. In this situation, you will need to pull back the part of the latch that secures the part. The valve turns and is removed. It is being replaced. Next, the new valve is fixed in reverse order.
Why is a solenoid valve needed?
Solenoid valves are a category of modern shut-off valves for pipelines for a wide variety of purposes. In everyday life, such electric valves are used in cars, special equipment, water supply systems and automatic watering and heating systems.
They are also widely used in industry to regulate current and control the transport of a variety of liquids and gases.
The solenoid valve for water or gas does not have any sensors inside. With its help, you can only regulate or completely block the flow of the working environment. If automation of these processes is required, then you will have to additionally install external measuring instruments, tying the operation of the electrovalve to them.
For example, use an additional controller and a water leakage sensor in combination, so that when a leak is detected, the solenoid valve receives the appropriate command from the controller and shuts off the pipeline.
The advantages of using solenoid valves include:
- quick adjustment of the working medium current through the pipeline;
- versatility and reliability of the device;
- long service life;
- small size and light weight;
- variety of instrument types.
The valve operates literally within a split second after the signal is given. It is designed to work with liquids under different pressures, from 0 to 25 bar, and with varying temperatures, from -20 to +120 ° C. At the same time, in a de-energized state, such an electric valve can remain either in a closed or open position - it all depends on the modification of the device.
In water supply systems, it allows you to automatically shut off the water supply if the pipes burst. And in heating systems, such a valve is used as a device for regulating the flow of coolant.
Washing machine solenoid valve repair
The solenoid valve is also called the fill valve, inlet valve, or water supply valve.
All these are names of the same device, designed to automatically supply and stop the supply of water to the washing machine.
If the solenoid valve is faulty or clogged, the washing machine does not draw water and the wash does not start.
To verify that the valve is faulty, you will need to test it. This part cannot be repaired, therefore, after a breakdown is determined, it is completely replaced with a similar new one.
What does replacing parts do?
All engine elements of the VAZ 2108 and subsequent models are developed by the manufacturer’s designers based on the principle of reliability and expediency. The first is manifested in the amount of metal used to manufacture a particular part. That is, VAZ valves are made with a large margin of safety and are designed for operation with a normal driving style.
The feasibility lies in the use of materials and technological processes that reduce the cost of each product as much as possible, so that the overall price of the car is acceptable to the buyer. This leads to an inevitable drawback - the significant weight of all stock parts, which increases the energy consumption for their movement and the force of inertia. Therefore, the 8-valve VAZ 2112 engine, equipped with factory elements, cannot overcome the 8 thousand rpm bar without consequences. Reaching such high speeds is allowed only for a short time, although often the engine is simply not able to do this.
For those who are interested in car tuning, motorsports, or simply aggressive driving, there is only one option left - to replace stock parts with lightweight ones that have less weight and inertia. These include T-shaped valves, which differ from the factory ones in the following ways:
- less weight;
- the “plate” of the element is made thinner;
- the lower part of the pusher has a smaller diameter;
- the entire pusher and “plate” are carefully polished.
The lightweight valve, which moves easily in the sleeve, puts less load on the spring, does not hang at maximum engine speeds and provides improved performance even with a stock piston group. The use of such elements provides the following advantages:
The paragraph on fuel economy says “theoretically,” since in practice, gasoline consumption under extreme operating conditions will be high in any case. Although, by means of deeper tuning of the power unit, this consumption can also be reduced.
Read more: Violation of traffic rules in Kazakhstan
There are no serious disadvantages when using lightweight valves in VAZ 2108-2115 engines. The service life of such parts depends entirely on the operating mode and speed loads, that is, on the owner of the machine. If we compare the average service life of stock and lightweight valves, the latter last less - up to 100 thousand km.
Operating principle and types of washing machine valves
operation algorithm :
- The control module of the washing machine sends a signal to the valve that the washing program is activated.
- An electric current flows to the valve's electromagnetic coil, which creates an electromagnetic field in it.
- The electromagnetic field of the coil opens the valve (the membrane rod is tightened), through which water begins to flow into the detergent cuvette.
- From the cuvette, water and powder enter the washing machine tank.
- When water has been collected in the required amount, the voltage supply to the valve coil is cut off, it closes, and water stops flowing into the tank.
Thus, the solenoid valve can be either open (water is poured in) or closed (water does not enter the unit). The principle of operation is similar to the operation of a conventional faucet, but the device is much more complex.
Classic solenoid valves (aka valves that were previously installed in washing machines) have one coil. The vast majority of modern washing machines have:
- Double-coil - a valve with two sections. The first coil supplies water to the first compartment of the detergent cuvette, the second – to the second, and the third – when both coils are working.
- Three-coil - a valve with three sections. Each compartment of the cuvette has its own coil.
Replacing and checking the solenoid valve on VAZ 2108, VAZ 2109, VAZ 21099
Welcome! From this article today you will learn for yourself how to correctly replace the solenoid valve on cars of the Samara family.
Summary:
Where is the solenoid valve located? It is wrapped in the carburetor body, and a block of wires is connected to its terminal. At first glance, after opening the hood it is very difficult to notice, and all this is because it is covered by the air filter housing. Therefore, to see this solenoid valve, you will have to bend down and thereby look under the air filter housing. For a more detailed location of this valve, see the photo below:
Note! For clarity, the air filter housing has been removed!
When should the solenoid valve be replaced? Most often, when the solenoid valve fails, the following problems begin to occur with the car engine:
- Firstly, the car’s idle speed becomes uneven, that is, the speed begins to fluctuate and in some cases the car simply stalls constantly.
Note! All this is due either to clogging of the idle jet which is installed on the valve, or to the failure of the solenoid valve itself, or to the lack of power to the same valve!
Checking the water supply valve
One or both solenoid valve coils may burn out , causing the part to fail. But often a breakdown is caused by a simple clogged valve filter.
To check if the water supply valve filter is clogged, you need to:
- Unscrew the water supply hose at the point where it connects to the machine.
- Pull out the filter (it looks like a fine mesh) and clean it.
- Reinstall the filter and screw on the water supply hose.
Checking the solenoid valve itself is not only more troublesome and complicated, but also potentially dangerous to health and life!
You need to remove the valve, connect the water supply hose to it and alternately supply 220 V to each coil.
It is not recommended such a check yourself! If water accidentally gets on the wires, a short circuit !
To diagnose and check the functionality of the water supply solenoid valve, call a washing machine repair specialist from VseRemont24 to your home.
The technician will test each valve coil with a multimeter. If the resistance readings are within 2-4 kOhm , the coil is working; if not, it is burned out.
How to replace the solenoid valve on a VAZ 2108-VAZ 21099?
Removal: 1) At the beginning of the operation, remove the air filter housing from the carburetor cover. (For how to remove the housing, read the article: “Replacing the air filter housing”)
2) Next, disconnect the wire block from the solenoid valve terminal.
3) Next, using a wrench, catching on the edges that are present on the solenoid valve, unscrew it completely. After unscrewing the solenoid valve, remove it from the car engine.
Note! Remove the valve carefully; when removing, do not lose the idle jet, rubber o-ring and cup that are present on this valve!
Installation: 1) Taking the new solenoid valve in your hands, install it in its place and then wrap it around the edges that are present on it.
2) After screwing, connect the wire block to it.
3) Finally, install the air filter housing onto the carburetor cover.
Replacing the water supply valve
Once you have confirmed that the water inlet valve is broken, all that remains is to replace it with a new one.
To do this you will need:
- Disconnect the machine from the power supply.
- Turn off the water supply valve to the unit.
- Disconnect the inlet hose.
- Remove the top cover (if the machine is front-loading) or the side cover (if it is vertical).
- Find the solenoid valve, disconnect the wire terminals and hoses from it. Attention! The clamps holding the hoses can be disposable. It will not be possible to re-attach them. New ones will need to be installed.
- Unscrew the bolts holding the valve or pull out the latches (depending on what the part is supported on).
- Turn the valve slightly and remove it.
Installing the carburetor solenoid valve
When replacing a solenoid valve, it must be adjusted correctly so that the incoming fuel-air mixture meets the required parameters. The installation is carried out with the engine running, as this will allow you to accurately adjust the valve. In a carburetor, the valve is located under the air filter cover, so to remove a faulty solenoid valve, you must first remove the air filter cover.
First, you need to hand-screw the valve into the carburetor seat and put on the standard wire that connects the valve to the control unit. After this, you need to start the car’s engine, which will stall and possibly try to stall. If the engine still maintains speed, then further tightening of the valve into the carburetor is done using a wrench (13 or 14 depending on the type of valve). Further installation is carried out in the following way:
- the key is turned 1–2 cm clockwise, after which the wire is removed;
- if the car engine does not stall, then the wire is put on again and the procedure is repeated;
- As soon as the engine stalls after removing the wire, the valve is installed correctly in the carburetor.
Installation of the solenoid valve must be carried out carefully so as not to damage the fuel nozzle and seat in the carburetor. During the installation process, the size of the fuel mixture entering the engine is automatically adjusted, after which tripping and detonation stop. For precise adjustment, you can tighten the “quality” and “quantity” screws on the valve.
If, after tightening the valve several times and disconnecting the wire, the engine still does not stall, this means that fuel is entering the engine bypassing the solenoid valve and it is necessary to look for a malfunction in the fuel supply system.
Purpose and device
The principle of operation of the intake valve is based on the laws of electromagnetism. Therefore, it is often called electromagnetic. The command to supply water is carried out by applying voltage to the coil. A magnetic field is formed around it, which draws in a core made of metal called a rod. Due to this, a small hole located in the center of a special elastic membrane opens, and water rushes into the dispenser, washing away the powder intended for washing.
Once the required volume of water has been collected, a special sensor will operate. Voltage will stop flowing to the coil. A special spring will work, which will return the rod to its original position and the water supply to the machine will stop. When the intake valve is de-energized, the spring reliably presses the core, closing the diaphragm hole.
Solenoid intake valves come in three types and can have:
- One reel. It is mainly used in washing machines of outdated models. In these devices, the water jet is controlled mechanically using a command device. Water flows into the dispenser using a lever.
- Two coils. Used in modern models of washing machines. Control is carried out electronically. A special module is provided for this purpose. Each individual coil is responsible for supplying water to a specific section of the dispenser. When two coils are turned on simultaneously, the water flow will be directed to the third section of the dispenser.
- Three coils. Just like the previous version, they are used in modern washing machines. They use a dispenser with three compartments. A distinctive feature of this type from the previous one is that, due to the third coil, it is possible to direct the flow of water into the third compartment of the dispenser.
Purpose and application of solenoid valves
Faulty vvti valve.
Where is the VVTI valve located and how to check it The solenoid valve acts as a regulating and shut-off device in the remote control of the transportation of flows of liquids, air, gas and other media. Moreover, the process of using it can be either manual or fully automated.
The most popular is the Esbe solenoid valve, which has a solenoid valve as its main device. The solenoid valve consists of electric magnets, which are also popularly called solenoids. In its design, the solenoid valve resembles an ordinary shut-off valve, but in this case, the position of the working element is controlled without the use of physical effort. The coil takes on the electrical voltage, thereby operating the solenoid valve and the entire system.
The solenoid valve works both in complex technological processes in production, or in public utilities, and in everyday life. Using such a device, we can independently regulate the volume of air or liquid supplied at a specific point in time. The vacuum valve can operate in rarefied air systems.
Depending on the conditions where the solenoid valve is used, the housing can be manufactured as normal or explosion-proof. This device is used primarily at oil and gas production points, as well as at automobile gas stations and fuel depots.
Water valves are used to automate water purification systems. In addition, the electromagnetic water valve has found its application in maintaining the water level in water tanks.
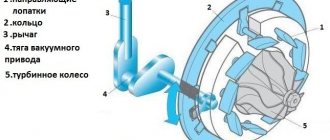
Valve device
The main structural elements of the solenoid valve are:
- frame;
- lid;
- membrane (or piston);
- spring;
- plunger;
- stock;
- an electric coil, also called a solenoid.
Valve design diagram
The body and cover can be made of metal materials (brass, cast iron, stainless steel) or polymer materials (polyethylene, polyvinyl chloride, polypropylene, nylon, etc.). To create plungers and rods, special magnetic materials are used. The coils must be hidden under a dust-proof and sealed housing in order to exclude external influence on the delicate operation of the solenoid. The coils are wound with enameled wire, which is made of electrical copper.
The device is connected to the pipeline using a threaded or flanged method. To connect the valve to the electrical network, use a plug. Heat-resistant rubber, rubber and silicone are used to make seals and gaskets.
The product is supplied with drives with an approximate operating voltage of 220V. Some companies carry out orders for the supply of drives with voltages of 12V and 24V. The drive is equipped with a built-in forced control circuit SFU.
Operating principle of electromagnetic systems
The electromagnetic inductor operates in all known AC and DC voltages (220V AC, 24 AC, 24 DC, 5 DC, etc.). The solenoids are placed in special housings protected from water. Due to the low energy consumption, especially for small electromagnetic systems, control using semiconductor circuits is possible.
The smaller the air gap between the stopper and the electromagnetic core, the more the magnetic field strength increases, regardless of the type and magnitude of the applied voltage. Electromagnetic systems with alternating current have a much larger rod size and magnetic field strength than systems with direct current.
When voltage is applied and the air gap is at its maximum extent, the AC system, consuming a large amount of energy, raises the rod and the gap closes. This increases the power of the output flow and creates a pressure drop. If direct current is supplied, then the increase in flow rate occurs rather slowly until the voltage value becomes fixed. For this reason, the valves can only regulate low pressure systems, except those equipped with small bores.
In other words, in a static position, provided that the coil is de-energized and the device is in the closed/open position (depending on the type), the piston is in a tight connection with the valve seat. When voltage is applied, the coil transmits an impulse to the actuator and the rod opens. This is possible because the coil generates a magnetic field, which in turn acts on the plunger and is drawn into it.
Intake Valve Check
To fully check this part, you need to remove it from the washing machine. It is usually located at the top of the back wall. Except in cases where laundry is loaded vertically. In this case, the inlet solenoid valve is located at the bottom of the structure, also on the rear wall.
Its performance can be checked by alternately applying voltage to the coils, after connecting the water hose. If it is working properly, the open inlet valve will allow water to flow freely. When the current supply to the coils stops, it will close and the water supply will stop. You need to take care of the container into which the water will be drained.
Types of solenoid solenoid valves
There are several varieties of the device in question. Such devices are classified according to the material of the body, design and de-energized position of the lock inside, type of seal and method of connection to the pipes.
Each of these options is designed to work with a specific medium in terms of composition, temperature and pressure. The solenoid valve must be selected carefully. If you take a device that does not meet the requirements, it will not last long.
According to the method of connection, solenoid electrovalves are divided into:
And in size they can be from 6 to 150 DN (from 1/8 to 6 inches). There is an option for any pipeline.
The body of the electrovalves in question is made of:
- plastic (reinforced PPA, PVC, nylon);
- of stainless steel;
- brass;
- cast iron
Each of these options has its own characteristics for pressure and temperature of the working environment. These numbers should be carefully studied in the device passport so as not to make a mistake with your choice. At the same time, any of the above variations is suitable for plumbing or heating in a private house.
Classification #1 - by internal structure
Based on the design of the control element, valves are divided into three groups:
Household solenoid valves are usually made with a membrane. This is a cheap and reliable option that can easily cope with regulating the flow of water in domestic heating and water supply systems.
The main separation of solenoid valves is carried out according to the position of the locking mechanism when the electromagnet is de-energized.
According to this parameter, solenoid electrovalves are divided into:
- normally closed, valve closed (NC);
- normally open, valve open (NO);
- bistable.
In the first case, until voltage is applied to the solenoid, the core is lowered down due to spring pressure and there is no water flow. In the second case, when the device is de-energized, the channel, on the contrary, is completely open, and it closes only after power is applied.
The third option is that the position can be either open or closed.
Classification #2 - based on operating principle
Functionally, solenoid electrovalves for water at 220 V and other voltages are:
The first ones have only one connection pipe to the pipeline. These are safety devices designed to release steam or water when the pressure in the pipes is too high.
Three-way devices come with three pipe connections for connection to pipes. Such options are designed to redirect flow from one pipeline to another.
Three-way valves are most widely used in heating systems. Such devices make it easy to transfer coolant from one circuit to another to mix the working environment.
As a result, the temperature of the water in the system changes, but the source of thermal energy continues to operate without changing the mode.
Also, solenoid valves are:
- direct action;
- indirect action.
In the first, the core moves solely under the influence of an electromagnet. Secondly, its movement is also affected by the pressure of the working environment.
Classification #3 - based on the material of the seal and membrane
Inside the body of the solenoid valve there is a membrane that blocks the flow of water. Plus, there is a seal between the coil and the main one with the pipes. Both of these elements are made of elastic polymer materials.
The seal in solenoid valves can be made of:
- FPM (FKM, VITON) – fluoroelastomer;
- EPDM – ethylene-propylene elastomer;
- NBR – nitrile butadiene rubber.
The first option is characterized by a high maximum operating temperature and resistance to oils and gasoline. The second is cheap and resistant to salts, alkalis and acids dissolved in water. The third one calmly tolerates contact with petroleum products and is usually used in industry and automobiles.
Possible faults
The following malfunctions may occur:
- Filter mesh clogged. It must be carefully inspected and, if necessary, cleaned of dirt and rinsed with water.
- The coils should be checked for serviceability. If voltage is applied to them, but the valve is still in the closed state, then a break is possible. Or the part burned out. A multimeter will help diagnose such a malfunction. The device is switched on in resistance measurement mode and connected to the ends of the coil. The serviceability of the part will be indicated by a resistance of 2 - 4 kOhm.
- Be sure to check the plastic inserts in the fittings that restrain the water pressure; if they are broken or missing, the part must be replaced.
Repairing the inlet solenoid valve is most often not possible, since it is a non-separable part that requires complete replacement in case of malfunction. Although some craftsmen replace a failed coil with a serviceable one, if available.
Valve inspection and repair
Checking valves is a mandatory process when diagnosing a car. It will help to weed out some of the possible causes of the malfunction.
It often happens that the needle valve of the VAZ 2109 carburetor can sometimes simply “stick”. And this causes problems. If the fuel supply needle valve is faulty, it should be cleaned or replaced.
It happens that the valve stops working in very hot weather. This can be expressed in the fact that the car starts, but after ten to twenty seconds the engine stalls. Externally determining the cause can be very problematic.
Sometimes in such cases, tapping on the carburetor cover helps, and then a few strokes are made on the manual drive of the fuel pump.
When the needle valve stops working in the closed state, nothing happens externally and you will not hear any sounds. An open valve produces the sound of gasoline filling the float chamber.
The process of replacing the needle valve of a VAZ 2109 carburetor
We recommend that you do not abuse the car and replace the valve. Otherwise, sooner or later, you will have to do more serious repairs to the VAZ 2109 carburetor.
Attention! Replacement is carried out only on a cold machine
It is necessary to loosen the bolts securing the cable and braid of the “choke” drive. After this, it can be freely removed from the carburetor. Now you need to leave the clamps in order to remove the hose from the carburetor that supplies gasoline and the return line. You can disconnect the wire from the forced idle Economizer valve. When you have done all this, you need to unscrew the five screws that secure the carburetor cover.
In this case, it is very important not to damage either the gasket or the floats. Now the cover can be removed. Turn the lid over so that the floats are at the top
After this, you can take an awl and push out the axis of the floats to remove them. We do everything carefully to avoid damaging the reeds. Otherwise, the fuel level may be disrupted. Now remove the old valve. New ones are made in such a way that its needle is essentially a separate part. This is very convenient because now the bridle can be easily put on the tongue. Be sure to soak the new needle for ten minutes in gasoline before you begin installing the new valve. Attach the new valve. The needle is put on the tongue with a bridle. In this case, it is inserted into the body itself. Next, the floats are installed, aligning the holes for the bracket axis and on the floats. We return the float axis to its rightful place. Now the cover can be returned to its place. But ideally, also wash the fuel filter. To do this, unscrew the plug located opposite the inlet pipe and pull out the filter. After that, it is washed in gasoline and put in place. Tighten the screws on the carburetor cover. We return the hoses and cable to their place and secure them.
After this, there will definitely be no problems with valve sticking. If necessary, check the solenoid valve of the VAZ 2109 carburetor.
Valve replacement
- First of all, the washing machine must be disconnected from the power supply and the water turned off. Then remove the back wall.
- All hoses and wires are disconnected from the inlet valve. Whatever you forget, where it goes, it’s better to write it down, sketch it or take a picture.
- Then the valve is released from the fasteners. The bolts that secure it are unscrewed or the latches are bent. They also have a place in some models.
- In order to remove the valve, it must be turned.
- Installation of the intake valve is carried out in reverse order.
How to check and replace the inlet valve in a washing machine
Each part of the washing machine performs its assigned function. So, the pump is used to drain water from the tank, and the inlet valve is used to draw it in. When its membranes are in the open position, water is poured. Once a sufficient amount has been collected, the membrane closes. How to check and replace the water valve for a washing machine? We will provide step-by-step work and useful recommendations in the publication.