A video recorder is an additional device that allows you to record the situation on the road while a vehicle is moving or parked. Recently, an increasing number of car owners have preferred to install the device in their car, since often only it can help understand an ambiguous traffic situation. The DVR records everything that happens and is mounted on the windshield. You can secure the device in various ways.
Choosing an installation location
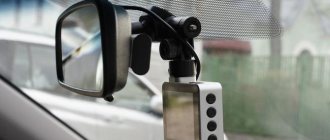
The main task of the DVR is to record the road conditions and the situation in the passenger compartment as best as possible. To do this, it is necessary to ensure a good viewing angle to cover the lateral space. There are two best places: the windshield approximately in the center for light devices and on the front panel for heavier devices.
There are also two options for mounting the DVR. This is a small suction cup or adhesive tape. The first is suitable for those who often leave their car unattended or are required to submit a video report after a trip. But oilcloth loses its properties quickly. Thus, it is suitable exclusively for inexpensive recorders that do not mind.
When choosing a seat, you should consider the airbag factor. Their operation can snag the device and drop it. In addition to the risk of death of the device as a whole, it can injure the driver or passengers.
Mio MiVue 788 DVR
Mounting options
Some of the best and most commonly used ways to mount the recorder include the following:
With suction cup
The suction cup as a fastening element holds the DVR on a vertical plane due to the difference in pressure. When the silicone circle of the suction cup is spread over the surface, a reduced pressure compared to atmospheric pressure is formed inside it.
Reliability of fastening using a suction cup can only be guaranteed if the material is completely sealed. If there is even the most microscopic hole in the silicone or rubber, the fastener will not work. Often the suction cups begin to fall off in the cold or after prolonged use. This situation can be avoided by choosing a different method of installing equipment.
On a special sticker
The sticker for the DVR is double-sided tape. to place it on the windshield in such a way that the device does not reduce the viewing angle. The best option for placing the device is behind the rearview mirror.
This option has the following advantages:
- good fixation;
- minimal financial costs;
- ergonomics;
- the ability to choose a location for fastening;
- long service life.
There is only one disadvantage of attaching it to a sticker - if necessary, the DVR cannot be easily removed and taken with you.
To the torpedo
Some modifications of the device are mounted directly on the dashboard on the dashboard of the car. This option is particularly reliable, since the adhesion of the adhesive tape to plastic is much higher than to glass. As a rule, a torpedo for installation is included with the device.
In this case, the DVR is visible and can catch the eye of potential intruders. But you can avoid this by removing the device from the mount and taking it out of the car. The fastening will not be damaged. One of the disadvantages of mounting it on a dashboard is the small viewing angle.
Connecting the recorder - where
There are a total of 5 options for connecting this device. Manufacturers clearly recommend and insist on connecting via the cigarette lighter. In practice, this is very difficult to implement - the cigarette lighter is traditionally reserved for chargers for phones, navigators or some other technologies. And installing a multi-socket adapter leads to an increased load on the vehicle systems, which is extremely undesirable in terms of safety and warranty conditions. Another disadvantage of this method is that it only works when the ignition is on.
Modern DVRs usually have a short wire. The main condition when choosing a connection location is that it should be as close as possible to the installation site. For the upper part, the ideal connection point is the ceiling lamp. If the DVR is located at the bottom of the windshield or on the front panel, there are more options - tape recorder input, direct connection to the battery or vehicle ignition. Let's look at them in more detail. The procedure described in each case assumes that the DVR is already installed, unless otherwise stated.
Upper lampshade
- Remove part of the vehicle's headliner.
- Pull the wires from the installation location to the lampshade. Hide them behind the trim.
- Remove the ceiling light according to the instructions in the vehicle owner's manual. Depending on the design, it is possible to disconnect the lamp from the power supply without any extra effort or use a tool.
- Use a tester to determine the wires that receive power constantly. For best results, carry out the check behind closed doors. It also determines the polarity of the contacts to which the recorder is connected. Solder with correct polarity.
- Now it's time to use the 5 volt adapter. You can buy it at a car store or use the power supply for the cigarette lighter. The wiring of the adapter or power supply must be connected to the recorder and wrapped with electrical tape.
- Complete the review by checking the functionality, hide the wires in a niche and assemble the lamp.
Connecting the DVR to the lampshade
Power supply for car radio
The most convenient and fastest way. The radio is also powered by a voltage of 5 amperes, so no adapters are needed. You just need to connect the DVR wiring to the orange power cable of the audio system.
Direct connection to battery
One of the rather complex but reliable methods. The load on the battery will be negligible. But here you can’t do without an adapter or a combination with a multiport charger. You will also need a 15 A fuse.
The connection is made through the engine compartment - either directly using an additional fuse, or through a mounting block where there are backup batteries. The positive contact must be powered from the battery, and the negative contact must be powered from any free wire of the same polarity.
Using additional wires for connection
Ignition
This method is the least common along with the cigarette lighter - such a DVR will not work in a parking lot with the engine turned off. The wires to the device can run along the top or bottom of the vehicle's windshield. Only the positive wire must be connected to the ignition system, and the negative contact must be connected to the vehicle wiring.
How to install a DVR yourself?
There are several ways to install and connect a DVR in a car. Each installation option depends solely on the power supply. Often, car enthusiasts use power supply from the main battery, Ignition terminal, cigarette lighter or interior lamp. The simplest connection method is to connect the recording device to the cigarette lighter. In this case, there is no outside interference in the car wiring, and the recorder cord is connected to the connector in the cigarette lighter to supply voltage.
However, this option is not always acceptable, since many motorists do not want to leave connecting wires in sight. A common way to install a DVR is to supply power from a constant source with a voltage of 12 V. The Ignition contact is often used by drivers, but it has a significant drawback: when the ignition is turned off, events will not be recorded, since the equipment will automatically turn off.
When connecting the recorder to a constant power source (battery), all connections are made through a fuse and a power switch.
Having studied the diagram for constructing relays and fuses, you can connect the recording device. It is recommended that you read the operating instructions before starting installation. As a rule, each model is accompanied by a detailed description of the installation process indicating the polarity of connecting connecting wires. After installation, you need to configure the equipment. First of all, the viewing angle is adjusted. When choosing the location of the video recording device, you need to take into account the possibility of its rotation.
Experts advise paying attention to the settings of control gadgets: shooting mode, date and time of video recording.
How to connect a microphone to a video recording device?
Today, there are a sufficient number of DVR models that are not equipped with a built-in microphone. Regardless of the scope of application of the recording device (in a video surveillance system or in a car), a microphone is necessary for recording conversations or other sounds and their subsequent playback. The process of connecting a microphone to a DVR is not complicated, since all models of equipment have special RCA connectors, which in everyday life are called “tulips”. As a rule, three-wire microphones are used in practice, and the connection diagram to the DVR looks like this.
One wire is connected to the power source, the second to the negative polarity, and the third to the audio output. Before soldering the connecting wires, it is recommended to put a protective mechanism (cap) on the tulip connector. To connect a microphone, it is advisable to use a coaxial cable, since it is thin and combined. A coaxial connecting line is easier to install due to the small diameter of the wire and its flexibility. There are DVR models to which you can connect a microphone via a USB connector. In practice, such devices are most often used to build a video surveillance system. The microphone connection diagram via the USB connector is as follows.
Dangers and life hacks
Reliable operation requires a wealth of knowledge in electronics and electrical networks, as well as skills in handling hand tools and testers. If the connection is not made correctly, the safety of the driver and passengers is at risk. Not only can the contact come loose from time to time, but the wires can fray or cause a short circuit.
It should be taken into account that the entire contents of the device are designed for short-term use. With constant use, especially with a direct connection, the DVR discharges the battery, so provide a circuit break button. Since many DVRs are now equipped with their own battery, this button will activate the contact when the DVR's power source is at a critical charge.
Also, incorrect connection can lead to premature wear of the video device. The discharges may cause audio interference or distort the video signal. And this is a significant disadvantage in its purpose - to protect the honor and dignity of the car owner in conflicts on the road.
Connection methods without a cigarette lighter
If your DVR is connected via a USB connector, there will be no problems with an always busy cigarette lighter. In other cases, it remains to use non-standard connection methods using a standard plug.
Connection to the lampshade
In this case, connecting a DVR without a cigarette lighter involves using the lampshade as the nearest power supply point.
- Use a Phillips or classic screwdriver to disassemble the front interior light.
- Solder the plug wires to the cable connectors or the negative and positive pads.
- Make sure that all connections are secure, otherwise the device will experience interference and the video recording may be distorted.
- Use a universal multimeter to check the mains voltage of the lighting system, determine the ground in the lamp cable and the connection points of the positive wire.
- Disassemble the standard plug of the device, since it is not suitable for supplying power from the lighting system to the recorder. At this stage, it is important to have electrical installation skills.
- Thanks to a special power module, you can ensure complete safety when connecting to a lampshade. The built-in 150 ohm resistor is a key benefit of the power supply. In some cases, it is worth adding load resistors to the electrical circuit if the DVR consumption is less than 200 mA.
- Get rid of the trim on the side walls of the windshield so that you can use a hidden installation of wires to the dome light or the hole in the dashboard.
- If you prefer an open installation, you can lay the cable at the junction of the windshield and the pillar. Make sure that the color of the wire matches the interior trim. Secure it firmly with adhesive plastic staples.
Connecting to the power supply of the car radio
In this case, the process is even simpler, since the power supply of this device also corresponds to 5 V. There is no need to use adapters and adapters. It is enough to fix the gadget and power it to the orange wire that leads to the car radio. The wire can be found under the front panel.
Connection to ignition
The method under consideration is considered the least used, since the recorder will only be able to operate after turning the key.
For this method you will need to do the following:
- fix the gadget and connect it using the adapter;
- wires can be laid along the bottom or top of the windshield and connected to the ignition system;
- at the next stage, you need to find the positive terminal using a tester and attach a wire with the same polarity to it;
- All that remains is to secure the negative (to the negative contacts of the wiring of the car or radio).
Some drivers put the lighting power cable under the trim or simply leave it dangling. If everything is soldered correctly, the car’s DVR will start working without being connected to the ignition. To turn it on, you need to press the button that controls the lighting in the car.
To the ignition
Another method is to connect to the ignition switch. This method ensures that the locking device operates only after turning the key in the lock to the operating position.
Before connecting the DVR in the car, you need to use a tester to find wires suitable for switching.
The harnesses used to start the engine are not suitable for this purpose.
The positive power cable must be carefully routed inside the steering column; it is recommended to weave it into the standard wiring harness and secure it with clamps. The negative signal is taken from the standard ground bolt located near the pedal assembly or under the side trim of the lower part of the body pillar. Switching to points inside the instrument panel is possible; the location is determined by the electrical circuit of the car or by a test device. The connected transformer is located inside the instrument panel; it is not recommended to install it under the steering column cover.
Some owners install an additional power circuit, which will allow voltage to be supplied to the recorder without a key in the ignition. The positive power wire is routed to the battery, and a 2-position switch is located under the instrument panel. In one position, power is provided through the ignition switch, in the other, it comes from the battery. It is possible to use a 3-position key to completely turn off the power to video recording equipment.
Setting up the recorder
Before you connect the DVR to your computer, you need to determine what outputs are on the DVR. As an example, consider the rear panel of the Motorola DCT6208. Of the 4 ports available on this DVR for video (DVI, Video/Audio Out, S-Video and Firewire), Firewire is the only one that carries both video and audio. Since there is only one connection to be made, this is the easiest way to do it. In addition, many computers are already equipped with FireWire, so you don't have to buy a video capture card. If this option is not available, you should use DVI along with Audio Out. If your DVR model does not support DVI, connect via Video/Audio. The last option is S-Video. Here you will also have to use Audio Out. This DVR does not support the latest HDMI standard and USB connectivity transfers audio and video faster than any other alternative.
Step 1:
- Connect the network port of the DVR to the RJ45 port of the computer (LAN network cable).
- Turn on DVR.
Step 2:
- From the menu, select Network Settings. Typically, there are two options here. One is called “Obtain an IP address automatically” and the other is called “Use the following IP address”. Choose the second one.
- After selecting this option, you must specify the IP address of your DVR. Just enter a simple IP address. For example, select "192.168.1.20" and the subnet mask "255.255.255.000". Apply the settings.
Computer settings
To connect the DVR to a Windows computer, go to Control Panel/Network and Sharing Center:
- Here select the option “Change adapter settings” - “Local network connection”.
- Double click on it. The properties window will open.
- Find “IP version 4” and double-click the line.
Now it's time to put the IP address directly on the computer. For example, the DVR was assigned IP "192.168.1.20". You need to install IP of the same series on your PC.
- Enter "192.168.1.21".
- Ping the DVR IP address from your computer or laptop and see the response.
Connection problems
During the connection process, it may happen that the computer does not see the DVR. Most often this happens due to incorrectly installed options, so the first thing to do is reset all settings and carefully reinstall everything. In some cases, the cause may be incorrect pinout of the connecting LAN cable. Some recorder models have their own settings that must be carefully observed. In fairly rare cases, the cause of an incorrect connection may be an antivirus program or firewall.
With this they read:
Outdoor CCTV cameras: key features, models and installation
Connecting an electric lock to a video intercom
Buying a video intercom with the Internet: main features and selection criteria
Video peephole with motion sensor and recording: main features, selection criteria and models
Did you like the article? Share with friends on social networks!
- Sergey
04/18/2018 at 03:33Thank you for the article. At first glance, VSK is just like 2×2. I will try.
Reply ↓
- Vlad
01/27/2019 at 10:42
no-ip is already shareware
Reply ↓
- Sergey
12/14/2019 at 16:51
No, I didn't understand. It’s better to use the services of a specialist, it’s easier and cheaper, and the service is not expensive
Reply ↓
