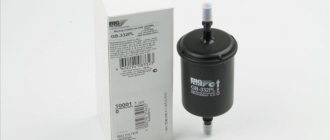
Replacement interval for cabin filter Chevrolet Cruze 1.6 and 1.8
If you look at the maintenance regulations, you will notice that replacing the cabin filter of Chevrolet Cruze 1.8 and 1.6 must be done after 30 thousand kilometers or after 2 years, whichever comes first. However, you should not delay replacing it if you begin to smell dampness in the cabin, the stove or air conditioner begins to work worse, and the windows in the car begin to fog up very much. All these signs indicate a failed cabin air filter. And in order to drive comfortably again, you need to replace the filter element. Moreover, the filter itself does not cost that much money.
How often should I replace it?
Factory regulations provide for replacing the cabin filter at every scheduled maintenance, that is, once every 15 thousand kilometers or every year, if the mileage during this time is less.
In reality, you usually have to change it more often:
- In the summer, when driving frequently on dirt roads with the air conditioning on, avoiding dust in the interior through open windows, the driver drives an even larger volume of dust through the filter. A noticeable decrease in the efficiency of air supply to the cabin occurs already at 7-8 thousand mileage in such conditions.
- In spring and especially in autumn, the main enemy of the cabin filter is humidity: leaves that get into the filter begin to rot, spreading a musty smell throughout the cabin. Shaking out the filter helps a little; you can get rid of the smell only after replacing it.
- Standing in traffic jams, often moving through industrial zones, you quickly contaminate the filter in the same way as on a dusty primer: microparticles of soot contained in exhaust gases and pipe soot are invisible to the eye, but within 6-7 thousand they can clog the micropores of the filter, standing out clearly on his curtain.
Selection of cabin filter for Chevrolet Cruze
For Chevrolet Cruze 1.6 and 1.8 there is one cabin filter:
It has the factory part number GM 13271190. At the time of writing this article (12/15/2016), such a filter costs approximately 500 rubles for the original and approximately 300 rubles for a duplicate.
This is what the cabin filter itself looks like: As you may have noticed, this is the most common cabin filter, consisting of a thick cardboard frame and corrugated filter paper. If you take a carbon filter, as we did, then it costs a little more and has a different number (GM 13 271 191). This filter ensures air purification not only from dust, but also from bacteria and unpleasant odors thanks to a layer of activated carbon in its composition. This is what the filter itself looks like:
Cabin filter for Chevrolet Cruze
The cabin filter cleans the air taken in from outside the cabin from foreign particles, odors and other harmful impurities.
The presence of a filter element in the Chevrolet Cruze significantly increases the comfort of the driver and passengers inside the car.
In order for the cabin filter to efficiently perform its functions, it is necessary to replace it before it exhausts its resource.
It is important to use a product with a body that fully fits the seat.
Also, during operation, periodic cleaning of large debris, such as fallen leaves, may be required.
Progress on replacing the Chevrolet Cruze cabin filter
1. Empty the glove compartment of everything unnecessary and find the following clip-on fasteners along the edges:
2. Use a flat screwdriver to pry each of them in turn and pull them out. It should look something like this:
3. Now you need to disconnect the gas stop of the glove compartment, which ensures smooth operation and at the same time fixes the glove compartment. It is located on the right side of the glove compartment. We simply squeeze its ends with our fingers and pull the loop to the side. At this moment, the glove compartment should fall down, thereby freeing access to the cabin filter.
4. The next stage of replacing the Chevrolet Cruze cabin filter is dismantling the filter cover. It is held in place by three latches, which also need to be bent with your fingers and the filter cover removed.
5. Here is the actual cabin filter itself:
We just pull it towards us and put it away.
6. It is advisable to remove dust from inside and wipe everything with a damp cloth.
7. Install the new filter in place. Please note that the filter must be installed in the correct position, namely in the correct direction of air flow. Typically, the air flow on the original filter is indicated by an arrow and the inscription AIR FLOW. In this case, the filter is installed with the arrow pointing down.
8. After the work has been done, we assemble everything in reverse order.
That's all! At this point, the work of replacing the Chevrolet Cruze cabin filter can be considered completed. In addition to this material, we recommend that you read articles on the topic: Replacing Chevrolet Cruze spark plugs Oil in a Chevrolet Cruze automatic transmission. Changing the automatic transmission oil of a Chevrolet Cruze How to distinguish a fake GM Dexos2 Long Life 5W30 oil?
We are replacing
To regularly inspect the condition of the cleaning element, learn how to remove the filter. The procedure is simple and can be done independently.
Tools
Replacement does not require any special skills or tools. You will need a screwdriver, and the materials you will need are a new cabin filter and a clean rag.
Filters of different brands
There are different types of products, differing in shape and materials. The cabin filter is a plastic box in which a filter element in the form of special corrugated paper is located. It consists of the finest fibers. Air molecules penetrate freely, while dust and dirt remain on the fibers.
Paper products are very popular due to their low cost and ease of installation. Disadvantage: fragility, impossibility of restoration and reusability. They are not resistant to moisture and mechanical damage.
The shape of the product can be panel or round. Based on the type of material, they are divided into regular and coal. It is believed that coal ones purify the air better, trap bad odors and last longer than regular ones. There are oil filters, but they purify the air worse and are almost never used on cars.
Steps
- To change the filter, open the glove compartment - glove box.
On both sides there are special latches - limiters that need to be pulled out. To do this, you need to pry each of them and pull them towards you. Left latch-limiter - Sometimes they come out hard. Since flexible plastic is used to make the walls of the glove compartment, the holes where the latches are located can be bent slightly to pull out the stops.
- After this procedure, the stopper on the right side of the glove box should be unfastened. Then you need to lower the glove compartment as low as possible to get to the place where the filter is located. The cabin filter chamber cover is now available. To remove it, you need to bend the three latches that secure it.
- Next, you should carefully pick up the old element and remove it.
- Before replacing, it is advisable to wipe the seat from dust and dirt with a clean cloth. Now insert the new filter in place of the old one.
- Assembly is carried out in the reverse order: the lid is returned to its place, the stops are inserted on the sides of the glove compartment. This completes the process.
Location of the cabin filter in the Chevrolet Cruze
In a Chevrolet Cruze with 1.6 and 1.8 liter engines, the cabin filter is located in the passenger compartment on the passenger side.
It is located behind the glove compartment, so you can only see it after removing the glove box. The location of the filter is shown in more detail in the figure below. The Chevrolet Cruze uses two types of cabin filters:
- regular, article number 13271190, and the price is about 500 rubles;
- coal, the article number of which is 13271191, and the cost is a little more than 800 rubles;
The manufacturer recommends using only the original product. Experienced car owners claim that there are a number of analogues from third-party manufacturers that are not inferior in quality to the branded filter element. The table below shows the best non-original cabin filters.
| Company manufacturer | Article number | Cost, ruble |
| MANN FILTER | CUK2440 | 300-400 |
| BOSCH | 1987432413 | 400-700 |
| MAHLE | LAK182 | 350-450 |
| TSN | 97765 | 380-590 |
| Nipparts | N1340913 | 390-400 |
| Denckermann | M110660 | 200 — 220 |
| JC Premium | B40017PR | 220-250 |
| GoodWill AG | 199 CF | 260-280 |
| Maxgear | 26-0604 | 300-400 |
| BSG | BSG65145013 | 400-450 |
| SCT | SA 1200 | 420-590 |
| Stellox | 71-10205-SX | 300-480 |
| JS Asakashi | AC9205 | 480-520 |
| Purflux | AH286 | 380-420 |
| Denckermann | M110660K | 410-450 |
| Kamoka | F412101 | 440-500 |
Causes
The cabin filter in a car is designed to clean the incoming air from:
During operation, the air filter becomes dirty, its throughput decreases, which negatively affects the operation of the heating system and comfort inside the car. The microclimate in the cabin depends on the degree of cleanliness of the incoming air, which affects the health of the driver and passengers.
According to the manufacturer's recommendations, the cabin filter in the Chevrolet Cruze is changed after 15–20 thousand kilometers or once a year. But mileage is not the only reason to replace the filter material. The conditions in which the machine is operated are of great importance. If you travel on hard surfaces far from the metropolis in rural areas, then the filter can be changed less frequently. In cities where the air is polluted with exhaust gases, dust, and smog, replacement is carried out more often.
Comparison of new and old filter
The need for replacement is determined after a visual inspection of the old element or by the smell that appears in the cabin when the stove is turned on. If the filter is dirty, the windows will fog up. The reason is the ineffective operation of the car's air conditioning system. Condensation accumulates in the contaminated element, causing a musty smell. If the filter element is dirty, the machine does not heat up in winter and does not cool down in summer. To eliminate the problems that have arisen, you should change it.
Replacing the cabin filter Ford Focus 3
You don't need a huge selection of tools to get the job done. When changing the filter at the beginning, you should stock up on a Phillips screwdriver and a Torx T15 bit to remove the filter cover - you will like the installed self-tapping screw with a Phillips head, as it is also called a “Torx”, then you will already know which screwdriver to take personally.
What do you need, we bought it for a Ford Focus
3 cabin filter, replacing it yourself will take a maximum of 10 minutes. We recommend stocking up on a flashlight, as it is also called, to work in a brightly sunny place - it will be much more convenient. First, we remove the lining under the glove compartment - on the car it is secured with pistons, so it is better to do this in a warm place: frozen plastic is fragile, and as you know, it is not the only plastic part that will have to be dismantled. In winter, you need to keep the car warm for at least half an hour, in other words, heat the interior properly with a “stove.”
Replacing the cabin filter on a Ford Focus 3.
Having removed the trim panel, we move on to the side trim of the center console, which is located at the passenger’s left foot. By picking up the plug with a plastic spatula (or, in extreme cases, a thin flat screwdriver), you can pull it out only toward you (it is held in place by four latches along the edges). A piston is hidden under it, which secures the cladding. There is an option to remove it with a thin spatula or carefully pull it out of its socket along with the panel (this is easier to do in a warm place).
In the farthest part of the stove body, almost at the engine shield, there is a cabin filter cover. It is held at the bottom by a self-tapping screw, after unscrewing which the cover can be pulled by the eyelet only towards you and upwards; after completion, pull out the old cabin filter
.
It is worth combining filter replacement with cleaning and disinfection of the air conditioner radiator: you should not wait for the characteristic musty smell to spread through the cabin, but carry out preventive maintenance in advance, especially since everything has already been disassembled.
To begin, use a narrow nozzle of a vacuum cleaner to clean as much of the cabin filter compartment as possible, then treat the radiator with an aerosol cleaner. They are sold with convenient flexible spouts that allow you to evenly spray the composition over the radiator area. You can make the composition yourself by mixing a pharmaceutical solution of chlorhexidine with any fragrance.
