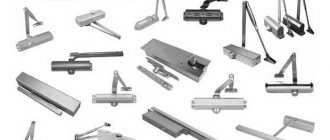
DIY wheel bearing puller
Homemade wheel bearing puller: drawings, photos, videos of a homemade device.
The author decided to make a homemade version of a tool for pressing out wheel bearings, an analogue of the one sold in stores.
Steel plates with a thickness of 8 mm and a pipe with a wall thickness of 7 mm were found as materials for manufacturing.
Third stage
Now you need to weld two supports to the body. The seam must be strong and airtight. Let's start working on securing the nut. We screw the bolt into the hole and thread the nut. We secure everything with a welding seam, but do not overdo it with the current, otherwise the nut may melt. It can be attached externally or internally. With the nut located internally, the overall design of the puller seems more durable and reliable. The threaded rod will act as a handle. This makes it much easier to remove the bearings.
Wheel bearing puller drawings.
A 320 mm long stud was also needed and a nut was welded to it. I also pressed the ball from the bearing into the center of the stud.
According to the drawings, they made these:
Cup with mate.
Also two washers measuring 74 mm and 62 mm.
This is what the entire set of tools for pressing out wheel bearings looks like.
In this video, the author shows in detail a wheel bearing puller.
Characteristics and purpose
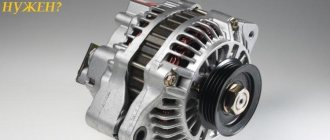
The puller is designed to unscrew or tighten the nut that regulates the tension of the ball bearings of the carriage, and the threaded bushing that holds the assembly in the bicycle frame cup.
The device is turned on lathes and milling machines or produced using stamping technology from alloy tool steel. To transmit the force required to loosen or tighten the nut, a wrench is used in relation to the head; stamped pullers have an integrated lever.
The bicycle carriage consists of a shaft and 2 ball bearings, the tension of which is adjusted by a threaded metal cup. On the opposite side of the axle there is a threaded bushing with a stop that limits the mobility of the bearing rings. The carriage and cup are screwed into a metal cup welded to the bicycle frame.
To unscrew the elements, you need to turn them in the direction of rotation of the pedals (on the left side the element is turned counterclockwise, and on the right side of the bicycle - clockwise).
How to make a universal wheel bearing puller with your own hands? Read and craft
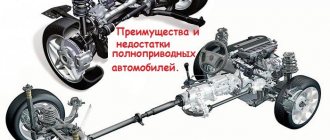
Most car enthusiasts are interested in how to make a universal wheel bearing puller with their own hands. After all, buying such a tool in a store is not a cheap pleasure. In addition, factory products are often made for a specific model. Therefore, if you buy a puller for one car, you are unlikely to be able to use it on another model. By making a universal puller, you are guaranteed to be able to change bearings on different machines. And almost every driver is faced with replacing this element of the hub, and repairs cannot be delayed. The wheel may become stuck while driving, causing a serious accident.
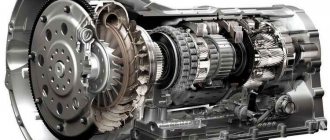
How to make a universal wheel bearing puller with your own hands? First, you need to understand the types and features of these bearings. Nowadays, only double-row bearings are used in passenger cars. They are more reliable and efficient. They are divided into the following varieties:
- Ball;
- Roller;
- Roller cones.
On passenger cars, ball or cone types are usually used. They are more compact and much more reliable. Depending on the installation method, they can be external or internal. Now, there are bearings with the ability to control the speed of rotation of the wheel. And depending on this, the operation of the bearing is regulated.
Drawings and diagrams
Cyclists publish diagrams of pullers for carriage cartridges made from improvised materials. When using a homemade tool, the risk of irreversible damage to the glass in the bicycle frame increases (the part cannot be restored).
The metal housing is drilled out from a standard hole or saved as an adapter sleeve for installing a carriage with reduced dimensions. Original pullers prevent damage to parts, speeding up the bike repair process.
Bicycle carriage puller diagram.
Making a puller
To work, you will need a grinder, as well as a welding machine. You will need to drill a hole, so be sure to use a drill. To create such a device, you will need a metal profile and a corner. The device is assembled as follows:
This completes the assembly of the puller. It remains to be tested. To do this, we take the hub in which we are planning to change the bearing. We put a puller on it. To do this, the legs with hooks are inserted behind the hub, and the cylinder is screwed close to the bearing. Make sure that it fits completely onto the bearing race. Next, by tightening the bolt, we squeeze out the bearing.
Replacement features
The main symptom of a malfunction is a whine from the wheel, which intensifies when cornering. An additional symptom will be heating of the hub. Delaying repairs may result in wheel jamming. In some cases, the heating can be so intense that the inner race of the bearing is welded to the steering knuckle axis. In this case, you will have to install a new fist.
When replacing, do not skimp on lubricant. The excess will simply be squeezed out of the hub. It is much worse if there is not enough lubrication. This will lead to rapid wear of the bearing. Therefore, experienced mechanics recommend periodically checking the presence of lubricant in the hub. If necessary, it is added. Most often, Litol 24 is used as a lubricant; this material is best suited for use in wheel bearings.
Conclusion
. There are a large number of different devices available for high-quality car repairs. Separately, there are pullers that allow you to remove bearings and seals. At the same time, drivers often wonder how to make a universal wheel bearing puller with their own hands. In fact, this is not difficult to do; all you need is straight arms and some tools. The puller will be comparable in characteristics to factory analogues. And such a design will cost significantly less.
Reliable simple do-it-yourself bearing puller
In this instruction you will learn how to make a simple, powerful puller that will always help you out in a difficult situation. To assemble it you will need a piece of thick-walled pipe and a thick steel plate. If you wish, you can make yourself several pieces of these pullers for products of various sizes. Let's consider in order how to make such a device.
Materials and tools used by the author: List of materials:
- thick-walled pipe; - thick steel plate; - bolt and nut (larger); - a metal rod (a handle is made from it); - dye.
List of tools:
— welding; — grinder (cutting disc, metal brush, and grinding disc); — a drill with large bits or a drilling machine; - lathe, cutting machine (optional).
Puller manufacturing process:
Step one. Preparing the main part
The main part of the puller is a piece of thick-walled steel pipe; it acts as a frame. If the pipe is not strong enough and the loads are large. It can easily bend. The thickness of the pipe walls must be at least 3 mm.
We cut off the required piece from the pipe; the author uses a cutting machine for this, but everything can be done with a grinder. Now comes the hard part, you need to cut a window in the pipe. This can be done using a grinder; it takes a long time, but is quite doable.
Step two. We make the upper and lower supports
For the upper support, the author decided to use the thickest sheet steel possible. Cut out a circle of the required diameter. The author uses a grinder for work, first we cut out the “polygon”, and then using a grinding wheel we bring it to perfection.
Cut out the other circle in the same way. Here the author used slightly thinner steel, but it’s better not to risk this, since the loads on both supports are approximately the same.
Finally, you need to finalize the supports. You need to drill a hole in the top support for the bolt. First we drill a small hole with a drill, and then drill it out to the desired diameter. The author used a lathe for these purposes.
As for the lower support, we also drill a hole in the center; its diameter should be slightly larger than the diameter of the axles from which you are thinking of removing the bearings. Then cut out a triangle shape for this hole. The supports are ready, let's move on!
Having welded the supports, you now need to secure the nut. We wrap the bolt in it and insert it into the hole. We weld the nut well, but try not to overheat, as the metal may become soft. The author attaches the nut from above, but I would recommend fastening it from the inside, so it will rest on the support, and the tensile weld may not be very reliable.
Finally, all you have to do is secure the handle; for this, the author used a threaded rod. Using a handle will make it convenient to remove bearings that are not too rigid. Otherwise, you can always use a wrench.
Well, let's check it out? As a test, the author tried to remove the bearings from the drill armature and so on. Now everything is done easily and at the same time it is guaranteed that you will not damage the product. In addition to bearings, this device can also remove various bushings and other similar parts. If the axle turns out to be too thin, you can come up with a spacer for the bearing to be removed that will rest against the base of the puller. Well, or you can make a separate puller for small parts, it’s easy to assemble.
Before removing, it is recommended to lubricate the axle with oil or WD-40, this will make things go faster. That's all, good luck and take care of yourself! Source
Receive a selection of new homemade products by email. No spam, only useful ideas!
*By filling out the form you agree to the processing of personal data
MY MOTORCYCLE
Today we'll talk about pullers. Since this is a very important tool that is needed in the process of repairing a motorcycle. Why do we need a puller - with its help we can remove those evils or parts in the bike engine where our law of “hammer, chisel and some kind of mother” is not suitable or is dangerous for the motor. After all, a motorcycle nowadays requires more gentle handling than before.
There are basically two main reasons why you can’t do without a puller: there is nothing to grab onto and there is no strength to drag. Like Archimedes, you need a lever and a fulcrum. Since there are a great variety of pullers in nature and all types cannot be counted in this article, we will focus on the main ones.
The first thing is what to focus on. Most pullers are actually levers (although they often don’t look like them) and, like any lever, they have two fulcrum points. One is, as a rule, a removable part. If it is being replaced - like, for example, a broken bearing - you don’t have to stand on ceremony with it: even if it crumbles into pieces, the main thing is that it does not complicate disassembly and does not damage the necessary parts (and hands, of course).
This puller is convenient for pressing bearings from shafts.
The second point of support is more responsible. The general rule is this: the support point should be located as close as possible to the part being removed (so that there is no distortion), the load on the area of the puller supports should be uniform (therefore, for example, be sure to place the puller legs at equal angles to each other so that the axis does not warp) Finally, the support itself must have sufficient strength. Otherwise, it will suddenly crumble at the most necessary moment and goodness is gone.
For example, if you rest the puller on a thin-walled crankcase cover, the likelihood of getting a hole in it is much higher than installing or removing the part. Designed for pressing out shafts, pulleys, etc. threaded holes in aluminum crankcases sometimes do not withstand the forces, and the threads crumble, and sometimes - even worse - the crankcase bursts.
Mandrel for removing and installing BMW steering column bearings. The massiveness and precision of manufacturing ensure the accuracy of repair work - even using the “shock” method.
Most often, this happens because some “masters” use the set screws of the puller to press out the part, instead of screwing them all the way and pressing the part out with the puller screw. That is, work as needed, and not: “I’ll do that crap anyway”
Pay attention to the presence of a thrust bearing under the bronze nut - it relieves the parts from torque.
And some people simply don’t have the necessary “tool”, and they build it on the fly from a plate with two holes. It also happens that the thread has already been torn by previous attempts, and any attempts to use it again end in failure. If there is no “fulcrum”, an inertial puller can help. It is a rod with a connecting part (thread corresponding to the part or other grip) with a limiter and an annular weight that slides along the rod. They hit the limiter with a load, and the part (most often this is how the shafts are removed from the crankcase) comes out due to the inertia of the massive assembly in which it is pressed.
If the knot is light, this method is not suitable. In general, impact technology is not very common when pressing out parts. Firstly, because the impact is absorbed by the elasticity and inertia of the parts
Secondly, directing the blow exactly in the right direction (which is important when pressing) is almost impossible. And any deviations will lead, at best, to distortion of the part, and at worst, as a consequence of the distortion, to jamming of the edges and damage to the mating surface. How many seats for bearings are broken by such equipment!
Wedge-shaped pullers (slotted screwdrivers) are indispensable for such operations. The main thing is not to overdo it!
Which pullers can be considered the oldest? Wedge ones, of course, are just driven into the gap to separate the parts. But there are almost no such places in a motorcycle, and the details are delicate and fraught with consequences. Usually, for routine work, powerful slotted screwdrivers are sufficient as a wedge puller. They can also be used to hook the crankcase cover (just don’t try to stick a screwdriver into the connector - you’ll crush the edges! - you can only insert a knife blade into it, and there are special “ears” on the casting to operate the lever), and remove the lever (kick, clutch) from the splines. But - no blows.
Most power pullers are based on screw mechanisms, which make it possible to create large forces with small movements and control the process. Here, I repeat, the main thing is the correct location of the puller, strictly along the axis of the shaft (bearing). This is why universal pullers with swinging arms are less convenient than special pullers that fit to size (or with a set of centering inserts).
Three-legged puller with legs secured with a screw-on clip. As a rule, such a design is difficult to ensure accurate alignment. Acceptable effort is average. Its advantage is its compactness.
In the most advanced three-legged pullers, the legs are fixed to ensure that they are evenly tilted. A universal puller with two paws moving along a guide allows you to install the paws asymmetrically to the hole, maintaining the alignment of the screw (which in practice, however, is rarely required).
But how can you tell if a puller is good or bad? First, look at the quality of execution. There is play in the holes, threads, the possibility of the screw being skewed - a crappy device, there will be many problems. The steel must also be appropriate, with heat treatment so that it does not bend under load (or at least not be scratched by a nail - a rough test for a non-specialist).
Universal two- or three-legged puller with smooth adjustment of the opening of the legs. The paws can be rearranged here with the grips facing outwards. The alignment is good, the permissible forces are above average.
The best examples have a support bearing (or a hardened ball at the end of the screw) so as not to transfer torsional force to the part (and not to displace its own support points). There are also very specific pullers - for example, for engine crankcase covers, chain drive sprockets, etc. If only there was an opportunity to purchase them.
Believe me, it is often easier to buy or make a suitable tool (and sometimes you can do without a lathe: with a sharpener, file and welding - after all, micron precision for support, as a rule, is not required) than to pick with a screwdriver or swing a hammer, risking ruining the motorcycle, both hands and mood. And the tool will always come in handy.
Oil filter pullers for motorcycles are of little relevance. Moreover, each of the ones presented here has its own disadvantages. The black one is comfortable, but it only fits one size, and the chain and three-legged ones require constant tension for fixation, which is difficult to ensure without holding them with one hand, while the other works with a key...
Ten tips for working with pullers:
- Before disassembling, wet the parts with a penetrating lubricant. Make sure that the part is freed (for example, the retaining rings are removed - they are often not visible under a layer of dirt), clean the surfaces.
- Install and center the puller. If necessary, use bushings and liners. Fix the legs (supports) of the puller.
- It is most convenient to use a ratchet wrench to rotate the puller screw.
- Do not use an extension cord. Pullers, as a rule, are designed so that the force of a wrench 20–40 cm long is quite sufficient. Otherwise, the puller may break. If a part doesn't work, make sure you haven't forgotten anything. For example, some components for disassembly - and especially assembly - need to be heated or cooled. Thus, “hot” the crankshaft with bearings is inserted into the engine crankcase, and “cold” the valve guides are inserted into the cylinder head.
- When assembling, pay attention to the edges of the mating parts. There should be no burrs or dents on them. If the edge is sharp, it is worth removing a minimum chamfer (0.5–1 mm).
- Measure the mating parts. Typically, the interference does not exceed 0.5% of the diameter (i.e. 0.1 mm per 50 mm), with the exception of thin-walled and pliable parts (boots, oil seals).
- Before assembly, lubricate the parts (and the rotating part of the puller) with grease.
- Measure the height of the parts and mark their location after pressing. This is especially important if the part is not installed point-blank, but, say, in the center of the groove.
- When installing, the puller must be supported only on that part of the part that directly experiences resistance - for example, on the outer race of the bearing when it is pressed into the wheel hub and on the inner race when installed on the shaft. Do not lean on covers, separator, seals, etc.
- If during pressing the force increases sharply, but the part has not yet reached its place, it may be warped. In this case, you need to disassemble everything, clean out the dent in the seat with fine sandpaper, and press the part in again. If the distortion has just begun, a light blow with a hammer (through a spacer so as not to rivet the metal) on the protruding edge can help.
Good luck with your repair......
DIY wheel bearing puller
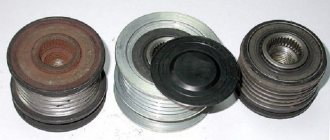
It's been a long time since it was time to change the front wheel bearing. There is no puller, not all stores have them, the market is a bit far away, but there is a bunch of scrap metal. I turned on my BRAIN, picked up the barbell and off I went. The only thing I bought was a puller for ball balls, it was annoying and inconvenient to pick them out with a pry bar.
Here's the whole set.
A piece of 75mm pipe 50mm long, two strips 70x30x5 fastened with 6 bolts, a very thick-walled washer D45mm, an M16 bolt and most importantly a crown for 65mm sockets. The pobedit teeth need to be removed from the crown, I was lucky and the reinforcement in the concrete wall did it for me)) )
Which wheel bearing puller to choose or how to make it yourself
- ✅ Contents of the article:
- 1. Types of puller
- 1.1 Selecting a puller for removing and pressing bearings
- 2. Overview of wheel bearing pullers
- 2.1 Cup Force 9T0311
- 2.2 Three-jaw KS TOOLS 630.3002
- 2.3 Two-jaw Kukko K-2030
- 2.4 Hydraulic puller
- 3. Review of pullers for VAZ and LADA
- 4. Recommendations for choosing a tool
- 5. Making a puller with your own hands
- 5.1. Three-jaw tool - manufacturing instructions
- 5.2 Do-it-yourself cup puller
- 5.3 Self-production of two gripping removal tools
- 5.4 Instructions for removable traverse
- 5.5 Drawings for self-production
- 6. Operating principle of cup puller
- 7. How to work with a three-jaw puller
- 8. Operating procedure on a hydraulic press
- 9. Using a bench vise instead of a puller
- 10. Impact method instead of a puller
- 11. Conclusions and additional useful materials
A wheel bearing puller is a specialized tool designed for pressing and pressing parts into vehicle hub units.
Since the bearings are installed on the seating surfaces with interference, pressing or pressing them requires a lot of force to be applied to a limited area of the unit. Conclusion - for this operation you need a reliable and also universal tool.
A wide range of size ranges for hub units correspond to various types of wheel bearing pullers (HBP). Choosing the right puller for replacing bearings is not easy. You will learn what parameters to follow by reading the article. We will also touch on the topic of making the device yourself and how to operate the tool.
Types of pullers
There are several types of devices:
- A unit consisting of a hollow metal cylinder (head). On its end surface there are working teeth. On the back of the puller body there is a 6-sided protrusion for a wrench; An additional square hole is provided to ensure centering of the device relative to the axis of the threaded bushing. A simplified puller without a 4-sided channel breaks off when force is applied and crushes the protrusions on the carriage cup, making it difficult to repair the unit.
- A tool stamped from steel sheet, consisting of a working head with profiled protrusions and a handle with a rubber protective cover. To unscrew the cartridge mount, no additional wrench is required: the cyclist presses the puller against the nut while simultaneously applying force to the lever.
- Adjustable wrench with replaceable pins, designed to remove carriages from different manufacturers. Metal contact rods are screwed into the working jaws of the tool; There is a mechanism for smoothly adjusting the distance between the pins. The handle with a protective rubber cover is rigidly connected to the grip. The tool is manufactured using stamping technology.
Universal pulley key.
Types of wheel bearing pullers
Study the summary table, which presents several main types of BSC, as well as specific recommended models.
What pullers are needed to remove and press in wheel bearings?
For the front and rear wheels, it is recommended to use two types of tools: with three or two legs and a cup puller - this is the minimum set of removable tools for the correct and safe removal and pressing of parts of hub units.
Wheel and bearing puller for VAZ and LADA cars
To replace the front and rear hub units on VAZs, according to the manufacturer’s recommendations, two types of removable devices are needed.
- Gripping tools are used to remove the ball bearing from the rear wheel.
- For pressing and pressing the bearing at the front wheel, cup types are used.
You can select models of these tools from the overview presented above. To select a cup puller, focus on the outer and inner diameters of your bearings, but as a rule, it is enough to read reviews and get advice from the seller.
vazoved
I drive a LADA VESTA CROSS, Moscow
Then there will simply be no one to pay the fines! This is a Korean 7 in 1 car tablet video recorder for Android..
I forgot about fines and Yandex Navigator.
There is FULL HD shooting, radar detector and GPS with 32 satellites. I got it at a reasonable price for just a few thousand here >>>> MORE...
Do-it-yourself universal wheel bearing puller
Buying a puller is not always justified, since it is not used so often when operating and repairing a car, so if you want, you can make the tool yourself.
Homemade tools also have advantages:
- Proven material.
- Possibility to make it to your own size.
- The cost is lower than that of a purchased device.
- Possibility of finishing or alteration.
Homemade three-grip tool
This type of tool is the most difficult to manufacture, since the parts have a unique shape and require precise dimensions to mate them.
Required tools and materials:
- Grinder with cutting disc for metal;
- Sheet 1 m2 10-20 mm thick;
- Hairpin M18x1.5x 400 mm;
- Two nuts M18x1.5 height 20 mm;
- Pipe section outer diameter 89 mm, wall thickness 7 mm;
- M10 bolts for hanging the legs in the eyes;
- Welding machine.
The legs are cut from a sheet of 10-20 mm, L = 200-220 mm, the cross is made from an M18x1.5 nut, or cut out of a solid sheet with a grinder. Mark the contours of the crosspiece, cut it out, drill a hole in the center, then use an M18x1.5 tap to cut the thread.
Second option: weld a nut to the sheet instead of threading it. Holes are made in the eyes for M8 or M10 bolts.
Video: “Making three grippers”
Cup puller
The main part of the tool: M18 pin, cup and replaceable disks. A threaded bolt and nut can be picked up in a store, but the remaining parts will have to be ordered from a turner based on a sketch or drawing.
For VAZ 2108, 2109, 2110, 2111 washers are suitable - 30, 34, 37, 77 mm, bowl (ring) - 77 mm. For other car brands, find the original part number and its dimensions, and then cut out the appropriate washers and cups.
Video: “Do-it-yourself cup puller”
Double jaw wheel hub puller
Having amateur welding skills, two gripping devices are made from plates, nuts, and studs.
Not the easiest way to make a SSP in a garage; to assemble it you will need:
- Sheet 5 mm;
- Bolt M 14x1.5x 240;
- Bolts with nuts M6;
- Nuts M14.
Video: “Do-it-yourself two-grip device”
Removable traverse for pressing out
This option is suitable for pressing and pressing the ball bearing out of the hub without removing it from the knuckle. The photo shows an example of such a design.
- One or two strong steel plates are taken, a hole for the bolt is drilled on top and a nut is welded.
- A second nut is welded coaxially from below.
- Next, holes are made for M10 bolts at equal intervals. The legs are cut from a 10 mm plate.
- The two plates are bolted together. Between them there is a long M16 bolt.
The only purchase is a crown to match the size of the ball bearing race. Cut the required washers from a 10 mm strip.
Tools and materials required:
- Bulgarian;
- Welding and drilling machine;
- Internal pipe section D 75 mm;
- Strip 70x30x5, 2 pieces;
- M6 bolts with nuts 4 pieces, lock nuts 8 pieces
- Thick-walled washer D 45mm.
Advantages and disadvantages
Advantages of the puller:
- the unscrewed carriage cup can be reused;
- the tool protects the threads in the frame glass from damage;
- The puller reduces the labor intensity of repairs.
Disadvantages of the tool noted by bicycle repairmen:
- The puller is suitable for unscrewing only 1 type of nut;
- when using a spanning tool, damage to the working edges of the carriage cup may occur;
- An additional wrench is required to operate the head puller.