Types of load forks
Before buying a load fork, you need to decide for yourself - do you need it?
Evaluate your experience in using a car battery, consult with fellow motorists, read forums on the Internet, etc. A loading fork is not an essential item like a spoon and fork in the kitchen. Is it worth spending a certain amount of money on a device that will be used a couple of times a year? Moreover, if friends have such a device and you can always ask for it for one day or even a couple of hours.
But if you still decide to buy a load plug, you need to decide: what batteries will you test?
There are two types of load plugs - for acid and alkaline batteries.
It is not recommended to use the same type of plug to test different types of batteries. It should be borne in mind that there are no universal plugs that can be used to test any type of battery.
So, if the resistance of the load plug for acid batteries (rated battery voltage 2.0V) indicates a load current of 100A, then when testing an alkaline battery (rated voltage 1.2V) with this plug, the load current will not be 100A, but only 60A:
1.2V / 2.0V * 100A = 60A
Those. the battery will be underloaded, as a result of which a faulty battery may be mistaken for a working one.
So, if you plan to operate batteries with a capacity of up to 90 A/h, then you must buy a load plug based on the presence of a current load of 100 A in it.
If you test batteries for trucks, then you need to buy a load plug with a load of 100/200A.
Working principle of the load fork
Sometimes batteries, for unknown reasons, refuse to turn the car engine. It seems that the voltage at the terminals shows normal, and the control light is bright, but the battery does not work under load.
The battery charge level is assessed using the following indicators:
- Voltage 12.7 V or more – excellent charge;
- Voltage 12.6÷12.69 V – good charge;
- Voltage 12.5÷12.59 V – satisfactory charge.
If the voltage is below 12.5 V, then such a battery must be charged; it is not advisable to use it, especially at sub-zero temperatures to avoid freezing of the electrolyte.
Testing batteries is quite simple: first we check the open circuit voltage. For a working and fully charged battery, it should be in the range of 12.6 ÷ 12.7 V. Some battery manufacturers consider 13.0-13.2 V to be normal voltage.
If the open circuit voltage is below 12 V, this indicates a 50% discharge of the battery.
But if you connect a load to the battery, the voltage parameters will be completely different. It is necessary to use a load, because often all batteries support normal voltage, but “dead” ones cannot withstand the load.
Then we check the voltage value with a load for 5 seconds. The load fork creates a load that is 2 times the battery capacity. Those. if the battery has a capacity of 50 A/h, then the load should be 100 A.
If, when connecting a load, the voltage drops below 10 V, then your battery has serious problems.
There is an opinion among novice car enthusiasts that using a load fork harms the battery. This is a false judgment, not supported by practice. It simply simulates one engine start, i.e. one-time energy consumption by the starter from the battery.
Normal voltage under load
When the button is pressed, our voltmeter should show a value of at least 10 V! At the moment of the pause, the voltage should return almost to its original value (for example, 12.5 V). If in the 10 seconds that we held the button pressed the voltage dropped below 10 V, then the battery does not hold the load and most likely will not be able to start the car normally. In other words, the difference between the voltage under load and the voltage without load should be no more than 3 V.
We should conduct about five such tests “load (5-10 sec)-pause (30 sec)”. If after the fifth test the voltage under load does not drop below 10 V, but confidently “freezes” above, then the battery is fully operational and is ready to start the car even in severe frost.
To assess the condition of the car's electrical equipment, you need to know how to use the battery load plug. Such skills are especially necessary today, when the installation of numerous additional electronic equipment and year-round trips with headlights on do not allow the battery to receive a full charge from a car generator. In addition, in the cold season, the process of its self-discharge accelerates. In such conditions, periodic monitoring of its condition is necessary.
How to use a battery load plug
It will be useful to know for all drivers who prefer to carry out simple maintenance operations on their car themselves. Timely charging of the battery with a stationary charger will extend its service life. Such a measuring device will not require any special financial costs, and can bring great benefits.
Why do you need a battery test?
modern car dashboard
It is especially important to carry out this operation before the onset of cold weather. During such a period, the load on the battery increases significantly, plus the cold accelerates the self-discharge process
A battery inspection can be carried out with a conventional voltmeter, but it is almost impossible to reflect its actual condition only with its help. For an objective examination, you need to use a load fork.
What it is?
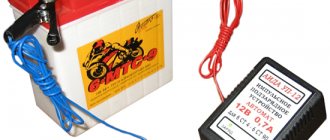
It is a simple device that contains a voltmeter, one terminal in the form of a metal rod, and the second is a piece of thick cable with a tip. There is also an insulated handle for easy operation of the device. The device may have one or more additional resistances that are needed to assess the performance of the battery. Each of them is designed for a current of approximately 100 Amps.
How is the battery checked?
When operating it in a temperate climate, the electrolyte density should be approximately 1.27 g/cm3
.
If this indicator is normal, you can continue checking; when a discrepancy is detected, you need to correct it. To do this, you need to purchase an electrolyte with a density of 1.33 g/cm3
and bring it to normal in each jar.
The test should be carried out in two stages, without load and then under load. It is advisable to carry out such a check only after the battery has been “settled” for several hours after charging or after a trip. Connect the load plug to the battery without additional resistance and look at the voltmeter readings. In the case when its readings are within 12.6 - 12.9 Volts
, we can “conditionally” consider the charge to be equal to 100%.
high currents
During such a test, sparking may occur when connecting to the battery, so the plugs must be closed. If the test shows that the voltage under load will be more than 9 Volts, the battery is in perfect order, otherwise it needs to be saved. We hope that after reading this article it has become clear how to use a battery load fork. Carry out regular maintenance and checks on your car's battery to ensure it's in good condition no matter what time of year it is.
Orion NV-01
Since the financial issue worries many buyers of this device, let’s compare it with a more expensive model from another manufacturer. The Orion NV-01 load fork costs about 600 rubles, and a more serious device, the Autoelectric N2001, costs 3,650 rubles. Therefore, Orion NV-01 can most often be seen in the hands of car owners.
The delivery package does not include the most valuable thing - instructions, no warranty card. As it turned out, the instructions are printed in small print on the packaging itself.
Let's move directly to the design. What pros and cons do we get for this price?
Design of the Orion NV-01 load fork
Structurally, the plug is made in a modernized body, but the simplest “two-pin” technology is used.
The first pin (with the letter B) is connected to the battery positive. This is purely a voltmeter. On the voltmeter we will see the voltage without load.
The second pin is made with a declared load of 0.1 ohm, which is approximately 120 A.
There is a wire with a crocodile, small, frivolous, but in principle why more?
On the front side of the case there is an analog voltmeter with a range from 0 to 15V and the ability to calibrate the readings.
Probably no other load fork has such a good view of the inside of the device.
Some might say that an analog voltmeter is inaccurate. And indeed, when taking measurements you have to look closely, the division value is 0.5V. The fork takes some getting used to.
How to use the Orion NV-01 load fork?
We take a 12-volt car battery, 60 A/h. We connect the wire with the alligator clip to the negative current drain of the battery.
We connect the right pin (with the letter B) to the positive down conductor. On the voltmeter we see a reading of ~13 V. In fact, the battery voltage is slightly lower (12.5 V - measured with an electronic voltmeter). We measured the open circuit voltage.
Then we connect the left pin for no more than 5 seconds to the positive down conductor. On the voltmeter we observe a reading of 10.5 V. Then we measure again using the right pin and observe the voltage recovery.
Yes, the measurement accuracy leaves much to be desired, but what can we demand from a device that costs only 600 rubles?
If you supplement the load fork with the simplest digital voltmeter, purchased on Aliexpress for 50-60 rubles, then the accuracy of the measurements will be simply “super”.
The average user is satisfied with this load fork model in all respects in terms of home use.
What are the advantages? This is the price, simple design, open body, nothing to break.
Watch the video: Checking a car battery with a load fork.
Orion NV-02
Structurally, it is slightly different from its younger sister - Orion NV-01.
- To test batteries with a capacity of up to 90 A/h, 1 spiral is connected, with a load current of up to 100A.
- To test batteries with a capacity of over 90 A/h, two coils are connected, the load current is 200A.
A central pin is used for measurements.
Voltmeter range 1-15 V.
The load fork can be used in two versions.
1. As a voltage meter (voltmeter), for which you need:
- — disconnect both spirals, for which you need to unscrew the right and left nuts near the dipstick;
- — connect the crocodile to the negative current lead of the battery or to the vehicle ground;
- — measure the voltage at any point in the car. If the wire is not long enough, you can lengthen it.
2. Testing the battery under load:
- — if you are testing a battery with a capacity of 15÷100 Ah, you need to tighten one nut near the probe;
- — if you are testing a battery with a capacity of 100÷240 Ah, you must tighten both nuts near the probe.
Measure the voltage at the battery down conductors under load. Readings from the voltmeter are taken after 5 seconds. measurements.
The degree of charge is determined according to the tables:
Dependence of the battery charge level on voltage at idle (at t 20-25°C)
Dependence of the battery charge level on voltage at the end of 5 seconds of testing with a load fork (at t 20-25°C)
For more detailed information, read the instructions.
Why do you need to check your battery?
As mentioned above, the battery is a device responsible for starting the engine of any vehicle, and its serviceability determines whether you drive a car today or walk. Unfortunately, buying a new battery does not guarantee that it will be in good working order, so for peace of mind, it is better to check the battery with a load fork when purchasing. How to carry out the check will be described below. If you haven’t gotten around to making a load fork, then there are several other ways to test a battery without a load fork. The main ones:
- external (visual) inspection of the battery;
- electrolyte level measurement;
- diagnostics of electrolyte density using a hydrometer;
- check using a voltmeter as well as a multimeter.
Article on the topic: Real fuel consumption on a Ford Transit
Orion NV-03
Using this device, you can determine the state of charge and serviceability of 12-volt batteries, as well as check the generator and on-board network equipment.
Structurally, the device is made similar to the previous model, with the exception of a digital voltmeter (liquid crystal display).
When stored, the device is in “sleep mode”. To wake it up from hibernation, you can press the “Mode” or “Select” button on the front panel or touch any battery terminal with a probe.
The device has several main modes:
- - an ordinary voltmeter;
- — measurement of battery voltage with load;
- — mode for viewing the results of previous measurements (“LOG”);
- — saving the results of measurements;
- — viewing saved results;
- — measurement of battery capacity;
- — mode for setting a time limit for measurements.
Design Features
Unlike previous models, a digital voltmeter is used.
Added the ability to determine the battery charge level and the ability to set the measurement time.
Controls:
- Digital LCD display.
- Button . This button navigates between modes and exits installation modes.
- Button—transition from the mode name to numerical measurement values, change numerical values in setting modes.
The procedure for using a load fork as a voltage meter (voltmeter)
By pressing the button we select the mode.
To disconnect the load spirals, you need to unscrew both nuts on the right and left of the stylus.
— connect the crocodile to the ground of the car or to the negative current drain of the battery.
— measure the voltage at any point in the car. If the wire is not long enough, you can lengthen it.
Battery testing
First you need to measure the open circuit voltage. To do this, connect the black alligator clip to the negative terminal of the battery.
We unscrew both nuts (disconnect the load) and pin the probe onto the positive terminal of the battery. We record the readings of a digital voltmeter.
Then we test the battery under load.
If the battery being tested has a capacity of up to 100 A/h, then tighten one nut (connect one load coil).
If the battery is from a truck (capacity above 100 A/h), then by tightening the second nut we connect another spiral.
We measure the battery voltage under load. We pin the probe onto the positive terminal of the battery.
The measurement starts automatically. At the end of the measurement, a beep will sound.
Mode for viewing the results of previous measurements
When selecting this mode, you can view the results of the measurements taken, for which you need to press the button and select the mode.
The display will show the numerical value of the measurement.
To save the results of the measurements, you must press the button and select .
Long press the button. The icon will appear briefly on the display.
The values will be saved.
Determining battery capacity
Using the button, select the “Charge” mode. appears on the display.
After 3-5 seconds, a digital value of the battery charge level (in percent) will be displayed.
How to set the measurement time
To enter the time setting mode, you must simultaneously press the and buttons. The display will show , followed by a numeric value. Using the button, set the required value in seconds from 1 to 9.
For testing batteries with a capacity of up to 100 A/h, the value is set to 5, and for automobile truck batteries, the value is set to 9.
For the device to remember your actions, you must press the “Mode” button.
For more detailed information, read the instructions.
How to check the battery?
A good battery is an important component of the smooth and trouble-free operation of any modern device. This is especially important for cars, since a battery that stops working in the middle of the road can significantly complicate life for both the driver and passengers. Checking the battery is a simple action that does not require special skills, which will help you avoid such incidents. Knowledge of how to test a car battery for performance will be useful when buying a used car, a second-hand battery, or choosing a battery in a store that does not inspire much confidence, when identifying the reasons for the inoperability of any device.
There are currently three main types of batteries: lead-acid, lithium and alkaline. Of these, lead-acid batteries are most often required to be tested, as this type of power supply is commonly used in cars, motorcycles and mopeds.
The time of greatest vulnerability of such a battery is winter, since the electrolyte, consisting of a mixture of sulfuric acid and water, is sensitive to cold, and the serviceability of the battery may be at risk. Do not forget that the combination of negative temperatures and deep discharge can kill the battery in the shortest possible time. Therefore, it is better not to neglect checking the battery charge and its performance, especially since this is not the most complicated procedure, unlike how to check a car battery for a short circuit.
Indicator
There are three common ways to check whether there is enough energy in your car battery. All methods can be used at home, subject to safety precautions. The first and simplest is suitable only for the lucky owners of maintenance-free devices equipped with a special indicator (the same method is used to assess the electrolyte level). To do this, just open the hood and look at the battery.
There are three indicators there:
- green - everything is fine, the device is charged, the electrolyte is normal;
- black - the car’s battery is running low;
- white - there is not enough electrolyte for correct operation.
Next, the power source needs to be recharged or the electrolyte level in it replenished. Or contact the service if the car owner is against using traditional methods on the car.
Such power supplies are more expensive to maintain and require the installation of a very good generator, as they are sensitive to voltage drops.
Multimeter
Method number 2 also does not require much effort. This is the use of a device to check the condition of the battery. This device is called a multimeter and in its basic configuration combines the functions of a voltmeter, ammeter and ohmmeter. Expensive models have even more functions, but these three are basic, they are quite enough to assess the battery charge level. Typically, a multimeter is a compact, portable device that can be purchased without any problems at any specialized store.
Before checking the battery with a multimeter, you need to carefully inspect the device case. If electrolyte leaks are detected, the charge leaks will most likely be located there. Diverging from the topic, it is worth noting that dust, dirt and leaks of oil and electrolyte, in principle, do not improve the performance of the battery. It is better to spend a little time regularly wiping the body of the device than to constantly recharge it.
After checking the appearance of the battery, you can begin measuring the charge. The main task of the car owner when using a multimeter is to correctly connect it to the battery being tested and select the desired mode.
If diagnostics are performed on a non-working car battery, the procedure will be as follows:
- Turn off all energy consumers.
- Set the voltmeter mode.
- Touch the red probe to the positive terminal, the black probe to the negative terminal. Sometimes the wires are the same color, but even if you confuse which one touches where, nothing bad will happen. In this case, the number will be negative, but the numbers will be correct.
- Evaluate the obtained diagnostic result displayed on the screen.
An example table of results would look like this:
- 12.5–13.2 V - battery is 100% charged;
- 12.1–12.4 V – half charge;
- 11.7 V - the battery has managed to discharge almost completely.
Checking the battery with a multimeter while the engine is running is used less frequently; this battery diagnostic technique will show the charge transferred to the battery from the generator and the serviceability of the voltage regulating device. If this data is also needed, then the procedure will be the same.
Results table:
- 13,5–14,0 - Everything is fine;
- 14,2 - usually means that the battery is discharged; in cold weather, this indicator can be observed in the first 10-15 minutes of operation;
- less than 13.4 - the battery is not able to fully charge.
If for some reason it is only possible to measure the car battery's voltage, this data can help determine its charge level. These indicators will not be as accurate, but they will help assess the situation. You need to start testing by turning off all electricity consumers, but turning on the engine. The normal value for such a load is 13.6 V. Then you need to turn on the consumers one by one (headlights, lighting, radio, etc.). The voltage should gradually drop by very small amounts (0.1–0.2). Sharp jumps in this parameter are an indicator of incorrect operation of the generator. The ideal value for all electrical appliances running is 12.8–13.0. A lower result reliably indicates a low charge level and possible battery wear.
Load fork
Testing the battery for performance using the load fork method requires a special device that is less widespread than a multimeter. It places a load on the battery similar to what it experiences during operation. Diagnostics of the battery under load allows you to obtain, perhaps, the most objective data on battery wear and charge level. The load plug itself consists of a voltmeter, terminals and load. This useful item can be purchased in a store or assembled with your own hands.
In the second case, the device assembly diagram looks like this:
- Make sure you have access to individual battery banks. Calculate the required load using the formula R=U/I. R is resistance, U is voltage, I is current. All necessary data can be found in the battery instructions. Please note that the formula is calculated separately for each jar.
- Select a resistor by calculating its power using the formula P=UI. P - power. This part must be made of wire.
- The terminals and wires used to test the battery with a load plug must be strong enough to withstand the required current power. All connections must be securely sealed. It is recommended to make the distance between the terminals equal to the distance between the battery poles.
- Connect a voltmeter, insulate the connections, make a rigid frame from a fireproof material that does not conduct electricity.
Testing the battery with a load fork can be carried out under load or without it. In the first case, the battery must be fully charged. Then, before applying the load, the device will show from 12.6 to 12.9 V. If this does not happen, the battery needs to be charged. It is possible that the charge is full, but the required numbers still do not appear. This is a reliable sign that one or more cans are hopelessly damaged.
If everything is in order and the correct indicators appear, you need to turn on the load and measure the voltage at the fifth second. The ideal indicator is 10.2 V. A number less than 9 is an indicator of battery wear. It is necessary to strictly observe the time of applying the load and taking readings. After five seconds of operation of the load fork, the most reliable result will be obtained. For a clearer understanding of how to assemble the device and use it to test the battery, you can watch the training video.
Electrolyte is an important component of any battery. If the level is not high enough, the battery may deteriorate irrevocably; if it is too high, the terminals will oxidize and the engine may be damaged. Checking the electrolyte level in the battery can be done in different ways. It all depends on the design features of the power source that needs to be checked.
Everything that was said above about maintenance-free ones fully applies to measuring the amount of electrolyte. On other models there is often a scale showing the current battery level, the maximum and minimum amount of electrolyte required for correct operation.
The easiest way to check a car battery is visually by unscrewing the lids of the cans and looking inside. Sometimes manufacturers leave part of the body transparent. A more reliable method is to use a special hollow glass tube of small diameter. It is lowered inside each jar until it stops at the bottom and taken out, having first clamped the hole with your finger. This way you can get the most accurate data on the amount of an aqueous solution of sulfuric acid inside the cans. When carrying out this procedure, the main thing is not to forget that the tube will contain an extremely caustic substance, and it is not recommended to allow it to come into contact with the skin and clothes.
Checking the density of the electrolyte in the battery is an important procedure that gives an idea not only of the condition of the battery, but also of the charge level (indirectly). To determine the ratio of water and sulfuric acid, you will need a device called a hydrometer (more accurately called a densimeter). It consists of a flask with a bulb at the end, inside of which there is a reservoir with shot or mercury.
Checking the density of the electrolyte in the battery should be done two hours after it is fully charged. Just like the level, the density of the solution is checked separately in each jar. To do this, you need to open the container, collect as much electrolyte as is needed for the float to rise, and mark the result on the scale applied to the flask. The correct numbers are 1.27-1.29 g/cm3. Different indicators are acceptable for different cans. If the result is higher than normal, add distilled water; if the reading is too low, take part of the electrolyte and add a solution with normal density. Read more about battery density in winter and summer →
Checking the technical condition of batteries is needed not only for cars. Power supplies serving other equipment, especially those that have been out of service for a long time, also need to be checked before use. For alkaline batteries, the same load plug is often used as for acid ones.
To check the capacity of a lithium battery, you can either use a special tester or test the battery under load using a suitable resistor. Next, you need to bring it to complete discharge, selecting and recording the voltage and current. The test result is a graph showing the actual battery capacity. Please note: This method is suitable for tech-savvy users.
So, when purchasing lead-acid batteries in an unverified store or from your own hands, you must carefully examine the item you are purchasing. First, a thorough visual inspection is important. Leaks, cracks, and other mechanical damage are a reason to refuse the purchase. In the future, they may cause the battery to become completely inoperable.
Secondly, you need to check the voltage at the car battery terminals. For a 12 V battery, this parameter should be at least 13–13.5 V. If it is lower, this is a discharged power source, and it is not recommended to buy it. You have the right to ask the seller to check the new battery in the store to know exactly what condition it is in.
And finally, about the release date. Abroad, this information is not considered important, but in Russia, especially if you buy from an unverified seller, it is better to pay attention to it. There are no uniform standards for applying this marking, so you may have to search. Batteries from foreign manufacturers that came to Russia legally are guaranteed for 12 to 24 months, so after purchasing a new product, you should keep the warranty card with the store’s stamp and the receipt until the service time has expired.