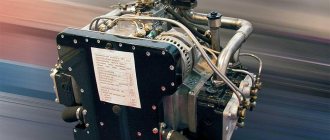
Engine history
The engine division of the Japanese automaker Mitsubishi has been developing the 4d56 engine for ten years. As a result, they produced a fairly powerful power unit that is capable of simultaneously quickly accelerating such a difficult car as the Mitsubishi Pajero Sport and overcoming off-road conditions.
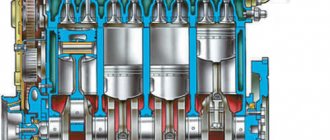
Mitsubishi 4d56 (pictured in section) debuted back in 1986 on the first generation Pajero. It is the successor to the 2.4-liter 4D55 engine.
The short block of this engine is made of cast iron alloy, which includes an in-line arrangement of four cylinders. The cylinder diameter has been slightly increased compared to its predecessor 4D55 and is 91.1 mm. The block is equipped with a forged crankshaft with two balancing shafts and an increased piston stroke. The length of the connecting rods and the compression height of the pistons have also been increased and are 158 and 48.7 mm respectively. As a result of all the changes, the manufacturer managed to achieve an increased engine displacement of 2.5 liters.
On top of the block is a cylinder head (cylinder head), which is made of aluminum alloy and includes vortex combustion chambers. The engine gas distribution mechanism (GRM) is equipped with one camshaft, that is, two valves per cylinder (one intake and one exhaust). As expected, the diameter of the intake valves is slightly larger than that of the exhaust valves (40 and 34 mm, respectively), and the valve stem is 8 mm thick.
Important! Since the 4D56 engine was produced quite a long time ago, the gas distribution system does not feature any innovative solutions. Therefore, it is recommended to adjust the valves (rockers) for this engine every 15 thousand kilometers (the clearances of the intake and exhaust valves are 0.15 mm on a cold engine). In addition, the timing drive does not include a chain, but a belt, which indicates its replacement every 90 thousand kilometers. If this is neglected, the risk of belt breakage increases, which will lead to deformation of the rockers!
The Mitsubishi 4d56 engine has analogues in the engine model line from the Korean automaker Hyundai. The very first variations of this engine were naturally aspirated and did not differ in any outstanding dynamic or traction performance: the power was 74 hp and the torque was 142 N*m. The Korean company equipped their D4BA and D4BX cars with them.
After this, the production of a turbocharged modification of the 4d56 diesel engine began, where the MHI TD04-09B was used as a turbocharger. This unit gave the power plant new life, which was reflected in an increase in power and torque (90 hp and 197 Nm, respectively). The Korean analogue of this engine was called D4BF and was installed on Hyundai Galloper and Grace.
The 4d56 engines that powered the second generation Mitsubishi Pajero were equipped with a more efficient TD04-11G turbine. The next modification was the addition of an intercooler, as well as an increase in the main technical indicators of the engine: power to 104 hp, and torque to 240 N*m. This time the power plant had the Hyundai D4BH index.
The release of a version of the 4d56 engine with a Common Rail fuel system took place in 2001. The engine was equipped with a completely new MHI TF035HL turbocharger paired with an intercooler. In addition, new pistons were used, which led to a reduction in the compression ratio to 17. All this led to an increase in power by 10 hp and torque by 7 Nm compared to the previous engine model. The engines of this generation were designated di-d (pictured) and met the EURO-3 environmental standard.
An improved DOHC cylinder head system, that is, a dual-camshaft system including four valves per cylinder (two intake and two exhaust), as well as the Common Rail fuel injection system of the second modification, began to be used on 4d56 CRDi power units starting in 2005. The diameters of the valves have also changed, they have become smaller: inlet - 31.5 mm, and exhaust - 27.6 mm, the valve stem has decreased to 6 mm. The first variation of the engine had an IHI RHF4 turbocharger, which made it possible to develop power up to 136 hp and torque increased to 324 Nm. There was also a second generation of this engine, which was characterized by the same turbine, but with variable geometry. In addition, completely different pistons were used, designed for a compression ratio of 16.5. Both power units met environmental standards EURO-4 and EURO-5, in accordance with the year of manufacture.
Important! This engine is also characterized by periodic valve adjustment; it is recommended to carry it out every 90 thousand kilometers. Their values for a cold engine are as follows: intake – 0.09 mm, exhaust – 0.14 mm.
Starting in 1996, the 4D56 engine was removed from some car models, and a 4M40 EFI power unit was installed instead. The final completion of production has not yet occurred; cars in individual countries are equipped with it. The successor to the 4D56 was the 4N15 engine, which debuted in 2015.
List of car models in which it was installed
The 4D56 engine was used on the manufacturer’s assembly line to equip Mitsubishi SUVs:
- Padjero II – mid-size SUV, 1991 – 2002;
- Strada - frame large pickup truck, 1991 - 1997/1999;
- Canter – light-duty truck and special equipment, 1993 – 2002;
- Delica/Star Wagon/L300 – minibus and truck, 1986 – 1999;
- L200 – pickup truck 2 – 4 doors, 1998 – 2006;
- Delica/Space Gear/L400 – truck and cargo-passenger version, 1994 – 2007;
- Challenger - mid-size SUV, 1996 - 1998;
- Pajero Sport I – SUV, 1998 – 2008.
Mitsubishi Delica
The resulting engine characteristics allow it to be used in trucks and SUVs. Power and torque are achieved at low to medium speeds, which is especially important for off-road driving and cargo transportation.
Specifications
The displacement of the 4d56 engine in all its versions was 2.5 liters, which made it possible to produce 95 hp without a turbocharger on later models. The engine does not feature any new design solutions and is made in a standard form: an in-line arrangement of four cylinders, with a cylinder head made of aluminum, and the block is cast from cast iron. The use of just such metal alloys ensures the required temperature stability of the motor and, in addition, significantly reduces its weight.
Another feature for this engine is the crankshaft, which is made of steel and has five support points in the form of bearings. The sleeves are dry and pressed into the block, which does not allow sleeves to be made with capital. Although the 4d56 pistons are made of lightweight aluminum alloy, they are still characterized by excellent durability and reliability.
Vortex combustion chambers were installed in order to increase power characteristics and also improve environmental parameters. In addition, with their help, the designers achieved complete combustion of fuel, which increased the efficiency of the entire engine, while at the same time reducing the level of emissions of harmful substances into the atmosphere.
Since 1991, the Mitsubishi 4d56 power unit has undergone some changes. It was equipped with a special system for increased engine heating before starting. This made it possible to solve the age-old problem with operating a diesel car in winter, because from that moment on, owners of 4d56 engines forgot about the problem associated with diesel fuel freezing at low temperatures.
The same version of the Mitsubishi 4d56 engine was equipped with a turbocharger, which was air and water cooled. Its presence made it possible not only to increase power characteristics, but also to provide more confident traction, starting from lower speeds. Despite the fact that this was a new development, the turbine, judging by feedback from owners, had an excellent level of reliability and was overall extremely successful. Its breakdown was almost always associated with improper operation and poor quality maintenance work.
It should also be emphasized that the Mitsubishi 4d56 is unpretentious in operation and maintenance. After all, even an oil change can be done every 15 thousand kilometers. The high-pressure fuel pump (pictured) also had a long service life - it is replaced no earlier than after a mileage of 300 thousand km, when the plungers wear out.
Below is a table of the main technical parameters of the Mitsubishi 4d56 engine, in naturally aspirated and turbocharged versions:
| Engine index | 4D56 | 4D56 "Turbo" |
| Engine volume, cubic cm | 2476 | |
| Power, hp | 70 — 95 | 82 — 178 |
| Torque, N*m | 234 | 400 |
| engine's type | Diesel | |
| Average fuel consumption, l/100 km | 05.01.2018 | 5.9 — 11.4 |
| Oil type | 5W-30 10W-30 10W-40 15W-40 | |
| Motor information | Atmospheric, in-line 4-cylinder, 8-valve | Turbocharged, in-line 4-cylinder, 8 or 16 valve, OHC (DOHC), COMMON RAIL |
| Cylinder diameter, mm | 91.1 | 85 — 91 |
| Compression ratio | 21 | 21 |
| Piston stroke, mm | 95 | 88 — 95 |
Transmission identification number
The transmission type code is stamped on the information plate attached to the rear bulkhead of the engine compartment (see above). The transmission identification number is engraved on a boss molded into the top of the front wall of the transmission housing. Drive Axle Identification Number (Galant AWD models only) The axle code is engraved on a boss molded into the differential housing. Transfer case identification number (Galant AWD models only) The transfer case is not assigned a separate code. On all-wheel drive (AWD) models, the transfer case number is located on the transmission housing.
Emission Control Systems Information Label (VECI)
The VECI label contains information on the location of components of exhaust gas emissions reduction systems, specification parameters for setting up individual components, and is used in conjunction with a nameplate on which the vacuum hose routing diagram is applied. The labels are usually attached to the back of the hood. In case of loss of information or discrepancies with the equipment actually installed on the vehicle, a new label can always be ordered from the service center of the vehicle manufacturer.
Where: MFI = Multiport Injection System SOHC = Single Overhead Camshaft Engine DOHC = Double Overhead Camshaft Engine * Engine code/letter number 8 on VIN ** Letter number 10 position in the VIN
↓ Comments ↓
1. Vehicle identification numbers
1.0 Vehicle identification numbers 1.2 Purchase of spare parts 1.3 Maintenance technology, tools and workplace equipment 1.4 Jacking and towing 1.5 Starting the engine from an auxiliary power source 1.6 Automotive chemicals, cleaners, sealants 1.7 Diagnosis of malfunctions of vehicle components and systems
2. Controls
2.0 Controls 2.1 Access, security 2.2 Seats and safety devices 2.3 Instruments and controls 2.4 Comfort 2.5 Operating techniques
3. Settings and routine maintenance
3.0 Settings and routine maintenance 3.1 Routine maintenance schedule for Mitsubishi Galant/Mirage/Diamante vehicles 3.2 Specifications 3.3 General information about settings and adjustments 3.4 Checking fluid levels 3.5 Checking the condition of tires and their inflation pressure 3.6 Changing the engine oil and oil filter 3.7 Inspection, maintenance and charging battery 3.8 Checking the condition of the cooling system components 3.9 Checking the condition and replacing the hoses located in the engine compartment 3.10 Checking the condition and replacing the windshield wiper blades 3.11 Rotating the wheels 3.12 Checking the condition of the suspension and steering components 3.13 Lubricating the chassis components 3.14 Replacing the ATF of the automatic transmission and final drive differential, checking the condition and maintenance of the AT filter 3.15 Checking the condition of the brake lines 3.16 Checking the condition/maintenance of disc brakes 3.17 Checking the condition of the protective covers of the drive shafts 3.18 Checking and adjusting valve clearances - Mirage only 3.19 Replacing the air cleaner filter element 3.20 Servicing the cooling system 3.21 Replacing the fuel filter 3.22 Check and replacing the valve of the controlled crankcase ventilation (PCV) system 3.23 Checking the condition and replacing spark plugs 3.24 Checking the condition, adjusting the tension force and replacing drive belts 3.25 Checking the condition of exhaust system components 3.26 Replacing manual transmission oil 3.27 Replacing transfer case lubrication - all-wheel drive Galant only 3.28 Replacement of rear differential lubrication - all-wheel drive Galant only 3.29 Checking the condition/maintenance of drum brake mechanisms 3.30 Checking the proper functioning of the parking brake 3.31 Checking the proper functioning of the vacuum brake booster 3.32 Checking the condition of seat belts 3.33 Checking the condition and replacing components of the ignition system 3.34 Checking/adjusting the advance angle setting ignition 3.35 Checking the condition of the fuel evaporation system components 3.36 Checking the condition of the power system components 3.37 Checking the condition and replacing the timing belt(s)
4. Engine
4.0 Engine 4.1. Removing/installing the power unit, dismantling components 4.2. Engine refurbishment
5. Cooling and heating systems
5.0 Cooling and heating systems 5.1 Specifications 5.2 Antifreeze - general information 5.3 Checking the functionality and thermostat 5.4 Checking the condition of the cooling fan 5.5 Removing and installing the cooling system radiator 5.6 Checking the condition of the water pump 5.7 Removing and installing the water pump 5.8 Checking the functionality and replacing the sensor unit coolant temperature meter 5.9 Replacing the electric motor of the heater fan drive 5.10 Removing and installing the heat exchanger 5.11 Checking the proper functioning and servicing heating and air conditioning systems 5.12 Removing and installing the heater and air conditioner control panel assembly, adjusting the drive cables
6. Power and exhaust systems
6.0 Power and exhaust systems 6.1 Specifications 6.2 Relieving pressure in the power system 6.3 Removing and installing the throttle body 6.4 Removing and installing the fuel line and injection injectors 6.5 Checking the condition and replacing fuel lines and their fitting connections 6.6 Checking the proper functioning of the injectors 6.7 Removing and installing the pressure regulator fuel 6.8 Removing and installing the fuel tank safety valve 6.9 Removing and installing the fuel tank 6.10 Cleaning and repairing the fuel tank - general information 6.11 Checking the functioning of the fuel pump, measuring the fuel pressure 6.12 Removing and installing the fuel pump/fuel flow sensor 6.13 Removing and installing the air cleaner assembly 6.14 Exhaust system
7. Engine electrical equipment
7.0 Engine electrical equipment 7.1 Specifications 7.2 Starting the engine from an auxiliary power source 7.3 Removing and installing the battery 7.4 Checking the condition and replacing battery wires 7.5 Ignition system - general information and precautions 7.6 Checking the proper functioning/adjusting the ignition system 7.7 Checking the condition and replacing the coil(s) ) ignition 7.8 Removing and installing the key transistor (ignition module) 7.9 Removing and installing the ignition distributor (models with a contactless ignition system) 7.10 Removing and installing the crankshaft and camshaft position sensors 7.11 Checking and adjusting the ignition timing angle 7.12 Ignition order 7.13 Charging system - general information and precautions 7.14 Checking the condition of the charging system 7.15 Checking the proper functioning, removing and installing the generator 7.16 Starting system - general information and precautions 7.17 Checking the proper functioning of the starter and starting circuit 7.18 Removing and installing the starter
8. Engine control systems
8.0 Engine Management Systems 8.1 Specifications 8.2 PCV System - General Information, Condition Inspection and Component Replacement 8.3 Evaporative Evaporative Control (EVAP) System - General Information, Condition Inspection and Component Replacement 8.4 Exhaust Gas Recirculation (EGR) System - General information, checking the condition and replacing components 8.5 On-board diagnostic system (OBD) - operating principle and fault codes 8.6 Replacing the control module (ECM/PCM) 8.7 Information sensors and actuators - general information, checking proper functioning, removal and installation 8.8 Catalytic converter - general information, condition check and replacement
9. Manual transmission
9.0 Manual gearbox 9.1. 5-speed manual gearbox (RMG) 9.2. Automatic transmissions (AT) 9.3. Transfer case
10. Clutch and transmission line
10.0 Clutch and transmission line 10.1 Specifications 10.2 Clutch - general information and checking the condition of components 10.3 Removing, checking the condition and installing components of the clutch assembly 10.4 Removing, checking the condition and installing the release bearing and clutch release fork 10.5 Checking the condition and replacing the guide bearing 10.6 Adjusting the clutch pedal 10.7 Adjusting the clutch cable, removing and installing the cable assembly (Mirage models with a clutch cable drive) 10.8 Removing and installing the clutch master cylinder 10.9 Removing and installing the clutch slave cylinder 10.10 Removing air from the hydraulic path of the clutch release drive 10.11 Removing and installing drive shafts 10.12 Hinges drive shafts - general information and maintenance 10.13 Checking the condition of the transmission line 10.14 Removing and installing the driveshaft 10.15 Replacing the cardan joint 10.16 Balancing the driveshaft 10.17 Removing and installing the driveshaft central bearing assembly 10.18 Removing and installing rear axle shafts (AWD Galant models up to 1993 edition .) 10.19 Removing and installing the rear axle hub axle, wheel bearing and oil seal 10.20 Replacing the rear differential drive gear oil seal 10.21 Removing and installing the rear differential housing (AWD Galant models up to 1993)
11. Brake system
11.0 Brake system 11.1 Specifications 11.2 Replacing the brake light switch 11.3 Removing and installing the GTZ 11.4 Adjusting the foot brake pedal 11.5 Checking proper functioning/tightness, removing and installing the vacuum brake booster 11.6 Removing and installing the regulator valve 11.7 Removing and installing brake lines 11.8 Bleeding the brake system 11.9 Disc brakes - general information 11.10 Assessing the condition of the brake pads 11.11 Replacing disc brake pads 11.12 Removing and installing disc brake calipers 11.13 Restoring the disc brake caliper 11.14 Removing, checking the condition and installing the brake disc 11.15 Drum brakes - general information 11.16 Removing, installing and checking the condition of the brake drum 11.17 Checking the condition of the brake shoes 11.18 Removing and installing the brake shoes 11.19 Adjusting the drum brake mechanisms 11.20 Removing, repairing and installing the wheel cylinders 11.21 Removing and installing the parking brake cable(s) 11.22 Adjusting the parking brake brakes 11.23 Removing and installing the parking brake friction shoes (models with rear wheel disc brakes) 11.24 Anti-lock brake system (ABS) - general information, fault diagnosis and fault codes 11.25 Removing and installing the hydraulic modulator 11.26 Removing and installing the ABS control unit 11.27 Removing and installing installation of wheel sensors 11.28 Removal and installation of acceleration sensors (G-sensors) 11.29 Replacing wheel sensor rotors
12. Suspension and steering
12.0 Suspension and steering 12.1 Specifications 12.2 Removal and installation of struts and coil springs of the front suspension 12.3 Restoration of strut assemblies of the front suspension 12.4 Checking the condition of the upper ball joints of the front suspension (Galant models 1994 - 1998) 12.5 Removing and installing the upper front suspension arms (Galant models 1994 - 1998 model year) 12.6 Checking the condition of the lower ball joints of the front suspension 12.7 Removing and installing the lower front suspension arms 12.8 Removing and installing the front stabilizer bar 12.9 Removing and installing steering knuckles and hub assemblies wheel bearings (front suspension) 12.10 Removal and installation of rear struts 12.11 Restoration of rack-mount assemblies of the rear suspension 12.12 Removal and installation of the upper control arms of the rear suspension 12.13 Removal and installation of the lower control arms of the rear suspension 12.14 Removal and installation of trailing arms of the rear suspension 12.15 Removal and installation of the rear anti-roll bar 12.16 Adjusting the wheel bearings 12.17 Removing and installing hub assemblies 12.18 Removing and installing the steering wheel 12.19 Removing and installing the steering column combination switch 12.20 Removing and installing the windshield wiper control switch 12.21 Removing and installing the ignition lock cylinder 12.22 Removing and installing the ignition switch 12.23 Removal and installation of steering drive rods 12.24 Replacing protective covers of the steering mechanism assembly 12.25 Removing and installing a manual steering mechanism 12.26 Removing and installing a hydraulic power steering mechanism 12.27 Removing and installing a steering pump 12.28 Removing air from the hydraulic path of the power steering system 12.29 Removing and installing wheel studs 12.30 Wheels and tires - general information 12.31 Wheel alignment angles
13. Body
13.0 Body 13.1 Specifications 13.2 Caring for Body and Underbody Components 13.3 Caring for Vinyl Trim 13.4 Caring for Upholstery and Carpeting 13.5 Repairing Minor Damaged Body Panels 13.6 Repairing Severely Damaged Body Panels 13.7 Maintaining Vehicle Hinges and Locks 13.8 Replacing Windshields and Other Fixed Parts glass 13.9 Removing, installing and adjusting the position of the side doors 13.10 Removing, installing and adjusting the position of the hood 13.11 Removing, installing and adjusting the position of the luggage compartment lid (Sedan models) 13.12 Removing and installing door rear view mirrors 13.13 Replacing the radio antenna 13.14 Removing and installing the front fenders 13.15 Removing and installing the instrument panel 13.16 Removing and installing the center console 13.17 Removing and installing the interior door trim panels 13.18 Removing and installing the outer door handle and lock latch drive elements 13.19 Removing and installing the side door lock cylinder 13.20 Removing and installing the tailgate/lid lock cylinder luggage compartment 13.21 Removing and installing the tailgate handle 13.22 Removing and installing the door glass and window regulator 13.23 Removing and installing the electric window drive motor 13.24 Replacing the interior rear view mirror 13.25 Removing and installing seats 13.26 Removing and installing the electric seat drive motor 13.27 Removing, installing and adjusting the position tailgate (Hatchback and Station wagon models)
14. On-board electrical equipment
14.0 On-board electrical equipment 14.1 Specifications 14.2 Finding the causes of electrical equipment failures 14.3 Electrical connectors - general information 14.4 Protection of electrical circuits 14.5 Relays - general information and checking the proper functioning 14.6 Checking the proper functioning and replacing the turn signal/hazard light switch 14.7 Removing and installing the steering column combination switches and switch ignition switch 14.8 Removing and installing switches 14.9 Removing and installing sealed type headlights 14.10 Adjusting the direction of the optical axes of the headlights 14.11 Replacing lighting lamps 14.12 Removing and installing the instrument cluster 14.13 Replacing instrument cluster meters 14.14 Speed control system (tempostat) - general information and fault diagnosis 14.15 Supplemental safety system (SRS) - general information and precautions 14.16 Removing and installing a radio/CD player 14.17 Removing and installing a CD changer 14.18 Removing and installing loudspeakers 14.19 Removing and installing windshield wiper arms 14.20 Removing and installing an electric motor for windshield wipers 14.21 Electrical connection diagrams - general information 14.22. Electrical connection diagrams
Typical faults
This engine has a good degree of reliability, but like any other engine it has a number of its own “diseases”, which at least sometimes occur:
- Increased vibration levels, as well as fuel detonation. Most likely, this malfunction occurred due to the balancer belt, which could stretch or even break. Replacing it will solve the problem and it can be done without removing the engine;
- Increased fuel consumption. In this situation, there may be more than one reason. The most common is a fuel injection pump malfunction. In most cases, by 200-300 thousand kilometers it wears out significantly, as a result of which it does not create the required level of pressure, the engine does not pull, and fuel consumption increases;
- Engine oil leaking from under the valve cover. The repair boils down to replacing the valve cover gasket. The 4d56 power unit is characterized by a high degree of resistance to overheating, due to which even high temperatures rarely lead to cylinder head deformation;
- Increase in vibration level depending on speed. Since this engine has considerable weight, the first thing you should pay attention to is the engine mounts, which need to be changed every 300 thousand kilometers;
- Extraneous noise (knocking). The first thing you should pay attention to is the crankshaft pulley;
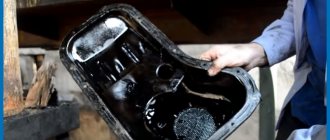
- Oil leakage from the seals of the balancing shafts, crankshaft, camshaft, pan gasket, as well as the oil pressure sensor;
- The engine is smoking. Most likely, the fault is the incorrect operation of the nozzles, which leads to incomplete combustion of the fuel;
- The engine is tripping. Very often this indicates that the piston group has increased wear, in particular the rings and liners. Also, the fault may be an incorrect fuel injection angle;
- The bubbling of antifreeze in the expansion tank indicates that, with a high degree of probability, a crack has formed in the main central bank and liquid is leaking from it;
- Very fragile fuel system return pipes. Over-tightening them can lead to rapid damage;
- On Mitsubishi 4d56 engines working in conjunction with automatic transmissions, insufficient traction is observed. Many owners have found a solution by tightening the kickdown cable;
- If the fuel and the engine as a whole are not warmed up well enough, it is necessary to adjust the automatic warm-up.
It is very important to monitor the condition of the balancing shaft belt (every 50 thousand km) and, if necessary, replace it in time. Its breakage may interfere with the operation of the timing belt, which may lead to its breakage. Some owners get rid of the balancer shafts, but in this case the load on the crankshaft increases, which can lead to it breaking at higher speeds. The bottom photo shows the engine charging system:
The turbocharger in this engine has a good service life, which is more than 300 thousand km. It is worth noting that the EGR valve gets clogged quite often, so it needs to be cleaned every 30 thousand kilometers. You should also carry out service diagnostics of the engine for errors, as this allows you to monitor changes in engine characteristics.
Important! The Mitsubishi 4d56 engine, especially the 178 hp version, really does not like low-quality fuel, which significantly reduces the overall life of the power unit. It is recommended to replace the fuel filter every 15 - 30 thousand km!
Below is the location of the Mitsubishi 4d56 engine serial number:
Vehicle identification numbers
The 17-position Vehicle Identification Number (VIN) is stamped onto a metal plate (nameplate) mounted on the instrument panel under the windshield on the driver's side of the vehicle. The VIN encrypts data such as country and manufacturer codes, vehicle type, engine and body characteristics, as well as some specific vehicle parameters.
Another information plate is riveted to the rear bulkhead inside the engine compartment. In addition to the VIN, the nameplate contains engine and transmission type codes, as well as the body paint color code. It should be noted that the information contained in the engine identification number placed on the nameplate is different and is supplemented by the meaning of the letter occupying the 8th position in the VIN. Thus, by the 4-position code 4G63 from the nameplate, you can determine that the car is equipped with a 2.0 liter SOHC/DOHC engine, however, there is no information on the configuration of the unit with a turbocharging system, while the presence of the letter U in the 8th position in the VIN code clearly indicates the presence turbocharging devices. When presented separately, the engine type code can take the following values: 4G15 - 1.5L SOHC engine 4G61 - 1.6L DOHC engine 4G93 - 1.8L SOHC engine 4G63 - 2.0L SOHC or DOHC engine 4G64 - 2.4L SOHC or DOHC engine 6G72 — 3.0 l SOHC or DOHC engine 6G74 — 3.5 l DOHC engine
In addition to the two information plates listed, there is a third one, which is a certification label and is attached to the end surface of the left front door pillar of the car. The certification label codes include information about the vehicle's production date (the year of manufacture can be determined by the letter occupying the 10th position in the VIN), as well as VIN and data on the maximum permissible loads on the front and rear axles of the vehicle (GRVW). The VIN is also recorded on the vehicle title and registration certificate. The number contains encrypted information about the date and place of production of the car, the year of manufacture of the model and the type of body.
4D56 engine tuning
It is worth noting that such a middle-aged engine as the Mitsubishi 4d56 should not be boosted. However, some owners send this engine to a tuning service, where they perform chip tuning and change the engine firmware. So, a 116 hp model can be accelerated to 145 hp and add about 80 Nm of torque. The 136 hp 4D56 engine model can be tuned up to 180 hp, and the torque ratings exceed 350 N*m. The most productive version of the 4D56 with 178 hp is chipped to 210 hp, and the torque goes beyond 450 N*m.
What do mechanics recommend?
Why does a KAMAZ diesel engine breathe?
The “golden rules” of a competent driver are as follows.
One of the main tips given by automotive industry professionals is to constantly monitor the balance shaft belt. This must be done after driving 50,000 km. The breakage of this element leads to a rupture of the timing belt, violating the safety and peace of mind of the driver. Some craftsmen are trying to improve the condition of the power unit by throwing out the shaft belts. It is strongly recommended not to commit such a rash act. The load on the crankshaft will increase, ultimately contributing to its complete breakdown. This will result in expensive repair work.
The turbocharger resource is calculated by the manufacturers for 300,000 km. After every 30,000 km, it is worth cleaning the EGR valve and not neglecting serial diagnostics. A significant role for the 4d56 Pajero Sport engine is played by the quality of the fuel poured into the tank. This is especially noticeable in the 178 hp engine. With. Poor fuel is poured - a decrease in service life should be expected. It is necessary to change the fuel filter after passing 15 thousand km.
Regarding tuning an engine that is “outdated” in the world of the car market, experts do not advise enhancing its quality. Some brave souls, however, take the car to a tuning studio, ordering a chip tuning and flashing service. In this way, 178 “horses” instantly turn into 210.
The engine was used at various times as a power plant in the Mitsubishi Challenger, Delica, L200, L300, various modifications of the Pajero, Space Gear, and Strada.
Interesting fact. UAZ owners are successfully experimenting by installing this engine. Coupled with a manual transmission, they create an excellent union.
In general, a vital device is characterized as repairable. There are no problems finding auto parts for it. The main thing is to arrive at the service station in a timely manner and subject the vehicle to diagnostic procedures, change the oil on time, and monitor the condition of the unit and its elements. In this case, you won’t have to think about repairs. It is necessary to choose a technical center without sparing time; a lot depends on the experience of specialists.
Maintainability of the Mitsubishi 4d56 engine
The Mitsubishi 4d56 engine has excellent maintainability. All elements of the piston group (pistons, connecting rods, rings, liners, etc.), as well as the gas distribution mechanism (prechamber, valve, rocker arms, etc.) are replaced separately. The only exception is the cylinder block liners, which must be replaced along with the block. Attachments such as pumps, thermostats, as well as elements of the ignition system should be replaced after a certain mileage declared by the manufacturer of the part. Below is a photo showing the location of the timing marks and the correct installation of the belt:
Pajero and its modifications (1st generation + restyling)
Let's start with the power units installed on the Mitsubishi Pajero Sport (and their modifications) of the 1st generation (including restyling). The first generation cannot please you with good quality diesel engines; there are two diesel engines in total for the first generation, the first is 4D56, the second is 4M40. There is no need to say much about the 4M40, and it is very rare to find a car with such an internal combustion engine in the Russian Federation, this is due to the purpose of the 4M40 for Mitsubishi Challenger cars (for the Japanese domestic market), so it is clearly not worth choosing a car with such an engine.
Typical problems for 4M40:
- problem with cracks in the cylinder head (coming from 4D56 engines) and the cooling system,
- timing chain stretching (on runs over 250,000 km),
- structurally weak injection pump design (contamination of the plunger pair, check valve, leaking seals),
- EGR valve (for cars with electronically controlled fuel injection pump).
The 4D56 is a much more common engine; if you pay attention to diesel, then definitely it. In the first generations (including restyling), this engine was in great demand due to its low fuel consumption (at that time) and high traction at the bottom. Despite the positive consumer characteristics of cars with 4D56, all its efficiency tends to zero, because this diesel engine is very capricious and requires constant attention.
Typical problems for 4D56:
- problem with cracks in the cylinder head and cooling system,
- rapid wear of the timing belt and balance shaft system,
- the motor can “triple”, in fact the “triple” effect is caused by the balance shafts,
- weak design of the crankshaft pulley, resulting in extraneous noise,
- structurally weak injection pump design (contamination of the plunger pair, check valve, leaking seals),
- EGR valve (for cars with electronically controlled fuel injection pump),
- weak cushions (supports) of the internal combustion engine.
With gasoline internal combustion engines, there are much fewer problems, despite the increased fuel consumption (relative to diesel engines), the design of gasoline engines turned out to be much more successful and more economical in terms of “children’s sores,” since there are practically no such problems. So, when choosing a 1st generation Pajero Sport/Montero Sport (+ restyling), you should first of all pay attention to gasoline internal combustion engines.
Typical problems for 6G72:
- contamination of the throttle assembly and airing of the system on the intake manifold, resulting in reduced traction, unstable operation at idle,
- increased oil consumption is caused by wear on the valve stem seals and rings, which can be easily solved by replacing them with new ones,
- increased noise of the internal combustion engine due to the breakdown of hydraulic compensators can be solved by replacing them,
- errors caused by oxygen sensors (there are 5 on the engine), so you should monitor their condition, as well as the quality of gasoline,
- weak engine cushions (supports),
- demands on the fuels and lubricants used.
Another gasoline engine is the 6G74, which is not widely used in the Russian Federation due to its rarity, and since this engine is based on a 6G block and belongs to the “Cyclone” line, the problems listed above about the 6G72 also apply to this to the motor. However, on the 6G74 the problem of internal combustion engine noise caused by hydraulic compensators is more pronounced, but on this engine noise can also occur due to a faulty hydraulic tensioner.
What kind of oil to fill in the Mitsubishi Pajero Sport diesel engine
Blog Specifications History Comparison Gallery.
Detailed photos of cars Photos of car interiors.
Dimensions of tires and wheels Dimensions of wheel bolts Dimensions of windshield wiper blades Which oil for the engine Which oil for the gearbox Which antifreeze for the radiator Which brake fluid Which air filter Which battery Which air conditioner fan Which cabin filter Which radiator fan Which fuel filter Interior heating heat exchanger Which intercooler Which oil filter Which oil cooler Which radiator Which timing belt Which brake discs Which brake drums Which brake pads Which lamps in the fog lights Which lamps in the headlights Which lamps in the turn signals Which lamps for license plate illumination Which lamps in the dimensions Which lamps in the rear fog lamps Which lamps in the reversing headlights What kind of lamps are in the brake lights?
Overall dimensions Fuel tank volume Trunk volume. Body elements Photos of the Mitsubishi Pajero Sport interior.
We recommend: Mitsubishi Lancer 9 automatic transmission what is the best oil to fill
Detailed interior. How many liters is the trunk size of Mitsubishi Pajero Sport.
How many liters? How long will the DSG6 robot live - look at the design and reviews Electric cars - what will appear on the market this and next year? Exeed - what kind of cars are these? More facts about the new Chery brand Resource of modern popular engines - myths and facts What automotive gadgets can be useful to you on the road?
Answers (2)
Fuel consumption of Mitsubishi Pajero Sport. Engine capacity Engine number Year of manufacture Recommended oil Oil volume l.
What is the cheapest way to travel in Russia - by train or by car? New generation Mazda CX-9 - is it worth planning a purchase? Saving fuel in winter - tips for practical drivers The best crossovers of the year - a universal class of cars Choosing a used car - how not to buy problems? Oil volume What antifreeze does Mitsubishi Pajero Sport have? How many liters of fluid for the brake system of Mitsubishi Pajero Sport.
Required volume What type of air filter does the Mitsubishi Pajero Sport have? Dimensions Recommended battery for Mitsubishi Pajero Sport. What type of air conditioner cooling fan does Mitsubishi have? What kind of cabin filter does Mitsubishi Pajero Sport have? Dimensions What kind of radiator cooling fan does Mitsubishi have? What kind of fuel filter does Mitsubishi Pajero Sport have?
Dimensions What kind of oil filter does Mitsubishi Pajero Sport have? Dimensions What kind of oil cooler does Mitsubishi have?
Dimensions What kind of engine radiator does the Mitsubishi Pajero Sport have? Dimensions What kind of brake discs does the Mitsubishi Pajero Sport have? What kind of brake drums does Mitsubishi Pajero Sport have?
Engine oil
What kind of brake pads does Mitsubishi Pajero Sport have? What kind of fog light bulbs does the Mitsubishi Pajero Sport have?
VIDEO: Subtleties of measuring the oil level Mitsubishi Pajero Sport 2.5d 4D56 Di-D
What kind of headlight bulbs does Mitsubishi Pajero Sport have? What kind of turn signal lamps does Mitsubishi Pajero Sport have?
Mitsubishi 2.5 D/TD
The 2.5-liter Mitsubishi 4D56 diesel engine was produced from 1986 to 2016. It was installed on popular Mitsubishi crossovers, pickups and minibuses.
This engine became the basis for the popular diesel internal combustion engines produced by Kia / Hyundai of the D4BA, D4BF and D4BH series.
The 4D5 engine line also includes the 4D55, which was installed on Mitsubishi Galant cars, L200 pickups and Pajero SUVs from 1980 to 1986. 4D55 engines are notorious for numerous problems with the cylinder head, in particular with its cracking.
Review of faults and methods for repairing them
If the belt drive breaks, the 4D56 engine is guaranteed to bend the valve with pistons. There are not so many typical breakdowns for this power drive:
| Oil leaks | Usually the valve cover gasket breaks | replacing the cover gasket |
| Increased diesel fuel consumption | high pressure pump output | fuel injection pump replacement |
| Detonation and vibration | stretching or tearing of the balancing shaft belt | belt replacement |
Replacing belts on that engine is not difficult; there is no need to dismantle other components and assemblies.
4D56 engine repair


