In most cases, such work is carried out by professionals, since the process requires certain skills and experience, and is also quite labor-intensive. However, you can apply vinyl to a car yourself. To do this, you should familiarize yourself with the features of working with film, study the sequence of actions when gluing, and also purchase all the necessary materials.
vinyl wrapping
Benefits of application
For any car, covering with anti-gravel film has several quite significant advantages:
- The body is reliably protected from minor mechanical damage.
- Modern film is almost invisible.
- The adhesive composition with its special formula makes it easy to apply the film and then just as easy to remove it.
- Does not affect the body coating at the chemical level.
- Does not require special care.
- Easily applied to any body shape.
- Has a long service life.
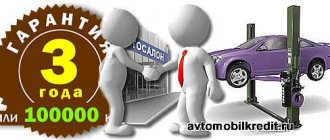
All manufacturers who make these products provide a guarantee for a fairly long period - this is an important plus. This is a guarantee that during operation the anti-gravel film on the car will not turn yellow and will not delaminate.
Another serious advantage is the free passage of ultraviolet rays through the protective coating. What does this mean for the car body? Thus, the color of the paintwork under the film will not have any difference with the color of the coating in those places where it was not glued.
It is also worth knowing that the protective film on a car does not protect against impacts as such. Its main function is to soften them. The impact force is distributed over the entire surface, thereby preventing body parts from being damaged. These products are applied where the risk of damage is greatest - fenders, optics parts, mirrors, bumpers, and the hood.
The application of this film guarantees maximum protection against chips, various scratches, exposure to gravel and a variety of mechanical damage. Car owners have already appreciated these advantages.
Dry method
Dry carbon fiber pasting has its advantages:
- the film does not move during installation;
- adhesion to the paintwork of the car is higher than with the wet method;
- vinyl stretches less.
Instructions:
- Preparation for pasting using the dry method is not fundamentally different from the wet method. But after removing contaminants with a wet solution, you need to dry everything thoroughly and then treat the surface with White Spirit.
- The film is applied to the element and smoothed.
- Heat the film with a hairdryer over the entire area and gently smooth it again with a spatula.
- After careful smoothing and heating, excess carbon is cut off.
It is worth considering that 3D class carbon films are more durable than 2D and are more suitable for the dry method. High-quality films have special perforations, and these channels help to expel air evenly.
Vinyl films: advantages and disadvantages
This coating is used when it is necessary to protect the entire body. Pebbles can get everywhere - on the side doors, rear and roof. Some of the advantages of this type of protection can be highlighted.
Thus, vinyl anti-gravel film for a car, which is made using cast technology, has high flexibility characteristics. Therefore, there are no difficulties in covering even the steepest curves with it.
An additional property is maximum surface protection from ultraviolet radiation.
After some time it leads to color fading. Another advantage is the cost, which is significantly lower than for polyurethane products.
Among the disadvantages are:
- small thickness (therefore strength is insufficient);
- in winter, during periods of severe cold, elasticity characteristics are lost;
- This product is more suitable for application on the sides.
In this case, protection is provided from gravel and stones that fall onto the sides at sharp angles.
Strictly speaking, the function of vinyl is more decorative. Installed vinyl anti-gravel film on a car can only effectively protect against ultraviolet radiation. Therefore, you should not count on anything more. Vinyl, unlike polyurethane, tears more easily where the polyurethane will only stretch. This, unfortunately, is also one of its characteristics.
Polyurethane products
Polyurethane auto protective film originates from military technology used in the United States. The product was tested in military companies of this country in Iraq. It was supposed to protect helicopter blades from sand. In principle, this is not even a film, but light armor, as experts call it. Ultraviolet radiation completely passes through the material, which allows the body to burn out more evenly.
This protection is glued to bumpers, mirrors, and also to the front parts of the hood. The high viscosity of the material and thickness is a huge advantage, which allows it to provide complete protection for surfaces. But this is also considered a disadvantage, since it is not possible to cover spherical body shapes or surfaces with large curves with it.
This type of anti-gravel film for a car is not suitable for a bumper. Reviews from those who have glued it to similar surfaces indicate that it is indeed impossible to completely cover the surface with it. In any case, there will be space that will not be protected.
Compared to vinyl, a polyurethane product retains its shape very poorly. Where the film bends, strong tension and a cellulite pattern are observed. Its service life is comparable to vinyl. Among the disadvantages there is one more - the film turns yellow over time.
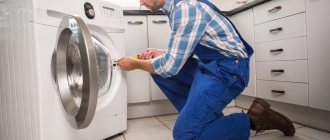
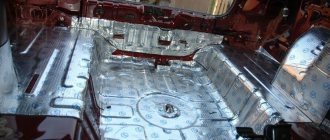
Preparing the car
The level of adhesion, and therefore its durability, directly depends on the quality of preparation.
- The car must be washed thoroughly. It is best to use a high-pressure washer, since our first priority is to knock out dirt from under the seals and grooves where the film will be tucked.
- For high-quality pasting with glossy, matte or carbon-style film, it is necessary to remove moldings, door handles, antenna, etc.
- If necessary, use a bitumen stain remover. Wipe the surface with clay and water.
- Using a squeegee and a rag, clean all the grooves, the space under the sealing rubber bands, as well as the edges of the body parts where the film will be folded.
- Pay special attention to removing silicone and fat deposits. Spray the degreaser onto the surface and then wipe off any dissolved deposits with a dry cloth. It is also possible to use two napkins: one soaked in degreaser and one dry.
Primer, soap solution, cutting
The recipe for preparing a soap solution is quite simple: a few drops of dishwashing detergent, for example Fairy, per 1 liter of clean water.
Primer should only be used when necessary:
- in places of complex recesses and depressions, where film tension is required to remove folds;
- along the edges of body parts where the material will be wrapped;
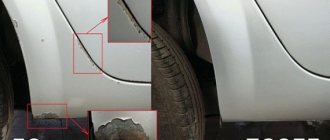
- the inner edges of the wheel arches of the car, where there is sandblasting from the wheels, vibration from lockers, etc.;
- if for some reason you have tampered with the adhesive layer on the film, thereby reducing its adhesive properties.
It is quite understandable to want to play it safe and also apply primer around the perimeter of the car body elements. But this is unnecessary if you followed the previous recommendations. Using a primer may even have negative consequences. If you glue, for example, a carbon-effect film, onto a poorly painted body element, then there is a possibility that after 3-4 years the film will be removed along with pieces of varnish.
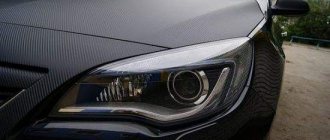
Carbon
Unlike vinyl, carbon has a voluminous texture.
This will allow, in addition to protection, to give the car some individuality. Carbon fiber is manufactured using special technologies and imitates carbon fiber as much as possible.
In addition to aesthetics, this protective film on a car perfectly performs its functions. The thickness of the material can vary from 180 microns to 200. This allows you to completely protect the surface from any influences.
Where to glue?
Pasting a car with anti-gravel film is carried out in those areas that are most susceptible to the mechanical effects of fine gravel. These are the front parts of the hood. A tape is often stuck there, the width of which is from 20 to 90 cm. The film is also glued to the back and front of the wings.
The bumper must be completely covered. The rear should be protected on the top. The lower edge is protected from sandblasting. Door openings, thresholds, the area around the door handles, the back of the mirror, subframes and headlights are also covered.
Uncover
The safest method, recognized by car enthusiasts all over the world, is cutting using automotive patterns. But, often at most service stations the film is cut along the body. This method has some disadvantages.
So, such a pattern may not be accurate. Only high professionalism saves you from possible mistakes. The material is cut with a certain reserve. Therefore, if the film was purchased without taking into account the allowance, then it may simply not be enough.
A knife on a car body can leave scratches that can trap condensation. And scratches will crack over time. Even experienced craftsmen do not guarantee the absence of damage.
Gluing carbon film to a car using dry and wet methods
Before describing the dry method, three important notes should be made:
- all dry gluing work should be carried out only indoors, and the temperature there should not exceed 20°C;
- The film should be glued using the dry method only with the help of a partner;
- the dry method is suitable only for the most experienced car owners who know exactly what they are doing. Beginner tuners are better off using the wet method, which will be discussed below.
Tools and materials
- Carbon film.
- Scissors.
- Scalpel.
- Roulette.
- Hair dryer.
- A set of squeegees of different hardness.
- Breadboard knife for cutting.
How to stick it on a car using a dry method
- all surfaces of the car to be pasted are thoroughly washed with soapy water and dried;
- Using a tape measure, determine the dimensions of the surface to be pasted. After this, a fragment of the film is cut off (and you need to cut it with a margin of at least 8 mm on each side);
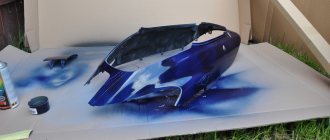
- the cut fragment is laid on a flat surface, pattern down, after which the backing is removed from the material;
The carbon film backing is removed manually
The carbon film is fixed with fingers
Hot carbon film is stretched with the help of a partner
The edges of the carbon film are trimmed with a breadboard knife
Wet pasting
- The area to be pasted is measured using a tape measure, then a piece of film is cut out under it (taking into account the reserves for a fold of 8 mm on each edge);
The film is applied to the hood to determine the size of the required piece
The film is smoothed and dried with a hairdryer at the same time
Installation
There is already an anti-gravel film ready for gluing. Its price depends on the material and manufacturer (for a bumper from 1000 rubles). It is important to remember that you should work very carefully, otherwise this process may incur additional costs.
The finished pattern is pasted onto the corresponding elements.
This must be done using a hair dryer or steam. Heating makes the material softer and more elastic. This allows you to stretch and stick the product tightly without air bubbles. Large sheets may require longer heating and more time. But if you purchase a high-quality anti-gravel film for your car, reviews indicate that the better the adhesive, the more reliable the protection will be.
Wet method
For those new to film wrapping, the wet method will be easier and faster.
Procedure:
- You need to cut a piece of film to the required size, taking into account a turn of 8 mm on each side. In large areas, it is allowed to leave folds up to 5-6 cm.
- The surface is degreased with a soap solution and washed with clean water.
- If there are uneven spots and scratches, then before applying the sticker you need to restore the structure of the surfaces using a primer or automotive putty. It is important to consider the following: if the primer dries in 5-7 minutes, then the putty takes up to several hours, and then it must be sanded with fine sandpaper.
- Afterwards, a soap solution is applied again - the carbon fiber will be attached to it. In order for the film to fit tightly, you must check that there are no contaminants left. And to apply the soap solution evenly, it makes sense to use a spray bottle.
- The film must be applied to the surface, having first removed the backing from it, and pressed step by step onto the paintwork, smoothing with a soft polymer spatula or felt squeegee.
- For fixation, the front part is heated with a hair dryer. The final gluing process should begin from the center of the element, gradually moving to the edges.
Important! Moisture should not be allowed to dry out during the first gluing process, so there is no need to apply the soap solution to too large an area at once.
To properly glue carbon fiber using the wet method, uniform heating must be observed, otherwise both the film and the car’s paintwork will be damaged. The minimum setting of a hair dryer in the range from +50 to +70° C is sufficient.