04/13/2020 2 100 Media devices
Author: Victor
A USB drive or flash memory card is one of the most common storage media used by car enthusiasts today. This is because almost all modern radios are equipped with USB outputs, and a flash drive is the easiest way to transfer music for playback in an audio system. But what if the audio system does not have this output? In this article we will tell you how to make your own USB adapter for standard radios.
[Hide]
How to connect USB to a car radio
Long gone are the days when the source of music in the car and beyond was a CD. This is why many manufacturers have stopped producing car audio equipment without USB support. Indeed, in the current age of technology, music can be stored anywhere, from flash drives to a mobile phone, which have a large volume, unlike CDs and DVDs. You can quickly and easily add music tracks to them. And USB makes it possible to listen to MP3 files from flash drives, various memory cards, and is equipped with an extra input for connecting external audio sources.
Using an MP3 player
Flipping through folders, tracks, and rewinding is done from the car radio. For a multimedia system in a car, flash drives have come into first place, but not everyone has radios that support USB installed in their cars, and money does not allow them to replace it with a new one. Therefore, many car owners are interested in the question of how to improve the radio without replacing it with a new one. Of course, you can buy an adapter and shell out a lot of money for it, but you can give a standard speaker system a second life by equipping it with a USB output yourself, spending only a little time on it.
ADVANTAGES AND INSTALLATION OF USB ADAPTER
YATOUR – 5 advantages of USB adapter:
- receives the signal without interference, compared to new FM transmitters;
- does not require separate power and can recharge phones and tablets via USB;
- installed and dismantled in 15-40 minutes (factory warranty is maintained);
- not conspicuous - the mp3-USB adapter is attached wherever you want (for example, in the glove compartment area);
- costs from 2,900 rubles.
You can install the YATOUR mp3 USB adapter yourself:
- Reach the back of the car radio.
- Plug the device connector there.
- Fix the adapter or USB extension cable wherever you like.
Or visit the service.
First way
For this purpose, you will need any unnecessary Chinese MP-3 player that reads songs from flash drives and memory cards, the main thing is that it has a headphone jack. You only need an audio signal from it.
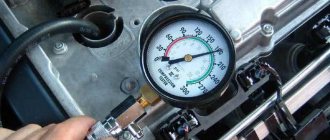
- Having disassembled the radio and removed the CD drive, the positive power wire of the MP3 music player is soldered to the contact of the old system, where the voltage is located after startup. Having connected the sound, take a wire and connect it to the output of the player and the AUX input of the radio. After this, the player board is mounted in the base of the speaker system, removing the drive - there is enough free space there.
- The main thing is to connect everything correctly to avoid a short circuit. The player control buttons are mapped to unnecessary CD drive control buttons. Having assembled the radio, you can enjoy music from digital media, from a flash drive, to do this you just need to turn on the AUX mechanism. You can scroll through the songs using the buttons.
- Before you start playing music from a flash drive, you need to turn down the volume, this will get rid of the loud signal when the input signal is strong enough.
Second way
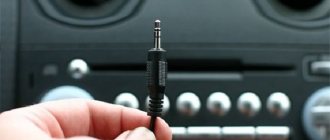
Also, to listen to a flash drive on your device, you can use an adapter that you make yourself. The main thing is that the radio has an external AUX signal output. To connect, you will need a plug from simple headphones and several tulip-shaped connectors, a four-core wire placed in a copper braid. It is important that the headphone cable is in working order; you can use a multimeter to check it.
- The insulation is removed from the main cable of the plug, which is located near the very base.
- The conductors of the right and left channels, having scarlet and green colors, are soldered to the middle pin of the tulip connector.
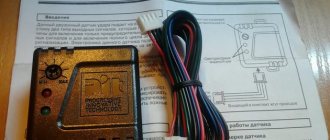
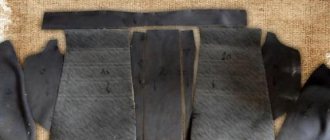
- When the work is completed, the contact of the main wire should be connected to the steel base of the tulip, and the others to the central terminals of the tulip. The result will be an adapter like the one in the photo.
- An adapter is connected to the external audio signal connector of the radio, where any reading device can be connected.
- After turning on, the AUX auto mode starts and you can enjoy the music recorded on the flash drive.
DIY AUX output
But what if your car radio does not have an AUX port for connecting external music sources? You should spend a little time and do everything yourself.
Before you start work, you should prepare everything you need. You will need a headphone plug and wires, you can take them from them. A regular plug is divided into several parts. The largest one, located at the plastic base, belongs to the central wire and has the main color. The two remaining parts are classified as channels and are painted in red and green, see the photo.
The first step is to remove the car radio. Basically, it is attached to plastic latches, so there should be no difficulties in removing it. Next, the bolts on the ventilation panel are unscrewed, after which the panel itself is lifted upward to remove all interference. All wires from the headphones are soldered to the tulip connector - common to the metal base, conductors to the middle terminals. Then the soldered wires, together with the plug, are brought out into the interior for convenient connection of reading devices.
The best option is an ashtray, shown in the photo. All wires should be well equipped so that after installing the radio, nothing interferes with them. Before checking the result of the work, it is necessary to completely turn off the sound on the radio, since the reading devices start screaming when connected.
After this, you can play any track. You should adjust the sound on the car radio in advance. If the work is carried out correctly, music should sound in the car speakers. The speaker system will play the role of an amplifier.
There is nothing difficult in the described methods for improving the standard radio and anyone can do it on their own.
Basic DIY connection methods
The easiest way is to use an FM transmitter with a player. Using this device, you can listen to music from a flash drive or memory card on a cassette or disk radio, even in the absence of an AUX connector. It is necessary that the tuner can receive a signal in the range 87.5 - 108 MHz.
Another way is to install USB in the standard radio. In this case, rework will be required. As a reading device, you can use a portable MP3 player or a special set-top box with a player and tuner, which has all the control buttons. These audio devices are connected via AUX.
How to solder USB
The car radio is removed from the dashboard, the wires are disconnected from the car, and the cover is removed. Then the CD drive or tape drive is removed. To make the rework easier, you should mark the wires to which sound from the USB should be supplied, as well as the power output.
To solder USB into the car radio, the negative wire of the set-top box is connected to the case. The wires that were unsoldered from the switch on the LPM should be soldered to each other. The positive wire of the USB chip should be soldered to the resulting connection. A shielded cable is used to output sound to the radio. One end is connected to the turntable circuit, and the other to the playback head pins or the volume control input pins.
The attachment is fixed in place of the slot for the cassette. If there is a radio receiver in this device, the standard radio tuner is dismantled. The corresponding wire of the USB circuit is connected to the antenna socket. The set-top box is controlled by built-in buttons or a remote control. Before turning on, the volume control of the radio should be set to the minimum position to avoid a sharp jump in volume.
Now you need to figure out what to do to connect USB instead of CD. To do this, contacts are closed that block mode switching after inserting a disk. The analog audio input and power output are also found. All wires from the USB player are soldered to the corresponding points on the car radio board.
To solder an mp3 player to a standard tape recorder, you will need to build in a voltage converter, since such a gadget is designed for a voltage of less than 12 V.
For ease of control, the button pins are soldered to unused buttons on the radio panel. To do this, you need to unsolder the resistors that stand between the controller.
The signal is taken from the player's headphone output. Playback is controlled by buttons on the radio. When fixing the player, the slot for a flash drive or memory card should be directed toward the CD slot. The radio will play the role of an amplifier with acoustics.
How to connect a flash drive to a standard car radio via AUX with your own hands if there is no USB input
A car radio is not uncommon; it won’t surprise anyone. On the contrary, its absence may raise a number of questions. In addition to sound data, the device display informs the car owner about the speed and indications of external lights, as well as much more. But not every radio is equipped with a USB connector. It’s worth thinking about how to connect a flash drive to a car radio if there is no USB input.
Connection options
There are several options for solving the problem associated with connecting a removable storage device to a playing device. Among these options, there are some that are welcomed only by a limited number of motorists. An excellent alternative to them are quite popular actions that allow even those who do not have a technical education to figure out how to connect a flash drive to the radio.
You can, of course, not subject yourself to any tests, but simply visit a retail establishment and purchase a high-quality reproducing device from a famous brand. However, although such a solution to the problem will be desirable for many, it is not at all affordable. For this reason, it is still useful to consider the recommendations of motorists who have gone through this modernization path on how to connect a flash drive to a car radio without a USB connector.
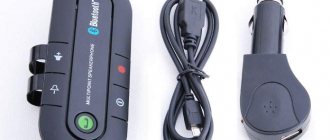
bluetooth adapter
Perhaps someone already has experience connecting a flash drive to a radio using a Bluetooth adapter. Of course, this option can be considered as one of the likely ways to solve the problem. However, those who have already gone through this technical solution path, in most cases, were dissatisfied with the result.
First of all, the Bluetooth adapter must be connected to the cigarette lighter, so you have to consider purchasing a splitter. And this is not only additional financial waste, but also the occurrence of some discomfort when the protruding parts do not allow quick movements. In addition, such a specific clutter provokes a decrease in the aesthetics of the car interior. However, the main disadvantage is that you can't expect high-quality sound reproduction.
USB adapter
Some skilled technical craftsmen can not only successfully implement a USB adapter into any car radio, but also pre-construct it themselves. However, this option is unacceptable for absolutely everyone, since you have to work with microcircuits and boards, which are important to understand. Even one incorrect soldering can cause the car radio to fail.
Why connect USB
Since the 70s of the last century, music has been heard from cars. At first, such a luxury as a radio in a car was not available to everyone. Only representative brands, for example Volga, could boast of it. The industry did not stand still, and soon the radio was equipped with a cassette recorder, and then began to support disks and even flash cards.
Motorists whose iron horse does not have a receiver that meets all modern requirements should not be upset. Installing USB into a standard radio is easy and does not require special skills. Almost anyone can cope with this task.
Option with adapter
You can connect USB to the radio using a special adapter. Now there is a wide selection of such funds. The adapter is suitable not only for USB, but also for memory cards.
Most radio tape recorders have a suitable socket at the end. You need to do the following:
- Pull out the radio.
- Find the connection socket.
- Disconnect the disc player connector.
- Instead, install USB in the radio.
The radio will recognize this operation as a simple change of player. If it outputs MP3 format from disk media, then it can also output from a flash drive.
You can do it even simpler and insert a memory card from your smartphone into the adapter, if such a function is supported.
In addition to advantages, this solution also has disadvantages. When the owner decides to change the car, he will have to change the adapter, because each car has its own control protocol. But when buying a new car, this is not such an acute problem.
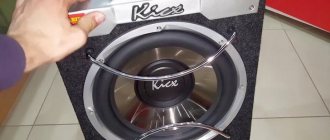
Storage for car radio
A car radio with a USB output is one of the most common audio system options. We will tell you more about the characteristics of the device and the choice of flash drive below.
Audio system with flash drives
Specifics
Most motorists choose audio systems equipped with a USB input because they have many advantages over traditional discs. When purchasing a flash drive for your radio, you need to take into account that not every flash drive is suitable for these purposes. Since the USB input is located on the front panel, it can be accidentally broken, and there is a high probability of damaging the socket.
So, in addition to the size, it is necessary to take into account the security and reliability of the device. When buying a flash drive for a radio, you need to take into account that it will function under conditions of temperature changes and vibrations. If the device is cheap and unreliable, over time it will begin to “glitch”, which will manifest itself in various symptoms.
Criterias of choice
If you are buying a flash drive for a car radio, there are several selection criteria:
- Dimensions. As you already understand, the dimensions should be as small as possible - this will protect the flash drive from damage.
- Brand. This is not to say that devices from lesser-known manufacturers are not as reliable, but in most cases this is true.
Soldering the board to install a USB drive
Which to choose?
Let's consider several storage options for car radios:
- Apacer Handy AH134 is a device in the form of a car key with small dimensions and a waterproof case. This option is one of the best for daily use. The device is equipped with a one-piece and molded body, and also has a fairly convenient shape. On sale you can find models with capacities of 4 and 8 gigabytes.
- The HP V165W model is equipped with a stamped housing, so if you decide to purchase this option for your car radio, you need to keep in mind that it cannot be left in the car at night. The flash drive will work normally at air temperatures from 0 to 60 degrees. On sale you can find options up to 32 gigabytes, which will allow you not only to listen to music, but also, if necessary, transfer large amounts of data.
- Kingstone Micro - this model has an eyelet for attaching to a keychain or rope, but unlike the previous version, it is stamped inside the case. If you believe consumer reviews, this option is less reliable; it is more relevant for users who will not often remove the device from the car radio socket.
- The PQI U280L Button Disk is equipped with special hooks on the case for easier removal, but in fact they are not as convenient as they might seem. It is not necessary to remove the device from the car radio, since its use is allowed in the temperature range from -20 to +75 degrees.
- Another drive option is the Pretec iDisk BulletProof model - according to the manufacturer, this drive is able to withstand a bullet. It should be noted that its dimensions are quite large, so when using a flash drive you need to be very careful. You are unlikely to be able to break the body of the device itself, but damaging the car radio socket is no problem. On sale you can find both 2 GB and 32 GB options (the author of the video is the MECHANIK LILIAN channel).
Modulator
Connecting USB to the standard radio can be entrusted to specialists, or you can save money and carry out the operation yourself. For those wishing to listen to their favorite music from a flash drive, a special modulator can come to the rescue. It is represented by a device that transmits information from a memory card or flash card over a radio channel.
The device needs to be plugged into the cigarette lighter and adjusted to the required frequency, which is also adjusted on the radio. After this, you can enjoy music files from the media. If the radio range is very clogged, it will be most effective to build a modulator into the tape recorder. To do this you will need:
- soldering iron;
- shielded wires;
- modulator, the advantage of which is the remote control;
- radio;
- voltage transformer.
First, disassemble the radio and disconnect the tape drive or disc player. Then the microcircuit is removed from the modulator. The plus of the FM modulator power supply must be soldered to the plus of the radio. When turned on, 12V should appear. Then you need to connect power to similar contacts on the radio. Moreover, the minus must be in contact with the minus. You will need an extension cord to bring the USB to the panel.
It is important to remember that the modulator has its own power converter, and the player has its own, and it depends on the brand.
The next step is to connect the audio output of the modulator and the input of the radio using a shielded wire. If the device is old and there is no input, the signal will have to be sent to the preamplifier directly. You need to look for it, guided by the shielded wire of the head. If everything is connected correctly, the modulator will work via AUX or Tare.
AUX, USB
In English, USB is read as Universal Serial Bus, which literally translates as universal serial bus. A special connector in a car radio (laptop, stereo, tablet, etc.) for serial connection of various types of devices.
AUX - output on the radio, as well as an adapter cable equipped with specialized connectors and performing the same role as USB (connects various devices and equipment to the car's standard radio).
Connecting a USB extension cable to the board
To make the correct connection, first you need to pry up the front panel with a thin awl or knife and remove the clip latch. To remove the radio itself, you will need a star screwdriver. You need to unscrew the 4 corner screws with it. Move towards yourself to pull out the radio. You need to take it out carefully so as not to damage the connectors on the back. The antenna connector is removed as follows:
- Raise the latch.
- Remove the connector.
The rest are removed by pressing a button and pulling out a chip.
After this, you need to disassemble the radio itself. First of all, cut off the seal and remove the top and bottom covers. The next step is to remove the CD drive to make it easier to work with. The main thing is not to damage the cable. It must be removed from the drive side. Next you will need:
- magnifying glass;
- soldering iron, or better yet, a soldering station;
- 3 resistors with a nominal value of 0 Ohm.
If you look on the board, the soldering point will be marked as R25. It is located next to capacitor C3. We place an SMD0603 resistor R25 with a nominal value of 0 Ohm. We solder the remaining 2 resistors where L501 and L500 are located. We unsolder the existing resistor R212 and replace it with a 10 kOhm resistor. And we add one more of the same additionally.
Then we solder in capacitor C515, equal to 0.1 microfarad. And then we install a USB power supply microassembly nearby. A capacitor C516 with a capacity of 0.1 microfarad is soldered in. At the end, you need to attach a USB cable to the connector and solder 2 electrolytic capacitors in place of capacitors C500 and C501. You need to make holes for them from the inside of the plank.
Insert electrolytic capacitors into the holes, observing polarity. Their capacity should be 100 microfarads, voltage - up to 25 volts. After this, you can check the device by connecting it to an autonomous power supply. If everything is in order, the flash drive should blink. You won't be able to play music in your car unless you have a CD player installed. There may be a problem with drive detection. This can happen if the cable is not securely attached.
If you follow all the recommendations and strictly follow the instructions, the conversion will be easy and interesting, and instead of a CD, you can play a flash drive. We often redo things that no longer suit us, the main thing is to do it right.
How to connect a flash drive via AUX to a car radio
CDs have not been used for listening to music for a long time. Outdated media have been replaced by USB drives with larger capacities. Most modern radios are equipped with a connector for connecting flash cards, but there are also outdated models without such a port. In this case, the user has a question about how to connect a flash drive via AUX in the car.
Using an old player
Before performing work, you need to prepare an unnecessary MP3 player capable of playing music from memory cards. The device must be equipped with a headphone jack. The process of connecting a flash drive to the radio via AUX includes the following steps:
- Removing the radio. After unscrewing the screws holding the housing, the device is removed from the seat. After this, the drive intended for reading information from CDs is dismantled.
- Connecting devices. The positive cable of the MP3 player is connected to the contact of the radio, which receives voltage after switching on. The radio input is combined with the output of the selected audio device. The player chip is connected to the base of the car radio. To place the board, use the space remaining after removing the CD drive. All connections must be insulated to avoid short circuits.
- Displaying player controls on the front panel of the car radio. The buttons will take the place of the remote CD drive keys. After turning on the AUX mechanism, it will be possible to play music from a flash card. The player buttons can be used to select songs and increase playback speed.
Special adapters
Drivers often ask whether it is possible to listen to music through a flash drive adapter in a car. The adapter can be made with your own hands or purchased at a specialized store. The radio must be equipped with an AUX output. To connect you will need the following materials:
- plug from old headphones;
- connectors that look like tulips;
- four-core cables protected by copper winding;
- multimeter
The headphone cord should work correctly. Its condition is assessed using a multimeter. After this, perform the following actions:
- the main cable of the plug, located near the base, is freed from insulation;
- the left and right channel conductors, marked in red and green, are connected to the middle output of the tulip-shaped connector;
- the contact of the main cable is connected to the metal base of the tulip, the remaining wires are connected to the central outputs of the connector (an adapter is obtained that allows you to connect USB drives to an old model radio);
- the adapter is inserted into the external sound output connector of the radio;
- a reading device is connected to the adapter;
- The radio is started, after which the AUX mode is automatically set, allowing you to listen to music from the flash card.
If the car radio is not equipped with an AUX output, you will have to make it yourself. The audio device is removed from the mounting socket, after which the ventilation panel is removed. The cables from the headphones are connected to the tulip connector and lead out into the cabin. Reading devices are subsequently connected to them.
What is a USB input on a car radio?
Many car owners are faced with a situation where the standard radio in the car does not read music from a flash drive. And the whole problem is that the device simply does not have a USB input, i.e. it was not originally provided. Moreover, this situation is relevant not only for old cars, but also on modern foreign cars you can often find such a distinctive feature. Almost everyone will agree that you want to listen to music in the car without any restrictions, but you can’t burn a lot on a CD. Yes, and disks in a car today are somehow inconvenient and outdated. What to do, is there a solution to the problem? After all, replacing a radio is not the cheapest pleasure and not everyone can afford it. Below we will try to understand the situation in detail and find the optimal solution.
The photo shows an example of a standard Audi TT radio with a USB input, but even today there are some cars whose radios do not have a USB connector
How to make and connect a USB input to a radio
Today, all kinds of electronic devices and devices do not exist and, of course, the problem outlined above has not remained aside. It is not necessary to change the standard radio; it is enough to simply improve the device. There are different options, which we will consider.
USB adapter from mp3 player for standard tape recorder
For this method, we need the simplest mp3 player that is capable of reading music files of the appropriate format from both a memory card and a flash drive. Important feature: the player must have an audio output (jack) for headphones. It is from this that the signal will be taken and sent to the radio. It is worth noting that to perform the procedure you need at least minimal skills in working with a soldering iron in order to avoid short circuits with solder during the soldering process and damage to the insulation of wires, elements, etc. We implement the player as follows:
- We disassemble the radio and remove the CD drive or tape drive from it (if the radio is a cassette).
- We take power from the standard device to power the player, the board of which is first removed from the case.
- Depending on the player's supply voltage, you will have to implement a voltage converter circuit. For example, the car's on-board network has 12 V, and the player is powered by a 3.6 V Li-ion battery.
- We take the sound signal from the output of the player and feed it to the AUX input of the radio. The connection requires a shielded wire, i.e. the wires must be braided. On the radio board you need to find the audio input contacts. We solder the wire from the player to them.
- We install the player board inside the radio, since after removing the CD drive, space will be freed up. For convenience, the USB connector itself is located in a hole intended for cassettes or disks.
- The wires must be connected carefully to avoid a possible short circuit.
- To control the player, the buttons are connected to unused buttons from the CD drive.
- All that remains is to assemble the radio, install it in place and you can enjoy the music, for which you just need to activate the AUX mode.
Installing USB in the radio is possible by introducing an mp3 player into the device
Thus, we assembled the USB adapter ourselves. With this connection method, the volume level on the radio should be lower, which will eliminate the loud signal at a high input signal level.
DIY adapter
Let's consider another option for connecting a flash drive. In this case, you will need a plug from standard headphones, tulip-type connectors and a 4-core copper braided wire. The adapter will be made from these elements. For the procedure to be successful, the radio must have an AUX input. Before starting work, make sure that the headphone wire is not broken. For this reason it is called a multimeter. The whole process is as follows:
- We remove the insulation from the headphone wire and see red and green conductors that correspond to the right and left channels (we cut off the headphones themselves). These conductors must be stripped and soldered to the middle contacts on the tulip connector.
- The braid of the main wire is connected to the steel base of the “tulip”.
- The finished adapter should have the following wiring: a signal from the right and left channels is supplied to the middle contacts of the “tulips”, and the steel base is the common contact.
- We connect an adapter to the external sound signal connector of the radio, with which you can connect any device: tablet, smartphone, player, etc.
- All that remains is to activate the AUX mode and you can listen to music.
Usage
The device comes with a disk containing several programs in Chinese, some advertising, documentation in Chinese and documentation in Chinese English. Almost everything is useless; I haven’t been able to use a single program. They showed a bunch of hieroglyphs, occasionally words about 2000 and XP flashed, but when I tried to do something with the flash drive, the message “access is impossible” popped up, even when running as an administrator.
Although there is also winhex with keygen - it is suggested to use it to create floppy disk images. And the attached instructions even mention that you need to use a keygen for registration.
Preparing a flash drive
The only useful information from the disk is that you can prepare the flash drive for use with the device by plugging it into the connector, holding down both buttons and turning on the power.
Then the flash drive will be formatted for use. The rest is practically useless. But if the device is already installed in the case, then pressing the buttons and plugging in the power at the same time can be inconvenient, so it’s easier to use a specially trained program. There is a program floating around the Internet from a European company (whose website no longer exists) designed to work with a similar emulator. Just in case, I’m posting it in one more place, more copies, useful and identical. After installation (preferably not in program files, but in some other folder - the program wants to write to its directory, although this behavior is configurable), you can run USB_Floppy_Manager_v1.40i and see the Batch Manage Tool program window. The programmers were somewhat inconsistent.
An attentive person will see something in common with the Chinese program. Yes, there is something. But here at least the letters are clear, unlike the Chinese.
On the left is a list of connected flash drives.
Before use, you need to right-click on the desired flash drive and format it. In this window, you can once again check that you are formatting the correct flash drive, select the size of the disks, whether to make them bootable during formatting (a minimum set of files is uploaded), and select how many floppy disks you want to have on the flash drive. In theory, the device itself supports up to a thousand (0-999), but this software only supports up to 100 (0-99). That's enough for me.
A formatted flash drive is perceived by a computer as a 1.44 megabyte USB drive. Well, depending on how much you format it (1.44, 1.2, 720k). You can write or read something there - it will then be clearly visible on the zero “floppy disk”. Although someone wrote that if you try to upload a large file there, other images may be damaged. I haven’t encountered it myself, but just in case I don’t use direct recording very often, and I keep the zero floppy disk free, with just a tag file lying around there, in case I suddenly forget that it’s a flash drive for the emulator. In disk management, by the way, the flash drive is visible in its full capacity as a single partition (I have two gigabytes).
After formatting, you can proceed to working with floppy disks. Their list is on the right side of the window. Serial number, volume, filling, date of last update. There is no additional information, such as signatures.
Here you can open the “floppy disk” to work with it, save changes, write the image to the floppy disk and save the contents of the floppy disk into the image. Well, format a specific floppy disk, and not all together.
When you open a “floppy disk” (Open), the contents are copied to the hard drive in the working folder, where you can work with files - add, delete, edit. When finished, you must return to the program window and click “Save” on the desired floppy disk - otherwise the changes will not be written to the disk, and when the “floppy disk” is opened again, they will be deleted from the working folder. When you close the program, the files are not deleted and live until you open the “floppy disk” again - after which they will be overwritten.
Uses img files for floppy images. It doesn’t support any non-standard formats, so forget about installing Windows 95 from floppy disks, there floppy disks were formatted to 1.6, if memory serves. Only the boot was of normal size.
You can select several “floppy disks” and perform batch operations on them. Opening will copy the contents of the selected "floppy disks" to disk and send you to the root of the program's working directory, rather than to a specific floppy disk. Saving will write the changes to the allocated “floppy disks”. Formatting - formats through the same standard window. And burning an image will write one image onto dedicated “floppy disks.” It will not be possible to record several different images this way. Just as there is no way to save several “floppy disks” into images, this will have to be done individually.
Well, that’s all from the software side. The program does not require administrator rights to work - unless, of course, the working folders are moved outside the Program files. Works fine on Windows 10 x64.
How to use it all
Everything is simple here. First, connect it instead of the drive.
When power is applied, the zeros on the display light up. The dots indicate the absence of a flash drive in the drive.
If you insert a flash drive, the dots disappear. The buttons on the right switch the number of the “floppy disk”. The right button in a circle switches units, the left one – tens, pressing both simultaneously – hundreds. When accessing the floppy disk, the light comes on. The device does not make any sounds during operation. I won’t shoot a video of the work.
Well, a little speed test. Windows 98SE, full formatting of the floppy disk (from clicking the “Start” button until the window with the result appears): Drive: 1:55 Emulator: 1:47
Copying a folder with files 1 megabyte in size - 1048576 bytes (DOS from Windows 98SE, copy *.* a:\): Drive: 45 seconds Emulator: 34 seconds