Home » Repair
09/06/2019 Category: Repair
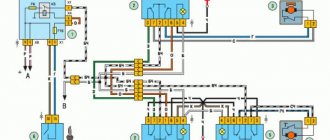
Despite the fact that the principle of controlling the window lifters is carried out exactly the same as in other models, the Lada Priora car uses a slightly different window lifter scheme . The main difference from other models is the absence of a power window unit. They are controlled by an integrated electrical package controller. The designers made this design to ensure ease of control.
To fully open and close the window, the driver does not need to hold down the control button. All that is required in such a situation is to hold down the button for a certain time. If you do not meet the specified time period by releasing the key too early, the window regulator will stop raising or lowering the window. In this case, the buttons do not cause network switching, as on a number of other models. They perform the function of a sensor, transmitting information to the electronic unit.
In addition to the use of electronic units, the operation circuit of the Lada Priora 2014 car windows supplies power to the electric drive in a specific way. One of the wires available in the system is multifunctional. It can control the mirrors, supply power, and also control the door lock solenoid.
Consequently, this wire can change polarity, depending on the characteristics of the switched-on consumer. The wires on the left and right sides are connected separately to connector X1. In this case, pins 4 and 6 are used. This property is very useful when locating potential circuit faults.
You may also need advice about Lada Priora error codes, which will help you identify a malfunction in your car.
How to look for faults in the current circuit of a Lada Priora car if the passenger door windows stop working? All power windows are unlikely to break at once. If you had to encounter such a breakdown in practice, most likely the problem lies in the electronic control unit for the electrical package.
It is worth noting that the breakdown of a single window regulator is very common in practice, especially on cars of the first production. The reason, again, is a malfunction of the unit, when the circuits responsible for controlling the electric windows completely or partially burn out.
This is due to shortcomings in the circuits by the manufacturer. The same reason could cause the window regulators to operate jerkily. As a result, the block manufacturer completely eliminated the problem, but this did not improve the situation, since older models still suffer from this “disease.”
But you shouldn’t hope that all the problems are just a (to put it bluntly) unstable block. Moreover, you should not believe that replacing the control module will correct the situation. There are a number of other reasons why malfunctions may occur.
What functions does the block provide?
The main functional purpose of the device is to monitor and control the electrical system in the car. Some important functions for which the block is responsible:
- fog lights, low beam, side lights;
- lighting in the car interior;
- direction indicators;
- power window system;
- operation, adjustment and heating of side mirrors;
- anti-theft system;
- signaling;
- door locking;
- trunk lighting;
- instrument panel lighting.
Partial, and even more so complete failure of the unit causes significant trouble for any car owner. The biggest problems are caused by the failure of the comfort unit in dense city traffic conditions.
How to find a relay in a car?
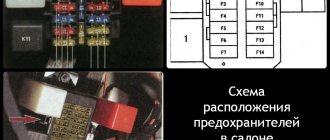
This element is located in the same place as the fuses: in a special mounting block. If the driver detects malfunctions in the operation of electrics or instruments, first of all, you need to check the serviceability of these elements. In most cars, the mounting block is located on the left side of the dashboard. To open access to the devices, you need to press a special button and move the cover down. Most often, the removal of fuses is carried out using pliers, which are in the block itself, and the relay is dismantled manually.
The element is checked if the lifting mechanism stops working. If there are no problems with the device, diagnostics of the lift itself (motor, gears, condition of wires) will be required.
Where is the Priora comfort block located?
To gain access to the product, you will need to unscrew the protective plastic walls of the car's center console. They are located on the left side of the front passenger seat and on the right of the gas pedal, on the driver's side. The device itself is located above the control unit. In order to remove the device you will need a 10 mm wrench and a Phillips screwdriver.
Pinout of the Priora comfort block
The main, important elements of the device are:
- The so-called control drivers. Each driver is responsible for a set of specific functions.
- Transponder receiver.
- Relay control.
- Transceiver. Communicates with the module installed in the door.
- 2 connectors. The first is responsible for supplying power, the second for transmitting the necessary technical information.
Click to enlarge
To ensure proper operation of all elements connected to the comfort unit connectors, it is necessary to study the correct pinout (numbered diagram for connecting wires to contacts). The design of the comfort block for the Priora, when studied in detail, is not particularly difficult.
Electrical problems
It is better to start diagnosing a malfunction by checking the condition of the fuse, which is responsible for the operation of the power windows in the VAZ 2110. Usually it is numbered F5. If necessary, the fuse must be replaced with a new one. If it is intact, proceed to the next stage. You will need a 12 volt light bulb with two wires going to its positive and negative side.
Connect the wires to the terminals of the window lift motor and press the button. If the light comes on, the wiring is good, but if not, start looking at the wires for breaks. Also don't forget to check the corresponding relay.
Another problem with the electrical wiring circuit is when the window opens when the button is pressed, but when it is released the glass rises again. In some cases, the button does not work until you turn the ignition off and on. These signs indicate a malfunction of the button, so you can try to remove it and clean the contacts, and if necessary, replace it with a new one.
Self-repair of the Priora comfort unit, is this possible?
If you have never encountered soldering, diagnostics of printed circuit boards of varying complexity and configurations, or do not have the necessary diagnostic or soldering equipment, then it is better to address the repair question to qualified specialists. If you have the above skills and understand the causes of malfunctions, independent repairs are carried out quite often. This is due to the fact that various microcircuits or chips constantly fail. For example, having established that the reason for the turn signal failure is a failed control driver, it is always possible to purchase a new part and simply re-solder it to replace the faulty one.
Checking the electrical package control unit (CBKE)
The difficulty in determining the cause of an ESP malfunction lies in the fact that a pair of wires (X1-4 or X1-6) coming from the TsBKE are multifunctional. That is, one wire can change polarity depending on the function (mirror control, power supply, central locking control).
Replacing the Priora comfort unit
Before purchasing a new product, you must be sure that the cause of the malfunction lies precisely in it. To do this, you can install a known-good unit in your car and test the operation of problematic units. If, with a new, serviceable device, electrical consumers operate normally, the old comfort unit is faulty. Otherwise, use an integrated approach, check fuses, relays, wiring, and all kinds of drives. In other words, the entire technical chain with which the faulty unit usually comes into contact during operation.
Replacement of the device is carried out in 7 simple steps:
- We put the car on the parking brake.
- Open the hood, loosen the negative terminal and remove it from the battery.
- We move into the car interior. For ease of operation, we roll the front seats back into the cabin as far as possible.
- We prepare the tool. Using a screwdriver, unscrew the mounting bolts and remove the 2 side walls.
- Using a 10mm wrench, unscrew the two fastening nuts.
- Carefully remove the block itself. When removing, rotate the product so that it does not hit other elements. Disconnect two contact connectors, the first is power, the second is information.
- Remove the faulty product and install a new one.
In the future, in order to inspect, diagnose or repair the Priora comfort unit, you will need to remove its protective housing. When purchasing a new unit, keep your sales or sales receipt. If you purchase a faulty device, this will allow you to return or exchange it for a new one. Prices for the product vary depending on the specific seller and range from 2,500 rubles to 10,000 rubles.
Window lift repair
Everyone knows that everything in this life is not forever, and the side window lifters in VAZ cars are no exception. The good thing is that in our domestic cars, the repair of mechanical window regulators is much simplified than in “foreign cars” worthy of imitation. And servicing a domestic window regulator is much cheaper in terms of spare parts than foreign ones. Yes, and installing an electric window lifter is a relatively inexpensive pleasure. To avoid the cable coming off the special guide grooves of the drum, two branches of the cable must be tied in the place shown by arrows in (Fig. 1) Fig. 1 Schematic structure of the window lifter in VAZ1 cars - lifting handle or lowering window; 2 - retainer and lining; 3—special socket; 4—main window lift mechanism; 5 — roller bracket; 6 — special screw; 7 — plate pressing the cable; 8 — special bracket; 9 — the glass itself; 10 - cable; 11 — lower cable roller; 12 - bolt; 13 - cable tension roller This is done if the window regulator is not removed for replacement. Now you can begin removing the window regulator. First, you need general vehicle repair preparation. Next, you need to remove the plates that press the cable and lower the glass all the way. The tightening of the tension roller mounting bolt should be loosened with a 10mm socket wrench, then the tension roller must be moved and the cable removed from it. (Fig. 2)Fig. 2 It is necessary to remove the cable from the remaining three rollers one by one. (Fig. 3) Fig. 3 The nuts that secure the mechanism for lowering and raising the glass should be unscrewed with an 8mm spanner or socket wrench. (Fig. 4) Fig. 4 There is a special technological hole in the inner door panel, through which it is necessary to remove the window regulator with the glass pre-lowered . (Fig.5)Fig.5Then we install the window regulator back. Installation is performed in the reverse order of disassembly. The window lift cable must be lubricated with grease. We untie the wire tied during disassembly, which secures the cable, and then adjust the tension. The cable is tensioned by moving the roller, and then the smooth running of the drive is checked. A high-quality Audi car service will repair your car. Experienced specialists from the AVTOSERVISSPECTR company will perform high-quality Audi repairs at an affordable price. All work is guaranteed. Having come to us once, you will forever forget about the breakdowns of your car.
What does the functional diagram of window regulators look like?
Window regulators in the Lada Priora may be faulty if there are defects in the operation of the relay or the fuse is blown. Then the window lifters jam on the rear doors or on the side of the seat located on the right. It is also considered incorrect operation of devices when the glass moves jerkily. This option is present in the Lada Priora of the first years of production. A little later, the shortcomings were corrected, and those who purchased the car in the first rows have to tinker with it themselves.
By the way, according to experts, it is not necessary to start replacing the control unit. Simple testing will help determine the real reason:
- See if the lock that controls how the power window control unit works in the Lada Priora is functioning correctly. If the lock is acting up, you need to check the plus or minus on the wire.
- It would be a good idea to check the condition of the fuse. To do this, connect the adjustment bulb to the body of the Lada Priora and see how the windows move in different directions. The same actions are carried out with a positively charged wire, and then with wiring numbers 1, 5, 11, 13. If the light always lights up, the fault is not in the unit. Most likely, some wire has been crushed or the electric drive has failed.
How to open a window when the SP is not working
Sometimes problems arise on the way, and the possibilities of self-diagnosis, and especially repair, are significantly limited. How to raise the window in such cases if the window regulator refuses to work? We have put together a small selection of tips that will help you get out of this unpleasant situation with honor:
- A screwdriver or pliers are enough to remove the door trim. This will allow the glass to be disconnected from the actuator, after which it can be raised or lowered by hand. To fix it in the upper position, the glass will have to be supported with something suitable, at least with a stick. In this condition, you can operate the machine for several days until it becomes possible to carry out a full repair;
- It is often possible to lift the glass manually by holding it between the palms of your hands and pulling upward with force. If the edge of the window is not visible, you will need to remove the rubber gaskets, and if this does not help, proceed to the previous step;
- Often the inoperability of the joint venture is caused by a banal discharge of the battery, especially after a long period of inactivity. The problem is solved by recharging the battery. You can try to “borrow” it from a neighbor, at least to raise the glass. But if you are in a hurry, and there is no compassionate neighbor, try pressing the “Up” key with high frequency - sometimes the glass actually begins to rise a little;
- You can raise a lowered window if the window lifter does not work using a barbaric method called “fishing”. It consists of using a fairly strong hook that squeezes into the gap between the door and the window. By moving it down/up and to the sides, you can hook onto the actuator and try to pull the glass up with this hook;
- if the joint venture does not respond to your actions, you need to check whether power is supplied to the electric motor. This is done as follows: turn on the ignition, and then turn on the overhead lamp, then press the window lifter button. If power is supplied to the motor, the intensity of the glow will decrease momentarily. In this case, you can try to revive the engine by pressing the ESP button and hitting the handle with which you open the door with your fist with considerable force. Sometimes this helps - if the reason lies in the wedging of the worm due to worn teeth of the plastic gear of the gearbox. This usually happens in the extreme (usually lower) positions of the glass;
- If the window regulator does not go down, the reason may be a broken electrical wiring. In such cases, it is necessary to open the door and remove the casing with wires. To check the lack of contact, you will need the help of a friend who will press the SP button, and at this time you will pull each of the wires in turn. If the glass moves, you have found a malfunction, and you can even fix it yourself;
- if you are convinced that the motor is intact and the problem is not a faulty gearbox (if the window goes down normally, without jerking or suspicious sound effects, but does not want to go up), try rearranging the wires going to the motor, and then press the “Down” key . If the glass rises, you can lower it before repairs can be made by repeating this procedure.
We hope these tips will help you temporarily solve the problem of your power window not working.
How to identify a malfunction
To determine the malfunction, follow the instructions:
- Connect the light bulb located under the door trim with the wiring coming from the electric drive. If the last one is broken, the light is on, which means the problem is in the wire.
- If the operation of the power window control unit leaves much to be desired, the main reason is the contact of the wire with the box or another wire.
If a breakdown in the Lada Priora needs to be repaired with your own hands, without having special tools, first rule out the possibility of a wiring break or short circuit that falls on the ground of the wire responsible for controlling and powering the door structure module unit near the driver’s seat.
Priora electrical package control unit 2170-3763040 (Comfort unit)
The equipment of the car, as is sometimes written, does not matter when a unit with a given number is installed.
The electrical package controller is a device designed for installation on VAZ 2170 Priora cars. It controls many car functions, for example, turn signals, power windows, instrument panel lights, side lights, low beam, fog lights, reverse lamp, interior lighting, heated rear window.
Design and types of window lifters
The Lada Priora has tempered glass on the front and rear doors. A window lifting mechanism is used to raise and lower them. The power windows are controlled using a button on the car door module. The driver can control the movement of the glass of all doors, and the passenger can only control the glass of his door. According to the principle of operation, the devices are divided into rack and cable.
Despite the fact that the Priora's window lifting mechanism is similar to other models, its difference lies in the absence of a window lifter block. Its function is performed by the built-in electrical package control controller (CBKE), located near the ECU.
In addition, power is supplied to the drive in a specific way. One of the wires is multifunctional. It changes polarity depending on the function performed: it controls the central locking, mirrors, and power supply. This makes it difficult to troubleshoot and repair the window regulator.
Master class on installing door closers
- First, remove 2 nuts on the door trim near the driver.
- Then we lift the plastic clips and free the car threshold from the lining.
- Carefully remove the noise and temperature insulating materials and get to the power window connector shown in the figure. Be sure to ensure that all openings in the car, on the side of the body, are closed.
- Next, you need to disconnect the existing connector and install the connector of our new device.
This is all that needs to be done to install the power window closer on the Lada Priora. Now you don’t have to worry that when you turn off the ignition in your car, the window glass will remain down. The closer will do his job.
And that is not all! If you want to leave the car ventilated while closing it, the power window closer function can be disabled.
Car owners sometimes have to deal with a situation where the power windows do not work. The design of the Lada Priora does not include a power window control unit. The article discusses the design of Priora window regulators, their main malfunctions and provides repair instructions.
Master class on installing door closers
- First, remove 2 nuts on the door trim near the driver.
- Then we lift the plastic clips and free the car threshold from the lining.
- Carefully remove the noise and temperature insulating materials and get to the power window connector shown in the figure. Be sure to ensure that all openings in the car, on the side of the body, are closed.
- Next, you need to disconnect the existing connector and install the connector of our new device.
This is all that needs to be done to install the power window closer on the Lada Priora. Now you don’t have to worry that when you turn off the ignition in your car, the window glass will remain down. The closer will do his job.
And that is not all! If you want to leave the car ventilated while closing it, the power window closer function can be disabled.

