Manufacturing methods
There are two ways to make fiberglass body parts:
- matrix-free. The matrix, that is, the form with which the fiberglass version will be made, will be the metal hood of the car;
- matrix In this case, a matrix is made, which can be reused if desired. This way you can not only tune your car, but also help your friends or make money from those who want to have a custom hood. The method is more expensive because, in addition to conventional materials, it also requires the purchase of gelcoat and wax.
First, let's consider a cheaper option for making a hood with your own hands.
As a guide to the amount of material, we present the values needed to make a hood with a straight front side measuring 105*135. To work you will need:
- polyester resin. There are also methods for making panels using epoxy resins. The hardener required for the resin is most often included in the kit. You can use a hardener used for working with putties. The amount of resin depends on the size of the hood, thickness, and the presence of various moldings. In our case, approximately 5-6 liters of polyester resin will be required;
- glass mat Fiberglass differs in cut sizes and density. To make a hood with your own hands, three density sizes are enough for you: 50, 300 and 600. For our example, the minimum amount of fiberglass is 9 square meters. m;
- sandpaper grade: P80, P120, P240, P500, P800. Of course, sanding blocks;
- brush. You can take one small (2.5 cm) and one wide. For rolling, you can use a paint roller;
- container for preparing resin;
- thin plastic film and soap-olea solution (1:1);
- two strips of metal, 4 bolts for fastening.
What is a fiberglass hood?
One of the primary and integral functions of the hood is to protect the internal mechanism and unit from external environmental factors. Hoods have all kinds of designs, and emphasize the style and exterior of vehicles. A fiberglass hood remains a good option, as it holds its shape steadily and is more reliable than the classic and metal variety. Due to its advantages, such a hood is very popular among car enthusiasts. Since making such a hood significantly reduces cash costs, most car owners try to do it themselves.
Manufacturing process
The following is the cheapest method. To make a fiberglass hood you will need:
- Apply the diluted solution liberally to the surface of the hood. Let it dry a little;
- cover the hood with plastic film, try to expel all air bubbles;
- lay sheets of 50-gauge fiberglass with an overlap of 2-3 cm. Do not leave more than 2 cm of material along the edges of the hood. Impregnated with resin, it will bend;
- dilute the polyester resin. Please note that immediately after adding the hardener, the resin will begin to harden. Therefore, do not dilute more than 300 ml;
- saturate the laid fiberglass with a brush. This must be done so that there are no air bubbles left;
- cover the impregnated fiberglass with a second layer. Make sure that the overlaps are not always in one place. Next, it takes 1-2 hours (depending on the ambient temperature) for the resin to dry;
- Use 80-grit sandpaper to sand off any resin deposits. Treat the joints especially carefully, but do not wash the fiberglass in the overlap area;
- repeat the procedure, allowing for interlayer drying. Distribute the purchased fiberglass evenly. After the 50th, the 300th should be applied, and then the 600th;
- After complete drying, the hood can be adjusted to size. To do this, you can use a hand or jigsaw.
It’s best to do the same manipulations, but on the back of the hood. Then you need to first remove the film, sand the mating surfaces and glue the two parts.
The hood needs reinforcements anyway. In the economical version, you can make them yourself at will. To do this, cut and position strips of foam plastic properly, after moistening the surface with resin. Then cover them with fiberglass. If your car does not have gas stops, you must make a place to fix the hood stop.
Fasteners and latch
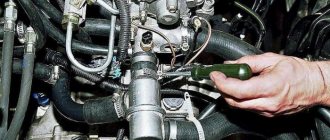
To make the fasteners, cut two plates of metal approximately 3mm thick. Screw two bolts into them on each side so that the hood “ears” can be screwed to them. Tack them by welding and then trim the bolt heads to get a flat surface. To ensure that the hood fits evenly along the gaps, carefully measure the location of the plates.
The plates and latch need to be “walled up” in the manufactured hood. To do this, sit them on epoxy resin and then cover them with enough layers of fiberglass.
This method is more technologically advanced. Manufacturing will require additional materials:
- wax for composite materials;
- rags that do not leave lint. For example, microfiber used for manual polishing;
- gelcoat for application with a brush;
- glass veil;
- aerosil, which promotes adhesion and strength of connection between two parts of the matrix;
- special matrix polyester resin. If you don't have it, you can use the regular one;
- degreaser;
- some thick material, masking tape.
Installation of overlays
Installing purchased overlays makes the whole procedure a little easier, because you already have ready-made plastic overlays. In order to install them, you need to dismantle the hood, decide on the installation location and make markings. Next, using a grinder, holes are cut out for the pads, they are tried on and checked for symmetry. If everything is done correctly, you can install the hood trims. Before this, we prepare the surface of the hood and the linings themselves, clean them and treat them with primer. Well, then the installation process itself. You can secure the overlays using double-sided tape. After this, the installation site is treated from the inside with a sealant to protect it from moisture, air and dust. When everything is dry, the hood can be put back.
It will be useful: Lada 4×4 tried on a new color
Sometimes such overlays are mounted as a purely decorative element. In such cases, cutting the hood is not required; the gills are simply marked and glued to the surface.
Making a matrix
Making a matrix with your own hands:
- wash the hood, wiping off bitumen contaminants, and degrease the surface;
- from the inside, cover the edges with dense material to create support for the fiberglass;
- apply special wax and polish the surface until shiny;
- apply gelcoat. Please note that it hardens quite quickly (7-10 minutes). After setting, when touching your finger will not provoke peeling of the material, you can apply another layer. Try to stretch the gelcoat as evenly as possible. Leave the surface for 12-14 hours to dry completely;
- moisten the surface with polyester resin and apply 2 layers of glass veil with a density of 600 grams/sq. m. Leave the surface for 10-12 hours to dry completely;
- further increase in the thickness of the matrix can be done with coarser fiberglass fabric (150-300 g/sq. m) and ordinary polyester resin. It will be enough to apply 2-3 layers and then leave the matrix for at least 24 hours at a temperature of 18-25ºC. During this time, the surface will dry and all shrinkage processes will end.
Now let's move on to the inside. All cracks between the amplifiers must be carefully covered with plasticine. Otherwise, the procedure is completely similar to that already described above. Since the two parts of the matrix will subsequently be connected, for the inside it is enough to put 2-3 layers of fiberglass with a density of 600 g/sq. m. Do not forget to wall up the fastenings and the latch.The manufacture of the matrix ends with the connection of two parts. Polyester resin with the addition of aerosil is used as glue. For a quality connection, the surface must be thoroughly degreased. After final adjustment, apply adhesive and then press the two parts tightly. Leave the matrix for 1-2 days for complete setting.
Final shaping and painting
Materials you will need:
- putty. To make any other body panel, only universal putty will be enough. But since the hood is constantly exposed to temperature changes during operation, it is better to use aluminum putty or a composition with the addition of fiberglass as a base layer. The final shape of the product will be given by universal putty. For our hood, 4 kg is quite enough. The quantity depends not only on the size of the product, but also on the qualifications of the craftsman;
- acrylic paint - 0.5-0.7 liters or pigment and varnish, if you paint using the method - base for varnish.
acrylic primer and hardener for it;
Manufacturing methods
There are two ways to make fiberglass body parts:
- matrix-free. The matrix, that is, the form with which the fiberglass version will be made, will be the metal hood of the car;
- matrix In this case, a matrix is made, which can be reused if desired. This way you can not only tune your car, but also help your friends or make money from those who want to have a custom hood. The method is more expensive because, in addition to conventional materials, it also requires the purchase of gelcoat and wax.
First, let's consider a cheaper option for making a hood with your own hands.
Materials, tools
As a guide to the amount of material, we present the values needed to make a hood with a straight front side measuring 105*135. To work you will need:
- polyester resin. There are also methods for making panels using epoxy resins. The hardener required for the resin is most often included in the kit. You can use a hardener used for working with putties. The amount of resin depends on the size of the hood, thickness, and the presence of various moldings. In our case, approximately 5-6 liters of polyester resin will be required;
- glass mat Fiberglass differs in cut sizes and density. To make a hood with your own hands, three density sizes are enough for you: 50, 300 and 600. For our example, the minimum amount of fiberglass is 9 square meters. m;
- sandpaper grade: P80, P120, P240, P500, P800. Of course, sanding blocks;
- brush. You can take one small (2.5 cm) and one wide. For rolling, you can use a paint roller;
- container for preparing resin;
- thin plastic film and soap-olea solution (1:1);
- two strips of metal, 4 bolts for fastening.
So how can you install “gills” on a car correctly and without much expense?
The first option is to order a ready-made hood from specialized workshops or companies. But this option is a double-edged sword. The positive side is that you don't have to waste time and effort making gills. You just need to choose from the catalog and install the hood on the car. Naturally, the price of a finished hood is higher than if you make it yourself, however, you lose the opportunity to choose the size and shape of the “gills”, the quality of the materials used and do not in any way affect the quality of the part. The easiest way to do manual tuning is to buy ready-made linings; they are quite simply glued to the car's surface, but they serve a purely decorative role and there is no question of any blowing. That is, the hood trims are only an “imitation” of the aggressiveness and sportiness of the car, and who needs an imitation? Therefore, real tuning enthusiasts customize the car with their own hands.
It is clear that each car has its own size and shape of the hood, and before starting work it is necessary to collect the maximum amount of information about it. It is very important to know the location of the hood stiffeners, otherwise you can seriously damage the car. For example, when driving, it will start to “play” or, in the worst case, break down, and this is completely unpleasant and such tuning is unlikely to be needed by the motorist. Additionally, you will have to think about a water drainage system, which can also harm your car.
Manufacturing process
The following is the cheapest method. To make a fiberglass hood you will need:
- Apply the diluted solution liberally to the surface of the hood. Let it dry a little;
- cover the hood with plastic film, try to expel all air bubbles;
- lay sheets of 50-gauge fiberglass with an overlap of 2-3 cm. Do not leave more than 2 cm of material along the edges of the hood. Impregnated with resin, it will bend;
- dilute the polyester resin. Please note that immediately after adding the hardener, the resin will begin to harden. Therefore, do not dilute more than 300 ml;
- saturate the laid fiberglass with a brush. This must be done so that there are no air bubbles left;
- cover the impregnated fiberglass with a second layer. Make sure that the overlaps are not always in one place. Next, it takes 1-2 hours (depending on the ambient temperature) for the resin to dry;
- Use 80-grit sandpaper to sand off any resin deposits. Treat the joints especially carefully, but do not wash the fiberglass in the overlap area;
- repeat the procedure, allowing for interlayer drying. Distribute the purchased fiberglass evenly. After the 50th, the 300th should be applied, and then the 600th;
- After complete drying, the hood can be adjusted to size. To do this, you can use a hand or jigsaw.
back side
It’s best to do the same manipulations, but on the back of the hood. Then you need to first remove the film, sand the mating surfaces and glue the two parts.
The hood needs reinforcements anyway. In the economical version, you can make them yourself at will. To do this, cut and position strips of foam plastic properly, after moistening the surface with resin. Then cover them with fiberglass. If your car does not have gas stops, you must make a place to fix the hood stop.
Fasteners and latch
To make the fasteners, cut two plates of metal approximately 3mm thick. Screw two bolts into them on each side so that the hood “ears” can be screwed to them. Tack them by welding and then trim the bolt heads to get a flat surface. To ensure that the hood fits evenly along the gaps, carefully measure the location of the plates.
The plates and latch need to be “walled up” in the manufactured hood. To do this, sit them on epoxy resin and then cover them with enough layers of fiberglass.
Matrix method
This method is more technologically advanced. Manufacturing will require additional materials:
- wax for composite materials;
- rags that do not leave lint. For example, microfiber used for manual polishing;
- gelcoat for application with a brush;
- glass veil;
- aerosil, which promotes adhesion and strength of connection between two parts of the matrix;
- special matrix polyester resin. If you don't have it, you can use the regular one;
- degreaser;
- some thick material, masking tape.
Deflector
Tuning a deflector on the hood is not just an element for giving a spectacular appearance. This part also has protective functions. Sometimes this element is simply irreplaceable during modernizations. The deflector, or “fly swatter,” is made from special perforated plastic, which can withstand low temperatures and does not change geometry when exposed to direct sunlight.
Installing this element on a car is very simple - you just need to purchase the option you like in the store. The deflector is attached to standard bumper mounting points. There are models of deflectors that are designed to be mounted on the hood. These elements are made of softer plastic, and their plates are thinner. If you install a deflector and then cover the hood with vinyl film, the car will look very unusual. The hood will be reliably protected from corrosion and dirt.
Making a matrix
Making a matrix with your own hands:
- wash the hood, wiping off bitumen contaminants, and degrease the surface;
- from the inside, cover the edges with dense material to create support for the fiberglass;
- apply special wax and polish the surface until shiny;
- apply gelcoat. Please note that it hardens quite quickly (7-10 minutes). After setting, when touching your finger will not provoke peeling of the material, you can apply another layer. Try to stretch the gelcoat as evenly as possible. Leave the surface for 12-14 hours to dry completely;
- moisten the surface with polyester resin and apply 2 layers of glass veil with a density of 600 grams/sq. m. Leave the surface for 10-12 hours to dry completely;
- further increase in the thickness of the matrix can be done with coarser fiberglass fabric (150-300 g/sq. m) and ordinary polyester resin. It will be enough to apply 2-3 layers and then leave the matrix for at least 24 hours at a temperature of 18-25ºC. During this time, the surface will dry and all shrinkage processes will end.
Now let's move on to the inside. All cracks between the amplifiers must be carefully covered with plasticine. Otherwise, the procedure is completely similar to that already described above. Since the two parts of the matrix will subsequently be connected, for the inside it is enough to put 2-3 layers of fiberglass with a density of 600 g/sq. m. Do not forget to wall up the fastenings and the latch.
The manufacture of the matrix ends with the connection of two parts. Polyester resin with the addition of aerosil is used as glue. For a quality connection, the surface must be thoroughly degreased. After final adjustment, apply adhesive and then press the two parts tightly. Leave the matrix for 1-2 days for complete setting.
Final shaping and painting
Materials you will need:
- putty. To make any other body panel, only universal putty will be enough. But since the hood is constantly exposed to temperature changes during operation, it is better to use aluminum putty or a composition with the addition of fiberglass as a base layer. The final shape of the product will be given by universal putty. For our hood, 4 kg is quite enough. The quantity depends not only on the size of the product, but also on the qualifications of the craftsman;
- acrylic primer and hardener for it;
- acrylic paint - 0.5-0.7 liters or pigment and varnish, if you paint using the method - base for varnish.
Assembly of hood matrices
Take the hood from which the matrix will be removed. A flange is made along its perimeter, that is, the sides are covered with strips of auxiliary material, slightly increasing its perimeter. Wax for composite materials is applied to the front part, after which the wax surface is polished. You can polish it manually with a lint-free rag. A gelcoat is applied over the polished wax surface, which should dry for about 12-24 hours. After the gelcoat has dried, two layers of glass veil with a density of 30–50 grams per square meter, pre-coated with polyester resin, are applied and left to dry for 12–24 hours.
Thanks to its structure, it protects the gelcoat from traces of other layers of fabric. Used as a barrier between the surface of the matrix and the glass mat. When gluing the material, you need to ensure that there are no air bubbles, as they reduce the rigidity of the product. Next, glass mat with a density of 300 grams/m2 is applied in two layers, coated with polyester resin, and left to dry for 12–24 hours. Afterwards, a double layer of glass mat with a density of 600 grams per square meter is applied with a bonding polyester resin. The structure is left to dry for at least 12 hours. The thickness is completed by roving fiberglass fabric, which, coated with polyester resin, is also laid in two layers.
After laying the last layer of material on the front part of the hood, the part is left to dry at a temperature of +20...−25 degrees Celsius for 40–60 hours. During this time, the processes of shrinkage and hardening of the matrix occur.
Next, the hood is turned over and work on the frame begins. Inside the frame, all existing gaps, chips, and cracks are covered with plasticine or other materials in order to avoid the ingress of resin. The process of waxing the inner surface is carried out, followed by polishing with a rag. The fiberglass fabric is laid in exactly the same sequence and volume as on the front side of the hood.
The outer and inner matrices are separated, the product is removed out. The resulting parts are treated with wax in 3–4 layers, with each of them polished. Next, we work with a general-purpose gelcoat, which is applied to the front hood matrix with a brush and left to dry for about 12–24 hours. Then a glass veil is applied, glass mat with a density of 300 grams per square meter, glass mat with a density of 600 grams/m2, each layer is pre-impregnated with polyester resin, everything is rolled with a roller, and thoroughly dried for 40–60 hours.
Two layers of impregnated glass mat with a density of 600 grams per square meter are applied to the inside of the matrix.
The fiberglass hood is pre-equipped with metal fasteners that will be attached to the interior.
The edges of the outer and inner hood matrices are glued along the perimeter with a strip of fiberglass 5–6 centimeters wide in 2–3 layers to impart strength. In the process of forming parts, a fiberglass cord soaked in resin is laid along all existing bends of the form.
After both parts have hardened, the flash is trimmed along the perimeters of the products. The embedded fastening parts are glued in before joining the matrices into one product. In order to assemble both parts into a solid hood, an adhesive mixture is prepared to glue the halves of the matrix. The mixture contains polyester resin and aerosil. Before gluing, the surfaces are thoroughly degreased, dust-free, and fitting and adjustment are carried out. The compound is applied around the perimeter where the hood will be glued. The upper matrix of the frame is glued into place in the lower one. After hardening, the irregularities are puttied and sanded. Also, the necessary technological holes provided for by the factory design are cut out on the surface of the part.
BOSSCAR.RU
Homemade cars (what we call homemade cars today) began to be built with the advent of the first factory models. The use of individual serial units and entire bodies without external panels makes it possible to build cars with an original design and non-standard consumer properties. Change the standard steering wheel to a steering wheel with tuning (anatomy + leather)
Moreover, the technical content of the donor provides the homemade car with modern characteristics of movement and comfort.
The Morgan Aero-8 replica car is built on the chassis of the Japanese executive sedan Toyota Crown. The attractiveness of this donor lies in its design. The Crown's body rests on a full-length subframe (albeit not a rigid one), to which all elements of the engine, transmission, suspension and fuel system are attached. To make a homemade car based on it, you can completely abandon the use of original body parts.
The layout of the chassis was left unchanged, the engine was not moved, but the radiator was moved behind the engine.
The panels of the new body are made of fiberglass and mounted on a spatial tubular frame. There is a glass hatch in the roof. The roof itself is removable and is attached to the body and windshield frame with four bolts. Crown rearview mirrors are mounted on homemade brackets. Like the prototype, the replica is equipped with headlights from a Volkswagen New Beetle. The radiator grille is made of brass and covered with chrome. Door handles from Alfa Romeo, instruments from Crown.
Interior parts are made of fiberglass and covered with leather and Alcantara.
At the “Autoexotica” exhibition in Tushino in 1999, my friend and I, the mastermind of the construction of exclusive cars, exhibited our first home-made car, Agata. A young guy approached us and asked if we could make a car according to his design. We agreed. My friend took charge of this construction project, and I promised to mold, glue and assemble body parts on the donor frame.
First, a donor was found: in good condition, a relatively new Toyota Crown.
The prototype model was taken from a toy store. The scale model of the Morgan Aero-8 car served us as a guide for constructing the proportions and plasticity of the body.
On the donor's stretcher, I screwed together a frame made of chipboard and beams and pulled hardboard over it.
I covered the frame in places where the body shape had rounded surfaces with plasticine and gave it a plastic shape similar to the prototype. In general, the proportions and dimensions of the body differ from the English Morgan. Our replica is wider, longer and taller than the original.
Using plasticine, I molded fiberglass and made a matrix. This was my record when I single-handedly glued the body matrix together in one week...
It took the two of us to remove the crusts of the matrix. Cleaning them from plasticine and sanding them was probably the hardest and dirtiest job. Part of the layout naturally collapsed during the removal of the matrix.
We screwed together the sanded fragments of the matrix and installed the assembled matrix for molding body panels. In this bowl I had to construct in negative form the shape of the internal surfaces of the body parts.
Step by step, in the order of arrangement of parts in the body, I built and sculpted from plasticine the sides of the doors, doorways, flaps and drains of the hood and trunk openings, flanges of the removable roof, license plate niches, headlights, lanterns and fuel tank cap. We also gradually molded these formworks with fiberglass.
Right in the matrix, we welded and assembled a light tubular frame along the contour of ready-made fiberglass parts. We glued this frame to the body panels along the flanges of the doorways, gutters and sill flaps.
As a result, after removing the matrix, we got a hard top with doors, a removable roof, a hood and a trunk lid.
A lot of time was spent installing the top of the body onto the donor frame and making the floor. We glued the floor panels, engine shield, trunk bottom and wheel arches from fiberglass. The top of the body and the floors were glued together with fiberglass. The result was a fairly rigid structure, especially since we also reinforced the floor with a metal frame. The floor frame was secured to the Crown frame on the original cushions.
A frame was made under the hood and a radiator with exhaust fans behind the engine was mounted on it. In the front part of the body we glued the engine shield, onto which we secured the remaining parts. Since the Toyota Crown is a right-hand drive car, the steering mechanism had to be moved to the left side.
Unfortunately, the time needed to manufacture the body before painting was limited to six months, and the number of performers was limited by the budget, so in many cases it was necessary to succumb to compromise solutions. In particular, a simplified design and technological solution for the hood helped us meet the deadlines. We combined the hood with the bumper and fenders, although this made it significantly heavier. This entire crust rises on two tubular hinge brackets mounted on the body frame above the instrument panel. The fiberglass hood panel itself has a steel subframe and a metal false panel, which is located close to the engine. In the lowered position, the entire structure is attached from the sides and front to the body frame. The trunk lid is also reinforced with a frame made of steel profile and secured to brackets - hinges to the body frame. For headlights and lanterns, niches are molded in fiberglass to protect the rear side of the lighting equipment.
In the body of the replica, we immediately installed a removable hard roof design. From below, through flanges, it rests on the shelf behind the rear seats and is attached to the body frame, and from the front to the windshield frame frame. The rear window on the removable roof, the windshield and side windows are flat, made to individual sizes. It was difficult to find the right seals for our frameless door glass. So we were not able to completely solve this problem on this body. From now on, we decided, if possible, to use glass with a sealant from a suitable donor.
Inside the door frames, I assembled subframes from a metal profile for mounting glass guides, installing hinges, locks and handles. I hung the doors on hinges in the openings and adjusted the gaps. After this, brackets were made from metal profiles and fiberglass for standard mirrors and screwed to the doors. The Alfa Romeo handles fell into place on the doors.
They placed seats in the cabin and attached them through the floor to the body frame. We mounted a console with a handbrake lever and a gear shift knob, a pedal assembly and a steering column with a steering wheel at a convenient distance from the seat. For the seats, window sills, trim and door handles, instrument panels and console housings were designed and manufactured from fiberglass. After painting the body, all interior parts were covered in leather and Alcantara.
The car has been used for several years in dry and warm weather.
Thanks to everyone who took part in the production of the car.
Articles about tuning with your own hands.
Author: Mikhail Romanov Website: https://bosscar.ru
When copying an article, please provide a link to my blog.
bosscar.ru
Preparing the hood for painting and painting
The assembled fiberglass hood is puttied, cleaned with a grinding machine, sandpaper and a block, checked for flatness, absence of dents and deep scratches. After this, a primer is applied in order to identify problem areas and coating defects. The developing primer layer is cleaned with fine sandpaper. Having thus developed the surface, if necessary, additional puttying of irregularities is carried out, as well as cleaning before applying the second layer of primer. Having developed the primer with sandpaper, as a rule, minor defects remain, which are filled with finishing putty and do not require additional application of primer.
The well-prepared surface of the product is dust-free and degreased with a solvent. Preparing paint for painting. To ensure that the color of the part does not differ from the color of the car, a color selection is made. The resulting paint of the desired shade is diluted with a solvent to the required consistency, and then poured into the container of the spray gun. The operation of the gun on a foreign surface is tested, and if necessary, the spray pattern and intensity of paint supply are adjusted. Using a properly configured painting device, a developing layer of paint is applied to the fiberglass hood. Leave to dry in the drying chamber for 12–18 hours. Clean the resulting surface with fine sandpaper in order to reveal residual minor defects. Irregularities are filled with finishing putty, leveled with a grinding machine, and covered with primer. Next comes final painting, drying and subsequent installation on the car.
Measure seven times
Good markup is the key to your success. Always remember this. The well-known proverb certainly applies here. But first we decide in what places on the hood (and some also cut through the wings) the gills will be located. So, we arm ourselves with high-quality measuring instruments. It will be convenient to use glass markers to draw lines. Don’t be afraid to re-measure the distances and re-mark them; anyway, the body part being cut will have to be additionally sanded and painted.
A little advice:
It is better to mark the hood before removing it from the car. In this case, you will be able to see the proportions and general geometry of the innovations (and, if necessary, adjust and change something). And when the hood has already been removed, marking errors are not so clearly visible.
List of consumables for making a fiberglass hood
In order to decide on the question of how to make a fiberglass hood, you need to know what materials to use, as well as in what quantities. To create a part measuring 100 centimeters by 140 centimeters you will need:
- polyester resin about 6–8 liter cans;
- glass veil with a density of 30–50 grams/m2 in an amount of 7–8 square meters;
- glass mat with a density of 300 grams/m2, with a total area of 8–9 square meters;
- glass mat with a density of 600 grams/m2 - 10–12 square meters;
- universal putty - 6–8 kilograms;
- alkyd primer - 1–2 liters;
- body paint - 0.5–1 liter;
- solvent 750 - 1 liter;
- tassels;
- solvent - 1 liter;
- wax for composite materials - 4–5 liters;
- Aerosil - 0.5–1 liter.
The hood, produced by molding from fiberglass, is 50–70% lighter than the factory counterpart, is not inferior to it in strength properties, and is even superior in durability, considering the material from which it is made.
We would be interested to know if you liked the real material.
Content
You can also get by with plastic covers glued to the hood, which will imitate the coveted gills. But this method is not for true tuning connoisseurs. In addition, you do not receive any additional airflow to the engine. So we immediately throw it aside (although, it seems, everything is simple here for those who decide to imitate: you buy overlays, mark the places, fasten them with glue or special tape, and clean them up). And below we’ll talk about how to make real gills!
Read more: How long can you store open motor oil?
Manufacturing methods
There are two ways to make fiberglass body parts:
- matrix-free. The matrix, that is, the form with which the fiberglass version will be made, will be the metal hood of the car;
- matrix In this case, a matrix is made, which can be reused if desired. This way you can not only tune your car, but also help your friends or make money from those who want to have a custom hood. The method is more expensive because, in addition to conventional materials, it also requires the purchase of gelcoat and wax.
First, let's consider a cheaper option for making a hood with your own hands.
Materials, tools
As a guide to the amount of material, we present the values needed to make a hood with a straight front side measuring 105*135. To work you will need:
- polyester resin. There are also methods for making panels using epoxy resins. The hardener required for the resin is most often included in the kit. You can use a hardener used for working with putties. The amount of resin depends on the size of the hood, thickness, and the presence of various moldings. In our case, approximately 5-6 liters of polyester resin will be required;
- glass mat Fiberglass differs in cut sizes and density. To make a hood with your own hands, three density sizes are enough for you: 50, 300 and 600. For our example, the minimum amount of fiberglass is 9 square meters. m;
- sandpaper grade: P80, P120, P240, P500, P800. Of course, sanding blocks;
- brush. You can take one small (2.5 cm) and one wide. For rolling, you can use a paint roller;
- container for preparing resin;
- thin plastic film and soap-olea solution (1:1);
- two strips of metal, 4 bolts for fastening.
DIY gill cutting
Making gills on the hood with your own hands is somewhat more difficult than gluing store-bought ones. For this you will definitely need a tool. Namely, a grinder, a hacksaw and metal scissors, a marker for drawing, glue, pliers, additional metal, materials for grinding and painting. Here we should not forget about patience, imagination, courage and the absence of fear of ruining something. After all, you will have to act at your own peril and risk. One wrong step and you can ruin your car's hood forever.
In order to make ventilation windows in the hood with your own hands, you should dismantle it. Before proceeding directly to the manufacturing process, it is worth finally deciding on their location, shape and size. After this, using a marker, you need to make markings on the hood, in fact, draw what you will do. Next, using a grinder, the required element is cut out and bent using pliers to a certain depth.
After this, you will need additional metal to make scarves that will close the gaps that have formed on the sides. Triangles of the required size are cut from a metal sheet with a grinder and welded. To prevent the metal from “leading” and twisting, it is better to use tin soldering or spot welding, making each successive point a couple of centimeters apart. And so on until the seam becomes continuous. After welding, the metal is thoroughly cleaned, leveled using putty, and primed. And the last stage is painting the hood and treating the inside with anti-corrosion agents.
Do not forget that after the ventilation windows are made, you run the risk of foreign objects (pebbles, sand, etc.) getting under the hood of the car. To avoid this, it is better to cover the holes made from the inside with a mesh. The mesh is attached using glue or a heat gun, and the contact points between the mesh and metal are carefully covered with sealant.
Manufacturing process
The following is the cheapest method. To make a fiberglass hood you will need:
- Apply the diluted solution liberally to the surface of the hood. Let it dry a little;
- cover the hood with plastic film, try to expel all air bubbles;
- lay sheets of 50-gauge fiberglass with an overlap of 2-3 cm. Do not leave more than 2 cm of material along the edges of the hood. Impregnated with resin, it will bend;
- dilute the polyester resin. Please note that immediately after adding the hardener, the resin will begin to harden. Therefore, do not dilute more than 300 ml;
- saturate the laid fiberglass with a brush. This must be done so that there are no air bubbles left;
- cover the impregnated fiberglass with a second layer. Make sure that the overlaps are not always in one place. Next, it takes 1-2 hours (depending on the ambient temperature) for the resin to dry;
- Use 80-grit sandpaper to sand off any resin deposits. Treat the joints especially carefully, but do not wash the fiberglass in the overlap area;
- repeat the procedure, allowing for interlayer drying. Distribute the purchased fiberglass evenly. After the 50th, the 300th should be applied, and then the 600th;
- After complete drying, the hood can be adjusted to size. To do this, you can use a hand or jigsaw.
back side
It’s best to do the same manipulations, but on the back of the hood. Then you need to first remove the film, sand the mating surfaces and glue the two parts.
The hood needs reinforcements anyway. In the economical version, you can make them yourself at will. To do this, cut and position strips of foam plastic properly, after moistening the surface with resin. Then cover them with fiberglass. If your car does not have gas stops, you must make a place to fix the hood stop.
Fasteners and latch
To make the fasteners, cut two plates of metal approximately 3mm thick. Screw two bolts into them on each side so that the hood “ears” can be screwed to them. Tack them by welding and then trim the bolt heads to get a flat surface. To ensure that the hood fits evenly along the gaps, carefully measure the location of the plates.
The plates and latch need to be “walled up” in the manufactured hood. To do this, sit them on epoxy resin and then cover them with enough layers of fiberglass.
Matrix method
This method is more technologically advanced. Manufacturing will require additional materials:
- wax for composite materials;
- rags that do not leave lint. For example, microfiber used for manual polishing;
- gelcoat for application with a brush;
- glass veil;
- aerosil, which promotes adhesion and strength of connection between two parts of the matrix;
- special matrix polyester resin. If you don't have it, you can use the regular one;
- degreaser;
- some thick material, masking tape.
Making a matrix
Making a matrix with your own hands:
- wash the hood, wiping off bitumen contaminants, and degrease the surface;
- from the inside, cover the edges with dense material to create support for the fiberglass;
- apply special wax and polish the surface until shiny;
- apply gelcoat. Please note that it hardens quite quickly (7-10 minutes). After setting, when touching your finger will not provoke peeling of the material, you can apply another layer. Try to stretch the gelcoat as evenly as possible. Leave the surface for 12-14 hours to dry completely;
- moisten the surface with polyester resin and apply 2 layers of glass veil with a density of 600 grams/sq. m. Leave the surface for 10-12 hours to dry completely;
- further increase in the thickness of the matrix can be done with coarser fiberglass fabric (150-300 g/sq. m) and ordinary polyester resin. It will be enough to apply 2-3 layers and then leave the matrix for at least 24 hours at a temperature of 18-25ºC. During this time, the surface will dry and all shrinkage processes will end.
Now let's move on to the inside. All cracks between the amplifiers must be carefully covered with plasticine. Otherwise, the procedure is completely similar to that already described above. Since the two parts of the matrix will subsequently be connected, for the inside it is enough to put 2-3 layers of fiberglass with a density of 600 g/sq. m. Do not forget to wall up the fastenings and the latch.
The manufacture of the matrix ends with the connection of two parts. Polyester resin with the addition of aerosil is used as glue. For a quality connection, the surface must be thoroughly degreased. After final adjustment, apply adhesive and then press the two parts tightly. Leave the matrix for 1-2 days for complete setting.
Final shaping and painting
Materials you will need:
- putty. To make any other body panel, only universal putty will be enough. But since the hood is constantly exposed to temperature changes during operation, it is better to use aluminum putty or a composition with the addition of fiberglass as a base layer. The final shape of the product will be given by universal putty. For our hood, 4 kg is quite enough. The quantity depends not only on the size of the product, but also on the qualifications of the craftsman;
- acrylic primer and hardener for it;
- acrylic paint - 0.5-0.7 liters or pigment and varnish, if you paint using the method - base for varnish.
Let's assume that you didn't plan to finish the hood tuning by making it lighter. To mold all kinds of false air intakes and technological holes, you can use polystyrene foam or polyurethane foam. After gluing them with polyester resin, you can give them any shape, and then cover them with fiberglass and technical plasticine.
Putty will give the final shape to the product. Preparation for priming is carried out with P80 abrasive - for roughing. Be sure to use developers and bars of different lengths. Treatment with P-240 abrasive is the final treatment before priming. The primer is sanded with P600 with development, and then with P800 as a final sanding before painting. The completion of the fiberglass hood will be painting it yourself.
cutting
You should proceed with the cutting itself only if you are completely sure that the markings are correct. For these purposes, we remove the hood, take an angle grinder and put on safety glasses. If desired, you can seal the parts of the hood that are not exposed to impact with a protective film. But this is not necessary. Since there will still be further puttying and painting. We cut the hood exactly along the lines, observing safety rules (for example, there should be no explosive or flammable materials in the nearby garage while work is being carried out).