Bleeding the brakes of a VAZ 2112. How to do it correctly
In the list of diagnostic measures, bleeding the brakes of the VAZ 2112 is one of the first places.
It’s good when car enthusiasts understand this and take it quite seriously. It’s not for nothing that they say: “Why do you need a gas pedal if the brakes don’t work?” Bleeding the VAZ 2112 brakes is primarily necessary to remove air layers
, which lead to malfunctions of the entire well-functioning automotive mechanism. The most critical consequence of the presence of air in the system is its complete failure, when when you press the brake pedal it effortlessly falls to the floor and remains in that position.
Correctly pumping the brakes on a VAZ-2114: order and sequence of actions
If when you press the brake pedal it fails, and after several presses everything returns to normal, it means there is air in the system . He needs to be kicked out, that is, pumped up. On the VAZ-2114 hatchback, you need to pump the brakes “diagonally”: start from the rear left wheel, move to the front right, etc. Also, if the rear axle is suspended, then install a screwdriver between the pressure regulator and the bracket.
Why and when is pumping done?
The process, which drivers call “bleeding,” is based on the goal of removing layers of air from the cylinder and underwater hoses of the braking system. You can object by pointing out that the system is sealed
and only thanks to this technological feature does it function. However, under the influence of constant mechanical loads, as well as material fatigue, the tightness may be broken.
Conducting a daily visual inspection
Before leaving the road, in rare cases, a car may detect signs of hidden depressurization, which is a consequence of:
- Loose fluid supply hoses;
Stages of work
To carry out this type of restoration work, you need a set of the following tools:
, materials and auxiliary equipment:
- Capacity, preferably a clean bottle of at least 1.5 liters;
- Rubber tube from a medical IV or from a blood transfusion set;
- New fluid for the system.
An assistant is also needed to perform the work conveniently and quickly.
, which will pump the brake pedal from the passenger compartment - from this manipulation and the whole procedure got its name.
In the first stage, air is removed from the discharge cylinder
. To do this, the pedal builds up pressure and, alternately unscrewing the fittings on the cylinder, air bubbles are released from them. Prefaces these manipulations by adding fluid to the tank to the maximum possible level. Only after this do they begin to work with the wheel fittings.
However, in the case of the VAZ 2112, this is not critical, since on this model the system is multi-circuit and the sequential wheels do not matter in this matter. The procedure is similar to that done with the central cylinder, only there is only one fitting on the wheel.
Even if no repair work has been carried out on the system, the VAZ 2112 brakes must be pumped once every 3 years.
, or every 4,000-5,000 thousand kilometers. Bleeding is required if the liquid becomes dark, which indicates a loss of its performance characteristics.
Brake hoses: replacement
The essence of the procedure is to completely get rid of air pockets. Therefore you need to follow these steps:
- Fill the expansion tank with liquid to the maximum mark.
- Place a transparent tube onto the bleeder fitting. The second edge must be lowered into a jar with a small amount of liquid - this will allow you to monitor the release of air.
- Make sure that the fittings on all four brake mechanisms are unscrewed normally and that no trouble will arise during the procedure.
And now about the sequence in which to pump the brakes on a VAZ-2107:
- First, carry out work on the mechanism farthest from the main brake cylinder - on the mechanism of the right rear wheel.
- Then, when the brake pedal begins to be pressed with force and there is no air flowing in the tube, you can move to the left rear wheel.
- The third is to pump the circuit going to the right front.
- The left front circuit is pumped last - the wheel is located closest to the GTZ.
If the car owner notices smudges resulting from tire wear, it is necessary to change the brake hoses. Technical literature says that hoses installed more than 3 years ago are prohibited from being used. The explanation for this is simple: firstly, rubber ages, and secondly, it is more susceptible to deformation.
In a VAZ-2107 car, brake hoses are located both at the front and at the rear. These components lead the fluid fluid to the working cylinders. Having found out that the rubber component requires replacement, you need to stock up on:
- screwdrivers;
- pliers;
- a set of keys;
- new hose;
- brake fluid.
- Remove the front tire from the desired side so that there is convenient access to the caliper.
- Unscrew the bolt securing the hose from the reverse side and remove it with copper washers.
- Unscrew the hose in the area of fixation to the brake pipe.
How to bleed the brakes on a VAZ-2112: sequence, diagram and bleeding video
Why do you bleed the brake system? Of course, then, to expel the air. At the same time, part of the DOT fluid is replaced with a new one - the level can be easily controlled by the mark in the tank. Let's look at how to bleed the brakes on a VAZ-2112. In general, the instructions are suitable for all cars from the “tenth family”. The operations discussed below must be carried out with an assistant.
Everything we are going to do is further shown in the video below:
Scheme and sequence of bleeding the brakes
The time has come to act.
In a VAZ-2112 car, you can pump the brakes in your garage, but it is advisable to involve another person. Prices at a car service center are decent, so it makes sense to save money and gain experience. Before starting work, it is worth remembering that in machines of the tenth family the system is designed so that the contours are not located horizontally, as on classic models, but diagonally.
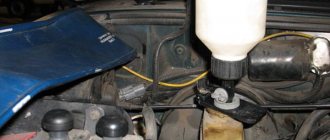
- First you need to drive the VAZ-2112 into the inspection ditch. Now you should open the hood and find the brake fluid reservoir. Open the reservoir by unscrewing the cap, and then add new fluid to the max mark.
Attention! You cannot add liquid from another manufacturer, even if the mixture looks identical. Any fluid contains all sorts of additives, each company has its own, so if you mix them, you can destroy the brake system of the car. This will lead to rusting or the brakes will simply be ineffective. Therefore, if you don’t know your brake system, it should definitely be replaced.
- After adding liquid, you need to close the reservoir cap tightly to prevent air from entering. You can first throw it on top, and then move under the bottom of the car. In the meantime, you need to ask your partner to sit in the driver’s seat, giving him “brake fluid”, which will need to be periodically added to the system.
Note. You can't understand why add fluid to the system? It's simple: when bleeding the brakes, air is removed, which harms performance.
- Now you need to explain to your partner how to monitor the level in the tank, that is, the indicator during pumping should not drop less than 15 mm. It is better to add liquid more often.
Attention! If it happens that the brake fluid completely comes out of the reservoir, the system will depressurize again. In this case, you will have to pump again.
- The next step is to ask your partner to press the brake pedal smoothly 5-10 times. At the last press, the pedal must be depressed and held in the floor position.
- Using a 10mm bleeder/regular socket, unscrew one of the GTZ (brake master cylinder) fittings. After it is unscrewed, you can see a small amount of “brake fluid” with air bubbles coming out from under the fitting. The latter need to be gotten rid of.
- The fitting must be tightened. Now you can tell your friend to release the pedal and then press it again.
- In the meantime, you need to unscrew the same fitting, monitoring what is happening. This process should be carried out until all the air is released. However, that's not all. Such measures must be done with all fittings.
When the GTZ has been bled, it’s time to move on to bleeding the brake system of the tires of your VAZ-2112.
As for the wheels, the brakes in them must be pumped in a strictly established order. First we go to the rear right one, then we are interested in the rear left tire, then the front right one, and the front left one finishes. This has always been the case on VAZs of classic models. The 2112 is considered a slightly different model. Therefore, the sequence is not so important here. Since the system is multi-circuit, it does not matter at all in what order the brakes are pumped.
Thus, if the brake system has not been repaired, bleeding the brakes in the 2112 model is a mandatory procedure. And it must be carried out either once every three years, or after a run of 4-5 thousand km. In addition, pumping is indicated if the liquid has acquired a dark color, which indicates a loss of its performance characteristics. Take care of your car, change consumables on time, pay attention to any clicks, sounds, or taps. And if you cannot cope with the problem yourself, be sure to contact competent, qualified specialists who will save your car.
Approximate sequence of steps for pumping brakes on a VAZ-2112
The car itself is placed on an overpass or in a pit. Pumping is carried out “diagonally”, starting from the rear wheels. Example: first the rear right cylinder, then the front left one, etc.
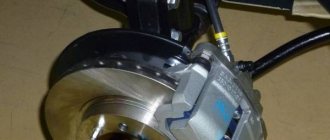
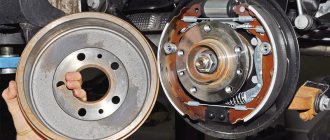
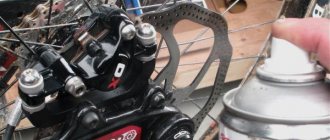
Rear and front brake cylinder
There is a fitting on each brake cylinder. We clean it, then remove the plug-cap. This will allow you to put the tube on top (see photo).
Photo 1 shows the rear brake cylinder, photo 2 shows the disc brake cylinder.
- On any car, including the VAZ-2112, you can bleed the brakes only with the tank cap closed. We find the expansion tank and tighten the cap tighter.
DOT fluid tank
At the final step, all four plugs must be returned to their place.
Tricks and subtleties
Perhaps we don’t have an overpass, but only a lift. This means that the rear wheels will be hanging out. And then you need to do the following: before pumping, install a slot between the bracket and the pressure regulator.
Brake pressure regulator
After bleeding the rear cylinder, the screwdriver or slot is removed.
It is advisable to use a spanner “8” key, not a flat one. The tube is then put on the fitting following the key. The material of the tube, that is, the hose, must be transparent. This also applies to the drainage container.
Common mistake
Let's assume that two cylinders were pumped, and when the second was pumped, there were no more bubbles. Then the third cylinder is pumped, and the job is considered done. This is where the mistake lies: all four cylinders need to be pumped. On another it is impossible!
How to properly level up if there are no helpers?
In theory, you can bleed the brakes on a VAZ-2112 alone. There is no ABS system here, but with it everything would be simpler - there is an electric pump. And instead of a pump we will use special equipment.
Brake bleeding device
Here you need an aerator or just a lid with a nipple. You can buy it or make it yourself - a classic tank cap and a nipple for a tubeless tire are suitable.
Procedure:
- The aerator cap is screwed onto the neck.
- One of the wheels is hung up and the structure is assembled, as in the photo.
Air from the tire enters the tank
In theory, everything looks simple. But in practice, you need to monitor whether the fluid has gone below the MIN mark. To top up, do this:
- Unscrew the coupling from the wheel nipple;
- Carefully unscrew the lid, fill the tank, and so on.
The air pressure entering the tank should not exceed two atmospheres. That's why we connected the hose to the tire and not to the pump. It is important!
There are other methods that allow you to bleed the brakes without an assistant. For example, a gas stop is installed between the pedal and the seat, or the liquid is drawn out with a syringe by opening the lid on the tank.
How to Properly Bleed Brakes on a VAZ 2110
Bleeding the brakes on any machine is carried out not only after repairing system parts, brake cylinders, replacing linear parts, and seals. Sometimes it is necessary to remove air from the system after the liquid boils, ventilation, when the liquid level in the tank drops, leaks, and also after depressurization of the brake line. The process of bleeding the VAZ-2110 brakes is simple, the work will not take much time, and you can do everything yourself, if not you can find an assistant.
Brake pump diagram for VAZ-2110
VAZ-2110 has two diagonal contours. This required a procedure to remove air from the system. When performing work, the following pumping sequence must be observed:
The procedure for bleeding the brake system of the VAZ-2110 and its modification.
Necessary materials
Before pumping, you need to stock up on brake fluid for topping up.
We carry a specific brand of brake fluid, and if we don't know the brand, we prepare to replace it entirely.
However, it is important to remember that the liquid must be exactly the same brand that was used previously. If we are not sure what kind of brake fluid is being poured into the VAZ-2110 system, it is better to be on the safe side and replace it completely. Otherwise, when mixed with different types of fluids, clots may form in the system, which will damage the brake.
Also required for operation is a transparent container half filled with liquid, a hose fitting about 40-50 cm long, and a ring wrench with a cut sector (suitable wrench).
Bleeding the brakes with an assistant
An assistant will be needed. Go.
- Open the liquid cap and attach it to a very acceptable mark.
Add brake to tank.
Remove the protective cap from the right rear wheel mount.
Block the sorcerer if necessary.
We put the hose on the fitting, connect it to the reservoir and fill it with brake fluid.
We bleed other brakes in order of priority.
We then bleed the brakes of the other wheels in accordance with the injection order.
We bleed the brakes ourselves, without an assistant
Not being able to find help is not failure.
To bleed your brakes yourself, you'll need a tank cap, a hose, and a tubeless tire nipple.
We bleed it ourselves, but to do this we need to stock up on an old standard brake tank without a water level indicator. 14 common nipples and drills for car inner tubes are also useful. Drill a hole in the center of the lid and insert the nipple. The fasteners are ready. We run to the pump:
- Fill the tank to the fullest.
- We close the tank with our lid on the nipple.
Wrap the cap and gasket around the tank.
Attach the other end of the hose to the camera nipple.
For convenience, you can insert a hose from a pneumatic system into the hose.
Conclusion
At the end of work, check the water level in the tank; the pedal should be tight with the smallest free gap. Good luck, strong brakes and pleasant trips!
VAZ 2112: how to properly bleed the brakes
VAZ 2112 bleeding the brakes yourself
Everyone knows that brakes were invented by cowards, according to the famous saying, but their presence on a car is vital! Hence the conclusion - the brakes must always be in working order. To do this, it is necessary to bleed the brakes. Now we will do this. These are instructions on how to properly bleed the brakes, with which you can bleed the brakes on a VAZ 2112 with your own hands.
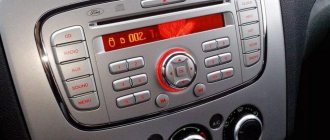
- Master brake cylinder
Diagram of the VAZ 2110 brake system. How to bleed the brakes?
The “ten” is equipped with standard brakes for this series, which ensure safety and normal controllability. Despite the outdated mechanism, the VAZ 2110 brake system provides a short braking distance; the only weak point of the unit is the wet road surface, but first things first. After studying this material, readers will learn how the brake system in the “ten” works and what malfunctions can await them. The article will also pay attention to system maintenance, or more precisely, pumping. The instructions contain two options: for solo work and pumping with an assistant.
Why do you need to bleed your brakes?
In principle, the question is very good:
- It is necessary to bleed the brakes in order for them to function smoothly.
- Bleeding a car's brake system involves removing air from it.
- Since the brake system on the VAZ 2112 is hydraulic (liquid), the presence of air there is extremely undesirable.
- Air in the system can lead to brake failure on one wheel in the best case, or failure of the brake system altogether in the worst case.
Remember! Even the “best case” of one wheel failing can result in a vehicle crash.
When should you bleed your brakes?
But this issue is more serious and it is necessary to approach its consideration more responsibly. When did air get into the brake system? So:
- Bleeding the brakes is required after any repair to the brake system. Perhaps, just replacing the pads in some cases does not entail bleeding the brake system.
- So, for example, replacing a brake hose, replacing the rear wheel cylinder on a VAZ 2112, replacing a brake system pipeline, replacing the master brake cylinder - all these works, as well as many others, require bleeding the brake system.
- If the expansion tank of the car's brake system runs out of brake fluid, air enters the system! The reason for this may be either a malfunction in the system or incompleteness of the expansion tank itself.
There must be a level in the tank
- You can also determine the need for bleeding by the position of the brake pedal. A normal pedal does not fall through initially; when you press it, it immediately creates pressure in the brake system, and reaching about a quarter of the stroke, it finally blocks all the wheels of the car.
- If there is air in the system, then the pedal will go idle for a small part of its travel - that is, it will fail.
- Often it is necessary not only to bleed the brakes on a VAZ 2112, but also to carry out some repairs on the brake system.
Bleeding brakes on VAZ 2113, VAZ 2114, VAZ 2115
Welcome! Bleeding the brakes is the most important part after replacing any unit in the brake system, or even after replacing the brake fluid itself with a new one. This procedure must be carried out in the cases described above, that is, after replacing something in the brake system itself, if you neglect this procedure, then you will have air in the brake system due to which you will not be able to simply brake , and in the literal sense of the word, your brakes will not work, but the pedal will simply move when you press it and when you release it and that’s it, so it’s necessary to pump the brakes.
But not in all cases, your brakes will not work at all; generally, this only happens after replacing the brake fluid with a new one, that is, if you only replace any brake caliper (for example, the right one), then after all this you will not have Only the right brakes on the front wheel of the car will work, and all the others, including the rear ones, will work!
Note! To bleed the brake system, you will need to stock up on: Firstly, an ordinary small about one liter bottle, which must be transparent, as well as a small hose which will be inserted into this bottle with one end and the other will be put on the fitting for bleeding, so choose the thickness of the hose strictly along the neck of the bottle and at this very fitting (What kind of fitting we are talking about, you will find out in more detail in this article but a little lower), and you will also need to stock up on new brake fluid, preferably of the same brand, if you are not going to change it, as well as a wrench or a spanner, and an inspection hole or a lift!
Tool
What will you need to bleed the brakes on a VAZ 2112? Here is the list:
- Capacity (half liter bottle)
- Hose for bleeder fitting
- Wrenches for 8 and 10. You can have regular open-end wrenches, or you can have special bleeders. They look like regular caps, only with a slot. See photo.
Universal bleeder wrench 8 by 10 mm
- Brake fluid. This is not a tool, of course, but it will be useful. One bottle will be enough.
- Rust cleaner. WD-40 or cheaper equivalents.
- Metal brush
Pumping the brakes
Now you can get started. On a VAZ 2112 we pump the brakes ourselves. The price at a service station for pumping is small, but you can save money, and by the time you get to the station, you can already have time to pump the brakes.
Master brake cylinder
After replacing the main brake or parts that are connected directly to it (pipes), it is necessary to bleed it. This is done differently than bleeding the brakes on wheels!
VAZ 2112 bleeding the brakes yourself
Remember! On a VAZ 2112 you won’t be able to bleed the brakes yourself - you need a second person, a partner. Can't cope without him.
- After installing the new cylinder, fill the expansion tank of the VAZ 2112 brake system with brake fluid to the level. In general, fill the tank full.
- Then your partner should be seated behind the wheel, and you yourself should take a seat on the left side of the car to ensure maximum access to the master cylinder.
- All fittings that secure the brake pipes to the master cylinder must first be tightened.
- Now the procedure is as follows. The partner pumps up the pressure in the system with the pedal, then presses the brake pedal to the floor and holds it there.
Your partner presses and holds the pedal
- You should use a bleeder wrench or a regular 10 wrench to unscrew one of the fittings of the master brake cylinder.
- After unscrewing it, you will be able to observe how a small amount of brake fluid comes out from under the fitting along with air bubbles. So, there shouldn't be any bubbles.
- Tighten the fitting. After which the partner releases the pedal. And then he presses it again.
- At this time, you unscrew the SAME fitting and observe what is happening.
- This procedure must be performed until there is no air left.
- But that's not all. Next, you should do the same operation with each fitting.
There is another option for bleeding the main brake cylinder:
- The essence of the process does not change. The steps are the same and the order is the same.
- In order to speed up the process, while your partner holds the pedal, you unscrew and tighten each fitting in turn. This is all done with ONE PRESS OF THE PEDAL, please note.
- But nevertheless, all the air will not come out with one press and the procedure will still have to be repeated.
After the main brake cylinder has been bled, you can begin bleeding the brake system on the car's wheels.
As you know, the brakes are pumped in the following order: first the rear right wheel, then the rear left, front right and ending with the front left. This is done on the classic VAZ, but the 2112 is a completely different model. Therefore, this order is not mandatory here. Since the braking system is multi-circuit, it does not matter at all in what sequence the brakes are pumped. But still, if you suddenly have to download on classics or other cars, download in this sequence.
VAZ 2112 how to bleed the brakes
We remember! And again, pumping the brakes on a VAZ 2112 cannot be done without a partner.
- We start with the rear right wheel. Reach the brake wheel cylinder of the rear wheel. To do this, you can drive the car into a pit or, as a last resort, spread a rag and lie under the car, like in the good old days.
- Remove the rubber cap from the bleeder fitting. Note: usually it is there, but if it is missing, then you need to clean the area around the fitting with a metal brush.
- Then spray the threads of the fitting with rust cleaner. Wait a couple of minutes.
Advice! Someone may neglect the last point (spray and wait). Let's say right away - if you break off the bleeder fitting, then this is a replacement of the brake wheel cylinder. And this is another money and time!
- Place a hose on the bleeder nipple and place the other end in a bottle with a small amount of brake fluid.
- Unscrew the brake fitting a couple of turns. Liquid with air bubbles will flow out of it.
- Now your partner should pump the pedal at medium speed.
- Once all the air has come out, tighten the bleeder plug and put on the cap.
- The procedure is repeated with the remaining three wheels.
This is what the cap looks like
That's all - we pumped the brakes ourselves!
Correct bleeding of brakes
For these purposes you will need:
- Key to “8”, preferably a ring one
- Rubber hose, container. Be sure to be transparent so you can see the air bubbles coming out. This way we will control the de-aeration of the system
- Brake fluid for topping up
Bleeding the rear brakes
We put our partner in the car and climb into the hole ourselves. Remove the protective cap from the bleeder fitting and put a hose on it. We collect some brake fluid into a container and lower the end of the hose into it.
Important! Its end must be completely immersed in liquid. Otherwise, you can “suck” air through it back into the system.
We ask the assistant to press the brake pedal several times and rest his foot in the lower extreme position, with the pedal fully depressed. Use the key to “8” to slightly open the fitting. Watch the brake fluid with air bubbles come out through the hose.
At this time, the pedal should “fail”, its resistance to the foot will disappear. He reports this. Tighten the fitting and ask your partner to press it a few more times. It locks the leg in a pressed position. Repeat the procedure until clean liquid without air comes out of the hose.
When you tighten the fitting, be sure to put the protective cap on it. It will protect it from dirt. We move on to the opposite rear wheel and repeat the operation.
Important! If your car is equipped with a rear brake force regulator and it is faulty, then bleeding will not work. If its rod is soured in the closed position, then the brake fluid pressure will not be transferred to the cylinders, or this will happen very slowly. It is not a fact that it will be possible to completely “drive out” the air.
Bleeding the front brakes
We move on to the front wheels, we do not let the assistant out of the cabin, no matter how much he resists. The process is identical to the rear wheels, only the location of the fitting is different.
We achieve complete de-airing of the front circuit and check the brake pedal for adequacy. It should be tight when the engine is off. We pumped it a couple of times, if you need to make a certain effort to push it “to the floor” - everything is in order, if it’s “sluggish” - pump it again. You can remove the front wheels and visually see whether the pads are closing on the disc. Try turning the rear ones by hand while pressing the pedal. They don't spin - everything is fine.
Important! Don't forget to add fluid to the reservoir. As you pump, its level will decrease. There is a chance to re-air the system and do all the work all over again.
Video on how to properly bleed the brake system of a VAZ classic:
Checking the brakes
After bleeding the master cylinder as well as the wheel cylinders, you need to check the functionality of the brakes before you go on a trip. So:
- The first is the pedal. She must take it high. Pump the pedal a few times, then press and check if the pedal falls off when pressed for a long time. If it falls, we pump the brakes again or look for another reason (we diagnose the brake system).
- Before leaving the garage, press the pedal several times.
- Select a suitable, spacious area to test the brakes.
- Accelerate the car a little (first gear will be enough).
- Let go of the steering wheel and apply the brakes. If the brakes work correctly, then all wheels will brake (visible from the marks of braking) and the car will not pull to the side.
- If it pulls away, it means that one wheel is working weaker. The reason for this may be the presence of air in the brake circuit of the wheel or a malfunction of the brake elements (working cylinder, piston or pads).
Watch the video which clearly shows how to bleed your brakes. Take care of the condition of your car, and it will serve you for a long time and safely!
Approximate sequence of steps for pumping brakes on a VAZ-2112
The car itself is placed on an overpass or in a pit. Pumping is carried out “diagonally”, starting from the rear wheels. Example: first the rear right cylinder, then the front left one, etc.
Rear and front brake cylinder
There is a fitting on each brake cylinder. We clean it, then remove the plug-cap. This will allow you to put the tube on top (see photo).
Photo 1 shows the rear brake cylinder, photo 2 shows the disc brake cylinder.
- On any car, including the VAZ-2112, you can bleed the brakes only with the tank cap closed. We find the expansion tank and tighten the cap tighter.
DOT fluid tank
At the final step, all four plugs must be returned to their place.
Tricks and subtleties
Perhaps we don’t have an overpass, but only a lift. This means that the rear wheels will be hanging out. And then you need to do the following: before pumping, install a slot between the bracket and the pressure regulator.
Brake pressure regulator
After bleeding the rear cylinder, the screwdriver or slot is removed.
It is advisable to use a spanner “8” key, not a flat one. The tube is then put on the fitting following the key. The material of the tube, that is, the hose, must be transparent. This also applies to the drainage container.
Common mistake
Let's assume that two cylinders were pumped, and when the second was pumped, there were no more bubbles. Then the third cylinder is pumped, and the job is considered done. This is where the mistake lies: all four cylinders need to be pumped. On another it is impossible!
How to properly level up if there are no helpers?
In theory, you can bleed the brakes on a VAZ-2112 alone. There is no ABS system here, but with it everything would be simpler - there is an electric pump. And instead of a pump we will use special equipment.
Brake bleeding device
Here you need an aerator or just a lid with a nipple. You can buy it or make it yourself - a classic tank cap and a nipple for a tubeless tire are suitable.
Procedure:
- The aerator cap is screwed onto the neck.
- One of the wheels is hung up and the structure is assembled, as in the photo.
Air from the tire enters the tank
In theory, everything looks simple. But in practice, you need to monitor whether the fluid has gone below the MIN mark. To top up, do this:
- Unscrew the coupling from the wheel nipple;
- Carefully unscrew the lid, fill the tank, and so on.
The air pressure entering the tank should not exceed two atmospheres. That's why we connected the hose to the tire and not to the pump. It is important!
There are other methods that allow you to bleed the brakes without an assistant. For example, a gas stop is installed between the pedal and the seat, or the liquid is drawn out with a syringe by opening the lid on the tank.
How to Bleed Brakes on a VAZ 2110 Alone
Alone or with a partner brakes on VAZ 2110
With the need to pump the brakes
Almost all car owners face this problem, regardless of the brand of car they drive.
But we will tell you how to turn off the brakes on 2110 , read the rules, the pumping procedure.
When it is necessary?
Typically, if all brake components are functioning properly, the brake water passages are tight and do not require bleeding. But if the TJ is leaking due to damage to the "overpass" and its level falling, it will also be useful to repair the brakes and continue bleeding.
This is a particularly suitable procedure because the airiness of the system can lead to such an extent that when everything is decided in seconds, the brakes will not work. And there will be nothing to pump and no one...
Thus, we will immediately make sure that if we find that the brake pedal has increased its travel, it will become “soft”, as car owners say - brakes .
Hydraulic brake circuit
In addition, there are other prerequisites for downloading:
- You had to interfere with the system;
- Cracks appeared in the hoses, TJ leakage;
- The brake fluid turned out to be bad and needs to be completely replaced;
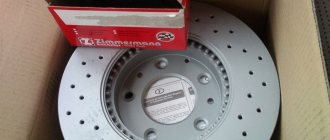
- You've changed your brake rotors (you'll need to do this at some point);
- The water content of liquid fuel has increased (it is hygroscopic, i.e. it absorbs and stores water), so it needs to be changed from time to time.
What can't be done?
As a general rule, all brake repairs must be filled. Remember: you can only add “native” liquid - especially from a brand that is already pouring into your VAZ 2110.
Brake fluids from different manufacturers
In no case should you confuse different brands, as the result is unpredictable! If this is not the case, then the only option is to completely replace the TJ in the system.
How to update one brakes (VAZ)
Video on how you can do it yourself to turn off the brakes
after tampering with a sealed system, e.g.
How to turn off the brakes alone
Before doing this, you need to slightly unscrew the cylinder or caliper seat so that the fluid can flow out slightly under the influence of gravity.
a priority
There is a strict sequence for bleeding the brakes
on VAZ
2110 . It is advisable not to interfere. So, first the right rear gearbox is bled, and then the front left gearbox is bled diagonally. Then the rear left and lastly the front right.
We work with a partner
Best of all - it's more convenient, safer, turn off the brakes
together. By the way, more than 80% of VAZ owners perform this operation
2110
.
First of all, make sure that the TJ is not leaking anywhere and everything is tight. Then add liquid until it is at the Mach line.
Now let's start bleeding the brakes:
- The wheel on which you inflate the mechanism must be secured, and how to properly rotate the wheels has already been said;
- The rear brake
has a special pressure regulator. It must be unlocked by inserting a screwdriver between the piston and the plate; - Locate the bleed valve on the appropriate brake. Wipe it down, remove the cap and put the rubber hose on your head;
- Pour some of the same brake fluid into the system into a previously prepared three-liter jar (or other transparent container), lower the end of the hose so that the hole can be immersed in the fluid;
- Your assistant, while driving the car, sharply presses the brake
about 4 or 5 times. On the last press, it holds the pedal at extreme pressure; - At this time, you open the valve halfway or ¾ and watch the TG run down the hose. There should be air bubbles there. When the leakage stops, close the valve completely;
- Only then can your assistant release the pedal;
- Then the assistant "inflates" the brake again and holds the pedal down, and you repeat the valve operation;
- A brake mechanism is considered to be of high quality when air bubbles are no longer emitted. That is, 3-4 steps may be required;
- Now remove the hose, wipe the fitting, attach the protective cap to it;
- Repeat the same steps with each brake. Remember to use the diagonal principle correctly;
- Remove the screwdriver that is blocking the pressure regulator.
Why and when is pumping required?
As we have already said, bleeding is a mandatory event after carrying out any work related to making changes to the brake system of the car.
We recommend that you watch the video about bleeding the brakes on a VAZ 2110 to clearly see the whole process from start to finish. The need for this kind of procedure is due to the fact that the system becomes airy; excess air does not allow the brakes to respond to the pedal being pressed at the right time. When driving at high speed, seconds matter, so the brakes must work one hundred percent.
Plus, there are a number of other reasons for which pumping is required:
- When pressed, the brake pedal of the VAZ 2110 sinks, it becomes like cotton wool;
- You have made adjustments to the braking system;
- A brake fluid leak was discovered and cracks formed in the supply hose;
- Old brake fluid is of poor quality and therefore needs to be replaced;
- The brake discs were replaced;
- The water level in the brake fluid has increased due to the hygroscopicity of the composition.
A little theory
To transmit force, one of the properties of the fluid is used - its incompressibility.
That is, when a force is created on a liquid, its volume does not change, and it acts as a transmitter. A hydraulic brake drive is more practical than a mechanical or pneumatic one, but it has one drawback - if air gets into the fluid, the transmission of force will be significantly reduced. This is because air, like any gas, is compressible. As a result, the presence of air leads to a change in the volume of the liquid when creating force (due to gas compression). Because of this, the force is no longer transmitted to the actuators, since it is absorbed by the volume change.
It turns out that effective operation of the brakes on a VAZ occurs only until air enters the drive system. And this can happen for several reasons.
Article on the topic - The design of the VAZ brake system
Tools
But it is important to know how to properly bleed the brakes on VAZs of different models and what is required for this. The operation itself is not complicated, so you can do it yourself. But it’s better to do this with an assistant - it will be both faster and easier.
Not many tools are required:
- Key for 8 (10);
- Silicone transparent tube according to the diameter of the fitting;
- Capacity;
- Brake fluid;
As for the wrench, you should use the cap type. There are also special keys on the market for unscrewing fittings, clamping. The fact is that the fittings often stick to the thread and are very difficult to unscrew. Using a regular open-end tool, you can easily “lick” the edges and then it will be completely impossible to unscrew the fitting.
The essence of pumping work is almost the same for all cars - VAZ-2101, VAZ-21099, and VAZ-2121 Niva. But the sequence of operations is affected only by the design features of the models.
Approximate sequence of steps for pumping brakes on a VAZ-2112
The car itself is placed on an overpass or in a pit. Pumping is carried out “diagonally”, starting from the rear wheels. Example: first the rear right cylinder, then the front left one, etc.
Rear and front brake cylinder
There is a fitting on each brake cylinder. We clean it, then remove the plug-cap. This will allow you to put the tube on top (see photo).
Photo 1 shows the rear brake cylinder, photo 2 shows the disc brake cylinder.
- On any car, including the VAZ-2112, you can bleed the brakes only with the tank cap closed. We find the expansion tank and tighten the cap tighter.
DOT fluid tank
At the final step, all four plugs must be returned to their place.
Tricks and subtleties
Perhaps we don’t have an overpass, but only a lift. This means that the rear wheels will be hanging out. And then you need to do the following: before pumping, install a slot between the bracket and the pressure regulator.
Brake pressure regulator
After bleeding the rear cylinder, the screwdriver or slot is removed.
It is advisable to use a spanner “8” key, not a flat one. The tube is then put on the fitting following the key. The material of the tube, that is, the hose, must be transparent. This also applies to the drainage container.
Common mistake
Let's assume that two cylinders were pumped, and when the second was pumped, there were no more bubbles. Then the third cylinder is pumped, and the job is considered done. This is where the mistake lies: all four cylinders need to be pumped. On another it is impossible!
How to properly level up if there are no helpers?
In theory, you can bleed the brakes on a VAZ-2112 alone. There is no ABS system here, but with it everything would be simpler - there is an electric pump. And instead of a pump we will use special equipment.
Brake bleeding device
Here you need an aerator or just a lid with a nipple. You can buy it or make it yourself - a classic tank cap and a nipple for a tubeless tire are suitable.
- The aerator cap is screwed onto the neck.
- One of the wheels is hung up and the structure is assembled, as in the photo.
Air from the tire enters the tank
In theory, everything looks simple. But in practice, you need to monitor whether the fluid has gone below the MIN mark. To top up, do this:
- Unscrew the coupling from the wheel nipple;
- Carefully unscrew the lid, fill the tank, and so on.
The air pressure entering the tank should not exceed two atmospheres. That's why we connected the hose to the tire and not to the pump. It is important!
There are other methods that allow you to bleed the brakes without an assistant. For example, a gas stop is installed between the pedal and the seat, or the liquid is drawn out with a syringe by opening the lid on the tank.
- 2101-1602591 – drain fitting (rear cylinder);
- 2101-1602591-01 – the same (front cylinder);
- 2101-1602592 – fitting cap.
- 2101-1602591 – drain fitting (rear cylinder);
- 2101-1602591-01 – the same (front cylinder);
- 2101-1602592 – fitting cap.
Bleeding the brakes of a VAZ 2107 yourself photo and video
Repair of the brake system KamAZ-5320
The brake system of the VAZ 2107, like any other, requires periodic maintenance and repair. And contrary to popular belief, no modification of individual elements or the entire system exempts you from fulfilling this responsibility. In this case, in addition to monitoring the condition of the brake pads and discs, it may be necessary to bleed the system to remove air bubbles from it.
The need to bleed the brake may arise in the following cases:
- Replacing the fluid in the system in accordance with the maintenance regulations;
- System repair;
- Fluid leak;
- Deterioration in brake performance after checking the condition of the brake discs and pads.
Brakes are usually pumped with the participation of two people: one (mechanic) works directly with the brake system, the second (assistant) is located inside the VAZ 2107 car. The tools for work you will need:
- Wrench 8/10 “tube” or socket;
- 8/10 open-end wrench or special, for brake pipes;
- Hose of appropriate diameter;
- Container for waste liquid.
In addition, if your car is equipped with 8-mm wrench fittings, it is strongly recommended to improve this drawback by replacing them with similar ones, but with a 10-wrench hexagon. Before starting work, add fluid to the brake reservoir to the maximum level.
The procedure for bleeding the brake system has a certain sequence - starting with the wheel furthest from the master cylinder:
- Right rear;
- Left rear;
- Right front;
- Left front.
The rear wheels of the VAZ 2107 are bled from the bottom of the car, so it is better to use the inspection hole. To bleed the front brakes, you need to remove the wheel. Otherwise, the bleeding procedure is the same for all wheels. After removing the protective rubber cap, you need to loosen the fitting using an 8/10 spanner. Particular care should be taken, as there is a risk of licking the edges, after which it will be difficult to unscrew the fitting.
Having loosened the fitting, put a hose on it, the other end of which is lowered into the container. After this, the assistant presses the brake pedal 3-5 times (until noticeable pressure appears in the system), after which he continues to hold it in the lower position. The mechanic uses an 8/10 open-end wrench to unscrew the fitting half a turn, as a result of which liquid with air bubbles comes out through the hose into the container, and the pedal “sinks” to the floor. Do not release the pedal until the liquid stops flowing out. The fitting is tightened and the procedure is repeated until when the fitting is released through the hose no more air bubbles come out.
Similar work is performed on the remaining wheels of the car. It is necessary to periodically monitor the fluid level in the tank and top up if necessary. If the volume is not replenished on time and the liquid in the tank runs out, air will enter the system and everything will have to start over.
As you can see, no particular difficulties are expected in bleeding the brakes of a VAZ 2107 car. All stages of the work can be done with your own hands at home.
It should be noted that recently the modification of the standard system has become widespread, consisting in the replacement of standard elements (calipers, discs, pads) with similar imported parts of higher quality and efficiency. However, the modification does not eliminate the need to periodically pump the system, so the described procedure will remain relevant.
Procedure for bleeding the brake system of a VAZ
Good brakes are the basis of our safety. The safety of family and others, as well as the integrity of the car. And this is not so little.
The brake system loves to be looked after and maintained. Replacing only the brake pads and brake discs is not the entire maintenance of the brake system; you also need to change the brake fluid every 2 years.
First, you need to look at the car's owner's manual and find out the manufacturers' recommendations. In the manual you can find out exactly when the brake fluid should be changed - once every 2 years or after 50-60 thousand kilometers.
Regularly changing brake fluid is the main reason why brakes are bled. It should be. But there are also unplanned cases when you need to pump the brakes.
- Changes in the behavior of the braking system. There may be several reasons. The important thing is that the brake pedal travel increases.
- Bleeding is carried out after any repair of the brake system: this can be tuning the brake system, repairing or servicing brake discs or cylinders, replacing brake pads, and so on.
In all cases, you need to know that the brakes need bleeding, so it is important to know how the brake system is pumped. But there is another option - contact a car service. In this case, you don’t need to think about how to properly pump the brakes.
Before you start bleeding the brakes, you need to first learn about some subtleties. If you only know about the general principles and sequence of bleeding the brakes, then you may not know about some design features of the brake system.
Bleeding the brakes is done in order to remove air from the brake system, which is sealed. You can pump it yourself, but it will take a lot of time and will not be very convenient.
Bleeding brakes on VAZ 2110, VAZ 2111, VAZ 2112
Welcome! Bleeding the brakes is a mandatory thing after replacing any unit in the hydraulic brake drive; by the way, this even applies to simply replacing the brake fluid (If it had to be completely drained), after which the brake system also needs to be bled, but few people know how to do this correctly, Therefore, especially for such people, we wrote a detailed article where we described everything down to the smallest detail, so, as they say, read and understand.
The process of bleeding VAZ brakes
To bleed the brakes, you will need an assistant who must sit inside the car and press the brake pedal on command. You can do mechanical processes yourself.
Further in the manual you need to clarify what car model the brake bleeding scheme is. If the manufacturer has not indicated what kind of pumping scheme, then there is a general rule:
- start with the wheel that is furthest from the master cylinder.
- For example, pump the rear right wheel, rear left wheel, front right wheel, front left wheel. Such a pumping scheme can ensure efficient removal of air from the brake system.
The next step is preparing a simple device for bleeding the brakes. This device consists of a plastic (rubber) hose, which is placed on a fitting, and a container.
But in auto stores there are special devices for bleeding brakes, which are manufactured industrially. But if you take into account the fact that the brakes will not be pumped every day, then you need to think about the feasibility of the purchase.
Brake bleeding technology:
- brake fluid is poured into the master cylinder reservoir;
- the brake system fitting near each wheel must be cleaned of dirt;
- a small amount of brake fluid is poured into a pre-prepared container;
- a hose is connected to the bleeding fitting, and the other end must be lowered into a container with liquid;
- your partner will need to press the brake pedal firmly several times, keeping the pedal pressed;
- Next you need to unscrew the fitting. After this, you can see how the brake fluid comes out into the container. Bubbles will show whether there is air in the brake system;
- the fitting is wrapped, and then they move on to the wheel, which is next according to the diagram.
There are two important points. First, use only the brake fluid recommended by the manufacturers. In this case, there is no need to save money.
If the pedal remains soft after bleeding, then you need to diagnose the brake pads and brake discs. Often the brake pedal fails because the brake discs or pads are worn out.
How to bleed your brakes alone
Bleeding brakes without an assistant is quite a difficult task and requires special preparation for the upcoming work. To complete the work, we will need a spare brake fluid reservoir cap. It should close the system tightly. We make a hole in it and insert the nipple from the wheel tube there. There should be no gaps in this connection and it should be airtight.
Cap with nipple
We screw the cap onto the tank and connect a compressor to the nipple, which will produce a pressure of no more than 1 atmosphere. If there is no such compressor, then you can use a tire inflation pump instead and extend its hose. We carry out further work in the same way as with an assistant. The only difference is that instead of pressing the brake pedal, you will need to inflate the system using a pump. The pressure created in the system will expel air bubbles.
This method is quite inconvenient, but if necessary, you can use it. If you do not want to construct such a system, you can buy this device at an auto parts store. This device is called an aerator. It costs only 70–100 rubles. But even with such a reasonable price for it, working with an assistant is much more convenient.
Aerator
After the brakes have been completely bled, remove the screwdriver from the rear wheel brake force regulator. Now add brake fluid to the maximum level and you can begin checking the brake system. Checking the brake system involves driving a vehicle.
Pumping scheme
To begin, start the car and press the brake pedal a couple of times. The pedal should be pressed evenly, smoothly and without failure. Now you should carefully drive the car a couple of meters and press the brake pedal. The car should stop smoothly, without any sudden movements. Now you need to drive the car at medium speed and check the operation of the brake system. Only if everything is in order and the car’s braking does not cause any suspicion, you can drive onto public roads.
We are pumping
Thus, bleeding the brake system is not so difficult even for a novice motorist. Having the tools and technical skills, you can save a lot on car service and have a pleasant time in the garage with your favorite iron horse. When planning to bleed your brakes, make sure you have someone to help you. After all, working together is not only easier, but also more fun. The most important thing is to remember to check your car's brakes after bleeding the brake system.