The washer reservoir is not a large, but very important detail. It contains washer fluid, which allows the driver to remove dirt from glass and optical devices while driving.
Nissan X-Trail is a car that many people buy for off-road use, where they have to use washers regularly. It is not surprising that the breakdown of the tank, the loss of its tightness leads to a lot of inconvenience. Let's figure out how to restore or replace the part.
Design features
The car window cleaning and washing system must always be in good working order; traffic safety largely depends on it. Its main component is a special tank; the efficiency of the entire system will depend on its serviceability. The volume, size and shape of the vessel will depend on the make and model of the vehicle. On average, the product can hold from 2.5 to 4 liters of water. The volume may be increased if other components, such as the rear window or optical elements, are to be serviced.
Windshield washer reservoir with two necks
The design characteristics of the container may depend on its type. Most units can be divided into two main categories: universal types and designs used for a specific make and model of vehicle.
The product usually has a rectangular shape, one or more electric motors can be located on one side, and there must also be a hole for a sensor to control the water level in the tank. The vessel is made of white plastic, thanks to which the car owner is able to independently determine the amount of anti-freeze remaining.
Where is the structure located?
The windshield wiper container is located in the engine compartment, but the car owner has access to its neck and cap, so the windshield washer can be filled at any time.
Location of the Lada Granta washer reservoir
It is not possible to visually inspect the integrity of the system. To do this, you need to go to a car service center or independently disassemble the structure located under the bumper or from the bottom of the engine compartment. In some cases it may be necessary to remove the wheel. The exact location of the product will depend on the internal layout of the power unit components.
What to do if the water in the windshield washer reservoir is frozen
Windshield washer nozzles replacement, cleaning, selection
Russian winter is very harsh. And not only living beings suffer from it, but also cars. And besides, it always comes unexpectedly. A situation often arises that the liquid in the windshield washer reservoir has either turned into an icy slush, or even into an icy monolith. As a result, all the glass is splattered with dirt, and it is not possible to clean it.
This can happen to absolutely anyone. Even an experienced car enthusiast may discover in the morning that the temperature has treacherously dropped below zero, but never got around to replacing the water with anti-freeze. However, there is nothing wrong with the fact that the liquid is frozen in the tank. The main thing is to know what to do.
What to do if the liquid in the windshield washer reservoir is frozen.
It is worth mentioning that starting the engine and warming up the engine compartment may not always help. This is because the washer reservoir, in most models, is not under the hood, but under the fender. Almost no heat from the engine reaches there.
The most effective way is to put your car in a warm garage. You just need to put your “swallow” in a warm, equipped box, or a heated parking lot, and after some time, everything will thaw. However, not everyone has time to wait, and even more so, not everyone can afford a warm garage. Therefore, if this does not suit you, then move on.
By the way, if there is no heated room, then, as an option, you can take the car to a car wash, or to a car service, to check something if you have been planning to do this for a long time. Harness the washers or locksmiths, and while they work their magic on your car, the ice will melt away, maybe it all depends on the time spent there.
If possible, you can disconnect the tank and take it to a warm place, where it will warm up, then you can fill it with new anti-freeze liquid and put it back. But only happy owners of VAZ cars can do this. For foreign-made cars, everything is different.
Well, there is no heated garage, there is no way to wash the car, and you drive a foreign car, and not a technical miracle of the domestic automobile industry? Then you will have to carry out a small operation to defrost the washer reservoir.
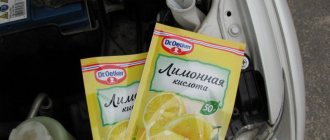
To begin with, we buy a good antifreeze liquid with an extreme temperature threshold, for example -40 degrees. We warm up the antifreeze in any way, for example, by simply placing the bottle in hot water.
While the liquid is heating up, turn on the heating in the car to full blast so that everything warms up to the maximum.
The car is warmed up, the anti-freeze too. Now add it to the frozen tank. As the ice melts, and when it turns into a liquid state, the volume also decreases, add more and more. After everything has melted, drain this cocktail and add good non-freezing liquid.
You can use regular hot water instead of windshield washer fluid. However, this will only work if the tank is only a third full. Everything is the same: pour in, and as the ice thaws, add more. But you need to remember that as soon as the water cools down, the frost will take over again, therefore, without delay, you need to drain everything from the container. Under no circumstances should you use boiling water; it can completely deform the tank.
After the water has receded and a high-quality anti-freeze agent has been poured in, you should warm up the engine, then open the hood slightly so that the air from the engine compartment passes out and fills the space. This will help warm up the injectors and the wiper line. After this, run the antifreeze liquid through the entire system. But do not turn on the windshield wiper until the system warms up, because with strong pressure, the tube going to the injectors may jump off the fitting, and this is a serious repair.
That's all. Buy only high-quality antifreeze liquid, do not forget to drain the water from the container on time, and you will not have problems with a frozen windshield washer reservoir. See you again!
Ravon Nexia's washer reservoir, what to fill, where is it located?
Daewoo nexia washer reservoir
There is rarely a car owner who does not care where and what is in his car. Knowledge regarding the washer fluid reservoir will also be useful: its location, the possibility of removal in the event of a breakdown, and methods for defrosting the washer fluid. After all, unpleasant surprises always happen unexpectedly and at the wrong time. To avoid this, you should follow simple rules.
First of all, do not forget to add water to the tank. A flashing liquid level light indicates approximately 0.5 liters remaining. And in the winter season, always use anti-freeze.
There are several reasons for a sink not working. If the wipers work, then the cause is definitely not the fuse. Otherwise, you need to replace fuse F9, located in the mounting block on the front panel of Ravon nexia devices. Another breakdown is the failure of relay F. To replace it, remove the mounting block. If previous faults are excluded, it is worth checking the pump motor. To do this, directly connect the terminals of it and the battery. If, after carrying out the manipulations described above, the pump is found to be working properly, then another possible reason will be a breakdown of the contact plate of the steering column switch. You can't do without tinning here.
Daewoo Nexia washer reservoir
Dismantling process
The windshield washer on the Ravon nexia is located in the left front wheel arch. Its damage is indicated by a sharply increased amount of washer fluid used. Also, when the car is parked, you can see a wet spot behind the front wheel (on the left). In order to replace a leaking tank you need:
- remove the wheel (observing safety precautions)
- remove the mudguard and remove the wheel liner
- the next step is to disconnect the washer pump wires and disconnect the fluid level sensor
- unscrew the fastening screw and remove the tank, pulling it out of the wheel arch
If its body is not damaged, then the leak occurs due to a torn rubber pipe. It's easy to replace.
Assembly proceeds in reverse order.
Oh, it's frosty - let's switch to the winter version, anti-freeze
With the arrival of winter comes new problems. And if the antifreeze liquid was not added in time, then they cannot be avoided. If Ravon spends the night in the open air, you will have to warm up the washer using all available and inaccessible methods.
One option is boiling water. Having poured it to the top, wait a little, then remove the cooled water and pour boiling water again. If this is not available, pour in heated antifreeze washer fluid. To do this, just pour it into a plastic bottle and put it near the car heater. Then pour it into the neck, in two or three doses, with an interval of 20 minutes. When you don’t have any “anti-freeze” at hand, you will have to use alcohol or vodka (as it turns out).
Fill with anti-freeze liquid
Similar articles
How to defrost the washer reservoir
How to replace the thermostat on a VAZ 2114 injector
Window washer in a car is a useful and necessary thing; it is often difficult to do without it when road dirt from under the wheels of cars in front flies directly onto your glass. This is especially true during the off-season, when the snow on the road has not yet turned into ice, or in damp weather. But often cold weather comes unexpectedly, the temperature drops sharply below zero degrees, and the water in the washer, for one reason or another, was not replaced in advance with a special antifreeze liquid. In this case, the water in the washer reservoir, as well as in the pipes and nozzles, freezes, and the washer stops functioning. Another option is also possible, when the antifreeze was purchased in a timely manner and poured into the tank, but it turned out to be substandard, simply put, a fake, and at the same time it also easily froze when the temperature outside dropped.
This can happen to anyone, so we’ll give below some tips on how we can restore the washer’s functionality and defrost its reservoir and tubes.
It would seem that the simplest solution is to drive the car into a warm garage and let the ice melt on its own, and then pour normal anti-freeze into the tank and fill the pipes with it, working the pump a little. Elementary. But not all car owners have the opportunity to find such a warm garage; after all, most car enthusiasts store their cars outside.
If you don’t have the opportunity to park your car in a warm garage, you can use the free underground parking of a large supermarket and leave your car there for several hours. It’s certainly not very warm there, but the temperature will be around zero, which is enough to thaw. True, such parking lots are not available in every city.
Heat emanates from a running engine, but often it is not enough to melt the ice in the tank, especially when driving, when cold air blows into all the cracks of the body, so there is no point in hoping that the tank will thaw itself, you will only burn gasoline in vain. True, this can happen after an hour or two of standing in a traffic jam, if the temperature outside is not very low.
The tank and pipes can also thaw at a car wash. If it's time to wash your car, then you can take the opportunity and ask the wash workers not to rush too much :).
If there is not much ice in the tank, you can try to defrost it by pouring hot water into the tank and then draining it until all the ice has melted
Then pour a mixture of water and alcohol in a ratio of 3 to 1 into the tank, and carefully use the washer. The alcohol should gradually defrost the ice in the tubes
If these methods are not suitable, then all that remains is to remove the tank and take it home to defrost. On a VAZ 2109, the washer reservoir can be removed quite simply, you need to disconnect the hose from the washer pump, which is located on the bottom of the reservoir, disconnect the two power wires (marking the polarity), disconnect the connector of the washer fluid level sensor on top of the reservoir and pull the reservoir up until it is removed from the mount.
Disconnect the level sensor chip, the washer pump power connectors and pull off the fluid supply hose
We take the tank home along with the pump, since there is most likely ice in the pump, and there we wait until everything melts.
It is also possible to use a combination of the above methods in a sequence convenient for you.
It is worth noting that such problems do not threaten you if you have a heated washer reservoir installed. If you don’t want to do the heating yourself, you can buy a ready-made washer heating kit.
How to protect yourself from freezing of the glass washer system?
First of all, you need to prepare in advance for the onset of cold weather and replace the water in the washer reservoir with non-freezing liquid. In order not to fill with low-quality liquid, which will freeze during the first frost, I recommend buying it in advance and leaving the can in the trunk overnight. If it does not freeze, you can safely pour it into the tank. If it freezes, take it back to the seller and file a claim. You can dilute the water with alcohol and pour this solution into the washer reservoir. It will also not freeze, but the specific smell of alcohol when the washer is working may not work in your favor if an inspector stops you.
The washer reservoir leaked — Daewoo Nexia, 1.6 l., 2010 on DRIVE2
After a “safari” arranged during a trip to Vologda, a leak appeared from the washer reservoir. There was a puddle of water under the left front wheel.
The tank was removed, the fasteners were tightened for normal fixation of the tank, the hole was sealed. The reason for the hole in the tank is its poor fixation. The wall of the tank rubbed against the mount in the body due to vibrations.
This is the root of evil, this is the very fastening!
Fragment of a tank installed in a mount. The bottom plate made a hole in my tank.
The tank is easy to remove. 1. Under the hood, unscrew the white plastic neck of the washer reservoir. 2. Remove the wheel. 3. Unscrew the 2 nuts holding the mudguard and the 2 nuts holding the factory locker with a 7mm wrench and carefully press out the bug latches holding the locker with an awl. Remove the latches very carefully so as not to lose them. There is no need to bury them deep!
Bolts for 7.
Two more bolts for 7
Here they are, these bugs. There are 4 of them. Very carefully squeeze the retainer out from the center of the bug. Do not push the latch too deep, you will lose it!
4. Using a Phillips screwdriver, unscrew the single self-tapping screw that holds the washer barrel (at the very bottom of the barrel)
The only self-tapping screw securing the washer reservoir to the body is located at the very bottom of the reservoir.
5. Remove the tank. We assemble in reverse order.
Having found the hole, I cleaned the washer reservoir with fine sandpaper, degreased it, filled it with Moment rubber shoe glue and, after the glue had dried, sealed everything with car plastic.
Necessary chemosis.
We wash, clean, degrease.
Pour in glue and enjoy the aroma.
Doesn't leak! Hooray!
I was surprised that under the factory standard locker everything was clean and dry. Why do people install additional lockers, making holes in the fenders and body?
Do-it-yourself heating for the tank
How to find out battery capacity
We will need a meter of copper tube with a diameter of 8 mm. The same braided hose - about 2 m. Clamps and cuffs for the tank.
The process does not require any special skills from you and is completely simple. A hole is drilled in the lid of the container into which a tube with a pre-designed and curved shape is inserted so that it has a horizontal position at the outlet. We connect the hoses to the thermostat and throttle assembly.
For another method, we will need the same tube. Using a soldering iron or gas torch, bend the tube to form a coil. It is soldered to a PCB plate, and this entire structure is installed in the tank. Make sure that it does not interfere with the water level sensor.
The hole size should not exceed 3 mm. Seal the edges with sealant. It will be more reliable to attach the coil with stainless steel bolts.
Third method: ready-made Geyser system. When coolant moves through the coil, both its temperature and the temperature in the tank rise.
Don’t forget to take care of the condition of your “swallow”, and then it will please you for a long time and work reliably. Monitor the level of windshield washer fluid and you won't need to change or repair tanks too often in winter.
Each manufacturer of a car of any brand recommends special liquids for use, and not ordinary water. Freezing of water in the windshield washer reservoir leads to its destruction and failure. Use anti-freeze products from well-known brands without dangerous methanol. If necessary and when the temperature rises, do not dilute it: this will impair the cleaning properties of the liquid.
- Chips on the windshield: do-it-yourself repairs, methods for repairing cracks
- Replacing car windshield wiper blades yourself
- Features of car windshield repair: tool kit
Precautionary measures
Of course, before starting the restoration you need to disconnect the negative terminal from the battery. In general, the process does not involve any difficulties or risks.
Experts recommend paying attention to only two points.
The first is that the tank needs to be replaced, not restored. There is no need to seal the cracks with epoxy resin or try to seal them.
All these are short-term measures that cannot give a normal result.
The second point is to be careful when removing the bumper. To avoid leaving unpleasant scratches, you don’t need to throw it on the bare ground after dismantling (it’s worth laying down a tarpaulin in advance), and it’s a good idea to protect parts that come into contact with metal body elements when removing them with masking tape.
Where is the capacity of the Renault Logan washer reservoir located, how to remove the reservoir
This situation can often occur when the washer reservoir fails. This happens for various reasons. If the plastic is damaged, liquid may leak out of the reservoir. It is impractical to repair such a tank. When it breaks, it is often completely replaced. But few people know how to find the tank itself and remove it.
Location of the tank under the hood of Renault Logan
On different versions of Renault Logan, the tank is located in different places.
Renault Logan 1st generation
It is located in the engine compartment on the passenger side. Between the hood compartment and the windshield, under a protective decorative plug.
The location of the washer reservoir is indicated by a red arrow
Reservoir lid is open
Washer reservoir without decorative plug
Renault Logan 2nd generation
The washer reservoir on the second generation Renault Logan is located on the left, closer to the edge of the engine compartment (where the passenger is). In the same place as the first generation, but a little to the left.
Close-up view of the tank lid
The arrow marks the filler plug of the washer reservoir on the second generation Logan
Removing the washer reservoir
To remove the tank you will need the following tool:
- Gloves.
- Screwdriver.
- The key is "10".
Tank replacement process
Initially, you need to remove the sealing tape from the partition located between the passenger compartment and the engine compartment. Next, the clip that holds the protective grille is dismantled. After this, the grill itself is pryed up with a screwdriver and also removed. Next, you need to disconnect the electric pump power wires and pipes from the tank. What to do if, during the replacement process, it turns out that the windshield washer does not work - the answer to this question is here!
At the final stage, the bolt securing the tank itself is unscrewed and it is removed from the car.
You should immediately check the operation of the pump and adjust the washer nozzles, your life may depend on it!
Experts advise that it is not necessary to remove the terminal from the battery when carrying out work. Next, a new tank is installed and reassembled in the opposite order to removal.
What to do if the washer cap does not hold well?
Quite a common problem. A bag and a hair tie will come to your aid.
Something like this, according to the collective farm, but this will solve the problem with the washer fluid leaving. Relevant for winter, since the washer is expensive and also stinks!
As you can see, the procedure for removing and finding the tank is quite simple. Anyone who knows how to hold a screwdriver can handle it on their own.
Tank selection
Many drivers claim that the base part is made of rather fragile plastic, unsuitable for intense loads, sometimes cracking even from severe frost. In this regard, the rational solution seems to be the purchase of an analog part.
The main thing is to make sure of compatibility in advance. Some tanks may initially lack holes for connecting the pump nozzles, but special “blanks” may be provided that allow for quick installation. Purchasing such spare parts is also a financially justifiable decision; they cost less than the originals.
The original tank is quite expensive, but there is a replacement from SAT (ST-DTU2-101-A0). But it does not have a hole drilled for the high pressure pump for the headlight washer. We'll have to improve it.
Design and principle of operation of the windshield washer
The windshield washer consists of a reservoir, an electric pump, pipes, nozzles and a switch. The tank is most often installed under the hood of a car. Its volume, depending on the model, usually ranges from 2.5 to 5 liters. An electric pump is built into the washer reservoir housing. A tube is connected to it, which goes to the injectors.
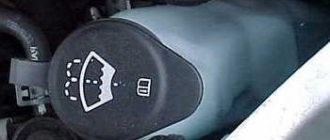
To supply the washer fluid, the driver just needs to pull the steering column switch, which activates the pump, and the fluid under pressure is sprayed onto the windshield. At the same time, on most cars, the windshield wiper blades are automatically turned on for several strokes.
Cars typically use jet windshield washer nozzles. That is, the liquid is supplied in the form of a jet. But fan-shaped washer nozzles are becoming increasingly common on modern cars. They spray washer fluid not pointwise, unlike jets, but evenly, over most of the windshield. This solution reduces washer fluid consumption and allows you to more effectively clean the glass from dirt. In addition, for countries with cold climates, many manufacturers equip their models with heated washer nozzles.
The windshield washer reservoir is usually located under the hood of the car. Moreover, for the convenience of motorists, its cover, on most cars, has an oval shape and is painted yellow, so as not to confuse it, for example, with the engine oil filler neck or the coolant reservoir. Many modern cars have a washer fluid level sensor. And when its level drops below a quarter of the tank’s volume, the corresponding light comes on on the instrument panel.
In the warm season, you can use plain water as a washer fluid. If the car is used on the highway, then a little detergent can be added to it to more effectively remove insect residues.
In winter, you need to fill the washer reservoir with antifreeze liquid. But if you did not have time to fill it before the onset of cold weather and the water in the tank froze, then you can warm it up in several ways.
The easiest way is to leave the car for a day in an underground parking lot, for example, in a shopping center. There, even in severe frosts, as a rule, the temperature remains positive.
After the water has melted, the tank should be filled to the brim with non-freezing liquid. But if there was a lot of water in the tank, it needs to be drained. And only then fill in the “anti-freeze”.
As a last resort, when there is no underground parking or warm box nearby, you can remove the tank and take it home. But this method is not suitable for many due to the complexity of dismantling.
Another problem that car enthusiasts often encounter is clogged washer nozzles. To clean them, you need to arm yourself with a thin wire. We insert it into the outlet of the clogged nozzle and clean it. But if this method does not help, you will have to remove the nozzle. It can either be washed at home under a strong stream of water, or blown out using a compressor to inflate tires.
In the future, to avoid such problems, when filling in washer fluid, make sure that no dirt gets into the tank and close the lid tightly.
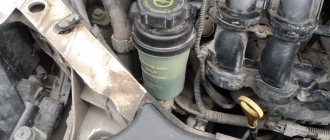
Removing the windshield washer reservoir for Daewoo Nexia 2008
The washer reservoir is installed in the left front wheel arch and is covered by a fender liner.
Location of the washer reservoir (for clarity, the wing has been removed) . To remove the tank, remove the wheel arch liner (see “Removing the front wheel arch liner”).
In the engine compartment, we disconnect the wiring harness connectors for the electric washer pump and the fluid level sensor in the windshield washer reservoir..
We remove from the hole in the body the split sealing sleeve of the wiring harness and the fluid supply hose to the washer nozzles.
Turning away...
...and remove the filler neck of the washer reservoir.
Use a 10mm head to unscrew the self-tapping screw securing the washer fluid reservoir to the body.
Moving the tank...
...from the body bracket.
Disconnect the fluid supply hose to the injectors from the electric pump...
...and lead the hose through the hole in the wire holder on the washer reservoir . Remove the washer reservoir.
Using a screwdriver, we move the electric pump...
...and remove it from the tank.
We remove the rubber sealing sleeve of the pump pipe from the hole in the tank body.
Using the “27” key, unscrew the fluid level sensor in the windshield washer reservoir...
...and remove the sensor . We assemble and install the windshield washer reservoir in the reverse order.
How to prevent a tank from leaking
The change of seasons has begun, and car owners are rushing to prepare for it: replacing special fluids in their cars, checking and adding oil, “changing” the wheels.
Frost seems to be a long time coming, and many people forget to drain the windshield washer reservoir. Suddenly a frost hit at night, and the water, freezing, expanded, the tank burst, and the ice damaged the pump. Sometimes a small crack in the tank has been there since the summer and did not remind of itself. With the first frost, the crack grew larger and the container began to leak. After physics lessons, we know that condensation formed from temperature changes freezes in cold weather and can cause problems in the components and assemblies of your car. Complex problems arise in plastic containers intended for special liquids, especially with windshield washer reservoirs.
If the water from the container is not drained and mixed with the newly added “anti-freeze”, then this mixture at a low temperature will turn into an icy slurry, which will put the windshield washer pump out of operation. Moreover, when water freezes, it will increase in volume and can rupture the pipes. Car owners try to repair the washer reservoir in a variety of ways.
We are finalizing the VAZ 2109 washer Crafts for cars
Good afternoon. I would like to share an idea for upgrading the windshield washer on 9. The point is to install a second motor and get rid of the washer solenoid valves (which are now very difficult to find on sale, because they were installed on the very first Samaras with an old-style reservoir that had a remote pump).
What we need to have:
1) Two motors (I always buy from VAZ 2110, because they are more powerful (2.5 Atm versus the standard 2108 1.6 Atm), I advise you to buy from PRAMO, because in addition to the pump itself, the kit includes a landing sleeve and a small mesh filter for cleaning).
160r/piece
right
completeness
filterik
2) A new type tank for 2 pumps (there are ready-made ones with 2 holes on sale, but you can make a second one without any problems if the tank has a seat for a second pump, as in my case).
new
3) Carburetor check valve 2108. It is needed so that the washer fluid is constantly in the pipeline, and when the pump is turned on, it immediately hits the glass in front of the wiper, and not after it passes through the dry glass.
4) Washer hose, very short length, ~10 cm. Needed to connect the pump with a check valve.
Now let's get started:
1) Make a hole for the second pump.
cut with a knife
2) Place rubber bushings on the silicone sealant.
ABRO black
3) We install the pumps ourselves.
4) And we connect according to the following scheme: To the first pump (which is closer to the headlight) we connect a tube from the rear glass washer + a check valve with a piece of hose. And to the second pump there is a windshield washer hose. Why in this order? Yes, because when the washer fluid freezes, the second pump, which is located closer to the engine, will warm up faster, because the front washer is more needed.
Next, we connect the wires to the pumps: Black wires (double) to the “-” pumps. We connect the pink wire to the “+” terminal of the windshield pump (previously this wire was located on the front window valve). Then we connect the pink wire with a black stripe to the “+” of the rear window pump. We isolate the remaining two wires (pink with a white stripe and the third black).
For better atomization, you can also install two-jet washer nozzles or fan nozzles from the VAZ 2110.
Replacing the washer barrel — Daewoo Nexia, 1.5 l., 2011 on DRIVE2
Hello! So I somehow poured some washer fluid into the washer fluid, drove it around, and saw it was leaking from the arch... It was dry outside, and naturally it immediately became clear that there was a problem with the barrel. He kept about a liter in himself, enough for the first time, but winter is ahead, and the matter needs to be corrected. Actually, I don’t even know approximately the price of a new barrel, a friend gave it to me; he had one lying around in his service center, idle. And so, to the point. How many people advised me “I need to take off the wing.” No need.
Full size
Remove the left wheel and protection.
Full size
The wires for the motor and level sensor are marked
Full size
Next you need to unscrew the expansion flank and move it a little to the side (it is not necessary to remove the pipes)
Full size
We unscrew the filler neck, just counterclockwise, then pull it out.
Full size
Naturally, it is separate from the barrel, so in the end this technical hole will appear
Full size
Next comes the most interesting part. It is necessary to disconnect the pump and sensor terminals. Why is the most interesting, you will understand in the process
Full size
Well, let’s move on to the barrel itself, just like on the expansion barrel, there’s a 10mm bolt
Full size
Here the barrel has been removed. Just marked its location
Full size
Having unscrewed the nut, the tank is held only by a simple fastening. You just need to pull it towards yourself
Full size
On the body
Full size
On a barrel
Full size
We unscrew the level sensor, I unscrewed it by hand. And we take it out, at first it may seem like it won’t come out. It will come out. The main thing is to do everything carefully
Full size
Now he's chatting carefree
Full size
Actually, the pump itself is also easy to remove, as they say, pull if it doesn’t push
Full size
Well, that’s it, here he is, lying sadly on his side, waiting for him to go to the trash. Marked the place where there was a small crack
VAZ 2109 windshield washer reservoir assembly
Dear visitors of the site “Everything about cars”! We will be very grateful for your comments on the video clip “VAZ 2109 windshield washer reservoir assembly”; registration is not required for this. We also ask you to let us know if you have any problems playing the video.
I worked on a collective farm on the Volga when I was young: I took 2 pipes out of the stove from the outlet, made a copper pipe in the form of a U, connected it through adapters and warmed up the washbasin with antifreeze, and put a rheostat on the pump, which increased the engine speed, washed away even the most fucking shit almost without firewood . I advise everyone
I have a second motor but it's the rear window
Why would the washer consumption double with 2 motors and also with 2 nozzles? Water consumption depends on the cross-section of the spray nozzles and the supply pressure, and not on how many motors will supply water. In this case, the consumption will be a little more, by 15-20, more precisely, we can say, it needs to be calculated mathematically.
I installed it from Shnivy, the device is the same but the volume is 2 times larger
Question. What is the orange valve next to the Pekar fuel pump and what is it for?
From the VAZ 2104 of the new model, set the pressure as in a fire hydrant
I have an evil one, the engine is in a transparent case and the joke is that it takes on water over time and eventually jams. What is the reason???
in case of rain, 100 km will not be enough, I installed a 5 liter from Shnivy without modification on a VAZ 2107 and it will be enough for 500 km.
you have more words than actions
no offense
Thank you for the video
There are a lot of unnecessary words. We need to briefly, to the essence, the essence. It's boring to watch, respect other people's time.
FROM THE MOTOR TO THE INJECTORS YOU MUST INSTALL A FILTER
Is the washer pump quieter than the original Zhiguli pump? Or does he also scream like a victim?
Buy a normal car and solve this issue once and for all
5+
In my Oka factory there is a barrel with a motor like the one in the video.
I don’t understand, spring comes in November for you?
My friend, where were you before with such a cool video, and I was so damn tormented that I sold the car...
It's not a motor, it's a pump
Possible washer failures
Everything was just fine, and the fluid was filled correctly and correctly, but the windshield washer suddenly stopped working.
What to do in this case, where to look for the cause and how to eliminate it when it is localized? Let's try to figure out all these questions. One of the most common reasons, by the way, may be hidden in a clogged filter located directly on the washer motor itself, in the washer reservoir. To eliminate this nuisance, you will have to remove the washer pump from the reservoir, then remove the filter elements from the pump and rinse them with a powerful stream of water, dry them - additionally blowing them off possible blockages with compressed air.
An equally common reason is when the washer jet turns out to be very clogged, or rather the jets, since there are usually a pair of them. If the car is often parked by the owner in an area under trees, or often ends up on dusty roads, the jets (injectors) may well become clogged.
They can be cleaned either with a thin wire or with a regular sewing needle. Using a wire, it is possible to adjust the windshield washer nozzles in order to correct the direction of spraying the washer fluid onto the glass.
If the above reasons are absent or eliminated, but the windshield spray system still does not work, the source of the breakdown should be sought in the electrical wiring. It is necessary to check the serviceability of the fuse responsible for the circuit servicing the glass washer system. If it is intact, then the next in line is the glass sprayer relay. To get to it, you should study the electrical diagram of the car.
The reason may be hidden not only in its malfunction, but also in the breakage of the supply cables, which can be eliminated by simply soldering the fallen or burnt-out wire.
Another reason may be a violation of the tightness of the system as a whole, either due to collapsed hoses, or due to poor quality of their crimping at the points of connection to the tank or to the system pump. If the system is leaking, then traces of leakage will be visible, which will indicate the location of a possible breakdown. The hoses should be purchased at an auto parts store, where you can also buy the clamps needed for crimping.
In order not to dig around again in search of a breakdown, since you already had to change the pipes anyway, it makes sense to remove the washer reservoir and, after draining the remaining liquid, clean it of the sediment and dirt accumulated in it. The design of the windshield washer system is not that complicated, so the tips provided may be quite enough to deal with possible reasons for its failure to operate.
And one last piece of advice. When cold weather approaches, it is necessary to drain the summer washer fluid or water, if it is used as such. Instead, fill the system with “anti-freeze”, which will avoid all the previously discussed problems and make it possible to use the car with constant pleasure.
Thus, by adhering to all the above recommendations, you can always keep the nozzles and the windshield itself constantly clean. After all, dirty glass is not only unsightly, but it can cause an accident. Dirt can prevent you from fully seeing the road, assessing situations on it and making the right decision.
Share information with friends:
Repair of windshield washer reservoir on Daewoo Nexia N150
While operating my Daewoo Nexia (restyled model), I encountered a problem with the windshield washer reservoir leaking. With regular replenishment and rare use, the washer fluid disappeared very imperceptibly and the warning light on the instrument panel came on every now and then. The fluid leak from the reservoir had to be detected and repaired.
The manufacturers of Daewoo Nexia hid the plastic washer reservoir under the left fender, so that from the engine compartment there is only access to the filler neck and to get to it you need to remove the left wheel and fender liner. First, don’t forget to dismantle the mudguard by unscrewing three screws.
The third screw is hidden on the back side of the mudguard. Unscrew it as shown in the photo.
The fender liner is attached not only with screws, but also with clips. You need to remove them very carefully and carefully in order to be able to install them back. The clip consists of two parts. In order to remove it you will need an awl or something similar. We press the awl into the center of the clip and squeeze out one part of the clip inside. And here it is important not to lose it. After this manipulation, the outer part of the clip will fall out of the hole on its own or with your help.
But since I did not immediately understand all the nuances of how this clip works, I had to buy new ones, which are slightly different in size, but this is not so important, since the place is hidden from direct view, and these clips perform the function of holding the fender liner no worse former ones. Dismantle everything necessary as shown in the photos below.
It is worth noting that when I dismantled the fender liner, I found a lot of dirt and soil in the cavity between the fender and the door. I thoroughly cleaned all this, and now I’m thinking about how to protect this area from contamination in the future.
Now that we have access to the tank itself, we can guess that the filler neck is attached to it with a threaded connection. Therefore, we unscrew it under the hood and remove the tank by slightly lifting it up and pulling it towards us. (The tank is attached at the bottom with one screw, unscrew it). Wires go to the tank. This is for a sensor that signals us about the amount of liquid. There is no point in tearing them off, so we can inspect the tank at a distance that their length allows us. You can fill the liquid to capacity to check for leaks. I didn't have any cracks in the case. But the threaded connection turned out to be not tight enough. To overcome the problem, I had to modify the connection by cutting out a rubber gasket from an old bicycle inner tube and placing it between the tank and the neck. As experience and time have shown, this helped to cope with the problem. Assembly must be done in reverse order.
Principle of operation
When considering such an element of car systems as a windshield washer, the question arises as to which category of systems it can be classified into. On the one hand, it is clearly visible that it belongs to comfort systems. This comfort obviously means providing good visibility for the driver and passengers and eliminating the need to constantly go outside and wipe the front glass yourself.
However, many manufacturers and engineers seriously call the washer system a safety system. Why is this so? The fact is that the quality of visibility directly affects the safety of the driver and passengers. An oncoming car or obstacle not noticed in time can lead to sad consequences that you don’t want to think about again.
But what does the washer system consist of and how does it work? What makes it work? Its main element is the washer reservoir, the capacity of which is about 3–5 liters. The washer reservoir is installed in the engine compartment, as a rule, as far as possible from the engine and other heated parts, in order to avoid damage to the material and its melting.
The pump's wiring is connected to the battery, which allows it to draw power from it and operate even when the engine is not running. Additional wiring is connected to the generator in case the car is started and the battery is in charging mode.
The pump switch is the steering column lever. Typically, to activate the pump, you need to pull it towards you and hold it until the volume of liquid poured onto the glass is sufficient to effectively clean it. In some cases, an additional relay is installed that automatically turns off the pump a few seconds after the switch is pressed.
Device Features
There are new and old motors. The latter can be found on Soviet cars, or on VAZ 2107, 2108, for example.
Most cars, including the VAZ 2109, 2110, 2114, as well as foreign cars Mitsubishi Lancer, Pajero Sport or Ford Focus, already use new types of washer motors (pumps).
The main components of the washer are:
- nozzles;
- pump (motor);
- reservoir with washer fluid.
Nozzles are used to supply water to the windshield of a car. Therefore, they should be positioned so that the outgoing stream of liquid hits the center of the headplate as much as possible. The pump supplies water to the tank. By the way, on some cars, wash water is supplied not only to the windshield, but also to the main headlights in front and behind.
It doesn't matter what kind of car you have. It could be a Priora, Hyundai Accent, some Mazda or Toyota
All the washer motors work on the same principle. Although the device, characteristics and appearance may vary.
Pumps supply water or washer fluid. If the windshield washer does not work, most likely the reservoir or the nozzles themselves are broken. They can be replaced or repaired yourself.
If the pump breaks, the task is a little more difficult.
It is important to immediately identify the problem and fix the breakdown. Driving a car, especially in bad weather, when the windshield wiper does not work is dangerous
Causes of malfunctions
Don't rush to blame the engine for everything. It may work, but the windshield wiper does not function for other reasons.
Let's look at the key reasons why our wipers stop doing their job.
- Clogged filter or nozzle. Frequent breakdown. Especially for those who use tap water instead of special washer fluid. To solve the problem, you need to dismantle the devices and flush the system. The work is not difficult, but delicate;
- Supply hoses. They wear out over time, lose their tightness, and burst. Everything is simple here. Remove the old hoses and install new ones. Their price is cheap even on foreign cars;
- Incorrect connection. While carrying out some repair work on the wipers themselves or nearby components, you could disassemble the washer system and reassemble it incorrectly. Check connections and correct errors made during assembly;
- Electric motor and pump shaft. It happens that the connection between them is weak or completely broken. What to do? Right. The element needs to be better secured;
- Motor failure. It doesn’t happen that often, but you shouldn’t rule out this option. Before changing a part, try to clean the motor and its brushes, and get rid of all traces of corrosion. Sometimes it helps. If the repair does not produce results, replacement will help.
Here are the main causes of windshield wiper failure. It is not the most complex mechanism in a car, so you can repair it yourself.