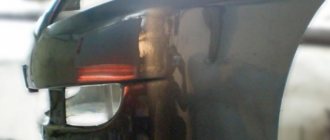
Damage to the bumper is a common car breakdown. You can get a hole not only as a result of an accident, but also by simply driving unsuccessfully onto a curb or by inattentively parking: posts, low fences and other protrusions often lie in wait for motorists in their yards.
The easiest way to fix it is to replace the part, but not everyone is ready to go through such an expensive procedure. Alternatively, you can solder or seal the hole. Both methods are effective.
If the bumper was manufactured using the cold mechanical pressing (molding) method, then it will not be possible to solder the crack. In this case, special types of glue come to the rescue. The advantage is that the repair can be easily done with your own hands.
In this article we will look in detail at how to seal a bumper, how to choose adhesive for repairs and how to prepare the surface so that you can carry out the necessary repairs yourself.
Which glue to choose
The quality of the gluing directly depends on the quality of the chosen glue. When drying, the glue turns into a full-fledged polymer layer. The point is that after hardening the glue has the same properties as the bumper. For repairs of this kind, special adhesives based on polyurethane or epoxy resin are used.
What is important to pay attention to:
- The adhesive composition must have high adhesion (adhesion of surfaces) to the plastic.
- If heat will be used during painting, the heat should not change the properties of the adhesive in the joints.
- Thermoactive and thermoplastic adhesives can be used if the bumper will be painted immediately after repair.
Below are several high-quality and effective adhesive compositions:
- Weicon Construction
(high strength and elasticity, resistance to various weather conditions). - AKFIX
(high quality and strength, does not require pre-priming, suitable for spot gluing). - Power Plast
(easy to use, gives reliable results). - Moment
(high-quality gluing, low cost, waterproof, but toxic). - Two-component composition for gluing 3M plastics
(has high adhesion to most plastics, does not spread, is easy to sand and paint).
epoxy (polyester) resin must be used as an adhesive material
.
In any case, the material must be selected for a specific plastic. Before gluing for finishing, do a test gluing to check.
Summing up
It is very difficult to glue plastic together firmly in non-factory conditions. Only following all the rules helps to make a strong bond of the material. Namely:
- meticulously clean the surface before gluing;
- choose the right type of glue for gluing this particular surface;
- observe the angle of inclination of pressing the elements after applying the glue;
- maintain safety during the gluing process. Try not to let the vapors in and prevent the substance from getting on the skin.
If these rules are followed, the gluing process will be successful and durable.
When using materials from thebestvideo.ru, a link to the source is required.
How to glue a bumper
Reliable and durable repairs require proper preparation of the part and adherence to procedures at all stages: from selecting glue to painting and sanding.
Before proceeding with any manipulations, the bumper must be removed from the car (with the exception of body kits that are broken in many places, they must first be fastened and then removed), and also check what it is made of in order to obtain the desired effect. This information is indicated on the stamp, which is applied to the inside of the product.
Preparatory work
The first stage of repair will be surface preparation:
- Clean surfaces from dirt, dust, oil and other contaminants.
- Dry the part thoroughly.
- It is important to degrease the entire surface of the part or treat it with a special chemical composition.
- Treat the surface to be repaired with an abrasive material or a grinding machine.
- The edges of the cracks can be drilled to prevent further expansion.
If you carefully approach the issue of preparation, the glue will adhere better to the surface, which will increase the strength of the repaired product.
Repairing cracks on bumper
The surface is ready, now we begin the repair.
- Cover the damaged area with primer and wait until it dries completely, or seal the outer part of the bumper with foil so that the glue does not leak out. After the glue has dried, the foil is removed.
- Carry out initial gluing from the inner surface of the bumper using special compounds with reinforcing properties. If no primer has been applied, the damaged areas must first be carefully aligned.
- Then you need to apply the adhesive mixture to the front part of the part.
- The glue is applied evenly to both surfaces to be bonded.
- To make the seam stronger, it makes sense to glue a metal or synthetic mesh impregnated with glue on the inside.
- Different adhesives require different drying times, please read the instructions.
Final stage
So, the glue has dried, but the appearance is still far from ideal. Let's move on to the final stage.
- We remove excess material (by cutting or grinding).
- We prepare the product for painting using a primer, putty or other materials.
- Painting the part in accordance with plastic painting technology.
Sealing process - preparation
Before sealing the bumper with fiberglass, we recommend conducting a trial compatibility test on a small area of the damage. To determine how to glue the body bumper, carefully study the manufacturer's instructions. The adhesive material must match the surface type of the part.
If there are body kits at the site of damage, they must first be secured and only then removed. At the same stage, accurately determine the material of the spare part to select the desired adhesive base.
This information is on a stamp on the inside of the product. When the mixture is selected, all that remains is to use it correctly in order to correctly restore the spare part after damage.
In order for the repair to last as long as possible, the bumper will have to be pre-treated. The part is disconnected in advance.
Carry out mandatory training:
- thoroughly clean the car buffer from dirt accumulations;
- remove residual oil and dust;
- let the parts dry;
- wipe it with a chemical to degrease it;
- grind the broken surface with an abrasive or a grinding machine;
- if the cracks are too deep, we recommend drilling them out, protecting the spare part from increasing damage.
With the listed procedures, you will achieve stronger adhesion of the glue to the surface, which will guarantee the quality and long service life of the part.
How to glue a bumper: let's get started
Once the surface has been pre-treated, it is time to begin the bulk of the restoration process. Cover the damaged area of the spare part with a primer and wait until the substance dries completely.
The second option: seal the crack on the bumper from the outside so that glue does not leak out of it. To do this, use foil. Once the adhesive has dried, the material must be removed.
Primary gluing from the inner surface of the buffer is carried out with a composition having reinforcing properties. To do this, we recommend using a composition based on epoxy resin with a high degree of adhesion. If you have previously decided to abandon priming work, then carefully move the damaged areas towards each other.
Sometimes the cracked parts are held together with metal staples. However, fixing the two parts from the outside is done with standard paper tape. He will carefully secure the edges of the surface at the same level before painting. After gluing the hole from the inside, the tape will be easier to remove than the staples.
When both parts of the car are securely fixed, apply the adhesive mixture to both parts of the damaged part. Before it dries, glue a metal or synthetic mesh to strengthen the seam.
This can be a painting mesh, which also needs to be treated with adhesive on top. It is impossible to predict the drying time, since each chemical composition takes its own time to dry.
Final stage
When the crack is glued and the adhesive solution is completely dry, the car buffer remains visually unattractive. There is no need to sound the alarm - this is natural, because there is still finishing work ahead.
Let's get started:
- Remove any excess compound on the plastic, carefully cut it off or sand it.
- Prepare the surface of the spare part for further painting. To do this, use a primer, putty or other materials for this purpose.
- The car buffer must be painted according to technology. Such paints are available in car dealerships.
Detailed work on painting a bumper with your own hands in the video:
Results
Repairing a buffer at home is not a difficult task. Therefore, if you have minimal experience in this matter and follow all the instructions, you can quickly restore the part. And you won’t have to spend money on paying a car mechanic.
Glue for car parts has significant advantages. It is cheap, its purchase will not affect the family budget. The method of sealing a cracked buffer with an adhesive mixture is in no way inferior to sealing.
We recommend watching the video instructions on how to glue a bumper with glue yourself:
Damage to the bumper is a common car breakdown. You can get a hole not only as a result of an accident, but also by simply driving unsuccessfully onto a curb or by inattentively parking: posts, low fences and other protrusions often lie in wait for motorists in their yards.
In conclusion
Almost any car enthusiast can repair a bumper using glue at home, without causing damage to the family budget. In terms of reliability, a sealed part will not be inferior to a sealed one.
There are many options available on the market and everyone can choose the right adhesive composition.
We recommend watching another method for repairing bumpers in this video:
Many drivers have encountered the problem of cracks appearing on their car bumpers. If it is plastic, then you can repair the damaged area yourself. There are many different ways to restore the aesthetic appearance of a bumper made of this material without resorting to the services of a car service.
Below we will discuss in detail the process of self-repairing damaged parts of a car body.
Tidying up the overall appearance
This stage is always the final stage for absolutely any type of DIY repair work. His primary task is to completely remove excess used material from the surface of the bumper, by grinding the surface or cutting it off. Performing grinding work on a thermoplastic surface is possible, but subject to maintaining low speeds, as well as applying little force, since this material tends to melt. After that, for bumpers that cannot be painted, they try to imitate the surface structure.
For bumpers that are subject to further painting, subsequent preparation is carried out using special materials designed for working with plastic, such as putty, primer and the like. Otherwise, during operation, or during installation of the bumper in place, there is a high probability that cracks will form or the paintwork will peel off.
Types of bumpers and materials from which they are made
Modern car bumpers can be made of metal and plastic.
In turn, plastic ones can be made from 2 types of material:
What is the difference between thermosetting plastic for car bumpers and thermosetting plastic?
The main difference between a thermoactive material is that it can be subjected to secondary heat treatment. Under the influence of high temperature, the material easily melts, becomes elastic, soft and can take any shape.
Thermosetting plastic, on the contrary, is very durable, resistant to high temperatures and mechanical damage.
Car bumpers made of thermosetting plastics, as a rule, are rarely subject to cracks due to the strength and reliability of the material.
The following types of thermoactive materials are distinguished:
- Polyethylene - used in the production of food containers, bags, etc.;
- Polystyrene - various insulation materials are made from them in construction, etc.;
- Polypropylene - used in the production of auto parts, including car bumpers, food industry, etc.;
- Polyvinyl chloride - production of insulating coatings for cables, window technologies, etc.
Thermosetting materials are divided into:
- Polyurethane - most plastic auto parts, both small and large, are made from this type;
- Epoxy resins - used for joining and gluing different parts;
- Fiberglass - used in the production of heavy-duty auto parts, including bumpers;
- Phenol resins - needed in the manufacture of small auto parts, computers. boards, etc.
How to repair minor damage to a plastic car bumper
Bumper damage comes in many different types, from minor scratches and small dents to serious cracks. Small dents and scratches can be removed yourself.
If the car bumper is made of thermoactive plastic, then minor damage to it can be easily eliminated using the polishing method with special chemicals. means.
For example, if there is a shallow scratch, it can be treated with WD-40 universal cleaner.
In order to polish a scratch or chip, you will need a sponge, a soft rag and a chemical reagent. First, you need to clean the damaged area from dirt and dust with a sponge and water. After applying chemical. spray or sponge. Next, the damaged area is intensively polished with a rag until no damage is visible on it.
The second way to eliminate small dents and scratches on a plastic car bumper is to straighten the damaged area with a hot air gun. The essence of the method is that the damaged surface is evenly heated with a hair dryer. Due to heat treatment, the damage is leveled and straightened.
The method is simple and does not require special skills to perform, but it is not without its drawbacks: there is a possibility of deformation of the plastic; heating with a hairdryer can only be used on unpainted areas.
Also, a wax pencil is considered a simple and inexpensive way to eliminate minor damage to a plastic car bumper.
With its help, scratches and chips are simply painted over. Chem. the composition of the pencil fills the damaged areas, leveling them with the general surface and forms a protective layer. The process of removing chips and dents with a wax pencil takes no more than 5 minutes.
What to do if there is a crack on the bumper - methods for repairing it
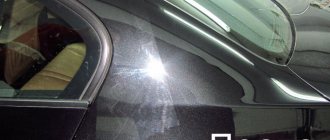
If a crack has formed on the car bumper as a result of damage, then simply cleaning and polishing this place will no longer work; in any case, it will be visible.
To repair a crack, you need to resort to more effective methods. There are several ways to repair cracks in plastic bumpers:
- repairing damage with liquid polymer;
- welding using a rod;
- welding the crack with a hot air gun;
- repairs using fiberglass;
- gluing plastic with a two-component composition.
Let's look at each of them in detail.
To make it easier to work with damaged areas, the car bumper must be removed and secured on a stand. Before starting the repair, you need to thoroughly clean the damaged area from dirt and dust, and if the bumper has already been repaired, then remove the remnants of the repair kit from the last time.
Experts advise treating damaged surfaces with any degreasing chemical before starting repairs. means.
Seal the crack using liquid polymer
For this method you will need: a soldering iron, fine-grained sandpaper, a knife, wire cutters, steel wire, a hot air gun, a piece of protection for the car fender liner.
- We clean the edges of the crack with sandpaper.
- If the crack is long, then it must be sewn together in several places along the edges with scraps of steel wire. The edges of the wire are bent and cut off with wire cutters.
- Next, the edges of the crack are brought together and carefully soldered with a soldering iron.
- The fender liner protection is made of polymer plastic, which melts easily and is suitable for creating patches. Small strips are cut from the protection fabric (about 2-3 cm wide, 15-20 cm long and 2 mm thick), which will be patches for soldering.
- The place where the patch will be applied and the patch itself is cleaned with a sharp knife.
- We heat the damaged area with a hairdryer in the place where the patch is applied. Next, we heat the patch strip to a semi-liquid state, gradually applying it to the damaged area. This is repeated several times (with new strips) until the crack on the bumper is completely sealed.
- The resulting seam is cleaned with an emery wheel and prepared for painting.
Do-it-yourself plastic bumper repair: all restoration methods
A car's bumper usually suffers from curbs when parking and stones on the road. And no one is immune from troubles on the roads in the form of a small accident.
Car repair shops charge considerable sums to restore a cracked part. The ideal way out of this situation would be to repair a plastic bumper yourself.
We'll tell you how to repair a bumper with your own hands without huge material and time costs.
Types of plastic bumpers
Plastic bumpers on modern cars are made from two main types of plastic - thermosetting and thermosetting. It is necessary to know the differences in these types of materials in order to choose the correct method for repairing and restoring a car bumper. To find out what kind of plastic a car bumper is made of, you need to look at its back side.
Thermoactive plastic bumper
Thermoset plastics can be recycled because they soften and become pliable when exposed to high temperatures. Easy to weld. These include:
- various polyethylenes ( PET, PET, LDPE, HDPE) - used in the production of pipes, car tanks, bottles, children's toys, food containers and packaging, bags, rugs;
- polystyrene (PS) is used in the manufacture of containers for dairy products, audio and video cassettes, and various tableware;
- polyvinyl chloride ( PVC, PVC) is used in the production of windows, flooring, bottles, packaging films, cable insulation, credit cards and medical products;
- polypropylene ( PP, PP) is used in the production of food containers, batteries, bottle boxes, and automotive parts.
Thermoset plastic bumper
This type of plastic is used much less frequently in production because it is not recycled.
When exposed to high temperatures, thermosetting plastics do not melt and break down. Very difficult to weld. But they are very durable and resistant to damage.
These are the following types of plastics:
- polyurethane (PU, PU) is used in coatings, trims, gears, membranes, cushions, mattresses and car seats;
- epoxy resin is used in adhesives, sports equipment, electrical equipment, and automotive equipment;
- Phenolic resins are used in ovens, cutlery handles, automobile parts, printed circuit boards;
- fiberglass (ABS/MAT) - used in car bumpers and other reinforced parts.
The bodies of modern sports cars are made from precisely these plastics - fiberglass and carbon fiber .
Types of car bumper damage
Both the front and rear bumpers are subject to various damages. Depending on the degree of damage, you should choose one or another method of restoring a burst bumper. Damage can be of the following types:
- Cracks.
- Scratches.
- Dents.
Repairing car bumper scratches
We repair the bumper with our own hands - remove scratches from the body. To remove scratches and repair the bumper, sand it . Take sandpaper and carefully smooth out all the irregularities until the surface is even and smooth. Then apply putty to the surface and, after drying, primer. Now you can start painting.
You can also get by with a special liquid polymer , the composition corresponding to the markings on the bumper. Apply a layer of polymer according to the instructions on the package, then sand it until the surface is perfectly smooth.
Car bumper dent repair
To remove a dent on the bumper , use a hair dryer or a gas torch. Heat the deformed area, softening it, and give it the correct geometric shape. This method is suitable for thermoactive plastics - polyvinyl chloride or polypropylene.
If there is significant deformation of the geometry, it is not recommended to straighten the bumper yourself - it is better to contact a specialist car service center.
Caution: Do not overheat the area being treated, this may cause further deformation.
Car bumper crack repair
bumper repair is impossible without knowledge of crack repair. Cracks in a car bumper can be repaired in many ways. To select the appropriate option, be sure to look at the markings on the back of your part. Depending on the type of material, you can repair a plastic bumper yourself:
- welding with a hot air gun or electrodes;
- using fiberglass and liquid polymer.
Necessary tools and materials for bumper repair
For various methods of repairing plastic bumpers, the following materials :
- A soldering or construction hair dryer, or a soldering station with a hair dryer, or a gas torch.
- Soldering iron, industrial or household.
- Solder for plastic (like bumper plastic).
- Fiberglass fabric.
- Metal mesh.
- Set of liquid polymers.
- Epoxy or polymer two-component adhesive.
- Sandpaper of various grits.
- Primer.
- Putty.
- Rag or rags.
- Roller for painting work.
- Glue brush.
Car bumper repair procedure
Using certain techniques at home, you can restore a car bumper from various types of plastic. Let's look at the most common methods of how to repair a bumper with your own hands.
Repair using fiberglass and liquid polymer
The best way to repair a fiberglass or polyurethane bumper is to use a fiberglass patch. You will need a piece of fiberglass fabric, a liquid polymer compound or epoxy glue (two-component). The procedure is as follows:
- Preparatory work: remove the paint and thoroughly sand and degrease the surface.
- After cleaning, cut a piece of fiberglass to fit the damaged area.
- Mix the two glue components and stir.
- Apply glue to the surface and glue the fiberglass.
- Apply several layers of glue using a blotting motion until the fiberglass turns white.
- Go over the resulting layer of fiberglass with a roller, moving in different directions. This is necessary to compact the layer.
- After drying, carefully sand the surface with sandpaper, moving in a circle.
- Then apply an even layer of putty to level the bumper.
- When everything is dry, apply 2-3 layers of primer and dry. Sand it with sandpaper.
- Now you can start painting.
Welding the bumper with a hot air gun and solder
Only thermoactive types of plastics can be welded. Therefore, if your part turns out to be thermoset plastic, choose a different repair method.
Before you repair the bumper yourself by welding or soldering, clean it thoroughly and dry it thoroughly. Now you need to select a plastic solder that matches the material of your car's bumper. There is a plastic type marking on the back - select plastic rods with the same markings.
How to solder a bumper, work order:
- Clean the damaged area with sandpaper or a sander.
- Using a powerful soldering iron (100 Watt or more), solder a uniform groove along the entire length of the crack. This must be done very evenly, try not to overheat the plastic so as not to smear or damage it.
- Take a plastic welding rod and apply it to the resulting recess on the front side of the part. Warming up with a high temperature hairdryer for a better connection. It is recommended to heat both the solder and the groove itself simultaneously along the entire length of the crack. You should get a reliable, strong seam.
- Once the outer seam has hardened, do the same on the inside of the bumper.
- To make the weld stronger, make several transverse “bridges” . To do this, weld across the seam alternately small pieces of solder measuring 3-4 centimeters in size. Don’t forget to put such bridges on the ends of the crack so that it does not spread further.
- the resulting seam with sandpaper or sandpaper to level the surface.
- Now the car bumper can be puttied, primed and the paintwork can be restored.
how to properly repair a car bumper and repair a crack with your own hands using soldering or welding from this video.
Source: https://remontautomobilya.ru/kak-provesti-remont-plastikovogo-bampera-svoimi-rukami-vse-metody-vosstanovleniya.html
Which glue to choose for the bumper
Automotive stores sell a large number of adhesives that can be used to glue a cracked plastic bumper. You should not choose ordinary household products for this purpose. The specialized composition has a higher degree of adhesion and a lot of other advantages: it does not leave stains, is not afraid of moisture and vibration.
To glue plastic on a car bumper, you can buy the following adhesives:
- Weicon Construction. Structural two-component adhesive based on methyl methacrylate, sold complete with an activator. It is suitable for gluing metal, plastic, composites, ultra-strong, does not emit toxic fumes. The glue does not require drying in special ovens; it hardens at room temperature in just 4 minutes.
- Akfix-705. The product is ideal for gluing small pieces, sealing defects on plastic bumpers, moldings, fenders, and is suitable for spot application. Does not require preliminary priming, ensures reliable fixation and long service life of the repaired item. For polymerization, contact of the glue with moisture from the air is sufficient, because, like superglues, it is made on the basis of cyanoacrylate. The kit also contains an activator aerosol, which is used when there is insufficient air humidity or to accelerate the polymerization of the seam.
- Good glue for all types of plastic, fiberglass. They can easily glue cracked plastic parts, remove small chips and dents. Thanks to its reliability and moisture resistance, the product allows you to carry out other types of body repairs and eliminate radiator leaks.
Tools and materials
To dismantle the bumper and carry out repairs at home, you will need a number of tools. Some of them are quite expensive, although they can always be replaced with manual tools. Here is a sample list of what a master might need:
- keys, screwdrivers;
- sandpaper with different grain sizes and a block;
- grinding machine with wheels;
- electric drill (mini drill);
- rubber spatula;
- clamps for fixation;
- construction hair dryer;
- soldering iron;
- metal tape (rigid adhesive tape);
- a sharp knife (for example, a stationery knife).
As consumables, you need to purchase putty, primer and paint for the bumper, and, if necessary, mesh to reinforce the crack. You will also need a solvent to degrease the part, high-quality glue, and rags. In order to comply with safety precautions, you need to prepare gloves and safety glasses.
How to glue a bumper: instructions
If the bumper is cracked, it is better to carry out repairs without delay so that the defect area does not become clogged with dirt. First, the part must be removed by first removing the plugs and disconnecting the fasteners. Severely broken body kits do not need to be removed immediately; they should first be fastened together and then disconnected from the car. Before work, it is important to double-check what material the bumper is made of in order to choose a truly suitable adhesive for it.
Novice craftsmen are wondering whether it is possible not to remove the bumper before repairing and painting? If the product is not properly dismantled, it may burst during manipulation. Only removing the part will eliminate excess stress in the area of cracks and their further increase.
Preparatory work
First, it is important to carefully prepare the base that will be subject to application of glue. This will directly affect the service life of the adhesive joint. First of all, wash the bumper, clearing it of dirt and oil, and dry it well. Then do the following:
- remove the coating (varnish, paint) using a grinding machine or a block with sandpaper;
- remove all rust, if any (it cannot appear on a plastic bumper);
- the edges of the crack are drilled with grooves in the shape of a Latin V so that it does not continue to expand, and also for the purpose of more reliable adhesion of the glue;
- degrease the bumper using acetone, alcohol or another solvent;
- sand the product and prime it or coat it with a special adhesion improver;
- leave until completely dry.
Repairing cracks on bumper
First, primary gluing is carried out on the inside of the bumper, using the selected adhesive with powerful bonding properties. Next, the composition is applied to the front part of the part, acting carefully and accurately. If necessary, the areas around the crack can be covered with foil, which will prevent contact of the glue with undamaged areas. From the “wrong side”, if there are large chips, you can apply a mixture of adhesive and soda, since these components turn into durable acrylic-like plastic upon contact.
If the bumper is cracked so that it falls apart into two parts, the individual pieces are combined with each other with an exact fit and secured with metal tape. If necessary, after gluing, clamps are used to clamp the fragments. For reliability, a reinforcing mesh made of metal or synthetics is glued onto large cracks from the inside, impregnated with glue. Wait until the product dries completely according to the instructions. After the clamps are removed, the adhesive seam is sanded to the level of the surface of the part.
Puttying and painting
The sealed bumper needs to be painted with high quality so that its appearance does not cause any complaints. Sometimes puttying is first carried out with a special means for plastic, which will smooth out minimal defects. The layer of putty must be very thin, otherwise it will not stick.
After the putty has dried, the surface is sanded with P1000 sandpaper and primed in 2 layers, the drying time of the first is at least 15 minutes. Then the bumper is painted with decorative auto enamel to match the body color. Apply the paint in 3-4 layers with intermediate drying cycles of 15-20 minutes. The last step is to varnish the bumper to give the repaired part a flawless look. Strict implementation of the entire sequence of actions will help you save on the work of professionals and learn how to fix minor problems with your car yourself.
Types of defects and how to avoid them
During painting, unpleasant defects often arise that spoil the appearance of the car.
- When choosing paint, select the appropriate solvent, otherwise flakes will appear on the coating.
- Too thin or, conversely, thick paint will lead to drips. The same defect will appear if you spray paint at a low temperature and unacceptably close to the surface being painted. The defect is eliminated using sandpaper.
- If you spray paint too far from the car, you risk creating a grainy surface. But even if you followed the spraying rules, and a defect still appeared, dust may have settled on the surface during painting. To avoid this, carry out repairs indoors.
- The main protection of the bumper with your own hands is coating with special polishes and varnish. But if the old paintwork and rust are not completely removed, the varnish will peel off and the paint coating will have to be re-treated.
- The occurrence of shagreen (a defect resembling an orange peel) is explained by improperly diluted paint, failure to observe the interval between drying layers and work at temperatures above the permissible one. Ideal working conditions are temperatures no higher than 20 degrees.
- Using primer unevenly will cause the polish to curl, where the top coat dries while the bottom layer remains wet.
These are the main problems that may appear after coloring is completed. Follow these tips and the repair will take place without any unpleasant defects.