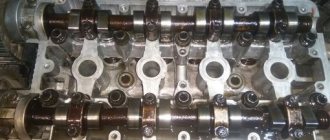
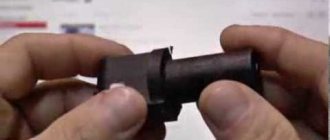
The UAZ Patriot is equipped with a crankshaft position sensor, which is used to determine the TDC position for the first cylinder of the engine. Determining such cyclicity is necessary for the power and ignition system. The crankshaft position sensor is the only sensor that will prevent you from starting your car engine if it is faulty. On a UAZ Patriot car, a sensor type DG-6 0261210113 from Bosch or 23.3847 can be installed. Both sensors are made in the form of an inductance coil with a core, which responds to changes in the magnetic field around it. The change in the magnetic field occurs due to the rotation of the synchronization disk with teeth on it.
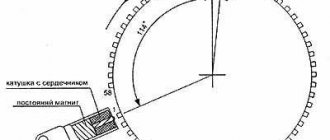
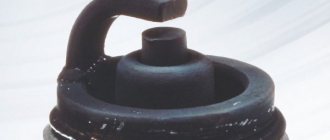
To better understand the operating principle of the crankshaft position sensor, take a look at the picture below.
UAZ Patriot crankshaft position sensor: 1 – sensor winding; 2 – body; 3 – magnet; 4 – seal; 5 – drive; 6 – mounting bracket; 7 – magnetic circuit; 8 – synchronization disk
The sensor is installed on the ebb bracket and is rigidly secured with a bolt. When the synchronization disk rotates, a small voltage pulse is generated in the sensor, which in turn is transmitted to the machine's ECU. At the same time, one tooth is missing on the synchronization disk, which precisely indicates the TDC position for the first cylinder of the engine. It is at the moment the electrical signal passes from the crankshaft sensor that the ECU calculates this position.
Engine QG15DE Nissan
The topic of Japanese cars and the quality of their workmanship is almost limitless. Today, models from Japan can compete with world-famous German cars.
Of course, not every industry is without its drawbacks, but when purchasing, for example, a Nissan model, you don’t have to worry about reliability and durability at all - these qualities are always high.
A fairly popular power unit for some Nissan models is the well-known QG15DE engine, to which quite a lot of space is devoted on the Internet. The motor belongs to a whole series of engines, starting with QG13DE and ending with QG18DEN.
Short story
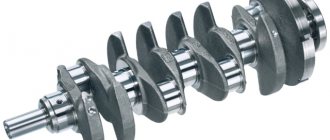
The Nissan QG15DE cannot be called a separate element of the engine series; for its creation, the base of the more practical QG16DE, which was characterized by increased consumption, was used. The designers reduced the cylinder diameter by 2.4 mm and installed a different piston system.
Such design improvements led to an increase in the compression ratio to 9.9, as well as more economical fuel consumption. At the same time, power increased, although not so noticeably - 109 hp. at 6000 rpm.
The engine was operated for a short period of time - only 6 years, from 2000 to 2006, and was constantly refined and improved. For example, 2 years after the release of the first unit, the QG15DE engine received a variable valve timing system, and the mechanical throttle valve was also replaced with an electronic one. The first models were equipped with an EGR emissions control system, but it was removed in 2002.
Like other Nissan engines, the QG15DE has an important design flaw - it does not have hydraulic compensators, which means that valve adjustment will be required over time. Also, these engines are equipped with a timing chain with a fairly long service life, which ranges from 130,000 to 150,000 km.
As mentioned earlier, the QG15DE unit was produced for only 6 years. After which its place was taken by the HR15DE, with more improved technical characteristics and performance indicators.
Specifications
To understand the capabilities of the engine, you should familiarize yourself with its characteristics in more detail. But it is necessary to clarify right away that this engine was not created with the aim of registering new speed capabilities; the QG15DE engine is ideal for quiet and constant driving.
Make ICE QG15DE
| engine's type | Row |
| Working volume | 1498 cm3 |
| Engine power relative to rpm | 90/560098/6000105/6000109/6000 |
| Torque relative to rpm | 128/2800136/4000135/4000143/4000 |
| Number of cylinders | 4 |
| Number of valves | 16 (4 per cylinder) |
| Cylinder block, material | Cast iron |
| Cylinder diameter | 73.6 mm |
| Piston stroke | 88 mm |
| Compression ratio | 09.09.2018 |
| Recommended fuel octane number | 95 |
| Fuel consumption: | |
| - when driving around the city | 8.6 l. per 100 km. |
| - when driving on the highway | 5.5 l. per 100 km. |
| - for mixed driving | 6.6 l. per 100 km. |
| Engine oil volume | 2.7 liters |
| Oil burn tolerance | Up to 500 grams per 1000 km |
| Recommended Engine Oil | 5W-205W-305W-405W-5010W-3010W-4010W-5010W-6015W-4015W-5020W-20 |
| Change of oil | After 15,000 km (in practice – after 7,500 km) |
| Environmental standard | Euro 3/4, high-quality catalyst |
The main difference from power units from other manufacturers is the use of high-quality cast iron to make the block, while all other companies prefer more brittle aluminum.
When choosing a car with a QG15DE engine, you should pay attention to economical fuel consumption - 8.6 liters per 100 km when driving around the city. Quite a good indicator for a working volume of 1498 cm3.
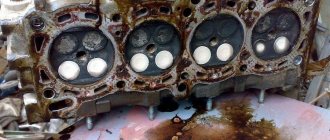
To determine the engine number, for example, when re-registering a car, just look at the right side of the cylinder block of the unit. There is a special area with a number stamped on it. Very often, the engine number is coated with a special varnish, otherwise a layer of rust may soon form.
Reliability of the QG15DE engine
How is such a concept as the reliability of a power unit expressed? It’s very simple, it means whether the driver will be able to get to his destination with any sudden breakdown. Not to be confused with service life.
The QG15DE motor is quite reliable, which is due to the following factors:
- Fuel injection system. The carburetor, due to the lack of electronic components, allows you to win in acceleration and jerking from a standstill, but even ordinary clogging of the jets will lead to a stalled engine.
- Cast iron cylinder block and cylinder head cover. A material with a fairly long service life, but does not like sudden temperature changes. Engines with a cast iron block should only be filled with high-quality coolant, preferably antifreeze.
- High compression ratio with small cylinder volume. The conclusion is a longer engine life without loss of power.
The engine life was not indicated by the manufacturer, but from reviews of car enthusiasts on the Internet we can conclude that it is at least 250,000 km. With timely maintenance and non-aggressive driving, it can be extended up to 300,000 km, after which it is necessary to carry out a major overhaul.
The QG15DE power unit is absolutely not suitable as a basis for tuning. This motor has average technical characteristics and is designed only for a calm and smooth ride.
List of main faults and methods for their elimination
There are the most common breakdowns of the QG15DE engine, but with high-quality and timely maintenance they can be minimized or avoided.
Timing chain stretched
It is very rare to see a broken timing chain, but a more common occurrence is a stretched chain. Wherein:
- The engine starts poorly or does not start at all. In this case, it is necessary for the starter to perform long-term work, which also affects its service life.
- The appearance of floating speed at idle.
- Failures in operation are possible, very similar to the consequences of a failed spark plug.
- Increased noise level when the engine is running.
There is only one way out of the situation - to replace the timing chain. Now there are many high-quality analogues, the price of which is quite affordable, so there is no need to buy the original, the service life of which is at least 150,000 km.
The engine won't start
The problem is very common, and if the timing chain has nothing to do with it, then you should pay attention to such an element as the throttle valve. On engines whose production began in 2002 (Nissan Sunny), electronic dampers were installed, the cover of which requires periodic cleaning.
What signs indicate a probable malfunction of the DPKV?
Some symptoms will prompt the driver to check and possibly replace the crankshaft sensor.
1. The engine cannot be started. There is no ignition spark. No voltage is supplied to the injector connectors when the starter rotates. The combination of all three signs almost unambiguously indicates a malfunction of the DPKV.
2. While driving, significant detonation occurs in the cylinders, especially during acceleration or on an incline.
3. The power of the power unit has dropped significantly.
4. Engine speed changes randomly.
5. The unit operates unstably, including at idle, and stalls from time to time.
If problems arise with the crankshaft position sensor, the on-board computer displays an error code 0335 or 0336.
However, if the listed signs appear, do not rush to bury the sensor. It is possible that it is working properly, but something is preventing it from working properly.
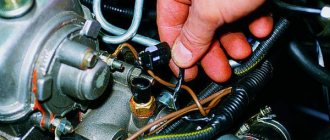
First, check the sensor chip to see if the contact is reliable and if the wire has fallen off. Check the wires from the sensor to the control unit as a whole.
In the simplest case, it may turn out that the end of the sensor or the gear ring of the flywheel is dirty. Try cleaning them.
It is possible that the cause of unstable operation is an incorrect gap between the sensor and the drive disk. Then adjusting the gap may solve the problem.
Engine instability, tripping and other troubles can occur if the flywheel does not fit tightly enough on the crankshaft. A similar picture is possible in the case when the sensor itself is poorly secured and dangles due to vibration.
Also check the condition of the flywheel ring teeth. The controller not only records the gap with two missing teeth, corresponding to the passage of TDC. It also counts the existing teeth. If at least one of them is damaged or broken off, the ECU will perceive this as a DPKV error.
Computer diagnostics will not reveal such problems; all this must be inspected and checked manually.
In rare cases, the normal operation of the crankshaft sensor may be disrupted due to interference from high-voltage wires, for example, when the starter is operating.
Crankshaft sensor Nissan Almera N16
The operation of the power unit of the Nissan Almera N16 is directly influenced by the crankshaft sensor. Failure of the DPKV seriously affects the performance of the engine.
In most cases, the engine refuses to start. This is due to the impossibility of generating control commands in the ECU without receiving information about the position and speed of the crankshaft.
Purpose of the crankshaft sensor
DPKV Nissan Almera N16 is used to determine the position of the crankshaft and its rotation speed. It synchronizes the operation of the electronic power unit control unit. The ECU learns about the top dead center of the pistons and the angular position of the crankshaft.
During operation, the sensor sends a signal, which consists of pulses, to the engine control unit. The appearance of disturbances in the transmission of information leads to a failure of the synchronization of the ECU and is accompanied by a stop of the motor.
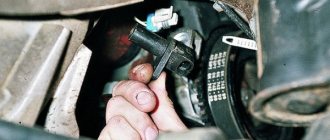
Location of the crankshaft sensor on Nissan Almera N16
In order to see where the DPKV is located on the Almera H16, you need to look from under the car. It is important to take into account that the sensor installation location is covered by a crankcase protection that will need to be removed. The location of the DPKV is shown in the photographs below.
Sensor cost
The Almera N16 uses the original Nissan sensor 8200439315. Its price is extremely high and amounts to 9000-14000 rubles. Almera N16 cars are also equipped with Renault DPKV 8201040861 from the factory. The cost of a branded meter is in the range of 2500-7000 rubles.
Due to the high cost of original sensors, they are not widely popular in car dealerships. This makes them difficult to purchase. For this reason, many car owners are inclined to purchase analogues. Among them there are a lot of decent options at an affordable price. The best analogues of the original Almera N16 sensors are presented in the table below.
Table - Good analogues of the branded crankshaft sensor Nissan Almera N16
ManufacturerCatalogue numberApproximate price, ruble
| Maxgear | 240045 | 300-600 |
| Intermotor | 18880 | 600-1200 |
| Delphi | SS10801 | 700-1200 |
| EPS | 1953199K | 1200-2500 |
| Lucas | SEB442 | 500-1000 |
Methods for checking the crankshaft sensor
Failure of the crankshaft position sensor is always accompanied by an error being entered into the memory of the on-board computer. Therefore, checking the DPKV should begin with reading problems from the ECU. Based on the received code, you can determine the nature of the problem that has arisen.
Further testing involves removing the crankshaft position sensor from the vehicle. It is important to determine the presence of mechanical damage. Therefore, the body is subject to careful visual inspection. If cracks or other defects are detected, the sensor must be replaced with a new one.
If a visual inspection shows nothing, then it is recommended to check the resistance. To do this you will need a multimeter or ohmmeter. The measured value should not exceed 500-700 Ohms.
If you have an oscilloscope, it is recommended to connect it and take graphs. It is easy to identify missed pulses using them. Using an oscilloscope allows you to most accurately check the DPKV.
Required Tools
The list of tools that will be required when replacing the crankshaft position sensor is presented in the table below.
Table - List of tools for replacing DPKV
NameSpecial addition
| Socket head | "on 10" |
| Ratchet | With cardan |
| Spanner | "at 13", "at 15" |
| Rags | For cleaning work surfaces |
| Penetrating lubricant | To unscrew the crankcase protection fasteners |
Replacing the crankshaft position sensor is possible through the top of the engine compartment. To do this, you will need to remove the air filter housing. The disadvantage of this method is the need for sufficient flexibility of the hands and the ability to work “by touch”. Therefore, most car owners change the crankshaft sensor from underneath the Almera N16. In this case, an inspection hole or overpass will be required
Self-replacement of the sensor on Nissan Almera N16
Replacing DPKV with Almera N16 occurs according to the algorithm below.
- Remove the power unit crankcase protection.
- Remove the terminal block from the sensor.
- Unscrew the bolt that secures the DPKV to the power unit.
- Remove the sensor. It should be borne in mind that removing it may be complicated by sticking of the sealing ring. In this case, it is advisable to crawl under the sensor with a thin screwdriver.
- Install a new crankshaft position sensor on Almera N16.
- Reassemble everything in reverse order.
Source: https://zapchasti.expert/datchiki/datchik-kolenvala/datchik-kolenvala-nissan-almera-n16.html
Required Tools
The list of tools that will be required when replacing the crankshaft position sensor is presented in the table below.
Table - List of tools for replacing DPKV
| Name | Special Addition |
| Socket head | "on 10" |
| Ratchet | With cardan |
| Spanner | "at 13", "at 15" |
| Rags | For cleaning work surfaces |
| Penetrating lubricant | To unscrew the crankcase protection fasteners |
Replacing the crankshaft position sensor is possible through the top of the engine compartment. To do this, you will need to remove the air filter housing. The disadvantage of this method is the need for sufficient flexibility of the hands and the ability to work “by touch”. Therefore, most car owners change the crankshaft sensor from underneath the Almera N16. In this case, an inspection hole or overpass will be required
Crankshaft sensor Nissan Sunny
The QG18DE crankshaft sensor is one of several sensor devices that ensure normal engine operation. DPKV transmits information to the vehicle’s on-board computer. The ECU uses this information along with signal inputs from other sensors to control ignition timing and fuel injection. This keeps the interaction of the motor parts timed and working in harmony.
The sensor wears out or fails over time. There is a possibility of damage to sensor parts such as wiring, gear, pin, magnet. In such cases, repair or replacement is required.
Checking the crankshaft position sensor UAZ Patriot
Connect one probe of the tester, turned on in ohmmeter mode, to the central terminal of the sensor wiring harness block, and the second probe to any side terminal. The sensor winding resistance should be 700–900 Ohms. This check can be performed without removing the sensor from the vehicle.
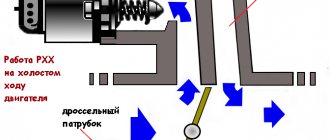
Connect a tester switched on in voltage measurement mode with a minimum measurement value to the sensor terminals. Quickly bring a metal object (such as tweezers) to the sensor core. If the sensor is working properly, there will be a voltage surge on the device.
If the voltage does not change, the sensor is faulty and needs to be replaced.