Why is the engine difficult to start when hot?
The question is often raised on car forums: why is the engine difficult to start when hot? Moreover, this problem exists in carburetor, injection, and diesel engines. For example, a person drove a car for some time, then stopped and turned off the engine, but after a couple of minutes he could no longer start it again. The engine seems to catch and then immediately stalls. So the driver has to stand and wait until the engine cools down. When cold - everything is fine, it starts as expected. Let's try to find out what's the matter?
If a carburetor engine has difficulty starting when hot, this is understandable. When the engine is running, a lot of air circulates through the carburetor, thereby cooling the carburetor. At the same time, the gasoline entering the carburetor is cooled. As a result, when the engine is running, its temperature remains much higher than the temperature of the carburetor. But this is while the engine is running. As soon as it is turned off, the air circulation immediately stops; accordingly, the cooling of the carburetor stops, and it begins to heat up sharply from the hot engine.
During the rapid heating of the carburetor, the gasoline remaining in the float chamber, at such a high temperature, also begins to evaporate very quickly, and these vapors begin to fill all the existing voids. Thus, air pockets appear in the fuel system - in the float chamber, air filter and in the carburetor itself.
This process can last from 5 to 30 minutes, depending on how long you decide to start the engine again. If you start it earlier than 30 minutes, the air-fuel mixture will be over-rich, fuel will flood the spark plugs, and such a hot start will not be easy.
In connection with the above, in a situation where you need to start a hot carburetor engine, you first need to lean the air-fuel mixture. To do this, you first need to depress the gas pedal once, fully or only halfway (depending on the situation). If you press on the gas several times, often, the proportion of the mixture will be further disturbed towards over-enrichment, and then the fuel mixture will completely flood the engine. If necessary, repeat this single press on the gas. After starting the engine, you need to press the gas several times, and then you can continue moving.
Injection and diesel engines
If the reason why a carburetor engine does not start well when hot is quite simple and understandable, then with injection and diesel engines everything is much more complicated. There may be several reasons for this problem. Here are the most common:
1. Malfunction of the JOT (coolant temperature sensor) - happens on both injectors and diesel engines. A faulty sensor sends the wrong signal to the ECU, and as a result, the fuel also flows incorrectly. The solution to the problem is to replace the JOT.
2. Fuel injectors are leaking. Gasoline flows through the injectors and evaporates. The result is an over-enrichment of the air-fuel mixture. To check the injectors, you need to unscrew the spark plugs and check if they are wet. To start a car with an injection engine when hot, you need (by analogy with a carburetor engine) to first let the gasoline vapors escape - to do this, open the throttle slightly. Fuel injectors can also leak due to wear on the seals on them. The solution to the problem is to replace the faulty injector.
3. Malfunction of the high-pressure fuel injection pump (for cars with diesel engines), due to the failure of: a) the plunger pair, b) the bushings and oil seal of the drive shaft. The solution to the problem is to replace worn parts.
4. The control injector temperature sensor has failed (for cars with diesel engines), as a result of which the injection angle changes and the car has difficulty starting when hot. The solution to the problem is to replace the temperature sensor.
5. The pump drive is stretched, as a result of which the injection angle also changes. The solution to the problem is to turn the pump one or two degrees to adjust the injection angle.
6. The fuel pressure regulator diaphragm is torn. Dripping gasoline enters the intake manifold, as a result, the mixture becomes over-rich and does not burn. The solution to the problem is to replace the fuel pressure regulator.
This is not a complete list of reasons why a car with an injection or diesel engine has difficulty starting when hot. In addition, a malfunction can lead to this problem:
– crankshaft position sensor (CPS),
– mass air flow sensor (MAF) (How to check the MAF),
– pressure sensor in the fuel drive,
Thus, if a hot injection or diesel engine is difficult to start, then there can be quite a few reasons for this, and it is best not to suffer yourself, but to carry out high-quality diagnostics at a car service center.
In addition to malfunctions of the UMZ-4216 engine itself, malfunctions of the engine control systems also occur during operation. The electronic engine control unit (fuel supply and ignition) is capable, to a certain extent, of diagnosing malfunctions of the UMZ-4216 engine control systems. In this case, sensors installed on the engine are used to obtain information about the operation of the engine and the systems controlled by the unit.
Typical possible malfunctions of the power and ignition control systems of the UMZ-4216 engine with electronic fuel injection.
To launch the self-diagnosis system (as well as to connect a special diagnostic tester ASKAN 10), there is a special 16-pin plug connector in the wiring harness of the UMZ-4216 engine control system. When a malfunction in the control systems is detected, the control unit turns on the diagnostic malfunction lamp (yellow lamp on the vehicle's instrument panel with an image of the engine circuit), and a code reflecting this malfunction is entered into its memory.
Switch Problems - Symptoms and Signs
A switch is one of the elements of a car's electrical equipment. His task
– ensuring normal operation of the contactless ignition system. The assembly is fastened in the engine compartment.
The device is different
reliability, ability to withstand severe vibrations and shock loads. This is very important, because the switch housing contains sensitive electronics.
At the heart of the VAZ switch
– standard L 497 microcircuit, which controls an “NPN” type transistor.
>Scheme feature
– possibility of programming by the user and setting the required delay coefficient. Starting a cold engine directly depends on the correctness of this indicator.
Thanks to precise settings
, you can speed up the crankshaft rotation speed (while eliminating failures in operation) and guarantee high-quality traction of the power unit.
The main parameters of the switch device include:
Voltage range - from 6 to 16 Volts; operating voltage level - 13.5 Volts; ensuring an uninterrupted spark when the crankshaft rotates in the range from 20 to 7000 rpm;
switching current – from 7.5 to 8.5 A.
Symptoms of a Switch Problem
One of the main symptoms of a faulty switch is loss of spark.
. The engine starts hard and stalls from time to time, causing interruptions in operation.
But don't rush to replace it
- it is important to verify the reason, because
loss of spark can occur for a number of reasons
- failure of the Hall sensor, rupture of the timing belt, malfunction of the ignition coil, poor contact in the distributor cap, problems in the wiring, and so on.
Therefore, first of all, a comprehensive diagnosis is necessary. The fastest and most effective way in this case can be a car diagnostic scanner. For the most part, this type of device is quite easy to use and has an affordable price. Of those presented on our market, we can recommend paying attention to the multi-brand scanner Scan Tool Pro Black Edition.
The car doesn’t start well when it’s hot: we look for and fix the problem
Modern cars are gradually moving from the concept of mechanisms to the concept of organisms. This is a highly complex system that requires ideal operating conditions. High engine power, squeezing everything that can be squeezed out of technology, and other features of the modern automobile industry indicate that modern cars must receive maximum care in order to work for a long time. One of the common problems that arise from improper car care is poor engine starting after it warms up. This means that if you park for a few minutes near the store, you will not be able to start the engine properly. The problem lies in two possible types of breakdowns, but there are also extraordinary cases. Today we will deal with the most common problems in this case, and also talk about specific types of problems.
It should be noted that the symptoms of poor hot starting can manifest themselves in different ways. One car refuses to start at all until the engine cools down a certain amount. Another power unit starts only on the third or fourth try, and the third one simply has to be cranked for a long time to start. In any case, no matter what happens to your car in this context, you need to find the problem and be sure to fix it. This task is a harbinger of more serious breakdowns, the repair of which will cost you much more money. So let's figure out why the car doesn't start well when it's hot.
Bad fuel or presence of additives in the fuel mixture
Low-quality gasoline or diesel fuel is one of the most common variants of this problem. But in this case, you can conduct an experiment that will show the true problem of your car. The fact is that low-quality fuel with a poor start when hot will have an even more unpleasant effect when starting the engine when cold. Therefore, it is enough to cool the car, wait for the engine to return to normal and start it. The following problems may also occur with fuel:
- Gasoline or diesel fuel may contain an additive that your engine does not accept;
- diesel fuel has frozen and acquired a jelly-like form, which is difficult to pump;
- there are solid particles in gasoline, the filters are clogged, and it is difficult for the pump to pump the required amount of fuel;
- the settings of the engine control system and air supply have gone wrong, one of the valves may have broken;
- the idle air valve, as well as the mass air flow sensor (mass air flow sensor) can cause such problems;
- It’s just a functional feature of carburetor engines – a very hot unit has difficulty starting.
Wiring diagram for Gazelle 402 engine: do-it-yourself replacement
Having become an indispensable vehicle, the Gazelle with the 402 engine still requires attention over the years.
Electrical wiring is not listed among the parts subject to scheduled replacement, however, an electrical diagram is often required when carrying out repair work in the engine compartment.
Native 402 engine for Gazelle
Equipped with a ZMZ-402 carburetor engine, the car successfully exhausts its service life, and when the time comes for a major overhaul, many owners think not only about restoring, but also about reconfiguring its operation.
And since carburetor versions of power units have become a thing of the past, the question of the prospects for using a restored engine is urgent.
Electrical system of a Gazelle car
The transition to multi-valve injection engines is possible and even recommended by the automaker, but owners are not always satisfied with this approach, especially from the financial side.
Advice: Be that as it may, when removing the motor for overhaul, the owner has the opportunity to replace the old electrical wiring.
If the resource of the restored power unit inspires optimism, and you have a Gazelle wiring diagram at hand, the 402 engine may well last for hundreds of thousands of kilometers.
Electrical wiring diagram for Gazelle 402 engine
Replacing wiring on a Gazelle car
The reasons causing the need to replace the electrical wiring according to the diagram in Gazelle cars are not only due to the overhaul of the power unit, but also:
- Due to natural wear and tear of wires;
- Delamination of insulation due to natural aging;
- Mechanical damage (kinks, scuffs);
- Short circuits in one or another electrical circuit;
- Oxidation of contacts and connectors.
Additional replacement materials
In addition to purchasing new electrical wiring, those corresponding to the motor used must also be replaced:
- High voltage wires;
- Electronic switch (in later versions of motors of the ZMZ-402 series);
- Ignition coil;
- Battery charge level relay;
- Fuse block contact group;
- Egnition lock.
Places requiring installation work
Laying the wiring harness is not a difficult task, especially since the places for their attachment to the frame are provided initially (gutters, service holes, etc.).
Gazelle interior with disassembled dashboard
However, according to complexity, replacement work is divided into areas of responsibility:
- Engine compartment;
- Vehicle interior;
- Rear part of the body.
The easiest part in terms of connection is the rear part of the car, where you only need to secure the harness and connect the rear lights and the fuel level sensor in the gas tank. The interior and engine compartment are more complex.
Installation of wiring on a Gazelle car
The wiring for Gazelle 402 is divided into the indicated zones.
Having laid out a new set of wires in a free place, its orientation will be immediately noticeable:
- The longest and thinnest tourniquet is intended for the back;
- The shorter one is for the interior;
- The largest number of wires and connectors is for the engine compartment.
The carburetor engine stalls after warming up - what's the matter?
Carburetor power units are actually a thing of the past. But many cars on the roads of our country still use this option for supplying fuel to the engine. For many, a carburetor turns out to be a fairly convenient means of replacing an injector, since the car becomes easier to repair and cheaper to operate. In most cases, the owner of a carburetor car can independently carry out basic maintenance work on the fuel supply system. In the case of an injector, this task should only be performed by specialists. For simple carburetor repairs, you do not need special equipment, but to work with an injector, such devices are simply necessary. Therefore, such a part of the engine power system has certain advantages. Interestingly, these advantages force many to change the injector to a carburetor, which is not difficult at all.
Problems that arise with the carburetor can be very different. One of the common problems is that the engine stops working after the car has completely warmed up. The driver has to increase the speed with the help of a choke, but this trick will not work on carburetors with auto-choke. Eventually, the engine will stall as soon as you release the gas pedal. At every traffic light, intersection and pedestrian crossing, the driver begins to curse fate, red lights and innocent pedestrians, and the carburetor continues to stall and refuses to work normally, despite very expensive gasoline. Let's figure out the nature of this trouble.
Create an account
Register a new account in our community. It's very simple!
And so let's figure out why a situation with a lack of spark may arise:
The first thing, of course, is to check whether there is power to the elements of the ignition system:
- ignition coil ,
- transistor switch ,
- additional resistor (if provided by the system).
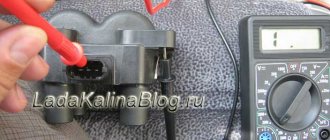
These elements of the ignition system need to be checked to see if there is power. You can simply check with a test lamp. Turn on the ignition and check the diagram of which terminals of the ignition system elements receive power, that is, the + wire, you can see on the ignition system page.
Do not forget that the ignition coil is fed with reduced voltage through an additional resistor 14.3729 or directly through a transistor switch 131.3734 with the added function of resistor 14.3729. The voltage at terminal K of the B-116 ignition coil will be slightly low.
Second, I would advise you to check the integrity of the wire that transmits impulses from the distributor to the transistor switch.
I think you haven’t forgotten that we have a contact-transistor ignition system; the distributor generates voltage pulses to control the transistor switch.
There is a wire break. You can check it with a tester; if you don’t have a tester at hand, you can get by with a test lamp made from an ordinary 12-volt light bulb and a piece of car wire. Disconnect both ends of the wire that stretches from the distributor to the switch, it is usually black, one end is connected to the distributor and the other to terminal D on the switch, and on the distributor there is only one wire, so you can’t confuse it.
Adjusting the ignition system ZMZ 402
The operation of the engine, its efficiency and reliability directly depend on the correct settings of the ignition system. In this article we will look at the design and components of the ZMZ 402 ignition system, as well as the procedure for setting the ignition timing
Ignition system elements
One of the main systems necessary for a successful engine start is the ignition system. For gasoline engines, the fundamental design of ignition systems differs very slightly - there are two types:• Contact system• Contactless system
The ignition system consists of the following components: 1. Coil2. Distributor-spark interrupter (distributor)3. Switch4. Spark plugs5. Ignition switch6. Starter
7. Additional resistance (in some cases)
How the ignition system works
For the ZMZ 402 model, this order looks like this:
1-2-4-3
The car engine is started by turning the key in the ignition switch - at this moment the charge from the battery is supplied to the starter, which begins to rotate the crankshaft, activating the distributor (via the drive). At this very moment, electric current is supplied to the coil, then through the commutator the charge is supplied to the spark distributor (distributor), which in turn distributes the current through the wires to the cylinder spark plugs.
IMPORTANT to know that the switch is a block of transistor switches that serves to control the currents that pass through the inductor.
Early ignition
One of the most common problems with the ignition system is too early an ignition timing angle - this is when, when fuel is supplied to the engine cylinder, the working mixture of gasoline and air in the combustion chamber ignites much earlier than the piston approaches top dead center. If the initial ignition timing is set too early, then problems with the vehicle's performance may occur. To avoid this, you should pay attention to signs of early ignition.
And this is:• The engine does not start the first time (the crankshaft turns in the opposite direction when starting the engine)• Unstable operation of the engine at idle• Detonation of unburned fuel (a chirping sound appears that does not disappear when the speed increases)• Carbon deposits on the spark plugs ignition (fuel that is not completely burned settles on the spark plug)• Shots into the muffler (fuel burns due to misfire of the ignition)• Black smoke from the muffler (fuel that is not burned in the combustion chamber burns out)• Increased fuel consumption
Late ignition
On engines with a carburetor power supply system, late ignition is the ignition of the fuel mixture at the moment when the piston has already reached top dead center or has already passed it. When the engine operates this way, fuel consumption increases, power and throttle response deteriorate. The main signs of late ignition are:• Trouble starting the engine (several attempts are needed)• Sluggish vehicle dynamics while driving (the engine stalls when the speed increases)• Light gray or white spark plugs• Shots in the carburetor (fuel burns out in the intake manifold )
• Engine overheating (the mixture burns out during the expansion stroke, which contributes to engine overheating)
Procedure for adjusting the ignition system
To correctly install the ignition on the ZMZ 402 engine, the following factors must be taken into account:• The engine operating order is 1-2-4-3• The distributor rotor rotates counterclockwise• The backlash on the spark plug should be no more than 0.8 mm• The resistance value of the resistor on the distributor should be from 5 to 8 kOhm• The resistance value on the spark plug ranges from 4 to 7 kOhm• The resistance of the stator winding varies from 0.45 kOhm to 0.5 kOhm
Label matching
To begin setting the correct ignition timing, you need to turn the crankshaft to a position that indicates 5 degrees. This is done as follows - you need to set the first cylinder at top dead center (end of the compression stroke). To do this, you need to align the middle mark on the crankshaft pulley with the mark on the cylinder head.
ATTENTION. The compression stroke on the first cylinder can be set if the distributor has not been removed before - by opening its cover, the slider will stand opposite the internal contact of the wire connecting to the spark plugs of the first cylinder.
If it is not possible to determine the compression stroke in this way, then it is necessary to unscrew the spark plug from the first cylinder and plug the hole with a rag or paper. Then you should start cranking the crankshaft until the paper-shaped plug is removed with the help of air created inside the cylinder. This will be the moment of compression.
Advance angle adjustment
Next, you need to loosen the octane corrector bolt, which is located on the distributor. A 10mm wrench will come in handy here. Then the advance angle is set approximately in the middle of the scale (this will be zero). Next, using the same 10mm wrench, you need to loosen the bolt securing the octane corrector plates.
The next step is to rotate the distributor housing so that both marks coincide - the red mark on the rotor head and the mark on the stator. When the housing is installed in the desired position, it is necessary to fix the distributor housing with one hand and tighten the bolt with the other.
Checking the correct installation of the ignition
The correctness of the set ignition timing is checked while the car is moving - at a speed of 50-60 km/h, the gas pedal is sharply pressed, a short-term detonation should follow (1-3 seconds). If detonation disappears after this time, then the moment was chosen correctly. You can set the ignition more accurately using a strobe light.
This short guide will help you set the ignition yourself without resorting to the help of specialists at home.
Source: https://remruk.info/regulirovka-systemy-zazhigania-zmz-402/
