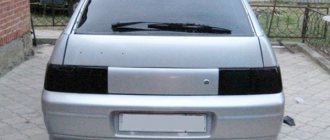
According to the legislation of the Russian Federation, light transmittance indicators on vehicle tinted windows must comply with the standards. On the rear and side windows, this figure should be at least 75%, and on the front - 70%. For violation there is a fine of 5,000 rubles.
Dear readers! The article talks about typical ways to resolve legal issues, but each case is individual. If you want to find out how to solve your particular problem , contact a consultant:
8 (800) 700 95 53
APPLICATIONS AND CALLS ARE ACCEPTED 24/7 and 7 days a week.
It's fast and FREE !
However, this is not the only reason to remove the tint. Sometimes the film itself is simply damaged or a defect appears on the glass. But how to remove tint yourself? The article will provide useful recommendations on this issue.
Causes of glass heating failure
One of the most common reasons for the breakdown of the heated glass system is the installation of tinting. There are 2 situations in which current-carrying filaments can fail:
- if you stick or smooth out the tint carelessly. You risk damaging one or more conductive elements;
- if you remove the film and scrape off the glue with sharp objects. Under no circumstances should this be done, otherwise you will also damage the glass.
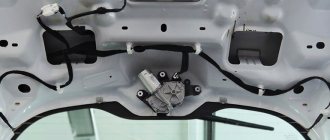
Determining that the heating thread has broken is quite simple - look at exactly where the fogging does not disappear from the windows when heated.
To quickly find it, it is enough to know the structure of the heating system and where the heating filaments are located.
Many car enthusiasts do not know what to do if they want to install tint film on a heated window. Theoretically, you can even do this yourself, but there are a number of features.
Protective films
Protective films for windows, the price of which is higher, the higher the quality, are multifunctional. They provide high-quality protection and, according to their purpose, are as follows:
- from burglary. It will protect the apartment from entry by thieves; they simply will not be able to break the window, since the film can withstand the strongest blows. If the blows are applied for a long time, only a crack may appear on it, but the glass itself will not break, but will remain on the film. Depending on the thickness, the film has an impact resistance rating of 31 kg/cm. square up to 182 kg/cm2;
- from fragments. Very durable. In case of any destruction of glass, even during an explosion, this film does not allow the fragments to fly away. It also softens the force of the shock wave;
- from weapons. A bullet fired from a traumatic weapon or pneumatic weapon will be stopped by glass covered with such a film, but, unfortunately, for a steel bullet this is not an obstacle, although it will still be slowed down;
- from listening. This film can reduce vibration from sound waves. Therefore, if there is a conversation in the room, it will not be possible to record this conversation;
- from children's pranks. Very relevant in a house where there are children. Parents can be calm about the possibility of their child falling out of a window or being injured by broken glass;
- from fire. The protection of this film protects the room where the fire occurred from air from the street, which means the flame spreads much more slowly;
- from heat loss. Reflects infrared and ultraviolet rays well. Therefore, in winter it retains heat, and in summer it provides coolness. At the same time, the film is transparent and transmits 85% of light.
Protection classes
Protective films have their own protection classes that correspond to certain thicknesses:
- film thickness 0.24 mm - class A1. Withstands impact 3.5 J;
- 0.412 mm - A2. Resists 6.5 J impact force;
- 0.6 mm - A3. Capable of withstanding a blow with a force of 9.5 J.
- The tolerance for impact force is 0.02 microns in one direction or the other.
Installation Features
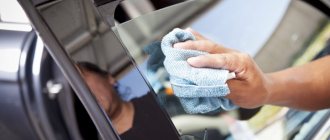
Tinting the rear window is perhaps the most difficult procedure for applying shading, since the window itself is large in area, convex and has a heating system. If the film is poorly formed, it is quite easy to damage the heating filaments. For example, you need to remove old film from a window. After removing it, there will be glue residues and various contaminants on the surface. To wash them, you should never use abrasives, but you can:
- Take the windshield cleaning fluid and run a cloth over the entire surface of the glass. It is important that the surface needs to be treated between the threads;
- to clean the threads themselves, use a solvent;
- An alternative cleaning method is special film removal liquids. However, they are usually suitable for films from specific manufacturers.
Remove remaining glue using a double-sided sponge with a soft and hard side. They need to be changed depending on the degree of contamination. After removing any remaining adhesive, you should wipe the surface with a tint solution and apply a new film. The further procedure is similar to conventional film application.
Another feature when installing a tint film on a heated window is that on older cars (manufactured before 2003), the heating threads are often oxidized and become tarnished over time. To remove it, you can use a blade, which very carefully use horizontal (and in no case vertical, so as not to damage the threads) movements to clean off the dirt.
Types of film
Depending on what functions the film should perform, it is divided into:
- sun protection;
- protective;
- decorative;
- architectural;
- automobile.
Films are used for plastic windows and those made of wood. All of them are made on the basis of polyester. This polymer provides:
- transparency;
- sufficient elasticity;
- strength characteristics of the film.
Depending on the type of film, it:
- has a different number of layers;
- different composition in each layer;
- may include a coloring pigment, and in cheap films, manufacturers make do with coloring glue, which reduces their quality.
The difference between professional films
- The outer layer serves as protection for the inner layers - the workers;
- There are several protective, that is, metallized layers. Their number determines strength;
- In the production of metallized film, the sputtering method is used:
- aluminum;
- bronze;
- titanium;
- nickel;
- sometimes even gold and silver.
According to their appearance, the films are:
- transparent;
- matte;
- mirrored;
- white;
- dark;
- colored;
- plain;
- having the effect of stained glass or glass with frost;
- just with a picture.
How to tint a rear window
First you need to thoroughly wash, dry and dry the glass. Then add a little powder and rub. Now you need to determine the size of the tint, which a tape measure will help with, and cut out the desired film. The next step will be molding - giving the tint the shape of the glass.
Methods for forming tint film
“wet” - wet (without removing the protective film), place the film on the outside of the rear window and smooth it by pressing from the center to the edges, while simultaneously heating the curved areas with a hairdryer. Thus, the film will bend and take the desired shape.
"dry" is a much faster method used in Europe. The point is that a piece of tint is placed on the rear window with the cover facing out, then the excess is cut off (the car may not be scratched). The folds are blown with a hairdryer and smoothed out by forcing.
Then, without removing the tinting from the glass, you need to install a spotlight in the car interior, the beam of which will illuminate the rear window. This is necessary in order to cut out the tint more carefully , taking into account all shapes and curves.
The cut film must be removed to wash the side that came into contact with the glass and carefully rinse off the baby powder. The glass can also be washed, since the film will again fall on it.
Having slightly moistened the film, you can begin to smooth it with short movements in different directions, starting from the center. This will show how well the film has been molded. Doubtful areas should be heated with a hairdryer and smoothed out. Now the film can be brought inside.
But before that, of course, you need to very carefully wash the inside of the rear window so that there are no grains of sand or dust left . If the glass is silk-screened, but you plan to apply high-quality tint to the rear window, then you should carefully go over the contour of the glass with sandpaper so that there are no unsightly white stripes. After this, wash the inside of the rear window one last time.
What is film adhesive
Peeling off the tint film is a very labor-intensive process that needs to be approached no less seriously than gluing it.
So the removal methods will largely depend on the reason why you need to remove the old tint. Because a relatively freshly applied film is much easier to remove than an old one. And so let’s get acquainted with the most common reasons for its removal. Reasons for removing the film:
- If you notice that the film has begun to fade, peel off, or some defects have formed, for example, air bubbles, or it has simply changed its color, then it is clear that there is no point in leaving it on the glass, because it has already lost its functions anyway and the appearance too. Basically, a change in color can occur when using non-metallic dyes in tinting, and the appearance of bubbles, in turn, is due to poor adhesion of the tinting to the window or poor-quality glue.
- If after purchasing a car you find that the film is too dark, then it also needs to be changed, since it may not meet the standards. The traffic rules state that glass tinting is allowed only within permissible standards, that is, the light transmittance of the windshield should not be lower than 75%, for all other glasses the lower limit is 70%. In addition, the windshield may have a light-protecting strip no more than 15 centimeters wide. If you are stopped on the road by traffic police officers and notice this violation, then you cannot avoid the corresponding sanctions in the form of a fine.
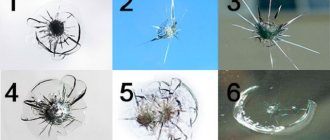
- Also, removing the tint is necessary if a chip or crack appears on the glass and you are going to fix it to prevent it from spreading further.
Of course, ideally, in order not to bother with removing the film, you can use a special service at a car service center. But the price has recently risen to the point of impossibility, so it’s easier to do everything yourself. Many car enthusiasts mistakenly think that it is very easy to remove the film on their own, and they are very mistaken. Because in order to do this efficiently, you need to know several important points, which will be discussed further.
Therefore, let's look at ways to remove tint film:
- Using heating with an industrial hair dryer or steam generator.
- No heating with soapy water.
- Using ammonia.
You can use any of these methods to remove film from your car windows.
The manufacturer of the tinting films also plays a very important role. Opinions differ about Chinese tinting; some say that it doesn’t come off well, while others say it doesn’t last at all. For example, according to consumer reviews, the quality of Chinese film is much worse than that of other manufacturers.
How can you remove old tint, you ask. In order to remove the old tint film, you must first prepare the necessary tools, such as an industrial or household hair dryer, although for heating you can also use a steam generator or other household appliances that can emit heat (in some cases they even manage to heat with an iron).
When using an industrial hair dryer, it is advisable not to overdo it so that the glass does not burst or deform, and the tint film does not melt.
Removal using an industrial hair dryer
Removal using a steam generator
Precautionary measures must be taken when heating the film because later it cannot be removed so easily; you will have to scrape it off. Also, for safety reasons, we recommend removing all decorative elements.
With the help of a steam generator, the film can be removed much faster and with better quality, because hot steam is supplied to the nozzle under pressure. This allows you to not only remove the film, but also the adhesive layer. It should be noted that although this method is quite effective, it is not safe, since the steam generator operates at a very high temperature, which can threaten not only the glass, but also one’s own health.
Next, we present more detailed instructions for removing the film using a hair dryer:
- First of all, you need to warm the film thoroughly so that it comes off the glass without much effort without leaving a layer of glue, although if it remains, it doesn’t matter, then it can be removed additionally, the main thing is that the film is peeled off with a blade. Important! While the hair dryer is operating, you need to ensure that hot air does not hit the rubber and plastic parts of the interior, so as not to damage them.
Self-removal of tinting from car glass
- The second important point when removing is the temperature regime, it should not be different, because a temperature difference can negatively affect the glass, as a result it will begin to crack, so it is better to carry out such work in the warm season. Experts recommend heating the glass to 40˚C; it is at this temperature that the glue will become soft and the film will not melt.
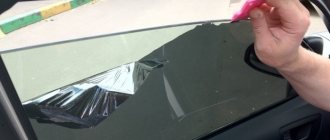
- After warming up, you need to carefully pry the film around the edges with a knife, trying to remove it in this way; you need to act slowly, because glue particles may remain on the glass, which will subsequently need to be washed with detergents.
To understand more clearly how to remove old tint, you can watch the video instructions below.
The question of how to remove old tint without a hair dryer is asked by those car enthusiasts who do not have such a tool. And their first mistake is the very idea that if the edges of the film have peeled off, then it will be much easier to remove it than in the opposite case. Sometimes the simplest thing you can do is simply pull on the protruding part of the tint, which will subsequently simply come off and leave no pieces of film behind for further removal, which will mean that the material that held it on the glass has simply dried out.
If the film adheres well to the glass, then you can simply “cut it off” using a sharp blade.
In order to get rid of old tinting with soapy water, without using heating, you need to:
- Immediately prepare the detergent, which must first be diluted with a small amount of water (24-40 ml of detergent per 1 liter of water). The finished solution must be poured into a sprayer for more convenient use. You need to spray it directly on the inner edges of the film so that the layer gradually comes off the glass.
- After that, we begin to pry off the film with a blade, at a very sharp angle to the glass, trying not to damage it. If you pry a piece of film until you can pull its edge, then you can try to pull it together with slow movements, while it is best to moisten the place where the glue was with a warm solution. This procedure must be done several times, while allowing time for the film to peel off.
- After the surface is cleared of film, you need to apply detergent to it and use a rubber scraper to remove the glue, which has softened under the influence of the product. You need to thoroughly clean the entire surface so that no material remains on the glass.
- If there is still glue left on the surface, it is recommended to use a special tint remover. Although 646 solvent or acetone will cope well with this task, they “remove the remaining adhesive material with a bang.”
- After using the products, you need to wipe the glass dry, preferably with a clean piece of cloth.
By using such a harmful substance as ammonia, you can easily cope with removing tinting in any condition, both old cracked and still in good condition, on the side window or stuck on the rear window with heating threads. This method of tinting the rear window using ammonia is often used by Americans, since it is the most reliable and can cope with the persistent adhesive of the highest quality tinting films.
Here's what you need for this:
- The surface must first be moistened with a soap solution, then with ammonia.
- Then you need to attach a small part of a plastic bag to it to collect garbage, onto which you also need to apply ammonia from a spray bottle. It is recommended to work in a respirator.
- Apply the same piece of polyethylene to the inside of the glass. After which you need to leave everything for a while to wait until the heat of the sun’s rays warms up the polyethylene. Under the influence of heat and ammonia, the film will begin to deform and peel off from the glass.
- Next, all that remains is to simply remove the film along with the plastic bag.
Read more: Home > Popular > Home appliances > "12v fan for car" 1,167 results
The disadvantage of this method is that it can only be used in sunny weather. As a rule, after removing the film, glue remains on the glass; it needs to be cleaned additionally, for example, using a soap solution and a blade. After all operations performed, it is advisable to wipe everything thoroughly with a napkin.
Today, black tinting will not surprise anyone; at the same time, it contradicts the law, according to which a fine is imposed on the violator for exceeding the light transmittance standard. To avoid a fine or simply make the windows transparent again, you should remove the tint film from the car windows.
There are two options: take the car to a car service center or dismantle the tinting yourself. For independent dismantling you will need the following tools:
- clean rags;
- any detergent (for example, “Fairy”) with a spray bottle;
- new construction or razor blade with holder;
- technical hair dryer (in the absence of a construction hair dryer, you can use a household hair dryer).
Using these tools, in just an hour and a half it is possible to completely peel off the tint film from car windows. The operating procedure is as follows:
- Pry off the top edge of the film with a blade.
- Spray detergent into the opened gap.
- Peel off the tinting as much as possible, then apply washing liquid again and completely remove the film from the glass (if the tinting does not work, you should methodically warm up the glass with a hairdryer, from a distance of 20-30 centimeters. The film should warm up by 40 degrees or a little more, but should not melt at the same time).
- Remove the remaining glue on the glass with white spirit.
- To remove stains and improve shine, you can rub the glass with a preservative polish.
Materials and tools
To perform car window tinting work with your own hands, you need a number of items, the set of which depends on whether you need to remove it or not. It is worth reminding: to obtain a high-quality result, it is advisable to entrust the pasting to a specialist or to carry it out together with an assistant. Before you start gluing, you need to check the car glass for irregularities and cracks; if there are any, it is better to refuse tuning. To implement your plan you will need:
- film;
- rubber spatula or roller;
- shampoo;
- spray;
- hair dryer;
- stationery knife;
- soft rags.
All materials used in the pasting process must be of high quality, but special attention should be paid to the choice of film. If you are starting to tint a car for the first time, then you should choose the one that is easiest to handle.
How to apply tint yourself
The tint coating should only be applied to clean glass. If work is carried out indoors, there should be no dust in it. Polluted air is one of the reasons for the appearance of bubbles. If you perform the steps without removing the glass, then the interior should also be clean.
To ensure dust is not guaranteed, it is best to carry out procedures on a cloudy day after rain. In the same way, you can protect yourself from the appearance of insects that can interfere with work outside.
If, due to complexity, you want to refuse a job, you always have the opportunity to contact the service. In addition to the fact that the window should be smooth, you should remove everything unnecessary from it, for example, the antenna.
What you will need
Before work, you need to prepare tools and material. Among everything you may need, consumables should not be neglected.
- Tinting film. The quantity should be enough for the side windows, as well as the front and rear glass.
- Rubber spatula and plastic scraper.
- Shampoo.
- Spray.
- Stationery knife with a retractable blade.
- Lint-free cloth, dry.
- Clean and warm water.
- Home or technical hair dryer.
Also, before work, the material must be prepared. Cutting out the film is not a difficult task, and involves cutting out pieces that will be 2-4 centimeters larger than the size of the surface to be tinted.
Car preparation
The next stage is preparing the machine itself. For quality work, be sure to wash the car and workplace. Even grains of sand can cause defects during operation, so attention to detail is worth paying attention to. The film should only be applied to a clean surface and in clean conditions. Therefore, car windows must first be washed on both sides using a special cleaning solution.
Even after washing, when wiping the car with a soft cloth, you must make sure that no lint remains on it - you cannot glue the tint material without bringing the coating to perfect cleanliness. Work should begin with the side windows.
Only after pasting them over can you gain experience and begin working on the rear and front glass. Then the process can go in two directions - removing the glass or not removing it. The most convenient way is to remove the glass; the effect of this is much higher, although it forces you to tinker, doing extra work.
We make the film ourselves
The advantages of tint film have already been described in detail, but the question remains: how and what is it made from? The production of car tinting is based on polyester material. The base for production must be of high quality, and very few companies produce such polyester. The classic film consists of several balls. The thickness of each is 20 microns. The manufacturing technique is quite complex; the layers are rolled at a certain temperature. It is very important that when used, the film does not distort the appearance of things and the interior. To achieve this, much attention is paid to the uniformity of the physical indicators of the base in its different sections. This property allows the film to be glued to any type of glass.
You can also tint your car at home. However, it is not possible to create a high-quality product that will meet modern norms, standards and operational requirements. Tinting film is made using temperature and chemical composition in a factory; recreating the process at home can be an impossible task.
Pasting technique
The methods for gluing the coating to the side, front and rear glass are not much different. Experts advise starting with the sides. Only then, having gained experience, can you begin to apply coating to the rear and windshield.
Before starting the procedures, the side windows are washed with water and a scraper, and then wiped with a rubber pad. The edges are wiped with a napkin, and hands are washed with soap before the second part of the work. The glass is moistened with soapy water, and the protective coating is removed from the pattern. The adhesive part is wetted with the solution, as are the fingers. The film is carefully applied to the glass, the absence of gaps is checked and how smoothly the applied material fits. Excess water is removed. Drying too hard can scratch the coating. Water is removed with progressive movements from the center to the edges.
The upper part of the film coating is fixed a little later. The remaining part is also moistened with soap solution. The film is tucked under the lower seal; kinks should not be allowed. The remaining liquid is removed from under the film with a hairdryer and distillation. There should be no water bubbles after finishing work. They can be removed almost immediately after applying the tint by walking over the glass with a rag or soft cloth.
The advantages of tinting yourself are obvious: saving money, since the work is carried out in your home. The heating of the cabin is reduced by almost half - this is especially noticeable in the summer. 99% of harmful radiation is blocked by tint film. If an accident happens and the glass in the car breaks, pieces of glass will not scatter throughout the cabin. The headlights of an oncoming car or the glare of the sun are not scary - the darkened coating will completely protect from excess light and radiation.
Hiding the contents of the cabin from strangers is the most affordable way to expand your personal space. And tinted glass can help significantly with this. The panel inside the cabin and the plastic will be protected from overheating, which is possible when exposed to direct sunlight. And if we talk about appearance in general, then a car with tinted glass looks more attractive than without it.
Very useful advice: if you want to tint your car, and the information provided may not be enough, it’s worth watching how to do it yourself in the video - a clear example that will help you do everything right.
Work procedure
All work with film can be divided into several stages:
- glass preparation;
- film pattern;
- gluing;
- trimming and drying.
At the first stage, it is necessary to thoroughly clean the car glass using a soap solution poured into a spray bottle and degrease its surface before tinting, and if necessary, repeat several times. If dismantling is chosen, it is worth enlisting the help of a partner.
If the glass remains in place during work, it is advisable (but not necessary) to remove the rubber seals before gluing.
At the second stage, you need to cut out the blank - turn the roll with the film with the adhesive side with the protective layer towards you and apply it to the wet glass with your hands, rolling it in the horizontal direction. The pattern is made with a spade behind the transparent area of the car glass. If the surface of the glass has a strongly convex shape, then tinting it in one piece will be problematic. In this case, it is permissible to make several patterns or one with cuts.
Useful tips
There are a large number of car tint films available on the market today. You can choose any color to your liking and even an option with an ornament or pattern. In this case, you need to be even more careful and careful, since intensive smoothing of the film may deform it and distort the pattern.
One more piece of advice for those who decided to tint the glass in pieces rather than as a whole sheet of material. In this case, it is better to make the cuts horizontally rather than vertically. If you can make a cut along the line of the heating element, it will be minimally visible to the eye.
If you definitely want to tint the windows of your own car with your own hands, but have no experience, then it is advisable to use the help and advice of a more experienced friend, or even better, a professional. Otherwise, to prevent the film from being thrown into the trash, it is worth at least a little practice gluing it on a piece of glass.
Compliance with the above rules and recommendations when tinting yourself will improve the appearance of your car with your own hands. And the film in this case will serve faithfully for a long time and problems will not arise due to low light transmission.