Typical headlight malfunctions
Now let's briefly talk about the malfunctions.
In accordance with the operating diagram, Bosch VAZ 2110 or Kirzhach headlights operate on the same principle. The same goes for other optical elements, be it turn signals on a VAZ 2110, Bosch fog lights, DRLs on a VAZ 2110, or brake lights. So, what malfunctions are typical for optics:
- The rear lights of the VAZ 2110 stopped working. Since these lights turn on when reverse gear is activated, there can be several reasons for their failure. This is the wiring, the inoperability of the lamp itself, as well as the failure of the reverse sensor. If two light bulbs stop working at once, then you do not need to immediately disassemble the rear lights on the VAZ; you need to check the functionality of the sensor.
- The side lights or dimensions in the turn signals of the VAZ 2110 do not work. In this case, you need to check the relay and fuse located in the block. If the problem is not with them, then check the wiring and the lamps themselves.
- The running lights on the VAZ 2110 refuse to work. You should also check the functionality of the fuse and the wiring with the bulbs. But if, in addition to the DRL, all other lights work, it would not be a bad idea to diagnose the steering column switch.
- Feet don't work. Recently, owners of “ten” cars have installed so-called stick lights in their stop signals. The sticks are so called because the glass on them is made in the shape of a hockey stick. And it often happens that the stops do not turn on after replacing the optics. If you have changed the lights, then first of all you should check the quality of all connections and the functionality of the brake light bulbs. If everything is fine with them, look for a problem in the wiring.
- Only the high beam or only the low beam or both do not work. If all optics are working properly, but only the high or low beams are not functioning, check the bulbs first. Further according to the diagram, the wiring, quality of contacts, and fuses are checked. If all components work, it is necessary to diagnose the steering column switches. It is possible that when one or another light is turned on, a contact on the switch circuit comes off.
- If you have xenon installed on a VAZ 2110, then the cause of the malfunction may be a failure of the ignition unit.
Features of the optics unit
How to properly install and adjust lamps in lens headlights, how to adjust the fog lights or DRLs on a VAZ 2107? We will talk about this in this article, but first, let's get acquainted with the features of the optical unit. Headlights on the VAZ 2107 can be made in two variations - the block can be either made of glass or made of special plastic.
The main advantage of glass blocks is the most optimal reflective effect, achieved as a result of the location of the ribbed plane inside the optics. It should also be noted that it is very difficult to scratch such flashlights.
As for the disadvantages, they are as follows:
- a crack will appear on the glass if crushed stone or an ordinary pebble gets on it;
- if there is a strong impact on the headlight, the block will be destroyed;
- It will be impossible to install and fix the front blocks in your car using screws.
Design Features
Adjusting the direction of the headlight beams of a Lada Priora car
Headlights
. Cars use block headlights that combine low and high beam headlights (lamp with one filament) and direction indicators. In addition, the headlights contain lamps. The low and high beam headlights are turned on using auxiliary relays K4 and K5 located in the mounting block. The control voltage to the relay windings is supplied from the headlight switch if the exterior lighting switch button is fully pressed. When the low beam is turned on, the low beam lamps light up, and when the high beam is turned on, all lamps (low and high beam) come on. Regardless of the position of the switch key, you can briefly turn on the high beam headlights by pulling the headlight switch lever towards you. In this case, voltage is supplied to contact “30” of the switch directly from power sources. Block B is provided for switching wires when installing headlight units with double-filament low beam lamps. In this case, the gray wire with a red stripe in block B must be connected to a wire of the same color going to plug “56b” of the switch. Then, when the low beam is turned on, the low beam filaments of the double-filament lamps will light up, and when the high beam is turned on, the high beam filaments of the double-filament lamps and the high beam lamp will light up.
Fog lights
. On VAZ 2110 vehicles in a variant version, fog lights can be installed in the front bumpers. The headlights are switched on by switch 27 (see instrument panel) using an auxiliary relay type 113.3747 installed in a block attached to the rear side of the mounting block. The fog lights can only be turned on if the exterior lighting switch 26 is turned on.
This video shows how to adjust the low beam headlights
car using the example of
the VAZ 2110
. After watching this.
Outdoor Lighting
. The side light is turned on by the external lighting switch 26 (in the key positions “I” and “II”). The power for the side light and brake light lamps is supplied through relay K1 for monitoring the health of the lamps. If any lamp burns out, the relay turns on the corresponding LED indicator in block 5 (see) of the on-board control system indication.
Direction indicators
. The direction indicators for the right or left side are activated by the switch lever. In emergency mode, switch 42 turns on all direction indicators. The flashing of the lamps is ensured by a short-circuit relay-breaker in the mounting block.
We adjust headlights on a VAZ-2107
Experts have developed an action algorithm for setting up automotive lighting devices:
- The machine is installed on a horizontal platform (necessarily level):
- the distance to the screen should be 5 meters;
- position – perpendicular to the screen.
- Special markings are applied to the prepared screen, which must correspond to the above diagram.
- The headlight hydraulic adjustment handle is set to the extreme right position.
- The low beam is switched on.
- The screw, specially designed to regulate the horizontal light beam, rotates until both boundaries of the light beam - upper and lower - are aligned (on the screen this will be line E-E).
- The second screw, intended for vertical adjustment, rotates - the vertical line (E-E) should be aligned with the break point of the upper boundary of the light beam.
Experts advise paying attention to the following nuance: each headlight must be adjusted individually. To do this, the second one is simply covered (for example, with a suitable piece of cardboard or fabric). And the adjustment procedure itself is similar to that described in the algorithm.
Installing electric headlight corrector
Reasons for VAZ 2110 battery discharge
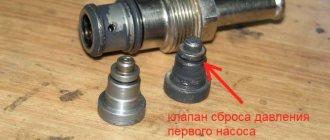
The standard device is not adjustable, it is not dismountable, as a result, if it fails, the headlight can only be replaced. Most often this occurs due to a leaking working fluid or “wedge”. If you need to replace the device, it is better to install an electric corrector instead.
On the “ten” you can put:
- Standard electric corrector for 2110. You can find it by article number EMKF-41.
- The corrector is from a different brand; motorists usually use a unit from GAZ for this.
The kit includes the electric corrector itself, O-rings and wiring. The main advantage of such a device over a standard unit is reliability. By installing an electrical corrector, you will forget about breakdowns of this component. The standard device system is made in such a way that the corrector is constantly under fluid pressure. Sealing rubber wears out especially quickly in cold weather.
Installation of electric corrector from GAZ
Connection diagram for the electric headlight control from GAZ
Installation must be carried out in standard places, no modifications are required here. But they will be needed in the device itself - you need to set the stroke and length of the rod. The installation can be carried out without modifications, but there is a possibility that the electric corrector will only work in the first 4 positions instead of 16.
The length of the rod is shortened according to the following scheme:
- Voltage must be applied to the actuator, and the rod must come out.
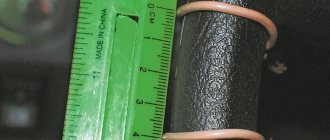
- The photo below shows where to cut the stem.
- Take a 9 mm file and grind down the rod. This step must be performed as carefully as possible, since we are working with a hollow cylinder.
- The remaining part of the rod needs to be seated back. A good quality super glue will work here.
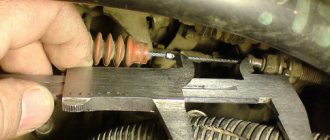
Now you need to reduce the speed. To do this, you need to change the resistor R1 - you will find it in the EC connection diagram. We change it to 4.3 kOhm. If you do not understand electronics, then look at the photo below - it shows the location of the resistor that needs to be replaced. When all modifications are completed, the electric corrector can be connected to the system.
When soldering, you need to use a soldering iron for small elements
Adjustment
We set the low beam to division “0”. This compliance will be further checked during the technical inspection of the vehicle. Unlike a hydraulic device, with an EC the machine must be placed at a distance of 1.2 m from the wall. When switching divisions, the level shifts by 60 mm. As a result, we should get the result as in the setup instructions.
Video on adjusting headlights:
We set the electric headlight adjustment to “tens”
On some VAZ models of the 2110-2110 family, headlight hydraulic correctors are initially installed by the manufacturer. However, these devices cause a lot of criticism from car enthusiasts; they often fail due to their not entirely successful design. Let's see how you can install an electric corrector, make headlight adjustment more reliable and thus get rid of unnecessary headaches. Why do you need headlight range control at all? It changes the angle of the light beam. In total, these devices come in three types: electromechanical, hydraulic and automatic.
We will focus on the electrical corrector. Why on it? This device is the most reliable of all those listed. Car enthusiasts, having installed an electric headlight corrector, as a rule, then do not repair it; it practically does not fail! First of all, we need to remove the standard hydraulic corrector. Then we take the wires from the new device and lay them in the places where the tubes from the hydraulic corrector passed. All that remains is to connect the device and enjoy the result. If you understand how this is done, then read no further. If not, then let's look at the installation process in more detail.
Lighting problems
VAZ 2110 2006
If the illumination of the road with headlights has deteriorated, then you should first determine the cause of this malfunction. You may not need to adjust your headlights. First you need to carefully wash the lens of the device. It may well be that the reason is simple - pollution. To avoid having to constantly wash the lighting fixtures, it is recommended to install a washer. Installation of the device does not cause problems, and the working fluid is supplied to it from the windshield washer.
Next, you should check the integrity of the lens. If small cracks, damage from small stones or other defects are found, this may lead to scattering of the light flux. The lens needs to be replaced. Abnormal operation of headlights can also be caused by defects on the surface of the reflector.
Perhaps, for various reasons (for example, defects), the reflective material began to deteriorate, which does not allow creating the desired concentration of the light beam. This reflector needs to be replaced urgently. Finally, the light element itself no longer satisfied the driver’s wishes.
Installing a halogen light bulb instead of a regular one will significantly enhance the lighting.
About correct headlight adjustment
| GENERAL INFORMATION |
Correct adjustment of headlights has more to do with driving culture than with any technical problems. Therefore, let's talk about why, over time, headlights begin to produce dim light, perhaps sufficient on a deserted highway, but completely ineffective on a busy one, especially if there is a lot of oncoming traffic.
Sometimes the generator and voltage regulator are at fault. There is some truth here: malfunctions of these devices are noticeable by the “movement” of the light flux, as if subject to the number of engine revolutions. It is clear that the poor operation of the generator and voltage regulator affects not only the efficiency of the headlights - first of all, the battery suffers, either not receiving a full charge, or, on the contrary, receiving it in excess, which causes the electrolyte to “boil”. In this case, the headlights only play the role of an indicator, although excess voltage greatly reduces the life of the lamps. Constant dim radiation occurs for other reasons: either the reflector becomes very dirty or corroded, or a dark coating appears on the inner surface of the lamp bulb.
If the longevity of the reflector depends on many factors, then even a completely serviceable lamp “acquires” a dark coating over some 30–50 thousand kilometers. Its efficiency in this case is 20 percent lower than the new one.
The reflector “lives” longer. In modern cars, the reflector and the headlight glass are, so to speak, an indivisible whole, which first of all ensures the most optimal light beam, and secondly, tightness. It was the lack of tightness that allowed dust to penetrate inside the headlight, which then burned on the reflector and reduced its light output. The same thing happened with moisture that actively condensed on the reflector, which caused corrosion.
About five years ago they tried to fight corrosion in some incredible way by pouring red brake fluid into the headlight. The fashion for this rather harmful than useful idea has passed, but another extreme has appeared - plexiglass “glasses” on glasses. In addition to the fact that such protection reduces light output, “smearing” the direction of the rays, it causes severe heating and burning of the reflector. In this case, what is the use of glass protected from stones if the reflector suffers? It is not clear, especially since, as has already been said, glass and the reflector now represent an indivisible whole? By the way, this is why there is no point in buying a “lens” separately: you will never get good light from such a headlight.
Finally, regarding the adjustments. Even the best headlights equipped with halogen lamps can be useless on the road if they are poorly adjusted. Not everyone, and not always, has the opportunity to make adjustments on the stand. Therefore, very good results are obtained by old, well-tested methods of “home” adjustment. The machine is placed on a flat area, 30 meters are measured and placed on a mark, say, a brick. One of the headlights, switched on to low beam, is covered with something, and in the second, the adjusting screws are rotated so that the illumination boundary is vertically brought to the placed brick. They do the same with the other headlight.
The high beam is adjusted in the horizontal direction, but without a brick: here it is important to ensure that the beams from both headlights do not bifurcate and do not converge in the middle
How to replace and adjust headlights on a VAZ-2107
Page 1 of 3
The VAZ-2107 is equipped with two block headlights (the headlight and turn signal are made in a single housing).
The headlight contains a side light lamp and a halogen two-filament low and high beam lamp.
!— Yandex.RTB RA-102613-23 —>
The electrical circuits of the headlamp are protected by fuses, and voltage is supplied to the lamp filaments through a relay.
On some vehicles, the headlight units are equipped with a hydraulic corrector.
It allows you to change the angle of the headlight beam depending on the vehicle load, so as not to dazzle oncoming drivers.
The right and left headlight units are not interchangeable.
The connection diagram for headlights and fog lights of a VAZ-2107 car can be seen in Figure 1.
Headlight adjustment
We check the correct adjustment of the headlights by the location of the light stripes on the screen.
We carry out checking and adjustment on a flat horizontal platform. As a screen, you can use a sheet of plywood (about 1.0 m high and 1.7–2.0 m long), a light building wall, a gate, etc.
We place the fully fueled car, with a jack, tools and a spare tire, perpendicular to the screen (at a distance of 5 m between the headlights and the screen).
We check and, if necessary, adjust the tire pressure to normal.
The assistant sits in the driver's seat.
In order for the body to take the desired position relative to the wheels, we swing the car from top to bottom, holding the wing.
We mark the screen with chalk as shown in the figure. The distance between the marks on the screen corresponding to the centers of the headlights should be 936 mm.
If the car is equipped with a hydraulic headlight leveler, set its adjuster to the first position (one driver). Cover one of the headlights with a piece of cardboard or fabric and turn on the low beam.
By rotating the adjusting screw located on the rear wall of the headlamp on the direction indicator side, we align the horizontal border of the light beam with the bottom line on the screen.
By rotating the second adjusting screw located in the opposite upper corner of the headlight housing, we align the point where the light beam breaks (the intersection of the horizontal and inclined boundaries) with the vertical line of the center of the headlight
We adjust the second headlight in a similar way.
It is better to adjust the headlights at night or in cloudy weather.
avtomechanic.ru
Manually adjusting car headlights
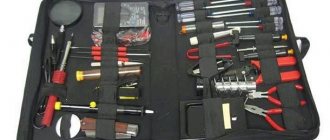
When adjusting and repairing headlights, you will need the following tools:
Marking diagram for manual headlight adjustment
If you still cannot do without adjustments, then you should start with manually adjusting the headlights. To carry it out, you need to do some preparation. First you have to find a flat wall on which to mark. The car must be placed in front of this wall at a distance of 5 m. The area on which the car is placed must be level and horizontal. The machine is installed perpendicular to the wall.
Next, you should eliminate all factors that may interfere with the correct adjustment of the headlights. In order for the car to stand level, you need to check the equal pressure in the tires and, if necessary, inflate them. In this case, the pressure must correspond to the rated value for the VAZ 2110. A load weighing about 75 kg is installed in the driver’s seat in the cabin (an assistant can be seated), and the VAZ headlight range control is moved to position 1.
A diagram of manual headlight adjustment is shown in Fig. 3. Vertical lines should be drawn on the wall: 0 - corresponds to the center of the car, A and B - correspond to the center of the headlights. Points E in the diagram indicate the centers of the lighting elements. At a height of 60 cm from the ground, horizontal line 1 is drawn, which determines the height to the center of the headlight, and horizontal line 2 is placed 75 mm below line 1 and corresponds to the correct location of the center of the light spot from the headlight.
Lighting adjustment in mechanical mode is carried out using a hydraulic headlight adjuster. This device should stabilize the luminous flux when the position of the car changes or it shrinks under load. The VAZ headlight hydraulic corrector is a one-piece system, so repair is impossible. It will have to be replaced with a new device. Replacing the headlight hydraulic corrector is carried out as follows.
Initially, it is necessary to separate the clamps securing the hydraulic tubes on the car body. The control knob, located on the dashboard, is detached by simply pulling it out by hand. The working cylinder and tube are removed through the hole, for which the container with antifreeze is tilted to the side. From the inside of the car, the master cylinder is unscrewed using a socket wrench.
A malfunction in the lighting system is a very dangerous defect that can lead to big troubles. Adjusting headlights is best done at a service station, but if necessary, you can do it yourself. In any case, you cannot drive a VAZ 2110 with the wrong amount of light.
We have collected a huge selection of videos about repair, tuning and maintenance of VAZ cars
Share photos and rate photos of other users
Marking
You need to draw a vertical line on the wall, which should fall on the central axis of symmetry of the car. On both sides of it you need to draw two more vertical lines, which will coincide with the center of the headlights.
Now, to adjust the low beam of the headlights, you need to draw a horizontal line, which should be located at a height equal to the distance from the center of the headlights to the surface of the ground. Below it, 50 mm, there will be a second horizontal line. And below the second border, the third line should be placed 100 mm.
After preparing the stand, you can proceed directly to adjusting the light optics.
Nuances of domestic cars
Owners of modern foreign cars are in many ways happy people. Of course, their cars are “stuffed” with electronics and automation, so a huge part of the settings is performed by the car automatically or using a computer.
Adjustment screws
This also applies to headlights. Their glow is adjusted electronically depending on the road surface, tire pressure level and a number of other parameters. That’s why they can rarely blind oncoming cars, notice obstacles on the road in time, and manage to see warning signs and speed limits.
Domestic cars, including the VAZ 2110, are deprived of these advantages. Light adjustments have to be done manually. If this is not done, problems will be difficult to avoid.
Frankly speaking, it is still better to perform the settings at specialized service stations. But if you don’t have the money for this, or car service services are too expensive for your budget? In this situation, you can resort to the help of your own hands, as well as a pair of hands of a friend. You won't be able to do it without an assistant.
Suggested options
As mentioned above, for car owners of the “dozen” the market offers only two options for headlights - domestically produced Kirzhach and original Bosch VAZ 2110 headlights. Of course, most consumers prefer German-made products, especially considering that their cost is lower than Russian optics ( author - channel Aleks B).
Which headlights are better?
Before removing and installing new optics, let's figure out which manufacturer to give preference to. Despite the fact that German-made products have always been famous for their quality, in reality, domestic experts recommend installing Kirzhach flashlights on the “tens”.
Let's see why this is so:
- It is clear that the purpose of the lights is to provide better visibility of the road surface when driving at night, while they should not blind oncoming drivers. These functions are performed normally by both Kirzhach and Bosch devices.
- Russian-made flashlights have a lens for near lighting and a reflector for distant lighting. As for German-made lanterns, they are equipped with two reflectors. The level of illumination of the road surface is generally identical in both cases, but the Bosch ones shine an order of magnitude brighter.
- In any case, lenses are better than reflectors because they provide a clearer line of light. In addition, their operation allows the use of xenon.
- Judging by the reviews of our compatriots, Bosch flashlights have poorer illumination, in particular in low beam conditions.
- German-made devices have an important feature - the road surface is illuminated much better in cloudy weather and rain, unlike Kirzhach. This is ensured by the fact that their design uses a larger reflector. However, due to this same feature, installing xenon in Bosch will be impossible.
Adjusting headlights Thread starter Antonina
Adjusting the headlights An interesting video about adjusting the headlights has been added to the article, be sure to watch. Adjusting the headlights is an important procedure on which the comfort and safety of car travel directly depends. Manufacturers produce cars with adjusted factory optics, but after a certain time they necessarily require adjustment or adjustment. The question of how to adjust the headlights also arises after any emergency, body repairs associated with the replacement of body parts of the front tail of the car, as well as after replacing springs and suspension struts. Adjusting the headlights is necessary for the correct direction of the light flux on the roadway and edges curbs. Not only comfort during movement depends on correct adjustment, but also, most importantly, safety in difficult weather conditions, at dusk and in the dark. How to adjust headlights? You can do this yourself, or you can entrust this operation to the masters at a car service center. Fortunately, they have all the necessary equipment. During the operation of the car, the headlight settings change slightly and generally require only minor adjustments. Headlight adjustment can be done either independently or at specialized car services equipped with the necessary modern equipment. How to adjust headlights with your own hands The adjustment itself on modern cars can be performed without disassembling the head optics - using adjusting screws (plastic knobs) in the back of the headlights. With their help, you can raise or lower the headlights vertically (up and down), as well as rotate the light beam towards the center or move it to its edge horizontally (right and left). Depending on the design, you may also need a Phillips screwdriver to adjust it yourself (long or short), and on some models - a hexagon or socket or socket wrench
The procedure for self-adjustment The procedure for adjusting headlights is the same for all cars: it does not matter whether you are adjusting the headlights of a VAZ 2107 or Renault Logan. To adjust the headlights with your own hands, you need a flat area on the street or in the garage and some surface (the wall of a house, garage, solid fence, etc.) on which you can mark an improvised calibration screen. The car is installed at a distance of 5 meters from the wall
Screen markings are applied to the wall. First, the center is marked - line 0, which should coincide with the longitudinal axis of the car. Then the distance between the centers of the headlights is measured and transferred to the screen in the form of two vertical lines - L (center of the left headlight) and P (center of the right headlight). Next, you need to measure the height of the centers headlights from the ground or floor, and at this height draw a horizontal line H on the screen. In this case, differences may be observed in the height of the center of the left and right headlights. On cars with an electric or hydraulic corrector, the regulator must be set to position “0”, otherwise the corrector will return the previous adjustments automatically. After this, you need to turn on the low beam headlights. For each headlight, it is better to carry out the adjustment separately, adjusting the position of its light spot, while covering the second headlight with any available material that does not transmit light, or removing the power from it. The light beam of fog lights is adjustable only in height. The headlights can be considered adjusted when the upper edges of the left parts their light spots will coincide with the horizontal line H (the height of the center of the headlights from the road), and the vertical lines L and P (the centers of the headlights) will pass through the intersection points of the inclined and horizontal sections of the light spots.
Olga
Svetlana 11 Jul 2020 20:40 Anatoly Kravchenko 11 Jul 2016 21:49 Lyudmila Bukhmiller 12 Jul 2020 04:46 Dmitry Klokov Cool advice 12 Jul 2020 09:37 Andrey Dyachenko
Adjusting VAZ 2110 headlights with your own hands | autoposobie.ru
January 5, 2014 ... An article about how to adjust the headlights of a VAZ 2110 with your own hands ... many drivers wonder how to adjust the headlights in ...
Self-adjustment of VAZ 2110 headlights at home...
Jan 26, 2014 ... Self-adjustment of VAZ 2110 headlights at home ... To properly adjust the headlights you need to do this ...
Expert advice
Experienced car enthusiasts give some advice to those who want to independently adjust the headlights on a VAZ-2107 in a garage.
- The entire procedure must be performed in the dark.
- All equipment must be in good condition, special attention must be paid to the voltage regulator and generator.
- If the headlight bulb is cloudy, then the reason for this may be a broken seal of the optical assembly connection, and this affects the level of light flux. To restore its tightness, you will have to glue all damaged fragments with sealant.
- After completing the adjustment procedure for both headlights, it is necessary to carry out a check: drive out onto the road at night and check the car lighting devices in operation.
- Self-adjustment of headlights can only be done for yourself, because such adjustment is not suitable for technical inspection. For proper adjustment, the car owner must contact a car service center with qualified specialists.
There is a special offer on our website. You can get a free consultation with our corporate lawyer by simply submitting your question in the form below.
Post Views: 178
Headlight adjustment
To accurately adjust the headlights, you need to fully fill the “ten” with fuel. It is also recommended that during adjustment, a person of approximately your build sits in the driver’s seat. Then the position of the body will be natural. Don't forget to check the tire pressure. If they are deflated (even a little), bring the indicator back to normal. All is ready? Let's move on to the settings.
- The check should be carried out at night. The car must be placed opposite a vertical surface - motorists usually use the garage wall for this. The front bumper should be parallel to the wall, and there should be exactly five meters from the headlights to the obstacle. Now you need to apply the following drawing to the obstacle:
- The driver may not always have the opportunity to draw a diagram, then he will have to rely on his imagination and imagine the drawing in his head. Print it out and place it on your dashboard. We turn on the low beam and cover the left headlight with any material that will not transmit light.
- Turn screw No. 1 in the desired direction and see how the position of the light in the drawing changes. When the position is on the desired line, we begin to work with screw No. 2 - we need to adjust the glow horizontally and raise it to the desired level.
- We need to ensure that the light does not go beyond the “M” line, but still touches the “N”. If necessary, you need to raise the line of light or lower it. Horizontally, the glow should be in contact with lines “D” and “C”.
- If the adjustment of the left headlight is completed, then you can move to the right one and perform the same steps.
- Done, light adjustment done.
Adjusting the fog lights of the VAZ 2110 - instructions on how to adjust it yourself, photo
Self-adjustment of fog lights VAZ 2110
When oncoming drivers constantly blink at you, signaling that you are “blinding” them, then it’s probably all about misaligned headlights, which even in low beam mode create inconvenience for road users.
To return them to their factory settings, you need to visit a service station, where they will adjust their luminous flux using a stand and special equipment. But when it comes to how to adjust the fog lights of a VAZ 2110 or any other AvtoVAZ model, then the question takes on much more meaning.
Headlights should not blind oncoming drivers
Please note! Their purpose is to improve visibility in difficult road conditions. Those
in situations where movement with conventional lighting is not possible.
The principle of operation of the fog lamp
Before grabbing the tools and adjusting the position of the PTF on the car with your own hands, every car owner must understand the features of their operation.
And for this you need to remember that fog:
- These are the smallest particles of moisture that are in the air;
- The emanating heat from the ground (road surface) does not allow them to sink, causing them to literally hang, which leads to the formation of a milky veil;
- The stream of light, reflected from them like a mirror, returns back and blinds the driver.
Narrow work space
All drivers know that turning on regular headlights in fog leads to poor visibility. This happens because droplets of moisture are located exactly at the level of the headlight of a modern car. After all, their location was determined for better illumination of the road situation - as close as possible to the driver’s organs of vision.
But PTF has another task - to make movement in fog possible. That’s why they are installed on cars as low as possible to the road surface, so that they, as they say, “shine under the fog.”
Correctly adjusted PTF shines “under the fog”
The fact is that moist air close to the ground is drier and, accordingly, does not have glare properties.
Caution! In no case should you install fog lights lower than 25 cm from the road surface. This is prohibited by the current GOST 8769-75. But what is not prohibited is the production of stickers on headlights that will protect them from stones. Since the price of PTF does not allow neglect their safety.
Description of the process of adjusting the light of car headlights
In order to answer the question: “How to properly adjust the headlights?”, the car enthusiast must choose a suitable place and prepare a universal tool: Phillips and round screwdrivers, a screwdriver, chalk, and a ruler.
A garage or any area where there is a vertical wall suitable for marking is suitable as a work site. The main condition is the ability to move the distance required for adjustment. As a rule, it is within 5-10 meters. The specific value is indicated in the technical passport for the car.
The process takes place in the dark.
The point of the procedure that answers the question: “How to adjust the headlights?” is to imitate in a static mode the operation of a car’s lenses when driving on the road.
- To begin with, the car drives close to the wall. The low beam mode is turned on. On a vertical plane, chalk marks the centers of the marks of two headlights. The distance between them is divided in half and a third point is placed. After 3 marks, first draw one line. Then, at a distance of 75 mm downwards, a second horizontal line is drawn.
- The marking of the wall continues with three vertical lines passing through the indicated 3 points.
- Then the car drives off to the distance specified in the passport. The optics are turned on again.
- The boundary of the light flux from the car must coincide with the lower horizontal line. The point of ascension of the light flux upward must be where the lines intersect. The bend angle of the light beam is indicated on the sticker under the hood, as well as in the passport.
- The headlights are adjusted in turn with each of the optical devices. A piece of plywood (or cardboard) is used to cover one or the other lantern. Each of the lanterns is raised and rotated by twisting the screws: in the horizontal and vertical planes.
Adjusting headlights using the example of a VAZ 2110.
Adjusting headlights using the example of a VAZ 2107.
For fog lights, the process is similar, but differs in the coordinates of the bottom line: not 75 mm, but 50 mm.
After completing the procedure, it is recommended to go out onto the road in the dark and check the results of your work in practice.
Good luck in mastering a new business!