Elimination of dips, jerks, and jerks in engine operation
Failure in the operation of the carburetor engine of VAZ 2108, 2109, 21099, 2101-2107, 2121 cars is one of the most common malfunctions.
Primary diagnosis of the causes of failure
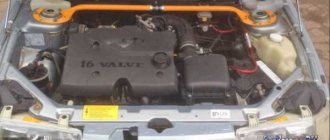
Visually inspect the engine compartment of the car
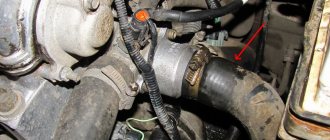
We are interested in the tubes going to the carburetor that have fallen off the fittings, and the tip of the wire to the solenoid valve. Sometimes a slipped connector can permanently ruin the previously flawless operation of a car’s engine. We check how tightly the carburetor solenoid valve is screwed in or the idle system fuel jet holder plug installed instead, and we also check the tightness of the carburetor mounting nuts.
We check for a stable spark on the spark plugs and a strong stream from the fuel hose going to the carburetor
In addition, we unscrew the carburetor fuel filter plug and check its cleanliness
On cars with a contact ignition system, check the gap between the breaker contacts and their condition
Checking the operation of the carburetor accelerator pump
We remove the air filter housing, rotate the throttle valve axis of the first carburetor chamber by hand and observe from above the jets of fuel coming out of the spout (spouts on 2108) of the accelerator pump nozzle. The jets must be strong, at least 1 mm in diameter, without breaks, and fall to the bottom of the mixing chamber (chambers for 2108).
We turn out the spark plugs and identify the defective
A black, flooded, corroded spark plug needs to be replaced.
Cleaning the carburetor from an aerosol can - carburetor cleaner
If it was not possible to quickly eliminate the cause of the engine failure, you will have to take a more serious approach to identifying the malfunction leading to the failure.
Identification and elimination of the causes of failure of the carburetor engine of VAZ 2108, 2109, 21099, 2101-2107, 2121 cars
We identify places where foreign air is likely to be “sucked” into the carburetor
Checking the car's electrical equipment for short circuits
Open the fuse box and look for the fuse that keeps blowing. We find out which circuit it protects and eliminate the short circuit. Let's check the operation of the voltage regulator in the generator.
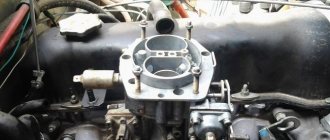
Remove the top part (carburetor cover)
We unscrew the GDS air jets, the GDS fuel nozzles, and take out the emulsion tubes. On Solexes, tubes and air jets are combined into one. We clean and blow them out. We remove the accelerator pump nozzle and also blow and clean it.
Adjusting the fuel level in the carburetor float chamber
Disassembling the accelerator pump housing
We check the integrity of the diaphragm and the cleanliness of the channels.
On Solex we disassemble the housing of the power mode economizer
We check the integrity of the diaphragm and the cleanliness of the channels.
We remove the carburetor body from the intake manifold and check the cleanliness of the holes in the transition systems of both carburetor chambers
We check the operation of the pneumatic drive of the throttle valve of the second chamber of the carburetor on Ozone and the mechanism for opening the throttle valve of the second chamber on the Solex carburetor
We check the serviceability of high-voltage wires, the distributor cover, and the slider
On cars with a contactless ignition system, we check the serviceability of the switch and Hall sensor
Checking the timing valves of a car engine
The check can be carried out by measuring the compression in the engine cylinders. At the same time, you can evaluate the condition of the cylinder-piston group as a whole.
More articles on the site on malfunctions of VAZ cars
Reasons that cause jerking and minor twitching of the car while driving
Carburetor malfunctions often include sudden jerks and slight jerking of the car when driving. In most cases, the carburetor is not to blame. Most often, jerking and jerking while driving with the gas pedal held in one position causes malfunctions in the ignition system.
The carburetor can be the cause of jerking only when several droplets of water or small debris are found at the bottom of the float chamber, which sometimes comes close to the fuel nozzle of the main metering system and, blocking the passage of gasoline, can cause irregular but very sharp jerks, up to complete stop of the engine. If jerking occurs only when the gas pedal is pressed, this indicates a clogged accelerator pump.
To distinguish malfunctions of the ignition system from malfunctions of the fuel system, you need to hold the gas pedal in one position during the test diagnostic trip and select a section of the road with a long uphill climb for such a check.
When the car jerks when moving up, with the gas pedal constantly pressed, the reason for this may be:
- faulty spark plugs or incorrect electrode gaps,
- a burnt-out core inside a high-voltage wire or a burnt-out resistor in the tip of a high-voltage wire,
- violation of the high-voltage insulation of the spark plug wire or spark plug tip, especially with metal shielding,
- burnt resistor in the distributor runner,
- failure of contact between the slider and the central carbon contact in the distributor cap,
- water dew on the inner surface of the distributor cap,
- bearing wear in the ignition distributor - (“Zhiguli”, “Moskvich”),
- incorrect gap between breaker contacts,
- faulty capacitor,
- faulty ignition coil.
In electronic ignition systems, the reasons for sudden jerking of the car while driving can be added to a faulty switch or periodic failure of the contact of electrical wires connected to the Hall sensor.
For reliable operation of any ignition system, the cleanliness of high-voltage elements - the ignition coil, distributor cap and high-voltage wires - is of great importance.
To find out whether the spark plugs are to blame for the car jerking, it is best to replace the entire set of spark plugs with a known good one and then take a test drive for 10 minutes. Checking candles at various stands only makes sense when purchasing a new set in a store. But even a spark plug that works well on the stand, under normal pressure, can fail after a short time of operation on the engine. The best test bench for testing spark plugs is your engine. No stand will be able to create the entire range of loads on a spark plug the same way as any normal motor.
The maximum service life of a standard spark plug is measured in thousands of vehicle kilometers and, according to various manufacturers, ranges from 15 to 30 thousand km. The spark plug can be used for a longer period of time, but this increases the likelihood of failure. There is a huge range of spark plugs on the automotive aftermarket today. But the quality of this product is low. When purchasing, you need to remember that a high price does not necessarily mean good quality.
When servicing the motor, you should check the gap size on the spark plugs, the cleanliness of the ceramic insulator and the reliability of contact with the high-voltage wire. A spark plug that has a built-in resistor usually has the letter R in its name. In this case, it makes sense to measure the resistance in the spark plug, which should not exceed 6-7 Kom.
One broken spark plug increases fuel consumption by up to 25%.
To test replace spark plugs, the workshop should always have three proven kits for the most common engines:
— with a spanner size of 21 mm;
— with a spanner size of 16 mm;
- for Ford cars with a thread diameter of 18 mm. Three different sets of serviceable spark plugs is the key to quickly finding the fault. The presence of candles in the workshop is also necessary, as is the presence of a 13mm wrench.
The spark plug is afraid of impact, therefore, if a working spark plug falls on the floor, it may then fail.
Checking high-voltage wires consists of measuring their electrical resistance with a tester. The resistance of the wires may vary and depends on the type of ignition system. For contact ignition systems, the total wire resistance can be from 0 - 6 Kom. For electronic ignition systems - from 2 to 15-17 Kom.
Repair experience shows that with greater resistance than specified, jerking occurs when the car moves, and in some cases it is even impossible to start the engine.
Each jerk is a missed spark in the cylinder.
In addition to measuring the total resistance of the wires, you should pay attention to the connection points of the wires with the distributor cap, with the ignition coil and on the spark plugs. The joints must be free of moisture, oxidation or dirt. The contact must be reliable.
When, with the engine running, you see or hear the clicking of a spark between the central and side contacts of the ignition coil, you can be sure that the reason for this was the increased resistance of one or more high-voltage wires or an increase in the gap between the electrodes of the spark plug.
Checking the slider consists of a general inspection of it and measuring the resistance of the resistor or current-carrying plate. The resistor resistance on electronic ignition systems is usually 1 Kom. On contact ignition systems - 5 - 6 Kom. A burnt resistor causes the car to jerk when driving. Removal and installation of the slider should be done carefully so as not to damage the guides.
When removing the ignition distributor cap, you must always pay attention to the condition of the central carbon contact. The malfunction is the coal hanging in the lid body. An air gap is formed between the runner and the carbon, which causes intense burnout of the carbon contact. The air gap in this place also contributes to jerking when driving.
On some car models, there may be a resistor in the housing of the central carbon contact, the resistance of which should not exceed 10 Kom. Therefore, when diagnosing, you should always check the resistance of the carbon. Burnout of this resistor also causes the car to jerk. The carbon with the resistor usually has a shiny side surface.
Water dew on the inner surface of the distributor cap causes the car to jerk. A crack or obvious burnout of the cover body is a reason to replace the cover with a new one.
On many cars, the ignition distributor cap has a protective metal shield connected to the engine ground. The screen absorbs radio interference that occurs as a result of sparking of the distributor. Over time, dust, dirt and moisture collect between the shield and the distributor cap, which allows high voltage to flow across the outer surface of the distributor cap. To eliminate this possibility, you need to regularly maintain cleanliness in this place.
For reliable operation of the contact ignition system, the gap size at the breaker contacts is of great importance. On any 4-cylinder engines, the gap should not go beyond 0.35-0.45mm. During operation, natural wear of the breaker surfaces occurs and the gap decreases. This leads to interruptions in pricing, jerks appear while driving and the ignition timing becomes later.
Another reason for the growls
The same jerks may appear after refueling with low-octane gasoline. On carburetor engines, the advance angle is set manually and is practically fixed. For normal operation of the engine on gasoline with a lower octane number, it will be necessary to install a “later” ignition.
The owner of a carburetor VAZ 21099 with LPG may encounter this problem. If for some reason he cannot fill the gas and is forced to drive on gasoline, then he has to change the advance angle setting. This is explained by the large difference in the octane numbers of propane and gasoline (for gas it is more than 100).
Sudden jerks in different modes
Erratic and sudden failures at various speeds are also associated with the ignition system.
A breakdown of the insulation of the ignition coil and high-voltage wires will cause irregular sparking between the electrodes of the spark plugs. Increased resistance of any wire also causes a spark to break out between the wires through the insulation of the distributor cover.
The insulation cannot be restored - the parts will have to be replaced. The “culprit” is easy to calculate - just open the hood in complete darkness with the engine running.
Also, the car may “shudder” after driving into a puddle at speed. In order to quickly deal with the problem, you need to wipe the high-voltage wires dry. Treat the connectors of the low-voltage circuit (at the distributor and switch) with silicone grease or WD-40.
Features of driving a car with manual transmission
For novice drivers, some of the nuances of driving a car with a manual transmission may be surprising news. For example, when changing gears in the gearbox, the car loses a certain speed. And the longer you delay switching, the more speed the car loses.
If you need to change to a higher gear, then you need to shift the lever quickly, without wasting time thinking about this step. But this does not mean that you need to sharply “stick” the lever into the wrong position. Try to prepare in advance for engaging a particular gear, even before changing speed. Because your car will suffer greatly from sudden and incorrect switching.
Remember that when overtaking a car, you should not shift unless you guarantee to do it quickly and correctly. This is especially true in cases where the maneuver must be completed in a minimum period of time or in an extreme situation.
Prolonged outages
The reason that the carburetor VAZ 21099 twitches while driving may also be insufficient fuel supply. In this case, jerks will take on the character of relatively long-term dips.
The most likely sources of problems are a clogged fuel filter and a faulty fuel pump. The peculiarity of such failures is that they first appear after the engine has been running for some time in modes that require a larger fuel supply - for example, after a long climb. As the filter becomes clogged with dirt or the fuel pump diaphragm loses its elasticity, the engine “fails” more and more often.
And finally, in cold weather, ice plugs can form in the fuel line. Sometimes, without completely blocking the cross-section of the fuel pipe from the gas tank, they cause a “deficiency” of gasoline in the float chamber. If you are unable to manually pump fuel into the fuel pump, then warm up the car.
Kia Spectra repair: Jerking during acceleration
The cause of jerking during acceleration may be, as in the previous case (see “Jerking at the moment of starting movement”), insufficient fuel pressure in the fuel line. The electronic engine control unit, having received a signal from the throttle position sensor about the intensive opening of the throttle at a large angle, strives to maximize the fuel supply, but due to the reduced fuel pressure it is not able to do this. For the reasons for this phenomenon and the method of checking, see the subsection “Jerk at the moment of movement starts.”
Section 1. Car structure General information about the car Passport data Car keys Controls Heating (air conditioning) and interior ventilation Doors Seat belts, airbags and child seats Seats Steering wheel adjustment Rear view mirrors Interior lighting Sun visors Hood Trunk lid Gearbox control lever
Section 2. Recommendations for operation Safety rules and recommendations What you need to have in the car Running in the car Operating the car during the warranty period Preparing the car for departure Filling the car with gasoline Using a jack Towing the car
Section 3. Malfunctions along the way The engine will not start Malfunctions of the fuel injection system Idle has disappeared Interruptions in the engine The vehicle moves jerkily The vehicle accelerates poorly The engine stalls while driving The oil pressure has dropped The engine is overheating The battery does not recharge Electrical equipment malfunctions There are unusual knocking Problems with the brakes Checking the brakes Wheel puncture systems
Section 4. Maintenance General provisions Daily maintenance (EO) First maintenance (MOT-1) Second maintenance (MOT-2)
Section 5. Engine Design features Possible engine malfunctions, their causes and solutions Useful tips Checking compression in the cylinders Removing and installing a decorative engine casing Removing and installing engine mudguards Replacing the power unit suspension mounts Replacing the protective bar Installing the piston of the first cylinder to the TDC position of the compression stroke Replacement timing belt Replacing the tension and support rollers of the timing belt Removing, troubleshooting and installing the flywheel Replacing engine seal parts Engine cylinder head Removing and installing the engine Lubrication system Engine cooling system Engine exhaust system Engine power supply system
Section 6. Transmission Clutch Gearbox Front wheel drives
Section 7. Chassis Front suspension Rear suspension
Section 8. Steering Design features Possible malfunctions of power steering, their causes and solutions Steering column Steering rods
Section 9. Brake system Design features Possible malfunctions of the brake system, their causes and solutions Bleeding the brake system hydraulic drive Master brake cylinder Vacuum brake booster Replacing brake hydraulic hoses and tubes Front wheel brakes Rear wheel brakes Parking brake
Section 10. Electrical equipment Design features Diagnosis of malfunctions of on-board electrical equipment Mounting blocks Battery Generator Starter Ignition switch (lock) Ignition system Engine control system Lighting, light and sound alarm Windshield wiper Removal and installation of a windshield washer Removal and installation of the electric motor of the radiator fan of the engine cooling system Heater fan Electric heating of the rear window Removal and installation of the cigarette lighter socket Instrument cluster Replacement of control lamps and instrument cluster illumination lamps Replacement of the control unit for exterior rear-view mirrors and the headlight electric corrector regulator Replacement of instrument panel switches Replacement of instrument panel switch illumination lamps Removal and installation of the clock Removal and installation of the unit ETWIS Car audio system Replacement of sensors and switches Anti-theft engine immobilizer system
Section 11. Body Design features Replacement of bumpers Removing and installing the mudguard and front wheel fender liner Removing and installing the rear wheel mudguard Removing and installing the front fender Removing and installing the hood Doors Trunk lid Removing and installing trunk linings Fuel tank hatch cover Seats Additional passive safety system Rear mirrors view Instrument panel Removing and installing the instrument panel Heater and air conditioning Interior fittings Replacing the windshield Body care
Section 12. Car care Anti-corrosion protection of the body Preparation and anti-corrosion treatment of hidden body cavities Sealing the body Engine washing Car washing
Section 13. Purchasing spare parts Engine oil Greases Coolants Brake fluid Fuel fine filter Engine lubrication system oil filter Spark plugs
Section 14. A trip to the service station
Section 15. Winter car operation How to prepare a car for winter Recommendations for starting the engine in severe frost What is useful to buy for winter Useful winter tips
Section 16. Preparation for technical inspection Recommendations List of malfunctions and conditions under which the operation of vehicles is prohibited Changes to state standards regulating the maximum permissible content of harmful substances in the exhaust gases of vehicles
Applications Appendix 1. Tightening torques of threaded connections, Nm Appendix 2. Fuels and lubricants and operating fluids Appendix 3. Lamps used on vehicles Appendix 4. Basic data for adjustment and control
Electrical circuits Diagram 1. Headlight connections Diagram 2. Headlight and front fog lamp connections Diagram 3. Cooling system radiator fan control system and air conditioning condenser connections Diagram 4. ETWIS and interior lamp connections Diagram 5. Rear lamp connections Diagram 6. Connections of the DRL system Diagram 7. Connections of the electric corrector of headlights and rear fog lights Diagram 8. Connections of direction indicators and hazard warning lights Diagram 9. Connections of the sound signal, brake light and reverse light Diagram 10. Connections of diagnostic blocks (vehicles equipped with manual transmission) Diagram 11. Connections of diagnostic pads with an automatic transmission Diagram 12. Starting system and generator set Diagram 13. Windshield wiper and washer for windshield glass and tailgate glass (cars with a hatchback body) Diagram 14a. Heating and air conditioning system Scheme 14b. Heating and air conditioning system Diagram 15. ECAT system connections Diagram 16. ECAT system and automatic transmission control system connections Diagram 17. Anti-lock brake system (ABS) connections Diagram 18a. Engine control system connections Scheme 18b. Engine control system connections Diagram 18v. Engine control system connections Diagram 18d. Engine control system connections Scheme 18d. Engine control system connections Diagram 18e. Engine management system connections Kia Spectra repair: Diagram 19. Passive safety system (SRS) connections Diagram 20. Front seat heating system connections Diagram 21. Sunroof power connections Diagram 22. Central door locking system connections Diagram 23. Power window connections Diagram 24. Audio system and clock connections Diagram 25a. Interior lighting connections Scheme 25b. Interior lighting connections Diagram 26. Circuit connections of the ETWIS unit, cigarette lighter, heated rear window and side mirrors
How to find the causes of failure
If you encounter a problem such as the VAZ 2109 jerking while driving, then the reason may be hidden in a malfunction such as:
- Power system problem.
- Ignition system problem.
Also, one of the main reasons that the VAZ 2109 jerks when driving is the carburetor, which urgently needs to be checked.
To determine if a car is broken, you must first prepare two wrenches (one eight, the other ten), two screwdrivers (one Phillips, the other straight), as well as a clean rag and thin copper wire. You will also need a compressor and liquid.
Your actions
- Remove the cover from the air filter.
- Remove the filter.
- Remove the drive vacuum corrector hose.
- Replacing the corrector (possible).
- Check the carburetor.
- Remove the hose that leads to the fuel.
- Pull the distributor out of the socket.
- Clean the nozzle hole.
- Put the sprayer back.
- Assemble the carburetor.
- Check the retraction of the drive lever.
- Check the trickles.
Next, most likely you will have to go to a service center or read how to properly adjust the carburetor here.
Why can the VAZ 2109 carburetor twitch?
The VAZ 2109 jerks while driving for the reason that a breakdown in this VAZ may be due to the carburetor.
Reasons why the carburetor twitches:
- Fuel filter failure. This is considered the most common breakdown in the VAZ 2109. Therefore, if jerking occurs in the car, the first thing you need to do is check this particular fault.
- Another important cause could be a breakdown of the accelerator pump.
- Broken ignition distributor. The vacuum corrector in it may break. Also, in addition to this, there may be other reasons for the breakdown. To accurately determine what happened, you need to take the car to a service center for a full diagnosis.
What to do if the VAZ 2109 carburetor jerks during acceleration
It often happens that the VAZ 2109 carburetor twitches when accelerating the car. In this case, determining the cause of the breakdown will not be very easy. This is because there can be a lot of such reasons and which of them led to the breakdown of your car is not easy to find out.
What could be the reasons for the breakdown:
- The gasoline pump is not working well.
- Problems with the fuel filter.
- The optional filter may become clogged.
- Ignition problems may occur.
- There may also be a low level of fuel fluid in the tank.
Of course, this is not the entire list of reasons why a VAZ 2109 car may break down. In this regard, it will be quite difficult and almost impossible to independently identify the cause of the breakdown. In this regard, it is better to use the services of a service staffed by professionals. They will help to detect and quickly eliminate the cause of the breakdown and the breakdown itself.
Also, one of the reasons for the breakdown of the thing that jerks when the VAZ 2109 is moving may be that the carburetor is defective. Even a person without special skills can eliminate this reason. It's quite easy to fix.
Mistakes made by beginners when shifting gears
With the help of this pedal, the mechanical process of mechanically disconnecting the engine drive from the wheel drive takes place. Therefore, on a manual transmission, when switching from low to high speed or vice versa, you need to depress the clutch pedal. If you do not learn how to operate this mechanism correctly, you are not only guaranteed to have your car repaired as quickly as possible, but you also increase the likelihood of getting into a traffic accident.
The main mistakes that most often occur when changing gears among beginners can be called the following:
- Over-throttle or dive of the car (short-term engine braking) at the moment of releasing the gas pedal and pressing the clutch. This happens because the student releases the gas faster than he squeezes the clutch in case of a dive. Or, on the contrary, he quickly presses the clutch, but does not release the gas pedal, resulting in over-throttle.
- Shift the emphasis to the hand with which the student holds the steering wheel (pulls the steering wheel to the left) at the moment of engaging the gear. This habit can easily lead you astray.
- Incorrect operation of the gearbox lever. The gear is engaged not according to the scheme, but diagonally. This leads to the fact that a completely different speed is switched on instead of the desired gear. For example, instead of first gear, third gear is engaged, and instead of second gear, fourth gear is engaged. You should know the location of each gear before you get behind the wheel for the first time. It’s better to practice changing gears with the car not running and exactly according to the diagram. In this way, various problems, such as those associated with incorrect shifting while driving, can be avoided.
- Also, novice drivers often distract their attention to the gear lever when shifting, instead of watching the road. This is strictly prohibited and may cause an accident, try not to look at it.
- As practice shows, choosing the moment for subsequent switching or not knowing which gear to engage at a particular speed also becomes difficult. We'll talk about this in more detail below.
You can also learn about the mistakes of novice drivers from the following video:
The reasons that the VAZ 2109 carburetor is troit
As a carburetor tripping, it means that there is no spark or the combustion mixture ratio in the chamber is incorrect.
In this regard, misfires may occur and the car will jerk. Many car enthusiasts have encountered the carburetor more than once, and therefore know very well the reasons for engine tripping. True, not many people can fix this breakdown. It is important to know that such friction can occur due to a violation of one of the components such as fuel, spark or air. This is where car owners need to look for a problem. Components where the problem of engine tripping may occur:
- Fuel.
- Carburetor.
- Fuel pump.
- Filter.
- Spark.
- Air filter.
Air shortage
The air filter is designed to clean the air from road debris, dust and other components that can damage the engine. This element is capable of accumulating dirt to the point of complete obstruction. A clogged filter is the most underrated reason why your car will drive rough due to inefficient fuel combustion.
Another popular reason for a car's abrupt acceleration is the mass air flow sensor. The component performs the task of measuring the amount of intake air and transmitting data to the on-board computer. A defective or dirty sensor causes a loss of engine power and increased fuel consumption.
Oxygen sensors
Most modern car engines are equipped with oxygen sensors (lambda probes). Their number can reach several pieces, depending on the car model. The presence of such a control loop contributes to the smooth and economical operation of the engine. Typically, you can find two types of such sensors:
- Upflow lambda probes. Located inside the exhaust manifold and designed to measure the oxygen level in the vehicle's exhaust gases during the exhaust stroke. Their task is to control incomplete combustion.
- Downflow sensors. Located behind the catalytic converter. They transmit to the computer the information necessary to fine-tune the ratio of fuel and air in the mixture.
Troubleshooting Methods
It is important to know that engine tripping can occur both when the car is moving and at idle speed. During this, popping sounds will occur. But the car jerking will only occur while it is moving.
The carburetor in a car is a rather finicky thing. Therefore, many are already aware that tripling can occur precisely because of the carburetor. In order to fix a car problem in the form of engine tripping, it is necessary to clean and overhaul the carburetor. You can clean the carburetor yourself by hand or using a special oven. But almost all car owners, as a rule, do this manually. The next step is to adjust the carburetor. In order to adjust the carburetor, you need to take the screws and adjust until the fuel and air-fuel mixture reach the optimal ratio. To sum up, we can say that it is possible to fix such a problem as the VAZ 2109 carburetor jerking when driving, but first find out the cause of this breakdown.
What causes the car to jerk when running at low speeds?
Since the car begins to twitch when reaching even low speeds, it will not be possible to immediately identify one specific problem. Problems may be hidden:
- In the engine fuel mixture supply system;
- In the vehicle ignition system;
- At the checkpoint;
- In the distributor design;
- Includes fuel filters;
- In the sparking system;
- In the control unit of the vehicle's on-board computer.
Let's go through the faults in each of the listed systems in detail.
Tip: When detecting a “jerking” behavior in the vehicle, the brakes may also squeak when braking. These 2 problems can be either interrelated or indicate completely different breakdowns.
Checking the engine fuel mixture supply system
Often the reason that the car jerks at low speeds is due to a malfunction of the power system. When the car starts to move, the cylinders simply cannot receive the required amount of fuel mixture, as a result of which the car is unable to transfer the required amount of power to the chassis for smooth driving and smooth commissioning of the transmission. As a result of increased pressure and transmission resistance, uneven running of the machine appears.
To solve this problem, it is recommended that you first pay attention to checking the throttle body. It also wouldn’t hurt to test and diagnose the performance of the sensors installed in the system for determining idle speed indicators. Do not forget to check the serviceability of the throttle valve position and the mass air flow sensor.
Throttle body
During diagnostics, most often a breakdown is found in the injectors responsible for uniform injection of the fuel mixture. In rare cases, engine jerking problems may be related to the air ducts that connect the injector receiver to the air filter structure. Here the problem lies in depressurization of connections and loss of pressure.
The solution to the problem is to replace all faulty components yourself or with the help of car service specialists. After repair, it is recommended to ensure that all connections are in good working order and that there is no loss of pressure in the fuel line system that is connected to the fuel pump itself.
If a power unit with a carburetor system was installed in the engine compartment of your vehicle, then you need to check the idle valve and the absence of damage directly to the carburetor.
Checking the car's ignition system
Sometimes the car starts to jerk while driving at low speeds as a result of a breakdown in the ignition system. Basically, the problem will be caused due to untimely ignition of the fuel mixture and air flow. In rare cases, the malfunction may be hidden in the receipt of low voltage from the spark plugs. The spark voltage simply will not be enough to ignite the fuel mixture in a timely manner. Also, when diagnosing the ignition system, check:
- Performance of ignition coils;
- Serviceability of the spark plug set;
- No tears in high-voltage wires;
- There are no problems in the ignition distributor-interruptor (in simple terms - in the distributor);
- Correctness of values coming from a set of sensors responsible for the position of the camshaft and crankshaft;
- The performance of the switch located inside the entire structure.
Often, the car may jerk due to the long use of a set of spark plugs. There is often a situation where problems are caused by spark plug gaps not meeting established standards.
Advice: if the ignition module on a VAZ-2112 is faulty, the crankshaft position sensor will be damaged and it will not be possible to start the car’s engine at all. This problem can only be solved after a thorough check and subsequent repair of the knock sensor.
Checking the car gearbox
Jerking of a vehicle engine often occurs due to improper operation of the engine and infrequent maintenance of automatic transmissions. If the total mileage of your car is 100-200 thousand km, then even with a seemingly serviceable gearbox, the car will move with some jerks.
As a result of frequent jerking of the engine, the oil in the box foams, causing the amount of solution to be either too small or too large. Repairing a gearbox takes a little time. In a car service center, in just a couple of hours they will remove the box and restore its operation.
Problems with the accelerator
At the moment when the driver sharply presses the gas pedal, a rapid increase in engine speed occurs, which, in turn, can lead to ineffective operation of the vacuum ignition angle regulators. As a result, at low speeds the distributor will sink, and the car will begin to move jerkily.
Since, with the gradual combustion of gasoline, the driver begins to increase engine speed, the engine must ignite and let in the fuel and air mixture even faster. If there is a problem with the vacuum regulators, the car will not be able to quickly increase speed, which will cause problems with opening the throttle valve. Without the simultaneous opening of the damper and air supply, gasoline will not be able to burn in time, which can ultimately lead to damage to the bearing, which is responsible for the ignition timing.
To solve the problem, the vacuum regulators are first diagnosed. Here you can independently remove all the hose and pipes, having previously tightly covered them with your hands. When the engine is running, you will hear the retracting effect of the regulators working. If a vacuum does not form when the air mixture is supplied, it means that the seal is broken precisely because of the damper. You should replace it and assemble all components in the reverse order.
Why does the carburetor of the VAZ 2109 twitch while driving?
The most common cause is problems with the fuel filter. Therefore, when jerking occurs, drivers are advised to check this particular component of their car first. If everything is in order with the fuel filter, then the reason should be sought in other parts.- There may be a problem with the accelerator pump.
- The third reason why the VAZ 2109 carburetor twitches when driving lies in the ignition distributor. There may be problems with the vacuum corrector. In addition to these reasons, there may be others; to determine what exactly happened to your car, competent diagnostics is necessary.
↑
Supply system
As a rule, the main reason that the VAZ-2114 car jerks when driving is due to a malfunction of the power system.
Usually, experienced car enthusiasts and auto mechanics try to look for the cause here first, and they will be right. While the vehicle is starting to move, insufficient fuel may be supplied to the cylinders. This leads to the development of low power, which is not enough for full operation of the transmission.
In other words, if there is an uneven supply of the fuel-air mixture in the power unit, then it will simply not ignite well. In turn, because of this, the timing of the explosion is disrupted, and the heart of the car begins to malfunction. The driver feels this, which causes a lot of discomfort while driving. What can be done:
- Check the functionality of the hall sensor.
- Pay attention to the position of the throttle valve.
- The condition of the injectors also deserves attention.
In addition, to understand the reason why the VAZ-2114 injector twitches when driving, it is necessary to evaluate the condition of each element of the fuel system. Moreover, regardless of the type of power unit. As experts note, due to depressurization of the pipes, the engine experiences fuel starvation. This is manifested by failures in engine operation. Therefore, it is better not to neglect a thorough check of the pipes!
How to find out what is the reason for the jerks?
To do this, it is necessary to carry out a diagnostic procedure, as mentioned above.
To find the reasons for this behavior of the car, you need to arm yourself with the following tools and materials:
To do this, it is necessary to carry out a diagnostic procedure, as mentioned above.
To find the reasons for this behavior of the car, you need to arm yourself with the following tools and materials:
- Phillips screwdriver.
- Copper wire with a diameter of no more than 0.3 mm (ideally it should be thinner than this).
Other reasons
Among other possible reasons that can cause the car to jerk when driving, it is necessary to highlight possible problems with the clutch on “mechanics” and malfunctions of automatic transmissions.
As for manual transmissions, jerking may occur after changing to a certain gear at the moment the driver begins to release the clutch pedal. In this case, you should start by checking the condition of the basket, clutch disc, release bearing, etc.
Finally, we would like to add that noticeable jerks when braking are mistakenly taken by some drivers for malfunctions of the internal combustion engine. In fact, a common reason for this behavior of a car can be worn out brake discs.
When you sharply press the gas pedal, the engine jerks, jerks and dips appear, the car does not pick up speed: the main causes of the malfunction and diagnostics.
The reasons why, after pressing the gas pedal, dips occur and the engine begins to choke. Gas engine failures when switching from gasoline to gas.
The engine stalls at idle: what to check. Possible causes of malfunction on engines with a carburetor, injector, and diesel power plants.
If the VAZ 2109 carburetor twitches during acceleration
It also happens that the carburetor of a VAZ 2109 twitches during acceleration. In this case, the list of reasons is quite large and it is not so easy to determine what kind of malfunction led to this behavior of your car.
- incorrect operation of the gasoline pump;
- problems in the fuel filter;
- clogging of the additional filter;
- there are ignition problems;
- very low fuel level in the tank.
And this is not a complete list. It will be quite difficult to find the reason on your own. If the carburetor twitches when accelerating a VAZ 2109, then it is better not to try to repair the car yourself. In this case, contact the service center and professionals who will be able to find and eliminate the cause of the problem. And it’s better not to delay contacting the salon for too long.
It also happens that the carburetor of a VAZ 2109 twitches during acceleration.
In this case, the list of reasons is quite large and it is not so easy to determine what kind of malfunction led to this behavior of your car.
The car jerks while driving: we find and eliminate the cause
From the reviews of car owners, we can conclude that this problem occurs with absolutely any vehicle - an old VAZ “Seven” or a new “Japanese”.
Important! Inspect all system pipes: sealing gaps will lead to air being sucked in instead of fuel. If the injector jerks at low speeds, check the operation of all sensors in the power system and the electronic control unit. There are cases of problems with the air ducts connecting the injector receiver to the air filter device. Perhaps the problem is the tightness of the connections.
If the problem is not the spark plugs, the cause may be faulty coils or breakdowns in high-voltage wires. Of course, no repair will help here, only replacement. The modular unit responsible for the ignition may also be faulty. Only diagnostics will help to find out the cause of its malfunction, and even then not in all cases.
We inspect all connections and terminals. Simple oxidation or weakening of the contact causes interruptions in operation.
In electronic ignition systems, the reasons for sudden jerking of the car while driving can be added to a faulty switch or periodic failure of the contact of electrical wires connected to the Hall sensor. Removing the clutch basket cover. After this, all parts are removed from the flywheel. A new driven disk is installed and the mechanism is assembled.

