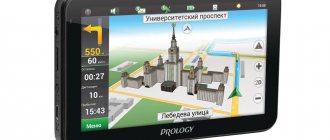
Music technology for cars is constantly being improved, becoming more and more functional every day. Today it is not necessary to purchase many disks and constantly monitor their condition. Now it’s enough to carry a compact flash drive with music with you. However, some car owners are faced with the problem of using a flash drive, and therefore they are interested in how to make a USB input in a car radio? We will talk about some of the subtleties in our article.
Is just one of many features that new cars and aftermarket head units often come with today that weren't available just a few years ago. While there's more going on under the hood than many realize. It is truly a plug-in and requires no installation.
Depending on the kit you find, it may have a proprietary connection to connect to a specific type of vehicle head unit, or it may simply include an auxiliary output. If the board is designed to run on a different power supply, installation is a little more complicated.
Preparing for work
Before you take action, you should consider how much it might cost you. If you are an amateur in this matter, you don’t even need to start, so as not to completely ruin the radio. The easiest way is to use an FM modulator. This device allows you to quickly upgrade your radio.
If you're looking for that kind of functionality, then upgrading your head unit may be more satisfying in the long run. So you have a bunch of old audio tapes that you want to copy or transfer to your computer? Free recording and editing software.
Step 1: Connect the cassette deck to your computer
Sound card with line input. The first thing you need to do to record audio from a cassette tape is to connect the cassette deck or tap the player to your computer. Now it's time to connect the other end of the cable to your computer. However, if you are going to buy this, you may want to buy a cable with a mini-jack already on the other end! Using an adapter may result in loss of sound quality.
Nowadays it is possible to purchase any convenient model, since most of them are equipped with a connector for a flash drive. In addition to the USB connector, there are SD and microSD slots. So, through another device you can listen to music from your flash drive. Of course, this option is considered the most primitive and not very aesthetic, so we will consider another method. It involves the use of a soldering iron.
Here you can select the input source from which you want to record audio. You should see a "Recording" section header and a "Device" drop-down menu underneath it. You can try all the options in the dropdown until you get the audio to record, one of them will work.
Other ways to transfer audio cassettes
Remember that you can always pause recording at any time if there are parts of the cassette tape that you do not want to transfer to the computer. Otherwise, you must now use the digital version of your audio tapes! If you don't mind throwing down cash, there are a few handy gadgets you can purchase to make the transfer process easier.
How to properly make a USB input in your car radio?
First, they disassemble the modulator and look for a microcircuit under the housing. The main thing is to consider the firmware that determines the functioning of the device. The model must be written on the microcircuit. To convert the radio to a flash drive, you will need to have an audio signal output connector. Find an audio out connector in the diagram and solder the wires to it. You can check the operation by connecting the speakers, and if there is a signal, everything is done correctly.
Hopefully this is enough to get your tapes into digital format without too much trouble. Just look at any computer to see an example.
Manuals, dealers, or online guides can provide advice on what type of formatting, files, and file structures are supported for your vehicle.
Typically, your car will download information about music content into its system. This may take some time the first time you connect the drive. IV Select the tracks you want to play. Depending on the information with your music files, you will be able to sort and play your music by artist, album, genre, etc. you can also see the album covers.
To install USB in a regular radio, you need to be able to think spatially.
For the soldering process, shielded type wires must be used. They eliminate unnecessary interference. In the existing modulator, which is charged from a car cigarette lighter, a stabilizer chip is hidden in the power connector. This “tail” will have to be disassembled and the board removed.
The specific buttons to press will depend on your car make and model. Most automakers sell their own official cables for their models. You can get them from your dealer or sometimes online. IV Select the playlist, album or artist you want to play music from and you are all set!
Preparing for work
Manuals, dealers, or online guides can provide advice on what drive types, formatting, files, and file structures are supported in your specific vehicle. Specific stereo systems may support other file formats and sticks with more memory. This means you'll be able to play music, audiobooks, or podcasts through your car's speakers.
The player's wire is unsoldered, and a bar is attached in its place, and shielded wires are thrown from it to where the microcircuit with 12V spots is in the radio.
Then you should seal the window under the cassette receiver so as not to break the structure by inserting a cassette there. This completes the key work. All that remains is to install the device in a standard slot and listen to your favorite music from a USB flash drive. A video to document the result is attached.
Products that may be of interest
This may include song titles, artists, albums, or album covers. You can also easily skip forward or backward through your tracks and adjust the volume. As a result, the sound quality is usually excellent. You can usually find out if your specific device is supported by reading your manual, visiting the vehicle manufacturers website, or contacting your dealer. Available in various colors.
What type of connection sounds best?
A Virginia native from the heart of the Blue Ridge Mountains, he enjoys spending time with his wonderful wife and sons, listening to music, writing, and playing games with friends. Robert's love for car audio began at age 16 when he installed his first stereo system.
Nowadays, no one can be surprised by a radio in a car; it’s difficult to see a car without it. The latter's screen displays not only sound data. In some versions, it displays speed, data about external light lights and much more. But in our digital age, not every one of them is able to support listening to music from USB. It's good that many car radios can connect this type of input.
And that's all it takes. Today we have a wide variety of music sources to choose from, as well as a variety of ways to stream music from your favorite source to your stereo system. The question is how do you determine the best way to connect? Some methods are easier than others, and some methods produce better sound than others. Here we'll look at the different ways to connect your music player to your car stereo and see which ones will provide the best sound.
A higher decibel number is better. It is measured as a range in Hertz, and the wider the range, the better. Regardless, this difference is not as significant as the signal-to-noise ratio discrepancy between the two. We'll use these numbers to evaluate some of our connection options below.
Found on the Internet: Installing Xcarlink 1. To install Xcarlink, you need to remove the standard radio and connect the plug to the changer connector of the radio. There are photos of removing various models of radios, write [email protected] 2. When connecting a Mazda6 (before 2005 onwards) in the radio, it is possible you will need to install jumper L716
Don't rush to disassemble the radio, connect Xcarlink first. If, when switching to the changer mode (pressing the “CD” button twice), the LED on the unit lights up, then this jumper is already installed in the radio. 3. When connecting a Mazda RX-8, the radio must have firmware version from 9.55 to 9.99 or higher than 10.01. To determine the firmware version, you must go to the “FM” mode, then press the “TEXT” and “1” buttons for a few seconds. The number will appear on the display firmware. Recording to a USB flash drive (memory card) 1.Format the USB flash drive to FAT32 (works with FAT too, but a little slower). To format, insert the flash drive into the USB port of the computer, and after detecting a new device, open “My Computer”. Click on the new removable disk and select “Format” with the right mouse button. In the file system, select “FAT32”. 2. On the computer disk, create folders with the names CD01, CD02…CD06 (for Mazda3), CD01, CD02…CD10 (for Mazda6), CD01, CD02…CD11 (for Honda Accord), etc. Folders must be named exactly as indicated (сd1, Cd1,01, etc. are not suitable!) Each folder can contain up to 99 songs in MP3 (and also WMA for the new Xcarlink version). The names of the songs do not matter; they can be in English or Russian. For fans of audio books, after this you need to organize each folder “By Name” (so that the audio files are read in order) 3. After recording the songs in folders, copy the folders to a flash drive. 4. It is best to connect the flash drive when the car is turned off. Xcarlink control 1. Switch to changer mode: double-click the “CD” (“Disc”) button on the radio or the “Mode” button on the steering wheel (FM1, FM2, AM, CD, EXT) 2. Switch folders: using the “Disc +” buttons and “Disc-” 3. Switching tracks: on the steering wheel or on the radio “Track” 4. Random playback by folder: “RPT” button on the radio Typical malfunctions 1. Does not read the flash drive Symptoms: After turning on, the display shows EXT8-88 or EXT 9-98 Malfunction: A) On the flash drive, in addition to the CD01, CD02... folders, there are other files. B) The presence of the “thumbs.db” file on the flash drive (thanks to Alex Birch, this happens when directly copying files to a flash drive, if the folder from the computer disk does not seem to appear) C) The folders contain songs recorded in OGG, AAC format... (such happens when using multi-format players on a computer, for example Winamp) It is necessary to review the file extension - on the folder select “Tools” - select “Folder Options” - “View” insert - uncheck the “Hide extensions for registered file types” Troubleshooting: A) format the flash drive, write only the CD01 folders... B) write the folders first on the disk, then copy to the flash drive C) delete files with a non-MP3 extension. 2.Does not switch to changer mode Symptoms: Does not switch to EXE mode Troubleshooting: It is necessary to register Xcarlink as an external CD changer. The negative terminal of the battery is removed for at least 6-8 minutes, otherwise the on-board computer will not reset. After this, during diagnostics, Xcarlink will be visible as an external CD changer. After this, you will need to configure the clock and radio. It is possible that the settings for the window regulators will go wrong (to adjust, you need to lower the glass on each door and hold the “up/down” button for several seconds until a characteristic click is heard). Connection Features 1. When you connect the mini-jack plug to the Line In input, the flash drive is automatically turned off. That is, the signal will be played only from this input. 2.When connecting an external hard drive via USB, you need to power it from the cigarette lighter (Xcarlink max current consumption via USB is up to 500 mA) 3.Reluctant to work with “left” flash drives like “Kinqston” (not to be confused with “Kingston”), and even the computer records them every other time. I think I described everything.
Why connect USB
Music in cars appeared back in the 70s of the last century. At first these were simple radio receivers with a small range of received waves, and they were installed only on executive Volgas. For the owner of a medium-sized Zhiguli, such luxury was unavailable for a long time. With the development of industry, a cassette recorder was added to the radio receiver, which was later replaced by disc support. Subsequently, even a CD changer appeared. The newest cars have radios with the ability to listen to music via USB.
The music signal remains in digital form until it is converted to analog by your stereo system, so no unnecessary manipulation is required. Pretty similar to your typical cassette player. It usually requires removing the stereo to connect to the antenna socket on the back, but it is much less susceptible to external interference than wireless transmitters.
Put this cassette player to good use with a cassette adapter for your laptop computer. If we connect to our music through a cassette adapter, we can expect it to sound like, well, a cassette. Plus, cassette adapter kits are inexpensive, making it the cheapest way to get around. The downside is the wiring that runs from your portable device to your cassette deck.
The USB connector is in the lower right corner
But what should the owner of a car produced 5-10, or even more years ago? Buy a new radio? No - modernize the old one.
But before we talk about such modernization, let's figure it out.
qoogi
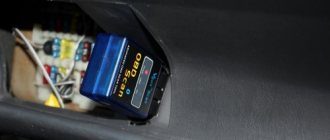
It was in the process of restoring a 2104 station wagon. The no longer young radio FORD SOUND 2004 (89FB-18K876-BB) found its place in it. By the way, the password on the radio is three-digit, and is written on its body. The audio device remembers not only cassettes but AM radio. It's not too complicated and easy to change. Has a good amplifier. Therefore, it was decided to remake it for modern storage media formats, namely USB, microsd and AUX for connecting to a smartphone or mp3 player. In general, I think that this kind of radio is not popular. They won't cost much if you buy them for such a modification. A very good and budget sound option for a car, home or garage.
The first thing we did was order an MP3 module with built-in all the capabilities we needed so much (ordered here: link ). All the rest we needed were various tools, glue, Dremel, Soldering Iron, and so on.
Since the Swallow was under repair, there was no opportunity to look at the pinout. I found several diagrams on the Internet, but to be 100% sure, I’ll check all the contacts myself.
I'm dismantling the radio. You need to remove two metal covers on the top and bottom of the radio; they are not screwed on, but simply latched. You need to remove it by bending the back of the covers. Since there are antennae in the front, you won’t be able to start from the pipe.
To determine where + and - are on this radio, just ring the largest capacitor near the connector. It should ring from one of the legs in the socket. This is a power + contact. The downside is that it’s as easy as shelling pears, it’s always on the case, and we ring the case with the legs in the socket and find a contact. The most difficult contact to find is the one responsible for turning on the radio display. This can be found using a resistor of at least 300 ohms, at the end of the + wire, connected in parallel to the power + wire. The resistor serves as protection; it can be used to poke all the incomprehensible connectors where the desired contact is supposed to be located. It is not necessary to poke the next half of the terminal block, where there are 8 contacts. All terminals are there for connecting speakers. By the way, in order for the front panel backlight to work, you also need to connect the positive wire to the corresponding contact on the terminal block. In my case, it is 4 from top to bottom, on the left side, where there are 7 contacts.
Next, on both sides of the front panel there are two screws. I unscrew them. I remove all the screws by simply pulling them towards me. I remove the front panel of the radio.
The cassette deck is secured with screws. I unscrew the screws that are located under the front panel, as well as the screw inside the radio.
I disconnect the deck connector. It remains to unsolder the three-wire wire that transmits the signal from the magnetic head to the motherboard, in the immediate vicinity of the 70010BB preamplifier (TDA3420), which works with this signal.
We unscrew the connector from the deck and unsolder all the wires on the deck from it. We also solder the long switch. That's it, we no longer need the cassette deck at all. Well, maybe for homemade products.
Near the preamplifier there are two small capacitors, I also solder them. They will be needed for soldering in another place.
Now let's work with the deck connector. We need to solder two wires from the MP3 module there, with a connector, it is red, for 12 V power supply. Our module is 12 volt, but it is not afraid of voltages or more. Thus, when we turn on the TAPE mode, the module will work.
Next, you need to solder four wires in place of the long switch, where the tracks on the board are connected. You also need to display the TAPE/RADIO mode switch on the panel. I did this using a P2K type switch from the times of GOST and the USSR. It fits perfectly in size, you don’t have to look for the button with a magnifying glass, and it also has several pairs of contacts that are independent of each other. This is what is required to switch modes. When one pair of contacts opens, the other closes, but there is no common conductor between them. I solder both pairs separately, so that when you press the button, the module turns on and the radio turns off. This is easy to determine.
In order for the lights on the front panel to light up (rewind ◄ ►), you need to short-circuit two of the three wires going to the same rewind switch on the deck. In my case it's blue and orange. We don't touch yellow at all.
We take the next wire from the module, four-wire with red wire, this is the antenna. I solder the antenna to the antenna connector inside the radio. I fix it with hot glue. All wires are delicate, so you need to fix everything securely. All the same, our roads are not European yet, and the car shakes well.
I solder the grounding connections, after tinning them as always, to a contact on the board, directly next to the diodes.
I solder the right and left channels to the negative terminal of the capacitors. I solder the capacitors with the positive leg to the output point of the track from the 70010BB preamplifier (TDA3420) to the board. Before the diode. This place has the best sound. From here the signal passes through our capacitors, then through a diode, another capacitor, and goes to the 70011SB (TDA1524) audio processor chip, where the volume is adjusted, modes are switched, and so on.
The next and most important thing. This is, of course, the front side of the radio. Where are all the control buttons and monitor output located. Here we have to install the module itself, having previously adjusted the sizes of the first and second for assimilation. I cut off all the excess. I widen the hole where the cassette deck was. And I completely turn off the space for the mode switch. I'll drill a hole there later. I adjust the panel flush and attach it with super glue. The rest is filled with epoxy resin and soda for a thicker consistency. I decided to experiment with adding black paint to leather jackets, and it turned out great.
I make a hole for a screw to attach the mode switch to the radio body. I immediately look to see if the screw head will shorten anything on the board. I isolate.
After the panel dried, 12 hours passed. It’s not “stone” yet, but it’s easier to remove burrs and decorate and polish everything beautifully.
I make a hole for the mode switch button. First, not with a large drill. Then more and to the desired size.
After processing the panels, I paint them all with the same paint. It turns out very cool. Not expected. One backlight bulb in the front panel burned out. I found a piece of 12 volt low power LED strip (three diodes, very small). I painted it with green nail polish, since the backlight is green. I just soldered it in place of the light bulb and laid the tape. Works normally without heating.
I'm assembling the front panel. Using silicone, I lubricate the mode selection button, as well as the hole where it will work. Everything is in reverse order. I attach all the loose wires with hot glue.
I'm testing the device. Everything is just great. The view is excellent, the panels merged into one whole, as if it had happened all at once. And the sound is generally excellent. This is not PAM8403, low, high, bass. And I'm happy. You can bet on the swallow, she will be happy.
What is a USB input on a radio?
This input on it, like on any other household audio-video equipment, allows you to connect ordinary flash drives according to the 2.0 standard. But this is clearly not enough. The radio must detect the flash drive, understand the format of what is recorded on it, and play it back. No one argues that if the radio has an audio input, you can connect the output from your smartphone and download music to it.
It's all about better sound quality
Additional input is the next best option. It is also one of the most common and easiest to use.
Source quality matters
In this article, we've looked at the best ways to get your music on a stereo system in terms of sound quality.
However, something to think about is how you encode your music into digital files. Music with less compression will sound better than music that is highly compressed. Likewise, internet radio stations often allow you to set a higher quality for your music in the settings menu. But what happens when you get a call? In most cases, they unplug the cord from the headphones and talk without them. This simple operation requires both hands and distraction for a few seconds. If this happens in a fast moving car... The situation on the road changes quickly, you get distracted... and get into an accident
.
The numbers presented here are very general. Apart from the sound quality, you should also consider the ease of connection and the elegance of the connection. And given how noisy the car's environment is, you may not hear much of a difference between any of the connection options.
What are the options for your car?
Try at least two different options and see what works best for your situation. It's worth it in the long run. Your options for connecting a music player to your car stereo depend on a combination of three things: the type of car, stereo, and music player you have. You can start the process.
There are several solutions to this situation:
- The radio (sometimes the CD player) may have an external input on the back side, plug a special adapter into it;
- you can remove the old player and put an FM modulator in its place;
- Solder the USB extension cable to the radio board.
Option with adapter
Whether you're buying a new car yesterday or driving a decades-old junker, your car of choice may not have all the modern features you desire. Some of my friends own older cars that they can modify, but aren't really sure what they can accomplish and where their money is best spent.
In both situations our cars are a little crappy and could use an upgrade. In this post, we'll look at how you can add all the fun things our modern age provides into any situation and without breaking the bank. If you have a cheap car or an older one, you probably don't have the optimal set of tires by default, and this is definitely an upgrade you should consider. Since they are the only point of contact with the road, they are one of the best upgrades you can make and the first thing you should consider.
The adapter works not only with USB, but also with memory cards
Most factory radios may have a socket on the back. All work comes down to several actions:
Here are the main things you should evaluate when upgrading your tires and the benefits they provide. Get tires designed for the weather you handle most: Your tires should handle well on standard roads, but they may not handle rain, snow or other harsh weather. Luckily, some tires are equipped with special features for better performance in specific weather conditions. If you live in rainy weather in Seattle, a wet weather tire will help. However, if you live in Los Angeles, you really don't need anything special for the weather. Choose what you need based on the weather conditions you deal with on a regular basis. Get the latest tires: If you plan to keep your car for a while, you should invest in a set of tires with a long tread life. It's hard to measure a tire's life expectancy, but its Performance Tire Quality Rating may give you a clue. This rating is based on tread wear, so you'll get more life from a tire with a higher rating. For example, a 150 class tire will withstand a 100 class tire by 50%. Choose between high and low profile tires: Most people want high profile tires. While people tend to prefer the look of low profile tires and may enjoy the better cornering they can provide, high profile tires tend to be safer and perform better in inclement weather. No matter what you choose, be sure to buy the complete set. You don't want to mix and match different tire profiles. If you live in Minneapolis, you may want to consider a snow tire. . For more information on choosing the best tires for your vehicle, check out Edmunds' Guide to Tires and Wheels.
The adapter can be placed like this
The advantages of this solution:
- The radio will “decide” that you just changed the player. Accordingly, if the radio supports MP3 playback from a disc, it will be able to play it from a flash drive.
- Some adapters, in addition to USB support, have memory card support. You can remove the card from the smart card described above and insert it into such an adapter.
But there is also a minus
Control protocols are different for different cars, so when you change cars, you will most likely have to change the adapter. But when buying a new car, this issue is not so important.
MP3 player in compact cassette format, with remote control and reads SD/MMC cards.
I won’t tell you for a long time what and why this player was bought for, but the few people for whom the players were bought are happy with them. In general, with this review, I doubted whether to post it, but after the release of this review, and, in particular, the comments under it, I decided that it was worth it. So, an mp3 player built into a standard compact cassette cassette:
The order was placed on June 26th, the store wrote about shipping on July 1st, and already on the 19th (i.e., from payment to receipt about three weeks) I could have received a parcel at my post office if I had not been away at that time. The player is packaged in a blister, which, unfortunately, not a single one has survived, because... were immediately thrown out. Inside the blister there was advertising printing like this:
And here is the package:
MP3 player - 1 pc. adapter for charging from the mains at 110-140V with an American plug - 1 pc. adapter for charging from a cigarette lighter 12-24V - 1 pc. remote control (as it turned out, practically useless, but more on that below) - 1 pc. USB cable - 1 pc. Stereo earbuds - 1 pc. instructions in English - 1 piece. And now, first things first:
Although the player looks like an ordinary cassette, it is actually a device that plays MP3 files from an SD/MMC flash drive.
There is a power switch on the left side,
On the right side, in order: miniUSB connector type B for charging the player and connecting it to a computer; receiver of IR signals from the remote control; 3.5mm headphone output
On the front side there are six control buttons: switching equalizer operating modes decrease volume increase volume previous track next track play/pause And a pair of LEDs: when the player is charging, one glows red, the second glows blue in stop or pause mode, and blinks blue during playback.
And so, the player is charged, your favorite music collection is copied to the SD card, the flash drive is inserted into the player. When you turn on the player, it immediately scans the memory card installed in it ( automatic music file search
), finds all the files it supports, and starts playing them (
automatic playing
). If necessary, you can use the buttons located on the player to set the desired volume level and switch the equalizer operating mode. There are also “previous track”, “next track” and “play/pause” buttons. Alas, the order of playback of files will be as follows: in the order in which the files were found in the file location table. Unfortunately, it cannot be changed. Unless, before copying music files, do a quick formatting of the memory card in order to delete all entries in the file location table, and copy the files to the card using FAR or Total Commander, in the desired order. There is no “random”/“consecutive” switching, which is a pity. You can connect headphones to the player and use it as a regular (albeit somewhat unusual-looking) mp3 player, or you can insert it into any cassette recorder and listen to music as if it were an ordinary cassette. Moreover, there is a mechanism inside that does not allow the hitchhiking to work. For those who like to listen to audiobooks, I’ll say right away: when the player is turned off, it remembers the track being played, and next time it will start playing from it. Unfortunately, time does not remember, so the track will play from the beginning. The sound quality is surprisingly quite good; with good headphones I was able to distinguish between mp3 files with 256 and 320 Kbps CBR. And in the car it sounds much better than the usual TypeI (Fe) compact cassettes. The pre-charged player worked for me personally for about 4 hours in the music center, and it did not run out of charge. But although it is possible to use the player as a card reader, I would not recommend it, because... The speed of working with a memory card when used in this way is very, very low. If necessary, it would be better to buy a separate card reader. The included remote control is very small (its dimensions are 45*85*5mm) and contains a CR2025 battery, which was prudently insulated at the factory with a transparent film that can be easily removed before use, but turned out to be virtually useless. The fact is that the player, having received a command from the remote control, does not execute it immediately, but with a delay of 1-2 seconds. And if you continue to hold down the button on the remote control, the player will think that these are several separate commands, will remember the whole sequence and will slowly execute them. Those. everything happens something like this: you press the “next track” button on the remote control and hold it down, waiting for execution, the player accepts the command execution delay time (a little higher about 1-2 seconds) accepts it several times, and then several times it and does it. executes the first one, the next song starts playing, but after 2-3 seconds it executes the second received command, i.e. again “next track”... and so on several times in a row, regardless of your desire. The only option found is to interrupt it - you need to perform some actions with the player itself. For example, press one of the buttons directly on it or turn it off and on. Well, or get used to pressing the remote control buttons carefully and briefly, and then expect a few seconds of reaction from the player. Moreover, the buttons on the remote control are tactilely indistinguishable from each other, and to find the one you need, you need to look at the remote control. In general, the remote control for this player in the car is practically useless. Its only use is this: if you have a large collection of several dozen or hundreds of files recorded on a flash drive, and for some reason you do not want to listen to it from the very beginning, then from the remote control you can dial the two or three-digit number of the desired track, and the player will start its reproduction. Most likely, the delay in executing remote control commands is due precisely to the fact that the device needs to wait for a two or three-digit serial number of the selected track, and this is where all this confusion comes from.
The adapter for charging the player from the mains, although it is designed for an input voltage range from 110 to 240V, but with a mains plug, as they would previously say, “the most likely enemy,” and without a suitable adapter is practically not applicable in our conditions. Although, taking into account the fact that the output of this adapter has a regular USB connector, and the output parameters say 5V 1000mA (I highly doubt it), it can be easily replaced with any other charger. And the player also charges perfectly from the computer.
On the cigarette lighter adapter it is written that the input voltage can be in the range of 12-24V, so you can charge the player’s built-in battery right in the car. The output voltage is the same, standard for USB 5V and the maximum current is up to 500mA (I also highly doubt it).
The USB cable is nothing unusual, the cable is just like a cable, it does not have any identification marks or inscriptions, and the connectors are quite standard: USB <-> miniUSB.
Ordinary cheap Chinese headphones, turned on, seemed to play, went into a pile of rubbish. Sufficient to test functionality, you can use it. But because The sound quality leaves much to be desired, only if nothing better is at hand.
Brief instructions in English, printed on newsprint paper. Contains a small description of the characteristics, three warnings that: when charging, the red LED lights up, random playback order from the SD/MMC card after playing all the tracks will start playing them again, and brief instructions for use, which in some places do not correspond to the device. Rather, it describes the buttons on the remote control, although the picture shows the player itself.
Conclusions:
If you have a good quality cassette radio installed in your car or there is no way to replace it, then this device is for you. Moreover, you can take several SD flash drives with you on the road and change the music playing in the car if necessary.
Advantages:
good sound quality, much better than when using FM transmitters, support for SD/SDHC/MMC cards (both 16MB and 16GB tested personally), also TF (TransFlash, now better known as microSD) through omnivorous adapters (32-320Kbps CBR/VBR ) long battery life (mine works for more than 4 hours, I didn’t detect it longer) support for FAT/FAT32 file systems the ability to use outside the car as an unusual type of ordinary portable mp3 player remembers which track it stopped on
Flaws:
“your” playback order from the remote control behaves in an unusual, peculiar way, you need to get used to it; there is a short pause between tracks (about a third of a second, noticeable only on “non-silent” albums, such as Pink Floyd -Wall) there is no provision for displaying the end of the charging process; low transfer speed via USB
Result:
After several months of use, none of the owners regret the purchase.
An arrogant ginger cat, in the process of thinking about where to put a comma in the phrase “tired of sleeping and eating.”
The same thing, but without a remote control, and therefore somewhat cheaper: dx.com/p/10203
Modulator: how to connect and use
FM modulator and remote control for it
An FM modulator is a device that can transmit a signal from a flash drive (as well as a memory card) over a radio channel. In general, it is plugged into the cigarette lighter socket and tuned to a certain frequency. The same frequency is adjusted on the radio receiver. You (and your neighbor nearby) can listen to music from a flash drive. But for a large city, where the radio range is jam-packed, you can do it differently: install the modulator directly into the tape recorder. How to do it?
To work you will need:
- soldering iron;
- a set of shielded wires (you can take regular ones, but shielded ones will give better quality (a sufficient amount of wire will be in the original radio);
- Modulator (you can use any MP3 player). The advantage of the modulator is the presence of a remote control, as well as a built-in power converter;
- the radio itself;
- voltage converter 12 - 5 V.
Operating procedure
Nutrition
The power converter in the modulator is different, in the player it depends on its brand.
Audio
A shielded wire connects the audio output of the modulator and the input of the radio.
There is no such input on ancient cassette players. In this case, the signal will have to be fed directly to the input of the preamplifier. It’s easy to find - it’s where the shielded wire from the head goes.
The wiring diagram for the amplifier chip can be found on the Internet.
Amplifier circuit indicating the required parameters of the parts
For example, this is what the circuit of an amplifier based on TDA2005 looks like.
Assembly
Since in the new version only the radio receiver unit remains, the modulator can be located in the housing. If all contacts are connected correctly, then the activation of “AUX” or “Tape” is redirected to the modulator.
Video
How to make USB support and still keep the old (working) player