To avoid burns, you should carry out all work as carefully as possible. Do not invert the battery, as this may cause battery leakage and damage to surrounding objects. Avoid contact of acids with the car body. This will cause the paint to erode.
What does density affect?
How to correctly measure and check the density of the electrolyte in a battery with a hydrometer? This indicator affects the battery’s ability to restore charge. By determining the density, you can find out the technical condition of the battery. Density is directly related to battery capacity. At low densities, almost no battery charging occurs.
Therefore, measuring this indicator is the main work when diagnosing a battery. This work is performed using a hydrometer. This device allows you to fairly accurately determine the state of the electrolyte.
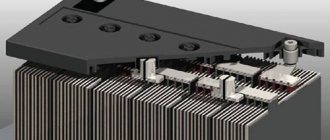
Hydrometer
This device is an oblong cylinder tapered on one side.
A rubber bulb is placed on the thick end. On a thin rubber tube-tip. Inside there is a float with divisions. The operating principle is simple. And probably everyone knows it from a school physics course. That is, the denser the liquid, the more mass the body can push out. In this case, the float has a certain mass. And depending on the density of the electrolyte, it will be immersed in the liquid to different depths. The relationship between density and immersion depth has been experimentally determined. In accordance with this, the scale is drawn. In practice, the higher the density of the electrolyte, the more it will push the float. The density level is assessed by rating the scale. It should be noted that all hydrometers sold in automobile stores have 2 scales. One is designed to check the density of the electrolyte. There the divisions are indicated in g/dm3. Another scale is used to check antifreeze and antifreeze. You can see °C on the scale.
Measuring the density of electrolyte in a battery
Measuring the density of the electrolyte poured into a lead battery is not so difficult, however, there are certain nuances associated with the features of the device and the principle of operation of the battery. Here are some important points to consider:
- It is possible to carry out the procedure for measuring density only in the case of a so-called serviceable battery, which provides access to banks (sections) with electrolyte through filler holes closed with lids. It is through these holes (usually their number is six, as is the number of sections) that the composition is taken to measure the density.
- During its operation, a car battery is constantly charged and discharged. The discharge occurs when the starter is cranked, and the charge occurs when the engine is already running from the generator. Depending on the degree of charge, the density of the electrolyte also changes. Values can vary between 0.15-0.16 g/cm3. It is important to note that a car alternator is not capable of fully charging the battery. During normal operation of the car, only 80-90% of the battery's potential is used. A full charge can only be provided by an external charger, which must be used before measuring the electrolyte density.
- The density of the electrolyte depends on its temperature. Usually measurements are made at a temperature of +25 °C, otherwise corrections are made.
Let's assume that all the above conditions are taken into account, and it is possible to proceed directly to measuring density. To do this, you will need a special device - a densimeter, which consists of a hydrometer, a rubber bulb and a glass tube with a tip. The device is inserted into the battery jar through the filler hole, and then the electrolyte is sucked in using a rubber bulb. This continues until the hydrometer floats to the surface. The readings are taken after the hydrometer stops oscillating and it becomes possible to determine the exact value. The readings are taken on a scale, while the gaze should be at the level of the surface of the liquid.
The resulting value should be in the range of 1.25-1.27 g/cm3 if the car is operated in the middle zone. In a cold climate zone (the average monthly temperature in January is below -15 °C), the indicator should be in the range of 1.27-1.29 g/cm3. You need to check the electrolyte density for compliance with these numbers in each of the six battery cans. The readings should not differ by more than 0.01 g/cm3, otherwise they will need to be adjusted.
As we have already said, the density of the electrolyte changes depending on the temperature. This means that in winter and summer, the liquid in the same fully functional battery will have different densities. The table below gives an idea of how much the readings will vary.
| Electrolyte temperature, °C | Correction to densimeter reading, g/cm3 | Electrolyte temperature, °C | Correction to densimeter reading, g/cm3 |
| -55…-41 | -0.05 | +5…+19 | -0.01 |
| -40…-26 | -0.04 | +20…+30 | 0 |
| -25…-11 | -0.03 | +31…+45 | +0.01 |
| -10…+4 | -0.02 | +46…+60 | +0.02 |
The dependence of the freezing temperature of the electrolyte on its density is shown in another table. Based on these data, it is possible to establish the optimal electrolyte density for specific climatic conditions. The lower limit of the selected interval should ensure that the electrolyte does not freeze even in the most extreme cold and will provide the force required to crank the starter. At the same time, it is also impossible to overestimate the density, since corrosion processes begin to accelerate on the positive electrodes of the battery, leading to sulfation of the plates.
| Electrolyte density at 25 °C, g/cm3 | Freezing temperature, °C | Electrolyte density at 25 °C, g/cm3 | Freezing temperature, °C |
| 1.09 | -7 | 1.22 | -40 |
| 1.10 | -8 | 1.23 | -42 |
| 1.11 | -9 | 1.24 | -50 |
| 1.12 | -10 | 1.25 | -54 |
| 1.13 | -12 | 1.26 | -58 |
| 1.14 | -14 | 1.27 | -68 |
| 1.15 | -16 | 1.28 | -74 |
| 1.16 | -18 | 1.29 | -68 |
| 1.17 | -20 | 1.30 | -66 |
| 1.18 | -22 | 1.31 | -64 |
| 1.19 | -25 | 1.32 | -57 |
| 1.20 | -28 | 1.33 | -54 |
| 1.21 | -34 | 1.40 | -37 |
Measurement
Before measuring the density of the electrolyte, be sure to prepare for this work. Inspect the battery carefully. It should be free of stains and dirt. It is advisable to measure the self-charging level. For this you will need a multimeter. After this, one probe of the device is placed on the battery terminal, the other on its body. The resulting indicator is the level of self-charging. Ideally it should be around 6V
.
The room temperature should be about 20°C. If you brought the battery from the cold, you need to wait until it warms up.
The acid is hot. Therefore, you should definitely have a container of water on hand. So that, if necessary, you can wash off any electrolyte that gets on your skin. It is also advisable to wear special glasses. The work itself is done as follows:
- First, unscrew the plugs from the battery. Remember that the banks do not communicate with each other, so the density must be checked in them separately;
- The liquid level is visually assessed. It should not be critically small;
- The liquid is taken with a hydrometer. It should be held vertically. The collection is carried out in the following way. The pear shrinks.
- The tube is lowered into the jar and the pear is released. Thus, the liquid is drawn into the device;
- Visually assess the condition of the electrolyte. The gray color of the liquid indicates crumbling plates. This means the bank is inoperable. Assess the hydrometer readings. In this case, the float must float absolutely freely;
- The liquid is poured back and proceed to checking another jar.
If it turns out that the density does not meet the standards, you should try to correct the situation. There are several ways to do this.
Method of using the device
Before checking the battery density with a hydrometer, you need to familiarize yourself with the operation of the device so as not to get chemical burns and achieve the correct results. Usually, for measurements, preliminary fluid is taken from the battery cans.
It is important to know that each car battery can is an independent container for liquids, so measurements will need to be taken for each container separately.
Safety precautions must be observed when pumping liquid for testing. Acid-resistant rubber gloves and safety glasses are required. An apron made of rubberized material or a special protective robe helps protect your clothes. To select the required volume, we use a glass tube, since this material is chemically neutral to acids.
The step-by-step algorithm for measuring density with a hydrometer consists of the following points:
- lower one end of the glass tube into the neck of the open battery can;
- part of the liquid will penetrate inside the tube, and its level will be leveled with that remaining in the container;
- Close the top hole tightly with your fingertip and slowly remove the tube;
- lower the end of the glass tube into the flask prepared for measurements, and then open the upper part of the tube so that the liquid flows into the vessel;
- since the hydrometer works correctly only in a certain volume of liquid, we repeat the procedure many times until the required amount for measurement is collected;
- We place the hydrometer inside the flask and wait for it to level, since we need the number indicated by the line of the liquid surface;
- after stabilization, the desired density of the liquid will be known.
After measuring, return the liquid back to the jar in the same way as it was taken. We carry out operations with each capacity from the battery in order to obtain complete information about the condition of the battery.
When working with a hydrometer, you need to squeeze the bulb and then immerse the pipette in the liquid so that it floats there like a float in a vertical position. After compression, the rubber is gradually loosened to smoothly fill the container. The measurements will be accurate when the float does not come into contact with the walls of the vessel. If it is stuck, the readings obtained will be unreliable.
.
Upon completion of work, rinse the device with distilled water. This will help extend its service life and eliminate measurement errors.
Raising the density
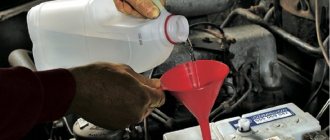
The main method for increasing the density of the electrolyte is charging the battery. The thing is that low density often means low battery charge. Therefore, in such a situation, the easiest way is to put it on charge. It is best to use an automatic charger for this. You should not check the density immediately after charging. You need to wait a couple of hours to get the most accurate results.
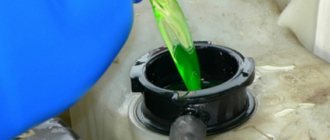
If this doesn't help, you can try adding electrolyte. But this should be done only at very low densities. After this, be sure to check the density. Pay special attention to the color of the liquid. It should be transparent.
Conclusion
. If your battery is dead, it is best to check its condition. There are special devices for this. Not all drivers know how to correctly measure and check the density of the electrolyte in a battery with a hydrometer. Therefore, due to incorrect measurements, they often throw out a working battery or drive on a faulty element.
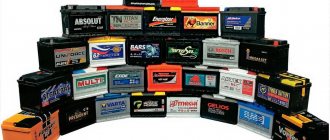
Selling brands of hydrometers in Russia
The choice of brands of hydrometers on the market in our country is quite large, but in fact they represent almost identical devices. The only differences are in the quality of the material used to make the devices.
Hydrometer IP1
What stands out from the general monotony is the IP1 hydrometer, which is made not with a standard glass hydrometer, but with a set of plastic sticks, opposite which the density value is written on the body. After filling the cavity of the device with electrolyte, the sticks float up and the density value is read on the scale from the one that floated last.
The measurement limit of this device is from 1.19 g/cm3 to 1.31 g/cm.
The scale division value is 0.02 g/cm.
Hydrometer IP1 - “Density indicator - 1” is not an entirely accurate device, but it is quite common among motorists, probably due to its low cost (approximate cost in stores is 100 rubles) and compactness.
Next, you can consider hydrometers costing from 100 to 250 rubles. There are quite a lot of brands of devices in this range.
Hydrometer Orion AR-02
Against the backdrop of all this diversity, the products already familiar to us from the series of chargers from the St. Petersburg enterprise NPP ORION SPB LLC, the Orion AR-02 hydrometer, stand out.
This is the only device for which I found instructions. You can read and download it here.
The principle of operation, safety precautions and the measurement process are described above, let's see what the rest of the specimens look like in the pictures and a short video about some of them.
Hydrometer for electrolyte Autovirazh AV-9901
Hydrometer for electrolyte Sparta 549125
Reviews on the Internet about the Sparta 549125 hydrometer are very decent, apparently the product is made with high quality.
Electrolyte hydrometer SKYBEAR 623000
There are not many models of imported hydrometers on sale, but you can find the following:
JTC-1039 BATTERY TESTER
Such hydrometer models are a little more expensive; their cost will vary from 300 to 600 rubles. They are compact and ergonomically designed. It’s nice to hold such a device in your hand, and you don’t have to assemble it to disassemble it, which is of course convenient.
Hella Hydro Volt
Hella Hydro Volt is a device for measuring density of fairly high quality. Compact, interesting, it has a pear built right into the body. As the stores write: “This model is highly accurate, the measurement error does not exceed 1 percent.”
The price for this device ranges from 800 and even up to 1400 rubles, according to online stores.
There is one problem that every motorist has encountered at least once. It consists in the improper operation of the battery, although the liquid that is used as an electrolyte is present there in sufficient quantity. To troubleshoot, you need to check not the volume of the substance that is inside, but its density. To do this, they use a device called a hydrometer, the scale of which precisely shows this characteristic.