October 31, 2014
4 min
…
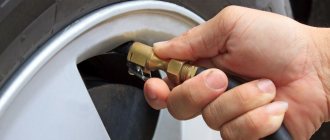
With the onset of cold weather, every driver is thinking about adding some important features to his car. One important option that most cars are not equipped with is heated exterior mirrors. In severe frosts, this element of the car body fogs up or becomes covered with ice, which greatly interferes with the normal operation of the car. Simply wiping the mirrors is not enough. You need to dry them to avoid distortions when inspecting the area behind the car.
Therefore, many decide to install heated mirrors with their own hands in order to obtain the necessary functionality and safety of movement in the winter. This procedure can be performed quite simply; there are several technologies that can be used for this process. Today we will look at the two most common technologies.
Heated mirrors using a halogen lamp
This design is the most economical and can be used on any car. It is advisable to install lamp-based heating in those cars where the mirrors are equipped with any electrical equipment. This will greatly simplify the task of connecting electricity to the light bulb and ensuring its normal operation.
You will need a halogen lamp with low power, a plate of insulating material (paronite, textolite or even electrical cardboard), skill and tools for disassembling the mirror and soldering contacts. The process of performing this procedure is quite simple:
- disassemble the mirror and evaluate the possibility of installing an additional light bulb in the body, because you simply may not have enough space;
- cover the plastic elements and electrical equipment of the mirror with foil so that the lamp does not come into direct contact with them and does not heat the plastic;
- connect the light bulb to the present contacts (if there are none, the contacts will have to be made from the passenger compartment;
- be sure to consider the possibility of turning off the lamp - you should not let it burn constantly, because this can damage the plastic parts of the mirror housing;
- lay the selected heat-insulating material under the mirror itself, which will distribute the supplied heat over the entire area of the mirror;
- test the resulting design and assemble the mirror to its original form.
This way you can get a working and safe heating system for rear-view mirrors, but you need to make sure that the lamp does not affect the plastic elements of the mirror. Otherwise, you will have to go to the market to buy new exterior elements for your car.
Despite the simplicity of the description of the method, the owner of the car, when working independently, may encounter certain difficulties in organizing this addition to the configuration of his car. If you have problems, you can contact electricians, or you can simply use the simpler second method.
The easiest way to make a heated mirror
You can install heated mirrors using the following simple tools and parts:
- Household hair dryer.
- Drills.
- 2 heating elements.
- Containers with hot water.
- Stationery knife.
- Wooden or plastic scraper
- Double-sided tape.
- White spirit.
Mirror disassembly diagram
You will also need some free time to complete the necessary actions:
- You need to disassemble the mirror and remove the mirror element. To do this, the housing must be heated, for example, using a household hair dryer.
- Remove the tape or other fixing material from the back of the mirror. For this you will need a scraper and white spirit. You should only use a wooden or plastic scraper, as violating this recommendation may damage the mirror coating.
- The next step is to glue the heating elements onto a double-sided adhesive base. You can also use screws or other fastening materials for this.
- Next you need to trim and remove all excess. The heating elements must be bent so that they do not “peek out” beyond the edges of the mirror.
- If the plastic mirror housing has stiffening ribs on the inside, it is better to cut them off, otherwise they will interfere.
- Finally, you need to make a small hole for the wiring.
Gluing elements
The process of installing a mirror into the housing can be done using:
- hairdryer;
- hot water.
Let's take a closer look at the second method (it is simpler and more convenient). A plastic casing is lowered into a bowl of boiling water to soften it. When the required result is achieved, you can begin installing a mirror equipped with a heating element.
Installing heated mirrors is very useful in cases where the driver lives in a cold climate zone or does not have a garage. When the heating element is turned on, the temperature rises, which leads to melting of snow and removal of moisture and condensation. Accordingly, the driver will not have to spend precious time cleaning components and increasing visibility.
Special heating elements for rear view mirrors
Today, in car stores, markets and on websites that sell various types of electrical equipment for cars, you can find special plates that you can simply install under the mirror and get the desired effect of heating the mirrors. These are plates with a heated spiral that are easily connected and installed in virtually any mirror.
To install, it is enough to follow the above processes, but you need to install the plate with glue. To do this, it is better to glue a frame to the inside of the mirror so that the heating elements do not directly touch the mirror. The advantages of this method of organizing heated mirrors are obvious:
- you get an excellent working system after just a few minutes of working with the installation;
- the efficiency of such heating is much higher than that described in the previous method;
- The operating life of high-quality mirror heating plates is much longer than that of a lamp;
- you can install a relay with a setting that will regulate the heating temperature.
This will help you get wonderful heating without complicated procedures. But there are certain disadvantages to this process. Such a system for heating rear-view mirrors will cost several times more than implementing the method with a halogen lamp. A plate with a heating element is quite expensive, especially if we are talking about a high-quality element.
We recommend installing only high-quality heating modules on your vehicle. Give preference to well-known manufacturers and good technologies to obtain the necessary operating conditions for the installed system. We invite you to watch a video of a person with experience in installing heated mirrors on his own:
How to make heated mirrors
The essence of the useful option is the same - disassemble the case and install heating inside.
1. Heating when using light bulbs. A common method used by drivers with domestic cars, among others, an incandescent light bulb is a source of heat and an accessible means of heating mirrors. The best option would be a pair of low-power 10-watt light bulbs or 1 2-strand 21+5 watt light bulb. The size must fit into the housing and be installed so that there is no contact with the mirror and the wall of the housing.
- Remove the housing and carefully disassemble the car door trim and get to the pillars on which, and hold onto the mirror. Disassemble the housing itself and protect the plastic box under the mirror with heat-resistant material. Glue foil on top to reflect heat from the front wall, directing it to the mirror itself.
- We fix the light bulb, and use a socket or heat-resistant clamps to connect it to the electrical wires. If there is not enough space in the case, then the electrical wiring is soldered to the lamp and insulated.
The electrical wiring is placed freely for further adjustment of the mirrors. If installed correctly, the ice will melt within 2-5 minutes, but they should not be turned on for a long time, otherwise the plastic will melt, which will lead to deformation of the mirrors.
Another method is with two mirror heating modes , a powerful mode designed for quick heating of the mirror and a weak one for fogging. Install a two-pin lamp 215 into the mirror housing, and power the bulb accordingly. In this case, 21 Watts will work for rapid heating, and 5 Watts will be enough to protect the mirrors from fogging.
2.Wire heaters. First of all, craftsmen should take care of the base on which tungsten filaments will be glued or, for example, nichrome, nickel or maganin wire from an old toaster or heater; as is known, they get very hot, which leads to the burning of the base of the mirror.
- Tungsten filaments are attached to the base, avoiding their contact with each other, and are soldered to the electrical wires to the +/- output using a soldering iron.
- Insulating material is laid on both sides strictly without gaps to increase the useful effect.
The same threads are attached without a separate base, but to the back side of the mirror, having previously cleaned it and pasted double-sided tape over the entire surface. Apply a thread in the form of a spiral onto the sticky base of the tape and cover with a layer of the same tape and press, thereby fixing it and protecting it from external influences.
3. Heaters on the printed circuit board. You can buy them at the car market, and they are sold for a specific car model, as well as standard sizes. They consist of a couple of layers of polymer material, and printed conductors are hidden between them.
- Disassemble the case, degrease it and glue the board with glue.
- There are two terminals on the side of the board; solder the wires to them and insulate them.
- To transfer heat, you should resort to thermal insulation and foil on the inside of the case.
Next, connect the wires to the car electrical wiring and display the heating control button on the panel.
Read about what types of car seat covers there are and how to choose the right option here.
Also look at the Procrossover for information about what kind of oil is poured into the gearbox and how to replace it.
4.Film heaters
The resistive elements are reliable, and the installation is identical to that of printed circuit boards.
- Glue the film using double-sided tape to the back of the mirror, having previously degreased it. Try on the film, trim off the excess and bend the heating elements so that they do not look beyond the edges of the mirror.
- If there are stiffening ribs on the inside of the case, you should carefully cut off the ribs so as not to interfere and make a small hole for the wiring.
Connect the outgoing wires already included in the kit to the car electrical wiring, then display the control button on the control panel. Insulate the soldered contacts with sealant.
Let's sum it up
Installing heated mirrors was not such a difficult task, but the results of this process will be remarkable. No longer will you have to wait for your rearview mirror to stop sweating or scraping ice off it after a cold winter night. It is enough to properly organize the mirror heating system to obtain the necessary capabilities for safe operation of the car.
Many car owners prefer the services of electricians when installing such systems. But you won’t have any problems installing such a device yourself. Have you ever taken part in such a process as installing heated rear view mirrors?
Heated mirrors - advantages and features
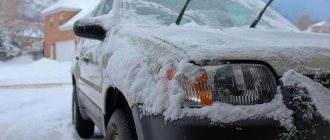
Heated mirrors are a new option, the features of which many car enthusiasts have already appreciated. The heating system has become indispensable for those drivers who live in a temperate continental climate.
Hot summers and cold winters cause a lot of inconvenience; sometimes you have to wipe off snow or dirt from your mirrors while driving. The decision to buy heated mirrors will help prevent such situations while driving and ensure sufficient visibility in difficult weather conditions.
How does the function work?
Leading American and European automakers conducted a series of studies and tests of cars during the long off-season, after which the heated mirror function was added to the basic package. You can also choose powerful car batteries on our website. In Asian countries, this option is not particularly popular, since in their climate there is no such need.
Why do you need to buy heated mirrors?
Many drivers leave their cars in open-air parking lots. Snow, rain and drops of moisture are blown by air currents when the vehicle moves, so the car dries quickly. The situation with rear-view mirrors is much more complicated, since the need to use them arises immediately at the beginning of the movement while still in the parking lot.
The main advantages of the heated mirror option:
- removal of frost in a short period of time;
- rapid drying of precipitation in the form of rain, snow, fog;
- preventing the “fogging” effect.
Features of the heating system
Heating equipment consists of a switch, wiring and a special heating element, which must be installed on the rear side. To operate the device, a standard 12V car network is sufficient. The driver turns on the device by pressing a button and in just a couple of seconds the result is noticeable. On average, the mirror heats up to a temperature 50-70 degrees higher than the air temperature.
Types of mirror heating.
- The simplest mirror heating you can buy is the wire type. The main disadvantage of this heater is the uneven heating of the mirror surface.
- It is possible to buy a mirror heater based on printed conductors. It costs significantly more than the previous one; for its high-quality operation, it requires a close location on the surface of the mirror.
- Film heaters - a continuous film is applied to the back side of the glass using vacuum deposition. This application allows the film to prevent driver dazzle and perform the function of a mirror surface.
In the Avtovolna online store you can purchase heated mirrors at competitive prices from reputable manufacturers. You can buy a universal model, as well as products designed taking into account the characteristics of the car brand. To do this, simply go to the website and find the desired item in the catalog or contact our representative by phone and describe your wishes and requirements.
We make heated mirrors with our own hands
The first serious frosts, as a rule, become the reason for serious thoughts about such a useful and at the same time fashionable option as heated mirrors. A frozen rear view mirror is an unpleasant and at the same time dangerous phenomenon that interferes with normal visibility and the ability to navigate the road. The trouble is that we remember the need to make a heated mirror only when a problem arises, and with the arrival of the first warmth we forget about it again until the next frost.
One day I got tired of wanting and I decided that it was time to have heated mirrors, after which I found free time and began to bring my ideas to life, see for yourself what came of it.
A heated mirror is a relatively young invention; new foreign cars of the latest models are most often equipped with it, and then only as an option. Of course, I didn’t change my car just because of this shortcoming, since it would be unreasonable, and besides, heated mirrors can be done with your own hands, fortunately, there is plenty of this kind of goodness on the market for automobile “tricks”. Almost any “bells and whistles” today can be easily installed on your car, if only you had the desire, as they say, and, of course, the financial opportunity. As I already said, a heated mirror is not only a fashionable gadget, but also a guarantee of your safety. A frozen rear view mirror can very well cause serious trouble.
Relevant: Do-it-yourself ignition switch illumination on a VAZ
I could implement my idea in two ways: the first was by entrusting the car to specialists and paying for all the installation work, and the second was to make heated mirrors with my own hands , saving time and gaining invaluable experience. As you can imagine, I chose the second option. There were several implementation methods; among all those available on the network, I chose the simplest, in my opinion. I bought heating elements and installed them on the mirrors. The installation work is not difficult, but without some skills and knowledge, you can do something stupid, and you also need to be careful here.
In order to install heated mirrors with your own hands, you must have:
- Household hair dryer;
- Drill;
- Heating element (2 pcs);
- Dishes with hot water;
- Stationery knife;
- Scraper (wooden or plastic);
- Double sided tape;
- White Spirit;
- And of course, “hands growing from the shoulders” and some free time.
Well, let's get started:
- The first step is to heat the frame of the mirror element using a hair dryer.
- Next, remove the mirror element from the housing.
- Remove the tape (or whatever you have) from the back of the mirror element using a scraper and white spirit, only do this with a plastic or wooden scraper, otherwise you may damage the mirror coating.
- Now you need to stick double-sided tape on the heating elements. In principle, you can fasten it with self-tapping screws or use any other fastening option.
- The next step is to trim off the excess. Adjust the heating element so that its edges do not protrude beyond the edges of the mirror element.
- I had stiffening ribs on the inside of the plastic mirror housing that were in the way, so I had to cut them off.
- Now, you need to make a hole for the wiring, it should be as small as possible.
Installation of heated mirrors in the housing can be done in two ways: using a hair dryer or using hot water. Boiling water is poured into the container, after which a plastic casing is lowered into it; when the casing softens enough, mirrors are installed in it along with heating elements. I like the second option even more; during installation it turned out that installation in boiling water is much simpler and more convenient.
Useful tips
In order for your mirror heating to work for a long time with maximum effect, try to glue the heating element so that its contacts do not touch the mirror coating. Constant contact with the heater may cause the mirror coating to fade. You can connect the button yourself, but if you are not sure, it is better to ask a familiar electrician for help, this will save time and save you from unexpected surprises during operation.
That's all, now you will have a heated mirror and experience in installing it yourself. All that remains is to wait for serious cold weather and test the work in real conditions.
How to determine the presence of a heater
Many drivers, having purchased a new car, do not know how to turn on heated mirrors. First of all, you need to make sure that such a system exists. This can be determined:
- By the presence of a heating button on the dashboard.
- After starting the car engine, touch the mirrors after a few minutes. If the reflectors are warm, then the system is installed.
- Based on the presence of heating elements and wires in the housing.
If desired, the heated side reflectors can be combined with the heated rear window.
Preparing for work
DIY car blanket dimensions, materials and sewing method
It doesn't matter which type of heating you choose. In any case, you must first perform a number of specific actions:
- We remove the mirrors from the car.
- We heat the circuit using a regular household hair dryer, then disconnect the glass from the body. We do the same procedure with the second mirror. We do everything carefully and slowly. If necessary, you need to reheat the layer of glue so that the mirror element can better come away from the plastic. The same procedure can be done with hot water.
- If the heating element sticks, the inner surface of the mirror is degreased.
If the case does not have holes for the wires to exit, you should make them yourself. Before doing this, you need to carefully consider where exactly the wires will come out, taking into account that their other ends will be connected to the appropriate fuse.
In addition, do not forget that both wiring must pass under the inner trim of the front doors of the car. And then under the plastic of the front panel or under it, depending on the vehicle’s trim.
If there are cracks or gaps in the housing, they should be carefully sealed so that water does not subsequently get into the wiring. Otherwise, a short circuit may occur.