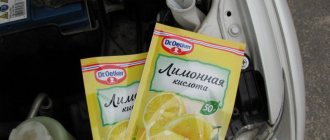
Some drivers may see a tube of toothpaste in their car or garage. Experienced drivers benefit from using toothpaste not only to clean their teeth, but also in the car.
Everyone knows that toothpaste has a good and effective abrasive and polishing effect. It is these properties that experienced drivers use.
Method number 1.
Toothpaste can remove white spots that appear on the body or windows of a car after a long period of parking in the open air. Such stains cannot be removed during washing. After treating with the cheapest toothpaste, not a trace will remain of white spots.
Method number 2.
Toothpaste is widely used for polishing car windows and car headlights.
For polishing, it is better to use whitening toothpastes. Whitening paste usually contains more abrasive particles.
If polishing is done with ordinary toothpaste, the effect will be practically invisible. If you polish the glass or headlights with whitening toothpaste, the glass or headlights will become as good as new.
Polishing headlights or glass with toothpaste should be done using a soft felt cloth.
Polishing glass and headlights with toothpaste will significantly save your family budget.
Method number 3.
Using toothpaste, you can remove small and shallow scratches from the car body. To remove a scratch, you need to use whitening toothpaste.
Apply the paste to the scratch and rub in circular movements for 2-3 minutes. If a scratch remains, it will be practically invisible.
Method number 4.
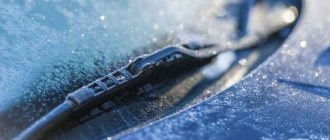
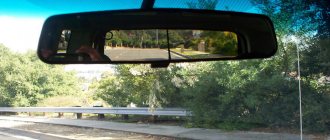
You can use toothpaste to remove fog from your rear view mirror. Apply toothpaste to the mirror and rub with a cotton swab.
Need to pay attention
that toothpaste cannot be used to defog a car windshield. At night, glare from the headlights of oncoming cars will blind the driver's eyes.
Method number 5.
Toothpaste can be used to protect headlights from dirt. To do this, apply toothpaste to the headlight and rub it with a soft cloth until the headlight glass becomes transparent. After applying the toothpaste, do not wash it off with water.
When driving in rainy weather on a muddy road, protected headlights will remain clean longer.
Bottom line.
Toothpaste can be usefully used not only for hygiene purposes, but also in the car.
Like, subscribe and leave a comment!
A car is a high-risk vehicle, so you need to be careful not only while driving, but also when inspecting and identifying various faults that can play a key role on the road. Car headlights are, of course, one of those parts of the mechanism that should be given close attention by the car owner.
Why do you need to polish your car headlights?
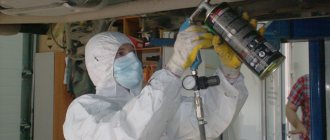
Car headlights suffer significant damage during operation: small and large stones get into them, road dust settles on them, dirt flies into them from under the wheels of oncoming traffic, and so on. In addition to reducing the performance of the main function - illuminating the road - dirty headlights make the car less beautiful and aesthetically pleasing. Unfortunately, no independent cleaning of car headlights has been invented, but car owners can easily do the cleaning themselves: to do this, they just need to carry out polishing work using a special liquid or toothpaste. This method is suitable for all types of headlights: both glass and plastic. There is nothing difficult for a car owner in polishing headlights with toothpaste.
To work you need to prepare the following:
- Actually, toothpaste. Any brand, any manufacturer
- Pure water
- Degreaser
- Unnecessary rags
- Roll of tape
- Brush
It is better, of course, to take a felt or felt piece. As an option, many car enthusiasts use an electric drill with special attachments.
Tools and materials
The standard polishing arsenal must include tools that can be used to remove the caps. You should also stock up on masking tape. To sand deep scratches, it is necessary to use different grits. The maximum grit range should be from 600 to 4000. To complete this job as quickly as possible, a sander or any other power tool will come in handy. Naturally, polishing a headlight with toothpaste will not work without the toothpaste itself. Moisten the surface to be sanded with clean water and rinse it.
Polishing plastic headlights with toothpaste requires a foam sponge. Felt or felt is also perfect. If you don’t have any of this, then you can use an electric drill.
Before starting work, the optics must be removed, having previously taken care of electrical safety, and the headlights must be fixed in a convenient position. Only then can you start working.
How to polish headlights with toothpaste
This process can be conveniently divided into four logical parts:
- The preparatory stage, during which it is necessary to close metal and rubber parts so as not to damage them during polishing
- Stage of preliminary cleaning of headlights from dust and dirt formations
- The stage of rubbing tooth powder with a brush or felt material. To do this, you need to make circular movements until the scratches disappear. As already mentioned, many car owners polish their headlights using a drill and special attachments. Naturally, for this method of work to be effective, the maximum speed of the drill should be set
- The final stage at which you need to clean the headlights from used toothpaste
The preparatory stage is the very beginning of the work, when measures should be taken to prevent damage. You need to wrap all metal and rubber parts with tape. This ensures their safety during polishing. Then you need to pre-clean the surface from mud, asphalt, and oil stains. To do this, it is recommended to take a degreaser, soap or regular laundry detergent. After the above steps have been completed, you need to move on to the next stage - polishing the headlights.
To do this, you need to apply a certain amount of toothpaste from a tube to the surface of the headlight or to the brush itself. Polishing should be done with quick, intense movements in a circle. If you decide to use a drill, then it should be equipped with a grinding wheel and apply toothpaste to it. Many car enthusiasts use polish for these purposes, which is based on diamond dust. It is worth remembering that the surface being treated should not become overheated. This is fraught with the appearance of microcracks. Plastic parts may even begin to actively melt. To prevent this situation, it is recommended to constantly check the surface being treated with your hand. If even the slightest overheating occurs, you should take a break from work and allow the surface to cool.
Factory Headlight Restoration Kits
There are special repair kits for polishing headlights, which are produced by the well-known company 3M. The set contains:
- several discs for grinding and polishing headlights with different grain sizes;
- special paste;
- device for using circles.
The process of restoring car headlights using a special kit from 3M is very simple. Protect surfaces close to the headlight with the included tape to prevent damage to the fenders or hood when polishing.
Gradually sand and polish the headlights using the discs and paste provided. To work, you will need a grinder or electric drill, as well as a spray bottle of water. Find detailed instructions for grinding with a description of all the subtleties in the kit.
The entire recovery process will take you no more than an hour. Using the instructions included with the kit, you can restore the headlights yourself at home.
Features of headlight polishing work
When polishing glass headlights, you need to do the same thing, only more carefully and prudently. Even in auto repair shops, such a service will cost much more than the same polishing of plastic headlights. Car owners are advised to use a medium-hard brush when polishing. It is recommended to polish the surface until the scratches completely disappear, and then you need to sand it with a clean cloth. If you have a polishing wheel, then these actions can be performed with it. Polishing headlights with toothpaste can take from half an hour to several hours in a row. Everything, of course, depends on a number of factors:
- How serious are scratches on headlights?
- How effective is the product you are using?
- Which method of doing the work is chosen - manual or using a drill?
- The material that underlies the headlight housing is glass or plastic.
Be careful when using a drill to polish headlights - avoid overheating the surface being treated.
Sometimes, if the scratch is very deep, you should use an emery cloth. They need to do a rough pre-treatment and then start polishing. It often happens that after all the above operations, the headlight still shines dimly. In this situation, it is recommended to clean the headlight from the back side, having first disassembled the structure.
What are the advantages of polishing car headlights yourself?
Here are the advantages of polishing your headlights yourself:
- Low cost, that is, noticeable savings for the car owner. After all, in a car repair shop such a simple procedure can cost five hundred to eight hundred rubles
- Small time investment
- No specific equipment is used. All tools for this work are freely available
- The ability to perform this procedure almost anywhere, for example, in the yard or on the side of the road
Self-polishing headlights also has a number of noticeable disadvantages:
- The effect of the procedure done, unfortunately, does not have a long-term perspective, that is, after some time it needs to be repeated again
- It should also be noted that there is always a risk of damage to the headlight when polishing with toothpaste yourself.
But if you weigh the pros and cons, then, naturally, the pros will outweigh, since this polishing procedure is the optimal option for cleaning and polishing car headlights.
- A car owner who has poor eyesight does not need to polish headlights. In this case, it is better to take the vehicle to a car repair shop and pay a specialist for this work
- When polishing glass headlights, if possible, it is better to use diamond paste.
- When polishing plastic headlights, if possible, you should use abrasive pastes.
- Polishing headlights with toothpaste is more effective on plastic headlights than glass
It is known that any thing loses its original appearance under the influence of various factors. This fully applies to car headlights. Over time, they turn yellow, become less bright, and scratches appear. What needs to be done to give them their original appearance and can this be done with your own hands?
What knowledge and materials are needed for high-quality headlight polishing?
To clean car headlights in garage conditions, craftsmen use either goyi paste or toothpaste. Although some masters recommend using tooth powder for this purpose. From a technological point of view, the work of polishing the surface of headlights with your own hands is not difficult and can be used for all types of automobile lamps.
Before you start polishing, you need to prepare the following:
- roll of tape;
- a bucket of clean water;
- degreasing agent;
- several towels;
- a fairly soft brush;
- almost any brand of toothpaste.
A piece of felt or felt can make the work much easier. It would also be a good idea to use an electric drill with a special grinding attachment.
Why periodic headlight polishing is required
ATTENTION! A completely simple way to reduce fuel consumption has been found! Don't believe me? An auto mechanic with 15 years of experience also didn’t believe it until he tried it. And now he saves 35,000 rubles a year on gasoline!
Car headlights play an important role and at the same time are constantly exposed to mechanical stress from gravel, pebbles and other objects flying out from under the wheels of cars in front, as well as dirt, dust, the adhesion of midges and insects, and so on. All this over time leads to the fact that the light from glass or plastic headlights becomes not so bright and directional. In addition, the appearance of the car becomes less presentable and attractive. There is no way to avoid this and that is why regular and thorough cleaning and polishing of the headlights of any vehicles is required. This work can be done either independently or trusted to a master. Naturally, it is best to polish car headlights yourself - this will save not only money, but also your precious time.
What you need to know about car headlight cleaning technology
You can clean car headlights at home using goya paste or regular toothpaste, and some home craftsmen recommend using tooth powder for this. In addition, there are special polishing kits and polishes, which differ in their degree of abrasiveness.
It is quite possible to use all these products for all types of headlights (glass and plastic). The technology for polishing car headlights with your own hands using toothpaste is quite simple.
To do this you need to prepare:
- scotch;
- clean water;
- degreaser;
- a couple of towels;
- brush;
- pasta - it can be very diverse - the brand does not matter.
It’s good if you have a piece of felt or felt on hand. You can also use an electric drill and special attachments for it.
Surface grinding
To sand a car headlight with your own hands at home, buy sandpaper of different grits - from 800 to 2500 units.
It is better to sand the surface of the headlight using small squares of sandpaper, making gentle horizontal movements along the surface. Treat the entire surface - it doesn't take long, no more than 5 minutes. Next, you need to change the sandpaper, choosing a finer grit, and repeat the same operation.
After changing the sandpaper, the sanding movements should be carried out perpendicular to the previous sanding.
This crosswise processing method will give a better result than chaotic circular movements in different directions. When performing the operation, the headlight should be constantly moistened with water - this way you will save time and reduce labor costs. Before replacing the sandpaper, completely clean the surface of the headlight from any abrasive that may remain.
You should start sanding with the coarsest sandpaper of 800 grit, gradually reducing it to 2500. This will allow you to get a smoother and cleaner surface with each new approach. After sanding is completed, the plastic of the headlight must be thoroughly cleaned and polished.
DIY headlight polishing process
The process of polishing headlights using toothpaste can be divided into several stages:
- Protect metal parts and rubber seals from exposure to abrasive agents;
- Preliminary cleaning of headlights from dust and dirt.
- Apply toothpaste to the surface and rub with a brush, felt or medium-hard towel. You need to do this with vigorous circular movements until the scratches are completely removed. If necessary, add toothpaste or goyim paste. By the way, it is more efficient to polish using an electric drill, which is equipped with special attachments. The speed should be maximum.
- Cleaning the polished surface of glass from dental residues.
The first stage of polishing glass headlights is to prepare the field of activity. To do this, you first need to carefully tape all metal surfaces and rubber seals with tape to prevent them from being damaged during polishing. Then clean the surface from dirt, grease, oils and other things. It is advisable to use a degreaser, soap solution or washing powder.
Technology for polishing headlights using toothpaste
After completing the preparatory work, you can proceed to the main process of polishing glass headlights. This is done in this way: the paste is applied either to the surface of the headlight itself or to a brush (felt or towel).
Polishing is carried out with very vigorous and fast circular movements. It is best to use special tools, such as an electric drill, hammer drill or grinder. To do this, they are equipped with special grinding wheels, onto which goi paste or regular toothpaste is applied; you can use a special polish based on diamond dust. When processing glass headlights, as well as plastic ones, it is important to prevent the surface from overheating.
Since this can lead to cracks or the plastic may “float” at high temperatures. To prevent this, you need to control the degree of heating of the glass surface; this is done by hand - the glass should not be very hot. Therefore, you need to take short breaks all the time.
If you have certain skills and use abrasive pastes with different abrasiveness ratings (from 400 to 1000), you can achieve a smooth change in the haze of the glass.
Description of the work process
Now let’s take a closer look at the process of how to polish headlights with toothpaste:
We prepare all the materials and tools necessary for the work. For an economical method, we take only the paste itself, any (preferably lint-free) clean rag, water:
- If you will use a machine or drill for polishing, you will need to purchase special attachments (polishing discs). You will need several of them.
- We wash the surface of the headlights with special products for cars, then carry out the degreasing process.
- We tape the untreated body parts around the headlights for protection.
- Apply toothpaste to the surface of the headlight and rub in with light circular movements using a rag. Polishing should be done until the scratches disappear.
- When using a special tool, the paste is applied directly to the polishing disc.
- After finishing polishing, wash off the remaining toothpaste with water and wipe the surface.
When using a special tool, the paste is applied directly to the polishing disc.
To polish the surface of the headlights, it is ideal to use felt cloth as a polishing cloth (rag). You need to polish glass headlights with toothpaste using a brush. And before applying toothpaste, you need to sand the surface to smooth out deep scratches. For better quality work, it is advisable to remove the headlights and wash away dust and dirt from the inside as well.
If you set out to polish your headlights yourself, but don’t want to spend money on special expensive pastes and tools, then polishing with toothpaste is the best option. This is an easy way to transform the appearance of your car, which does not require time or material costs.
Features of polishing glass headlights
Polishing glass headlights is practically no different from plastic ones, except that all work must be carried out more carefully, especially since such work is much more expensive even at service stations. When working, it is recommended to use brushes of medium hardness. Glass headlights are polished until scratches disappear completely, and then polished with a clean (without toothpaste) towel or a special polishing wheel. The entire procedure can take from 30 minutes to several hours and depends on the following factors:
- scratch depth;
- the product used;
- polishing method (manual or automated);
- type of headlight (material from which it is made);
In some cases (if the scratch is quite deep), sandpaper is used to rough the surface, and only then proceed to polishing and grinding the glass. There are situations when, after the work has been carried out, the “cloudness” of the headlight does not disappear. In this case, it is necessary to completely disassemble the headlight and polish its internal surface, which is carried out in the same way as the external side.
Polishing a car with toothpaste or how to improve its appearance
Result of polishing headlights with toothpaste
The process may seem simple and straightforward. All you need to do is wash the car, treat the damaged areas, apply the product and polish. In fact, everything is not as simple as it seems, because car polishing can be different. They are distinguished by purpose and materials. By type they distinguish:
- Restorative. It is carried out if there are cracks, chips, or scratches. This is a more complex process that requires compliance with all technological standards;
- Protective. After painting or buying a new car, you must protect the outer layer, which can be done at home using a drill and special attachments. To do this you need wax, Teflon, epoxy polish, GOI paste. We also polish our headlights quite often with toothpaste.
If there are no problems with special store-bought formulations, since everything is described in detail on the label, then with the usual toothpaste things are a little different. Really, how to work with it? And is it worth using it at all? These and similar questions interest car owners, especially inexperienced ones.
Headlight polishing
Headlights play an important role, but they are constantly exposed to mechanical stress, that is, they suffer from gravel, pebbles and other debris that fly out from under the wheels of cars. Over time, this leads to a decrease in the brightness of the headlights, and it also looks unsightly. Damage cannot be avoided, so regular polishing of plastic headlights with toothpaste is necessary. You can go to a salon, but it’s cheaper to do it yourself.
So, for work you will need:
water; scotch; degreaser; towels; brush; paste. It would be a good idea to have a piece of felt or felt on hand. An electric drill with attachments may also come in handy.
Polishing headlights with toothpaste with your own hands is carried out in the following sequence:
- First, you need to protect all metal parts and seals from the effects of abrasives.
- Clean the headlights from dust and dirt.
- Apply toothpaste to the headlights and begin to rub it using felt, felt or a brush. This must be done until the scratches disappear, adding paste if necessary. An electric drill with special attachments will make your work easier.
- Clean the polished surface from any remaining paste.
How to polish headlights made of different materials with toothpaste?
Polishing plastic headlights
The process of processing plastic and glass surfaces is no different. True, you need to work with glass more carefully, using brushes of medium hardness.
The entire procedure can take from 30 minutes to several hours, and the duration depends on factors such as:
- scratch depth;
- what product is used;
- polishing method (manual or automated);
- the material from which the headlight is made.
Drivers leave quite good reviews about polishing headlights with toothpaste, which indicates the effectiveness of the method. The main advantage is low cost, quick results, usually no special tools or equipment are needed, and you can polish headlights anywhere (even on the road).
Polishing headlights with toothpaste gives short-term results
To be fair, it is worth mentioning the shortcomings. The most important thing is that the results are short-lived, so the procedure will have to be repeated often. It is also possible to easily damage a glass headlight if you do not exercise due care and attention. In general, polishing headlights at home with toothpaste is the best way to quickly return them to their original appearance and eliminate minor damage.
Benefits of polishing car headlights yourself
In addition to the fact that polishing headlights with toothpaste, a do-it-yourself process that is quite simple and can be done by almost any car enthusiast, has a number of other advantages:
- The cost of polishing glass headlights at a service station is usually about 500-800 rubles, and in some cases it can be more. And if you do the work yourself, it will cost much less.
- Doesn't take much time.
- Most often it is done without the use of various devices and tools.
- Allows you to quickly polish the surface of headlights in almost any conditions (including right on the road).
How to wash a headlight outside and inside without disassembling it, how to clean the reflector
When using a car for a long time, the headlights become dirty just like any other part. Moreover, pollution can be not only external, remaining, for example, after an off-road trip, but also internal. If dust gets inside the headlight, there is a high probability that its housing is leaking. Perhaps, when installing new lamps, you did not glue the glass firmly enough. And sometimes this happens at the factory. Be that as it may, the optical device requires thorough cleaning from all sides, including the inside. Of course, the easiest way to do this is to completely disassemble the headlight. But if the headlight is initially one-piece, or you are afraid of damaging its insides, use our recommendations to wash and clean it without disassembling it.
Materials and tools
In order to clean your headlights as much as possible from dust, water droplets and dirt, both outside and inside, prepare the following set of tools:
- cleaning agent;
- toothpaste;
- a soft cloth made of microfiber or other fabric that does not leave fibers;
- household hair dryer.
- Screwdriver Set;
- insulating tape;
- adhesive tape;
- hard wire;
- two small magnets;
- fishing line;
- stationery knife and scissors.
It’s worth taking a closer look at the headlight cleaner. Not every liquid is suitable for these purposes, especially when cleaning lenses and reflectors from the inside. There is an opinion that alcohol or vodka removes dirt best. This is true. However, alcohol can corrode the coating on the reflector and ruin the optics forever. Therefore, you should not use heavy artillery. Distilled water with dishwashing detergent will clean the headlight a little more slowly, but no less efficiently. Some people use a regular glass cleaner for these purposes.
Another interesting method is to use cosmetic micellar water to remove makeup. It is sold in all cosmetics stores. You should not choose an expensive option; most importantly, make sure that the composition does not contain alcohol.
To remove dirt, try using makeup remover
How to clean the inside of a headlight without disassembling it
Cleaning your headlights will be much easier if you can remove the glass and take them apart piece by piece. Unfortunately, many modern car models are equipped with non-removable lenses. But even they require cleaning from time to time.
headlights need to be cleaned not only from the outside, but also from the inside
Over the years of operation, an impressive layer of dust and dirt accumulates on the optical elements. This negatively affects the quality of lighting: the headlights become dimmer and more diffuse.
Video: why you need to wash your headlights from the inside
Glass cleaning
Even if you don’t want to completely disassemble the headlights, you still have to remove them from the car. This process will be different for different cars: in some cases you need to remove the radiator grille, in others you need to remove the bumper. Most likely, you yourself know how to properly remove headlights from your car, but if not, take a look at the owner’s manual.
- After you remove the headlight, you need to remove all the low and high beam lamps, turn signals, and dimensions from it.
- Pour a small amount of your chosen cleaning agent into the holes.
- Now you need to temporarily seal the holes with adhesive tape and shake it properly. Usually after these manipulations, the liquid acquires a dirty yellow color. This means that you didn’t start cleaning in vain.
- Open the holes and drain the water.
- Repeat steps 2 and 3 until the water runs clear.
- If you poured soapy water into the headlight, rinse it with clean distilled water at the end.
- Use a household hairdryer to dry the inside of the headlight. Do not set the temperature too high to avoid damaging the optics. You must get rid of all the small droplets.
- Make sure the inside of the headlight is completely dry and reinsert the bulbs.
When working with halogen and xenon lamps, do not touch the bulb itself! Due to the high internal temperature, traces of oil from your fingers will remain on it, even if your hands are perfectly clean. This will significantly reduce its service life. Try to hold the lamps only by the base. If this is not possible, wear medical gloves.
To wash away dirt from the inside of the headlight, pour the cleaning solution into the housing and shake it
There is another unusual way to clean glass from the inside. It is not suitable for serious stains, but it can help if you need to quickly remove a small stain.
You will need two small magnets, which you need to wrap in a soft cloth. Lightly moisten the fabric of one of the magnets in the cleaning agent, secure it to the fishing line and place it in the headlight housing through the hole for the lamp. Using the second magnet, control the internal one and clean the glass in the right places. When you are satisfied with the result, simply pull the line and remove the magnet from the housing.
Video: cleaning the headlight from the inside using magnets
Cleaning the reflector
The reflector inside the headlight collects the light from the lamp into a single beam. Constant exposure to a light source may cause it to become cloudy. If you notice that the light has become dimmer and more diffuse, the problem may be caused by the reflector.
To clean this part from the inside without completely disassembling the headlight, use the following method.
- Remove the car headlight.
- Remove the low and high beam lamps.
- Take a strong piece of wire about 15 cm long and wrap it halfway with electrical tape or tape.
- Place a soft, lint-free cloth over the electrical tape.
- Lightly dampen the cloth with glass cleaner.
- Bend the wire so that it can reach the reflector through the lamp hole.
- Use a cloth to gently clean the reflector. Do not make sudden movements or use force! If handled incorrectly, the protective layer on the part may peel off.
- If after finishing work there are still drops of moisture on the reflector, dry them with a regular hairdryer.
- Replace the lamps and install the headlight on the car
using such a device you can clean the reflector through the lamp hole
Never use alcohol to clean the reflector! Under its influence, the reflector will delaminate, and you will have to purchase a new optical system.
Cleaning the outside of the headlight
Many drivers, when washing their car themselves, forget to pay due attention to the headlights. However, their cleanliness is much more important than the cleanliness of a bumper or car door, because safety depends on the quality of lighting.
Video: cleaning headlights from dirt
From yellowness and plaque
Sometimes an unsightly yellow coating forms on the outside of the headlights. It not only spoils the appearance of the car, but also makes the headlights dim.
Regular toothpaste will help remove yellow plaque from the surface of the headlight.
Today on the car cosmetics market there are a large number of products designed to combat this plaque. However, the most effective of them is already in your home - regular toothpaste. After all, if a product can remove plaque from teeth without corroding them, then it will cope with plastic just as well.
Apply a small amount of paste to the headlight and polish it
To clean a headlight with it, apply a small amount of paste to a towel or toothbrush, then buff the yellowed area in a circular motion. When finished, rinse the headlight and evaluate the result. If the plaque is very strong, repeat the procedure.
After polishing with toothpaste, the plaque disappears
Video: how to clean plaque with toothpaste
From sealant, glue or varnish
After carelessly gluing the headlights, a small amount of sealant may remain on the plastic. It does not affect the operation of the device, but spoils the appearance of the car. To remove the sealant, it must first be softened.
But what exactly to soften it with is a big question. The fact is that different compounds are removed using different substances. Unfortunately, you are unlikely to know what type of sealant was used at the factory. In this case, you will have to try all these means one by one.
Very often, the remaining substances can be dissolved using ordinary vinegar. If vinegar doesn't work, try White Spirit. In some cases, treatment with gasoline, alcohol, oil and even very hot water helps.
If none of the products gives the desired effect, warm up the contaminated area with a regular hairdryer. When exposed to heat, the sealant will become a little softer, which means it will come off easier.
In some cases, the headlight can be cleaned using a special silicone sealant remover. You can buy it at almost any store that sells car cosmetics. However, this product is not universal and is suitable, as you might guess, specifically for silicone compounds.
Once you have managed to soften the sealant, take a straight screwdriver and wrap it in a cloth soaked in the softening compound. Clean the desired area centimeter by centimeter. Then wipe the headlight with a clean cloth and enjoy its appearance.
Video: how to remove sealant using sunflower oil
To remove excess glue or varnish from the headlight, use WD-40. It will most likely be able to solve your problem. Nail polish remover without acetone is also suitable for removing glue.
Don't use acetone if your headlights are made of plastic! It will corrode the outer layer, and only polishing the headlights in specialized salons can help you.
With skillful hands you can remove any dirt, even bitumen residues. The main thing is that when cleaning headlights with your own hands, inside and out, follow the basic rules: do not use alcohol for the reflector and acetone for plastic. If you have tried all the remedies and the contamination still remains, try taking the problem to a car repair shop. Experienced specialists will do all the work, and at the same time suggest an effective cleansing method that you can successfully use in the future on your own.
carnovato.ru
Cons of polishing car headlights yourself
Polishing headlights with your own hands using toothpaste also has a number of disadvantages. The main one is that the effect of this operation is quite short-lived and must be repeated regularly. Secondly, if you are not careful when carrying out work, you can damage the glass headlight.
In general, polishing car headlights with your own toothpaste is the best way to quickly return them to their original appearance and improve their performance properties.
Hi all! As practice shows, high-quality headlight polishing paste provides a long-lasting and very beneficial effect for the optics of the vehicle. At the same time, not everyone knows what is better to buy, what kind of polish to choose and how to apply it with your own hands.
I’ll say right away that I won’t talk about the process of polishing glass and plastic headlights today. To do this, you can look at the link where the issue of doing it yourself in a garage or at home has already been discussed.
Today we will discuss the means themselves, their varieties, and also introduce you to the most popular solutions available on the Russian market.
Cleaning the outside of the headlight
Many drivers, when washing their car themselves, forget to pay due attention to the headlights. However, their cleanliness is much more important than the cleanliness of a bumper or car door, because safety depends on the quality of lighting.
Video: cleaning headlights from dirt
From yellowness and plaque
Sometimes an unsightly yellow coating forms on the outside of the headlights. It not only spoils the appearance of the car, but also makes the headlights dim.
Regular toothpaste will help remove yellow plaque from the surface of the headlight.
Today on the car cosmetics market there are a large number of products designed to combat this plaque. However, the most effective of them is already in your home - regular toothpaste. After all, if a product can remove plaque from teeth without corroding them, then it will cope with plastic just as well.
Apply a small amount of paste to the headlight and polish it
To clean a headlight with it, apply a small amount of paste to a towel or toothbrush, then buff the yellowed area in a circular motion. When finished, rinse the headlight and evaluate the result. If the plaque is very strong, repeat the procedure.
After polishing with toothpaste, the plaque disappears
Video: how to clean plaque with toothpaste
From sealant, glue or varnish
After carelessly gluing the headlights, a small amount of sealant may remain on the plastic. It does not affect the operation of the device, but spoils the appearance of the car. To remove the sealant, it must first be softened.
But what exactly to soften it with is a big question. The fact is that different compounds are removed using different substances. Unfortunately, you are unlikely to know what type of sealant was used at the factory. In this case, you will have to try all these means one by one.
Very often, the remaining substances can be dissolved using ordinary vinegar. If vinegar doesn't work, try White Spirit. In some cases, treatment with gasoline, alcohol, oil and even very hot water helps.
If none of the products gives the desired effect, warm up the contaminated area with a regular hairdryer. When exposed to heat, the sealant will become a little softer, which means it will come off easier.
In some cases, the headlight can be cleaned using a special silicone sealant remover. You can buy it at almost any store that sells car cosmetics. However, this product is not universal and is suitable, as you might guess, specifically for silicone compounds.
Once you have managed to soften the sealant, take a straight screwdriver and wrap it in a cloth soaked in the softening compound. Clean the desired area centimeter by centimeter. Then wipe the headlight with a clean cloth and enjoy its appearance.
What is important to know
It's no secret that some even use sandpaper to restore the surface of the head or rear optics of a car. On Drive2 you can find many similar stories and instructions.
Car optics need constant protection from negative influences from the environment, roads and other road users. The outer surface is constantly exposed to dust, dirt, mechanical damage, chemicals, etc. To clean it and restore its previous transparency and light transmittance, you need to take an appropriate care and restoration kit. The market range is huge, which is why many cannot decide what is best for them to use.
Some people buy a special 3M type kit, which already contains everything needed for polishing. Others use toothpaste, others use goyim toothpaste, and still others buy branded products that have received the most positive reviews.
The price of pastes varies, as does their composition. It’s quite difficult to say unequivocally which one is the best. Some believe that only abrasive, and diamond, paste is suitable for such tasks. Others categorically refuse the idea of using any abrasive for fear of damaging the headlight material.
To make the right choice, you need to consider several points:
- Material of manufacture. Some compounds are intended only for glass headlights, others exclusively for plastic ones. But there are also universal solutions;
- Severity of damage. There are chips and deep scratches that pastes cannot save from. But there are also simply cloudings, yellowing, minor scratches and abrasions;
- Matching the specific headlight. If you can find out which polishing agents are suitable for your type of optics, that would be great.
The polishing process itself is done with your own hands or with a grinder. In the latter case, it is better to use a device in which the speed is regulated.
You can process glass headlights yourself without fear of any special consequences. But when working with plastic, it is better to contact a car service. The only downside is that the price of the service is quite high. Both in Minsk and in Moscow. But there is a minimum risk of harming the car. What do you think about this? Leave feedback.
Varieties
Cosmetics intended for treating car headlights can be divided into 3 main categories. They are classified depending on the principle of impact on the surface.
On sale and even at home you can find the following types of products:
- Restorative. Their action is aimed at returning the headlight to its initial scattering properties. That is, effective light diffusion, transparency and illumination are ensured;
- Protective. They create a special transparent film on the surface that protects against minor damage and ultraviolet radiation;
- Combined. They combine the functions and capabilities of the two previous categories of pastes. Protect and clean at the same time.
The polishing mixture is usually sold as a paste or emulsion. Each form has its pros and cons.
Popular solutions
Considering what optics becomes before and after using various products and pastes, there are several key categories and types of products.
Based on popularity and effectiveness, such pastes are the most popular.
- Dental. You will be surprised, but toothpaste has excellent polishing properties. Suitable for plexiglass and plastic products with minor wear. It is applied extremely simply, the paste is rubbed with ordinary rags or towels. It is recommended to gradually rub in the toothpaste for 10-20 minutes, and then rinse off the excess with water and wipe dry;
- GOI. Chromium-based grinding paste. It is distinguished by its rich green color and dense structure. Suitable for, headlights and even precious stones. The paste has gained wide popularity and is used in a wide variety of areas. It is most convenient to apply using a grinder, after first applying paste to it or to the headlight itself. Residues are removed with water and dry, clean rags;
- Special means. Here we are talking about branded pastes produced by well-known companies. They are more expensive than previous options, but have better efficiency. There are professional and amateur products. The first ones are used in car service centers, they are expensive, but last longer.
You can find many videos online that show how headlights look before and after treatment.
Branded pastes
Let's make a small rating of the most popular and common polishing pastes that can be used to process plastic and glass surfaces of headlights. Some of them also, but here you should take a more careful approach to the issue of choice, studying the purpose and capabilities of a particular paste.
- Runway. Their product is called Headlight Polish. Silicone-free paste for easy application. You can process it by hand or with a sander. Costs about 350 rubles, the effect lasts 2-3 weeks;
- Lavr. Russian company offering the product Polish Restorer. Sold as a set costing 250 rubles. The composition contains a spatula, polish and several sanding papers. In addition to grinding, it creates a protective film due to wax and silicone in the composition;
- Abro. The paste is called HR230. Suitable for plastic optics only. A tube will cost 300 rubles. Excellently restores transparency and protects the surface. But you need to use it at least once every 3 months;
- Saphire. Good manufacturer of head lamp polish. It literally costs 160 rubles. It is recommended to order only through an authorized dealer. Restores transparency, does not require the use of a grinder;
- Sonax. Removes scratches well and is suitable for treating surfaces made of plexiglass. Can also be used for glass optics. Excellent German quality.
What good pastes for working with automotive optics do you know? What else would you include on this list, or what tools would you cross off from it, based on personal experience? Be sure to write, it will be interesting and useful.
Over time, the headlights of any car lose their attractive appearance, become dirty and begin to transmit light worse. Polishing headlights with toothpaste will help solve the problem quickly and inexpensively: it does an excellent job of removing clouding, yellowing and roughness. The method has been proven over the years, fast, easy. You just need to take into account a few nuances.
How to clean car headlights
Car headlights become dirty or yellow with oxidation over time.
Not only does it look bad, but it reduces your visibility at night and increases your chances of getting into an accident (especially at high speeds). Now, I will briefly tell you how to clean car headlights. It's a simple process and involves some simple household items you'll have around the house.
There are many pastes and solvents in stores. The RESTERM online store has a particularly large selection of all kinds of auto chemicals, as well as car glass cleaners, which can also be used to clean headlights. But, I believe that the following ingredients are simpler and less expensive.
Bucket, soda, any soap, clean cloth, sponge, bowl, water, small bowl. To do this, we will start by adding a liter of warm water to the bucket and add a piece of soap (about 1/6) to it. We will also pour some water into the bowl (about 100 ml) and add 5 tablespoons of baking soda. We made a simple pasta. Next we will clean the headlights. Take a sponge and use soapy water to begin thoroughly cleaning all of your headlights. Remove all dirt, clean all crevices. Next, take your bowl of baking soda and start rubbing the headlights in a circular motion. You don't have to use much effort, because baking soda will easily remove plaque and stubborn dirt. It is also very good to use an old toothbrush to clean headlights. Be careful not to use any solvents as the solvent may eat away at the paint around the headlights. Next, rinse your headlights with water and wipe them with a dry cloth.
Remember that your headlights are your safety. For example, for some reason you had to drive fast and at high speed, due to dirty headlights, you may simply not notice the turn and fly into a ditch. So it’s better to clean your headlights than to buy a new car later. Unfortunately, many people do not understand this, but only understand it when an accident occurs.
inetsowet.ru
Toothpaste for car headlights
Toothpastes contain abrasive substances that help clean plaque from teeth. But with the same success they help achieve transparency and shine of car headlights. Many drivers use this simple method when it is not possible to go to a salon. For example, on a long journey.
To clean your headlights you will need:
- Any polish is suitable: Splat, Sensodyne, ROCS, Lacalut, Blend a med, Colgate, “New Pearl”. You can use tooth powder, diluting it with water to the consistency of sour cream. The cost of the product, as well as the expiration date, does not matter at all. But, according to reviews, whitening varieties work better - they contain more abrasive particles and substances that dissolve plaque, dirt and pigments.
- A piece of felt for rubbing. It can be replaced with any medium-hard brush. An old toothbrush works great for polishing.
- Mounting tape. The impact of toothpaste does not benefit car paint and sealing rubber bands. Therefore, before starting polishing, it is recommended to cover the areas around the headlights with construction tape.
- A bucket of water and a rag. Useful for cleaning the car at the end of work.
Toothpaste can be used to polish glass and plastic car headlights.
Instructions for use
Polishing headlights with toothpaste does not take much time. It will take half an hour to do everything. Of these, 15 minutes you will just wait for it to take effect, so you can do something else.
Step-by-step instruction:
- Apply tape to the rubber seals and around the headlights.
- Squeeze toothpaste onto glass. A tablespoon of product is enough to clean one headlight.
- Lightly wet the felt rag. Rub the surface for 5-7 minutes.
- Polish one headlight, then the other and leave the paste on for 15 minutes.
- Armed with a clean rag and a bucket of water, rinse your car.
- Wipe the surface dry.
- Ready! You can evaluate the result.
For better effect
Polishing headlights with toothpaste does not always give a perfect result. To enhance the effectiveness of the procedure, use an auxiliary tool - an electric drill or a grinder with polishing attachments.
For polishing, it is best to use 3 different attachments in succession: medium-grained, fine-grained and felt (in the same order in which they are listed). This approach will help not only get rid of cloudiness and plaque, but also remove scratches.
When using a power tool to polish headlights, do not exceed 1500 rpm to prevent them from bursting or melting. It is also important to ensure that the surface does not overheat. To do this, take short breaks and constantly water the headlights with a thin stream of water.
Other ways to use toothpaste at home
Often, inexpensive paste is purchased to polish car headlights. If there is anything left in the tube, do not rush to throw it away. The product has proven itself well in everyday life.
Top 3 best life hacks involving toothpaste:
- You can clean the iron from carbon deposits using an old toothbrush and toothpaste. Heat the device until warm, unplug it and apply the product to the sole. Rub vigorously and leave for half an hour. Rinse it - and the iron will shine again, and even begin to glide like new.
- Clean silver items. The same set will help give a mirror shine to your favorite jewelry. Apply a pea-sized amount of paste to a dampened brush and rub the silver for 2-3 minutes. Rinse the items and wipe away any moisture.
- Get rid of unpleasant odors in the toilet. If your toothpaste contains menthol, it can be used as an air freshener and light disinfectant. Pierce the tube with a thick needle or awl, heated over a fire, 10-12 times, and place it in the toilet tank.
Toothpaste is a balm for car headlights. It makes your pet’s “eyes” shine no worse than your teeth after brushing. It will smooth out roughness, remove yellowing and cloudiness. Of course, the result will not be as perfect as from salon polishing. But considering that the method is budget-friendly and requires a maximum of half an hour of free time, we can confidently recommend it to car owners!